
 You all know that I am totally addicted to fabric...no secret right?
What you might not know is I also have a love affair with pretty papers!
Last week I taught a 2 day workshop at Quilted Works in St. George, Utah.
I made these paper flowers to go on top of the little take home packages that I made for each of my students as a thank you.
 First I cut 5 circles out of scrapbooking paper....all decreasing in size.
The paper that I used is by My Minds Eye.
I used a die cutter because I needed 30 sets but you can easily just make circles using a circle ruler or a compass. They don't have to be perfectly round either. Your largest circle will be slightly larger than your finished flower. Poke or punch a small hole in the center of each circle.
 I laid my circles out on my cutting mat and spritzed them with water. I didn't saturate them...just a fine mist. You can see that the paper will start to curl up a little from the water.
I used a little misting sprayer by Ranger (sold with scrapbooking supplies) but you could just use a regular spray bottle and turn the top to mist instead of spray.

I turned my circles over and sprayed them again.....(you can see Kassidy here helping me with the spraying!)
 Then I scrunched up each circle into a spitball!...
 Because some of the circles looked similar in size when wadded up, I laid them out in order of size so that I could easily keep track.
I let them dry a little for about 5 to 10 minutes...depending on how wet they were.
When I unfolded them, I still wanted to work with them damp but not too wet because wet paper tears easily!

I started with the large circle and unfolded them one at a time, stacking them on top of each other according to size. I didn't press them out flat but kept them still wrinkled and with wavy edges.....
 Like this.
 Carefully.....(your paper is still a little damp)... put the brad through all of the holes and close the back of the brad.

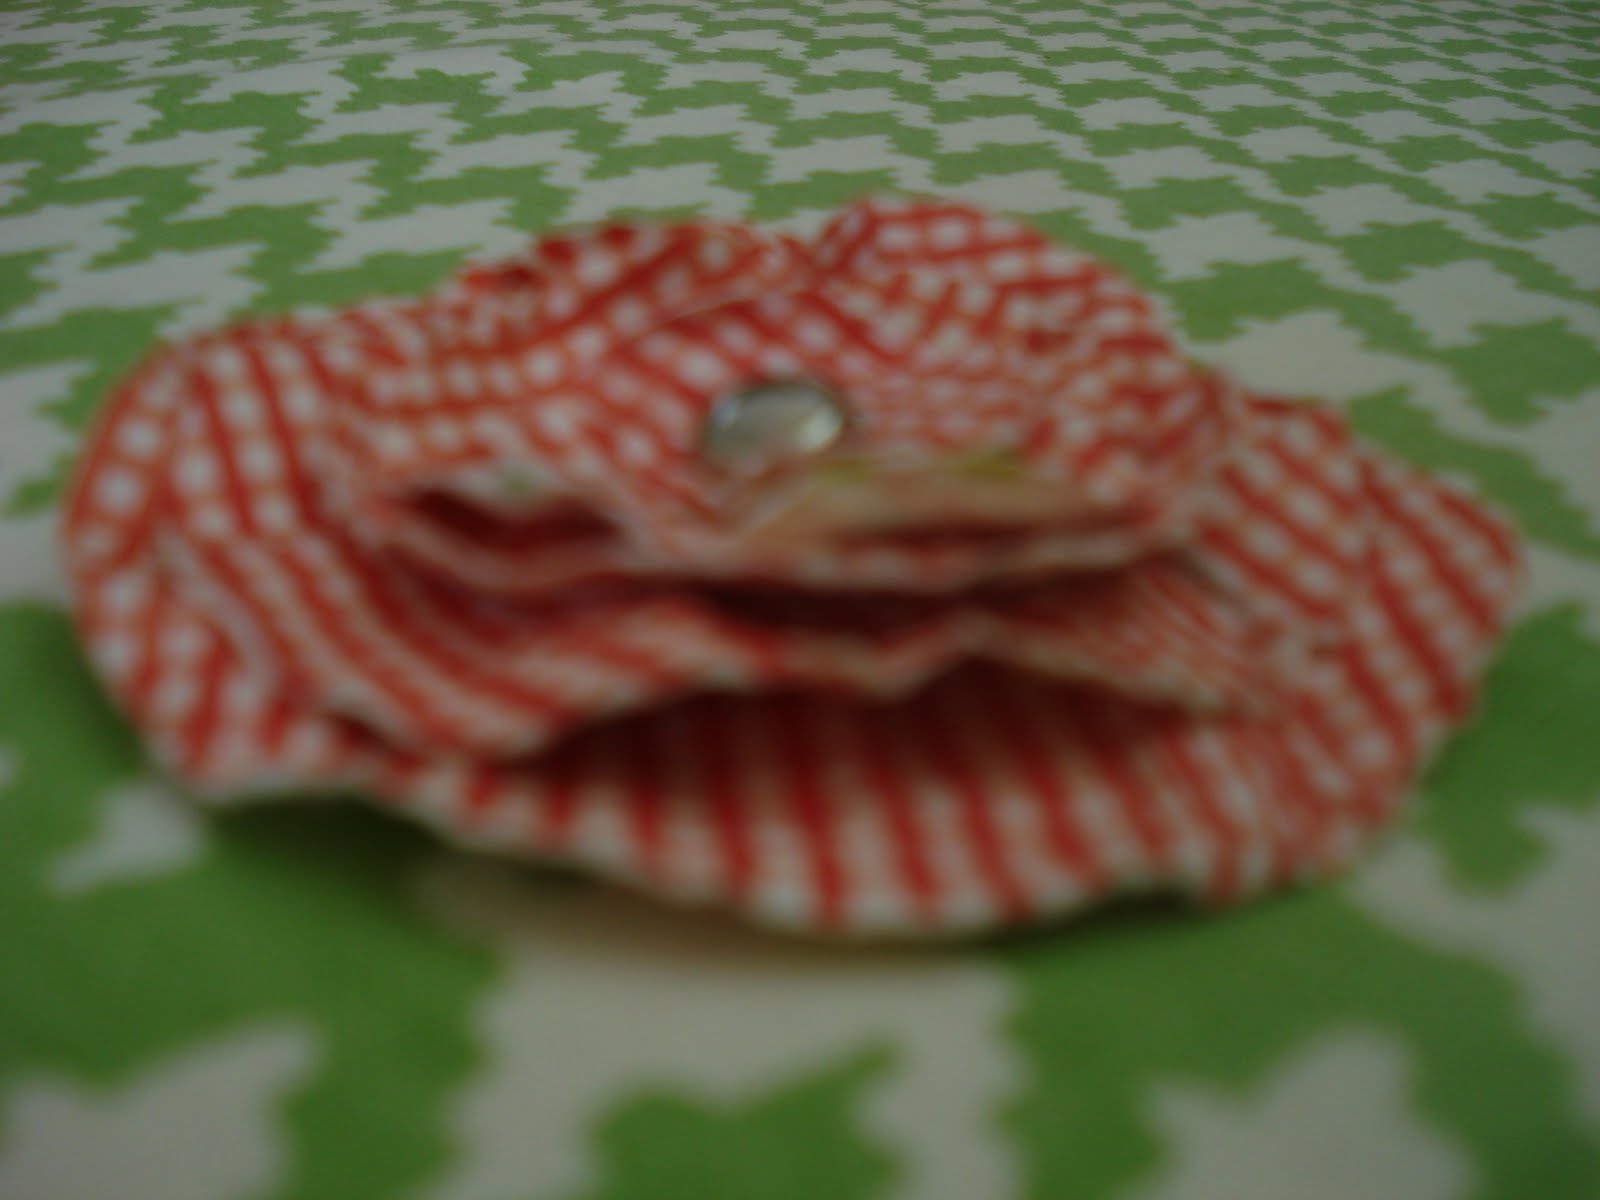
Top view...
 Side view...
 View of 30 flowers!
 I decided to make leaves to go on the side of my flowers. I used a leaf punch by Fiskars.

I started with the large circle and unfolded them one at a time, stacking them on top of each other according to size. I didn't press them out flat but kept them still wrinkled and with wavy edges.....
 Like this.
See the side view? You want your circles to be this tall and not smashed down.
You will need a brad for your flower center... of course I chose to use one with bling! ( by Making Memories)
 Carefully.....(your paper is still a little damp)... put the brad through all of the holes and close the back of the brad.
Top view...
 Side view...
 View of 30 flowers!
I laid my flowers out to dry completely.
Remember that however puffy and scrunched up they are is exactly how they will dry....so shape them how you want them at this point.
 I decided to make leaves to go on the side of my flowers. I used a leaf punch by Fiskars.
 You could easily just cut a couple of leaf shapes but the punch worked out better for me because I needed 60 leaves.
 I spritzed both sides of the leaves just like I did the circles.
 I let them dry a little bit ....I didn't make spitballs out of them.... I just scrunched them up a little and let them completely dry before adding them to the underneath side of the flowers with glue dots.
 These flowers are really fun and so easy to make! I used these in place of a bow for gifts and you could do the same thing....they would also make adorable magnets or pins.
I have made smaller ones before and glued them on the end of a clothespin to use for clips on my message board.
I'm also in the middle of another cute project using these flowers...I'll show you when it's complete!
How about you?
Do you like playing with pretty papers?
I've joined the "Free Pretty Things" linky party...go and see!
You can find other pretty things there by clicking here.


23 comments:
Hi Lori! Oh I am so envious of all you ladies there! :o) I have really enjoyed reading different blogs and seeing the pictures, from your time. :o)
I love scrap book paper. It makes my binders look so much prettier. Like my recipe book and saved ideas for cross stitching and quilting. :o)
Thank you for showing us how to create your lovely flowers. :o) And so many neat ideas to use them for.
Sincerely - Tricia
What a fun project! This would be so cute in Christmas colors and add them to a little package. Or a bunch of them on a larger package :-)
Oh, YES! I'm a huge paper addict! And I've made flowers like yours many times, but I dry them in the microwave about 20 seconds at a time until they are dry. Just place them on paper towels and zap! Thanks! Becky G.
http://camelliacottagedesigns.blogspot.com
Well, finally a reason to pull out all of my neglected, abandoned scrapbook paper! What a cute little project! Thank you for sharing the how-to!
These are so cute! Thanks for the tutorial.
NO WAY am I even going to make one of those...no way...Lori...sew you just mind yourself...and don't go making any mug rugs...that I cannot resists..I am telling you ..one addiction at a time is too much for me...I need help...lol
ok sew they are lovely...
Gorgeous project, thanks for the tutorial.
How cute!
I've made circle flowers like this out of satin or felt, but never thought to use paper! I love the texture crinkling them up adds. Just adorable!
These are so adorable, Lori, and thank you SO MUCH for the flower and darling cupcake wraps! Get some sleep!
Super Cute! A great craft to do with my daughter. Can't wait she will love this! Thanks for the tutorial.
I can't wait to go find some paper to try this. Making wrapping paper just got more fun. Thanx
Very, very cute! You're soooo darn clever -- thanks for sharing with us!!!
I now come to your blog a bit hesitantly...I know I only have SO MUCH TIME in my day and only so much time before Christmas and every time I visit you I find NEW WAYS to spend my time and money!!! And OH HOW I LOVE IT!! These flowers speak to me - actually they yell - so today, instead of raking leaves I'm heading straight to my Ben Franklin to buy paper and brads...thanks...I think! xoxoxo, Nan
How Darling! I love them! Great idea!
What a great idea for a simple something that makes a big statement. If I were younger, I would be into scrapbooking and also beading. There are so many fun things to do - no one should ever be bored!!! Great post, Lori. Carol
Fantabulous. Love this. You're a master at everything you do. The Lori Holt touch is going to go down in history next to the definition of spectacular. Thanks for a sweet day together.
These are so fun Lori. Yes I have seen paper flowers... but anything YOU MAKE just looks so cute!!
Hugs TOODLES-Angela
Love those flowers. How easy they look. I might give this a try.
Thanks Lori.
I made these tonight and blogged them. I hope it's ok that I linked back to you to give credit where it's due!
http://razberiswrl.blogspot.com/2010/11/i-love-when-new-project-is-free-paper.html
Hello Lori,
Thank you for sharing your beautiful paper flowers.
Great little project. I can imagine oodles of possibilities for these flowers.
Ninth Street Notions.
Hi Lori~
You are as talented with paper as you are with fabric. I, too, love paper flowers and am always looking for dew styles. I'm having fun following you on Pinterest!
Joyce
Thank you for such a Fabulous tutorial! I just love those flowers and made some myself! How simple they are to make and so Pretty :)
~Kim
Post a Comment