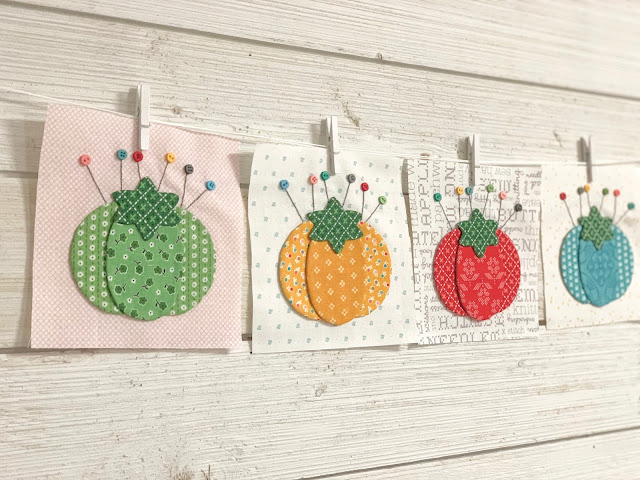
"TOMATO PINCUSHIONS"
Welcome to week one of the
"MY HAPPY PLACE"
Sew Along!
Join me here each week
when I will be doing tutorials
on the blocks for the quilt.
Of course because we are all sewing
from all around the world
we all have different time zones...
But I will be posting each Monday
right here on my blog
and you can follow my tutorials
any time each week that
is convenient for you.
For this sew along...
We are making the
My Happy Place Quilt
74" x 88"
I've been sew excited to begin...
This is going to be fun!!
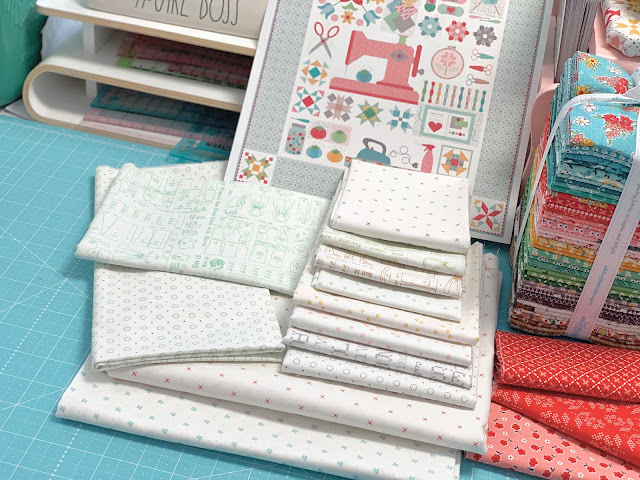
The quilt is made with my newest fabric
collection called STITCH...
fabric kits by now...
and that we are all ready to begin
after the delay that we have experienced:)
We are also using the
My Happy Place
Sew Simple Shapes
I have already posted the
post which details all of the supplies
for the sew along and how it works.
I have also given the link there
for the free PDF Download
of the Sew Along Guide
to read that post.
As per the sew along guide
cutting instructions
you should have everything for your
Tomato Pincushion Blocks
all cut and ready to go!
As usual for week one in my
Sew Simple Shape Sew Alongs
the first weeks tutorial is a video.
Because I have my very own brand new
I have posted the
Tomato Pincushion Block
Tutorial there.
to visit my channel and watch the
tutorial and I hope that you love it!
Leave me a comment there and let me know:)
If you like what you see
and my other videos there...
click on subscribe and click on the bell
to be notified whenever I post another tutorial for this sew along:)
I will be doing all of the
pieced blocks in the quilt
as a video tutorial there on my channel.
Here is a list of the
My Happy Place
Sew Simple Shapes
needed for the
Tomato Pincushion Blocks:
4 - L18
4 - L19
4 - L20
You will also need to cut
each background 8" x 8"
as it says in the guide:)
When I did my blocks for the quilt
I took a few photos so I thought I would
post them here for you even though
I have done the video:)
if you will be doing hand applique
or machine applique...
I did a video on my channel
where I demonstrate how I do both.
It may help you decide!
to watch it:)
"TOMATO PINCUSHION BLOCKS"
Make 4
Trim down to 6 1/2" square
before sewing them together
to go into your quilt:)
I hope you enjoy making your blocks
for this week
and that you enjoyed my video tutorial!
Next week I'll be doing these three block tutorials right here on my blog:)
1. Sewing Scissors
2. Knitting
3. Crochet Hooks
One of the things that I really love
about doing my sew alongs
is that we all have the opportunity
to get to know each other
and see each others progress through
where we can post pictures.
When you post a picture...
use the hashtag
and then everyone who is following
that hashtag page (including yourself and me)
will be able to see your post!
Then everyone can chat back and forth
by commenting on each others post.
It's a really fun way to
interact with each other:)
Okay...with that being said
I think we are all ready now
to get this sew along started!!
I'll meet you right back here next Monday:)
xx
Lori


Yay! I’m having so much fun with this. I feel like I want to pack my bags and run away to Lori Holt camp for 3 months. ❤️🧡💛💚💙💜🤎🖤💖🧵🪡
ReplyDeleteOmg! There is nothing I’d rather be doing than this right now. Wish I would have discovered this Lori Holt world years ago!!! 😍🤩😍🤩 sew fun.
ReplyDeleteI am so excited to start this sew along. This is my first Lori project so this is the first time doing this type of applique and only my fourth quilt to date. I hope I can stay on track and keep up each week.
ReplyDeleteThey're just as cute as ca (bee)! Pun intended! LOL
ReplyDeleteRiley Blake just has the cutest fabrics!
Love this option to stitch along with you.
ReplyDeleteExcited to be doing the sew along
ReplyDeleteI’ve waited patiently for MONTHS for the Sew Along to begin! Happy stitching! Can’t wait to see everyone’s progress!🧵💖
ReplyDeleteI am sew excited to do this! This is my first Lori Holt project and only my 2nd appliqué project. I’m a little bit nervous about this but you are such a practical instructor and you make it easy to understand. Thanks!
ReplyDeleteI could not wait to make these blocks! So cute! I woke at 4:00 the morning after watching video and went to work. Fun, fun, fun! Thanks for all your hard work!
ReplyDeleteThank you Lori for taking a few photos even though you did the video. It helps me a lot to watch the video first then just use the photos when working on my blocks. You are an awesome teacher. You are a rock star in my opinion. I pray someday before I go see Jesus that I can go to a retreat. I live in Michigan so it will cost a lot for travel but I sure wish it could happen someday. I was recently diagnosed with psoriatic arthritis and already have chronic pain from multiple back surgeries. I’m a nurse so it just happens. Wouldn’t train being a nurse though. God still gives me people to take care of. Anyway my fingers and wrists have been getting harder to use but I’m not giving up. Your wonderful books and fabric and sew alongside bring me so much joy. Thank you sew much. For the crossstitch too. You are a way maker! Lots of prayers for you Lori. Mary Mcclure
ReplyDelete