Good morning cute people!
Today is day 3 of my appliqué tutorials on how to use my new
Sew Simple Shapes.
for my iron on appliqué method
for my traditional hand appliqué method
Today I'll be talking about
my super easy and fun
most favorite way to
prepare my pieces
for applique!
I'm so excited that my
are finally here and
available to play with!
I love appliqué and I have found
over the years that
some think it can be hard
and so they are afraid to try it.
Because of this...
I decided to design a line of shapes
to use for appliqué so that
I can show you how
easy and fun it really is!
Appliqué can add so much
to your sewing skills.
Not only can it
add personality
to your projects...
I especially love appliqué
mixed with pieced quilt blocks!
This week...
I posted to show you
how to use my
Sew Simple Shapes
in several
different appliqué methods...
so you could learn and
then choose your favorite!
This is what they look like
in their cute little package:)
I named my first set
because the shapes are flowers,
leaves and petals:)
The set has 24 fun shapes
to mix and match
for super cute and
easy applique designs!
I'll be using shape A-12 to make a
"SEED" block.
This is a traditional
appliqué block with many names,
but my grandma and great aunts
always called this shape
a seed...so I will too!
I designed a line a fabric called
Calico Days
to go along with my BLOOM set.
It will be here in December...
Just in time to start my
BLOOM Sew Along in January!
We will be making the above quilt...
one block at a time ...
every Monday
right here on my blog!
But for this weeks
tutorials...
I used this
super cute fabric collection
called Fancy and Fabulous!
To cut fabric for the SEED blocks
for each tutorial and method this week...
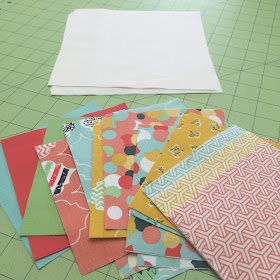
I cut 5" squares from the prints and
I cut 7 1/2" x 7 1/2"
squares for the background.
(I'll later square them up to 6 1/2" square)
I always cut my appliqué background
1" larger than needed
because the appliqué process
can shrink your blocks a little ...
so I like to appliqué first
and then
square up the block afterwards.
So this is my
very favorite method to
prepare my appliqué pieces...
for both machine appliqué
and hand appliqué.
I LOVE the results for either way!
I use Bee in my Bonnet
Sew-In interfacing
(that means sew in NOT iron on)
It comes in a 3 yard package.
You can purchase by
or find it at your local
or online quilt shop.
Simply trace the SEED shape
directly onto a piece
of the interfacing
using a mechanical pencil
for a nice thin line.
I traced 4 for my seed block:)
Then pin it to the
right side
of chosen fabric....
with your marked line
on Pellon side up.
Now take it to your machine
and sew DIRECTLY
onto your traced line...
backstitching when you
start and stop to secure...
Like this.
(that stitching line that goes off the edge is because I chain piece my shapes)
Cut out the shape leaving
an approximate
1/4" seam allowance
past your stitching line.
Pull the interfacing apart from
the fabric and make a small clip
with a small sharp pair
of embroidery scissors.
Once clipped...
you can get in there
to cut a criss cross
for turning.
Turn right side out.
I love to use this awesome
turning tool by CLOVER
to push out the
curves and points...
it works nicely for that!
After you get the
shape how you want it...
press it flat like this.
Press on the fabric side.
PRESS...do not iron.
This is what the
back looks like after pressing.
See how nicely the
seam allowances lie flat
inside after pressing?
*FYI - You DO NOT need to clip
outside curve seam allowances
so that they will lie flat...
you only clip INSIDE curves and
there are no BLOOM shapes
that have inside curves.
See how the shape that you
end up with is the same
as the template that you
started out with?
YaY!
Here are all four seeds
turned and pressed.
Prepare your backing fabric
by pressing in half
both ways and both diagonal
ways as well.
Place your seeds on like this...
lining up the points
of the seed ends
with the diagonal lines
that you have pressed.
Pin each seed shape into place.
Now your block is prepared
for either machine appliqué
or hand appliqué...
your choice!
I like to do both...
depending on the project.
For machine applique...
I use an open toe foot
so that I can see
where each stitch goes.
I like to use matching thread
for EACH appliqué piece by
switching the top spool...
but I keep a neautral color
in my bobbin.
I use a small zig-zag stitch.
I set my stitch width at 1.5
and the length at 2.0.
I backstitch where I
stop and start to secure.
This is how it looks after
I have machine appliquéd it...
it took literally 5 minutes.
The back...
small zig-zag stitch
with neutral thread.
Press your block from the BACK
and then square up with a
6 1/2" square up ruler:)
I quickly prepared another block
with Pellon to hand appliqué
so that I could show you
what that looks like.
Here it is completed ...
prepared with my interfacing method
and then hand appliquéd.
This took me about
15 minutes to stitch down
and of course I just used the
traditional hand appliqué
stitch that I teach
on my blog post
The only difference
is that the edges are
already turned under
when I use the interfacing.
YaY!
Easy Peasy:)
And because
"SEEDS"
turn into flowers...
I decided to use my
A-1 Sew Simple Shape
to make a circle for the center
of each block from
this weeks tutorials.
Of course I prepared them
in the same way
that I just showed you...
my interfacing method:)
I hand stitched the
circles in the center...
easy peasy!
This will probably become a pillow...
my daughter Kassidy
has already
claimed it for her room:)
So now I've shown you
several ways to use my
Sew Simple Shapes.
I am so excited about them
and I hope that you will
love playing with them too!
to get a set of your very own.
I will be showing you
many different things
to do with them...
remember that there are
24 in the set and
I've only used 2
for this project...
oh the possibilities!!!
I'll be back next friday
with a brand new
Farm Girl Fridays post...
"LIVE" from my
Farm Girl Vintage
Workshop/Retreat!
See you then!
xx
Lori


