YaY!
Today is all about the
big finish of the
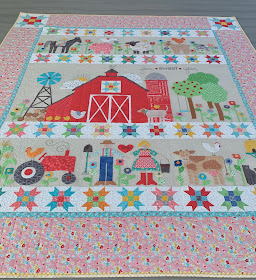
Farm Sweet Farm Quilt:)
I'm sew excited to
show you my quilt finish...
I took a lot of photos at
several different angles
so that you could see how it
looks all put together and
also see the awesome job
that my friend Juli Stubbs
did with the quilting.
She always goes above and beyond
and I'm thrilled with
how it turned out:)
Scroll through each and every photo
and when you get to the end
I have a surprise tutorial for you!
I'm so happy that the weather
was nice enough to take my quilt
out on the deck for natural lighting.
I adore the yellow houndstooth
print for the binding...
And I love how all of the little
5" Farmer's Daughters blocks
look so cute all in rows:)
I absolutely love how the
BEEHIVE Vintage Trim looks
tucked inside the binding.
If you haven't done this before...
check out this YouTube tutorial
on how I do it.
Now for the surprise!
If you have participated in
my other sew alongs then you know
that I usually do a tutorial
for a quilt label at the end...
And this sew along is no exception!
I used the
to make a
Farm Sweet Farm Animal Stack:)
First I cut
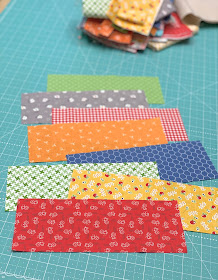
8 - 3 1/2" x 9 1/2"
scrappy Farm Girl Vintage prints.
Then I sewed them around a
12 1/2" x 18 1/2" piece
of the leftover linen background.
I made appliqués for the
cow...pig and chicken
just like we did in the quilt...
With the addition of a heart for the pig:)
I also decided to make
this milk cow black and white
and make hooves:)
I cut the piece for the legs
5" x 7" and a strip for the hooves
1 1/2" x 7" and sewed it to the bottom.
I pressed my seams open.
Then I simply traced the
entire Sew Simple Shape legs
like this and sewed them.
After turning they look like this
and are all ready to go!
I stacked my animals a little
to the right of the block
to make room for the
embroidery on the left.
If you are not making your block
for a label you could stack
the animals more in the center
and make an adorable
mini quilt or a pillow!
I typed what I wanted my
label to say and then
printed it out.
I traced the embroidery on
with a pencil and used my
I think it's important to
label your quilts...
even if you just simply put
your name and the year.
Here is what it looks like
with the appliqué
and embroidery completed!
I love it it looks
on the back of my quilt:)
To put it onto the
back of your quilt just
press the outside edges
under about 1/4" and applique
it onto the
Farm Life 108" widleback.
I used the one in COTTAGE
color for the back of my quilt
but any of the 3 colors
that it is available in would work!
I know that I always say this
about each and every quilt
at the end of a sew along...
but this is one of my very
favorite quilts ever!
Thanks so much for joining me
and as always...
the tutorials will remain on my blog
for ever so just find the link
for each week on the
right sidebar here on my blog.
Remember that you must be
viewing the full web version
of my blog to see the right sidebar.
Even though this is the
last tutorial for the
Farm Sweet Farm Quilt...
I am still having fun and
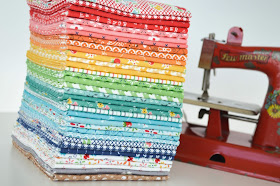
playing with Farm Girl Vintage fabric
for another sew along
that I have been doing called the
VINTAGE BLOCK ALONG
and it's perfect for
using leftovers from your kit!
Here are the first four blocks
and we are up to
block 15 right now...
and I'll be posting block 16 this Thursday.
Each block is a free tutorial
of a vintage block from my
grandma's pattern basket and
they will all eventually become a quilt.
for week one and to read all about it.
And some other exciting news...
You are invited to join my
Granny's Garden Sew Along
that will start at the end
of this coming August.
We will be using my circle rulers
and a new set of Sew Simple Shapes...
To make my new
Granny's Garden Quilt
(76" x 86")
out of my Granny Chic fabric collection
that will arrive this summer.
The quilt consists of
42 - 10" finished blocks that we will
first applique shapes onto circles.
It will be super fun and easy...
if you did my very first
sew simple shapes applique quilt called
"BLOOM" you will love this one too!
Thanks again for sewing with me.
If you want to know what is
going on with me and my designs
from day to day you can
catch up with me on my
Tune in right here this Thursday
for block 16 of the
xx
Lori


So beautiful! I wish I had grandchildren to sew for . . . yet! Always hopeful. But when I get the notification that one is on the way, I'll know where to come. Love the tractor with the chicken - heck, it's all fab! Thank you - I haven't been sewing along but enjoying seeing the progress. xx
ReplyDeleteWhat a wonderful farm quilt. Thanks for the inspiration.
ReplyDeleteI Love this quilt and especially that label! How fun!! Thanks for sharing the inspiration!
ReplyDeleteThis is just about the cutest quilt EVER!!! I love it! I have my fabrics and I'm ready to begin but I had health issue develop which derailed me. Thanks so much for leaving your Tutorials on your blog!!
ReplyDeleteGracious, SO much eye candy! The quilt is so beautiful with the pieced strips separating the farm scenes, and the quilting is amazing! Lori, YOU out-did yourself again! I love the quilt label too.
ReplyDeleteI am so excited to see the remaining posts for the Vintage Block Along, and now ANOTHER new fabric line and quilt along to look forward to! I can't wait to see what you have in store!
Thanks so much for these tutorials!
Lori, you are such an inspiration! The love and adorable accents you incorporate in your quilt just is overwhelming to the heart! Then you to add your beautiful "label" on the back....all so breath taking...leaves me in ahs! Thank you for all your encouragement!!!
ReplyDeleteOh my word I LOVE the stacked animals!!! I need to hurry and get going on mine! Thank you so much for the pattern and tutorials. And for designing such a cute quilt to make me set outside my box and try applique.
ReplyDeleteFabulous! Of course! Now I just have to get a my snail moving to finish before August! At this rate ol' snail should be ready!! Have to!! The whole family can't wait for the farm to be theirs! Slow & steady will get it done!! Thank you Lori for your beautiful work and inspiration!!❤🐌❤
ReplyDeleteLove the quilt. It was so fun watching every month for the newest block. It is so darling.
ReplyDeleteCary J.
Just...everything you do is good!
ReplyDelete