

Today I'm going to show you
how to make this vintage quilt block
that I am calling
"Grandma's Star"
But first...
stick with me while I tell you
a little about this block
and why it's so near and dear
to my quilty heart!!

The pattern for this block
was in the November 1950
edition of
The Workbasket Magazine
and several years ago my
grandma gave me her copy.
You know that I grew up in a
quilting family and spent many hours
first "under the quilt frames"
and then joining my mom...
my grandma and her sisters...
(my great aunts)
"around the quilt frames"
putting in a good share of stitches!
The quilting was always accompanied
by good company...
good stories...
good food...
and lots of laughter.
It was our way of life
and it was a good one:)

I love reading vintage patterns...
they are sew fun!
Grandma and her sisters made this quilt
and many others in a variety of colors
using fabric leftover from dress yardage
(grandma always bought 4 yards for one dress)
and used scraps of feed sack prints.
The block was originally called
Star of Bethlehem and if you are
a vintage quilt lover...
you know how popular
this block was back then.
There have been many variations
since over the years...
all with an additional
variety of names given.
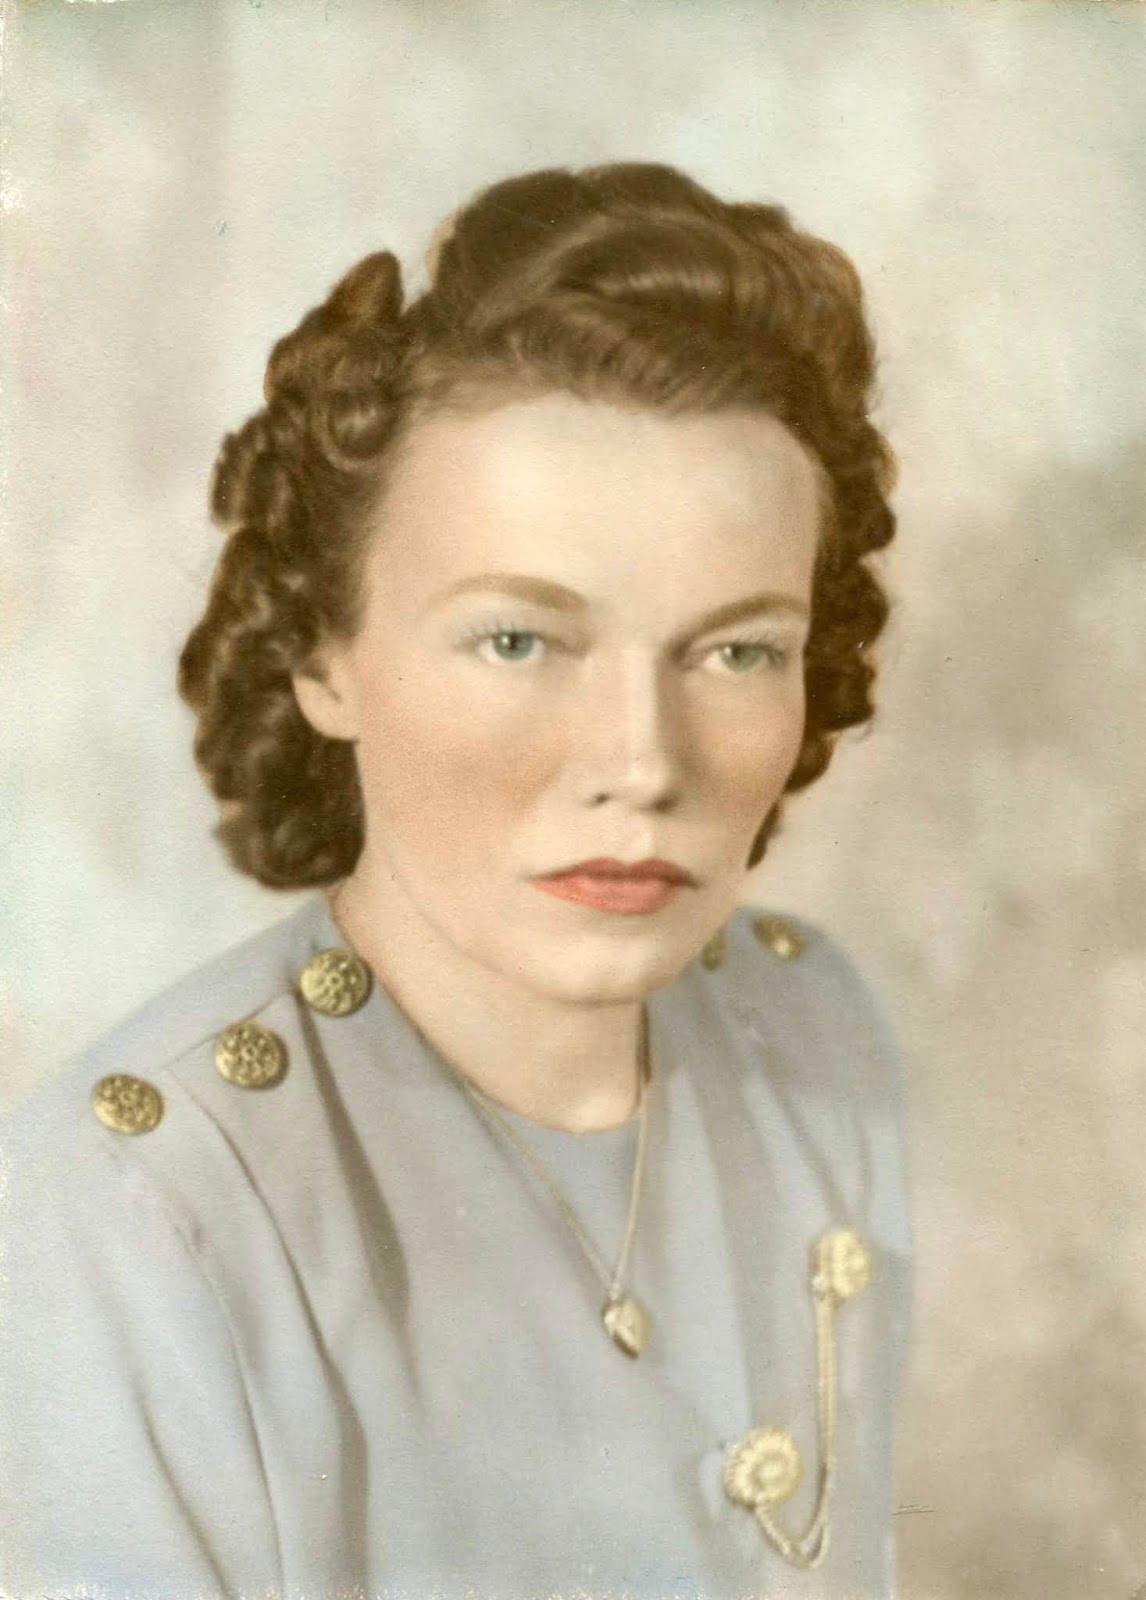
I am choosing to call mine
"Grandma's Star"
in honor of my Grandma Mildred Crane...
affectionally known to all as Milly:)
She looks so serious in this photo
which doesn't surprise me at all
because she did not like having
her photo taken..
but she had a beautiful wide smile
and a contagious laugh!
She is my Mom's mother and
lived just down the road from me
and in the small town of
Herriman, Utah where I grew up
and was a big part of our everyday lives.
She has been gone for 7 years now
and I still miss her every day.
to read my post about her and our relationship.
Grandma's are sew important!

Okay...
so now onto more about the
Grandma's Star quilt block.
Of course a quilt pattern
in the year 1950 meant templates
and not rotary cutting like today ...
so of course I drafted it up
for you modern style!

I've saved this block tutorial
(and many others)
for a very long time...
waiting for the perfect fabric collection
that would go perfectly side by side
with my Grandma's Star Block
And here it is!!!
that has just been released this month.
YAY!!

I designed this collection with
visions of all scrappy happy blocks
and of my blocks from my
and also with visions of many many more
Farm Girl blocks to come!

To say the least...
I am beyond thrilled with
each and every print
(it's my largest collection so far)
and I have SEW many plans...
BIG PLANS
that will be happening with this collection:)
Todays tutorial is just the start.
If you choose to follow along...
all of the vintage block tutorials will eventually be a quilt!

As you know I like to make my
Farm Girl blocks in both 6" and 12" size.
I made the 6" Grandma's Star first.
Here is the 6" cutting:
Background
Cut 8 - 1 1/4" x 2"
Cut 24 - 1 1/4" x 1 1/4"
Fabric One (mine is aqua)
Cut 8 - 2" x 2"
Cut 8 - 1 1/4" x 1 1/4"
Fabric Two (mine is red)
Cut 24 - 1 1/4" x 1 1/4"
If you want to add 4 corners
like piece "E"
in the magazine photo...
cut 4 - 2"squares.

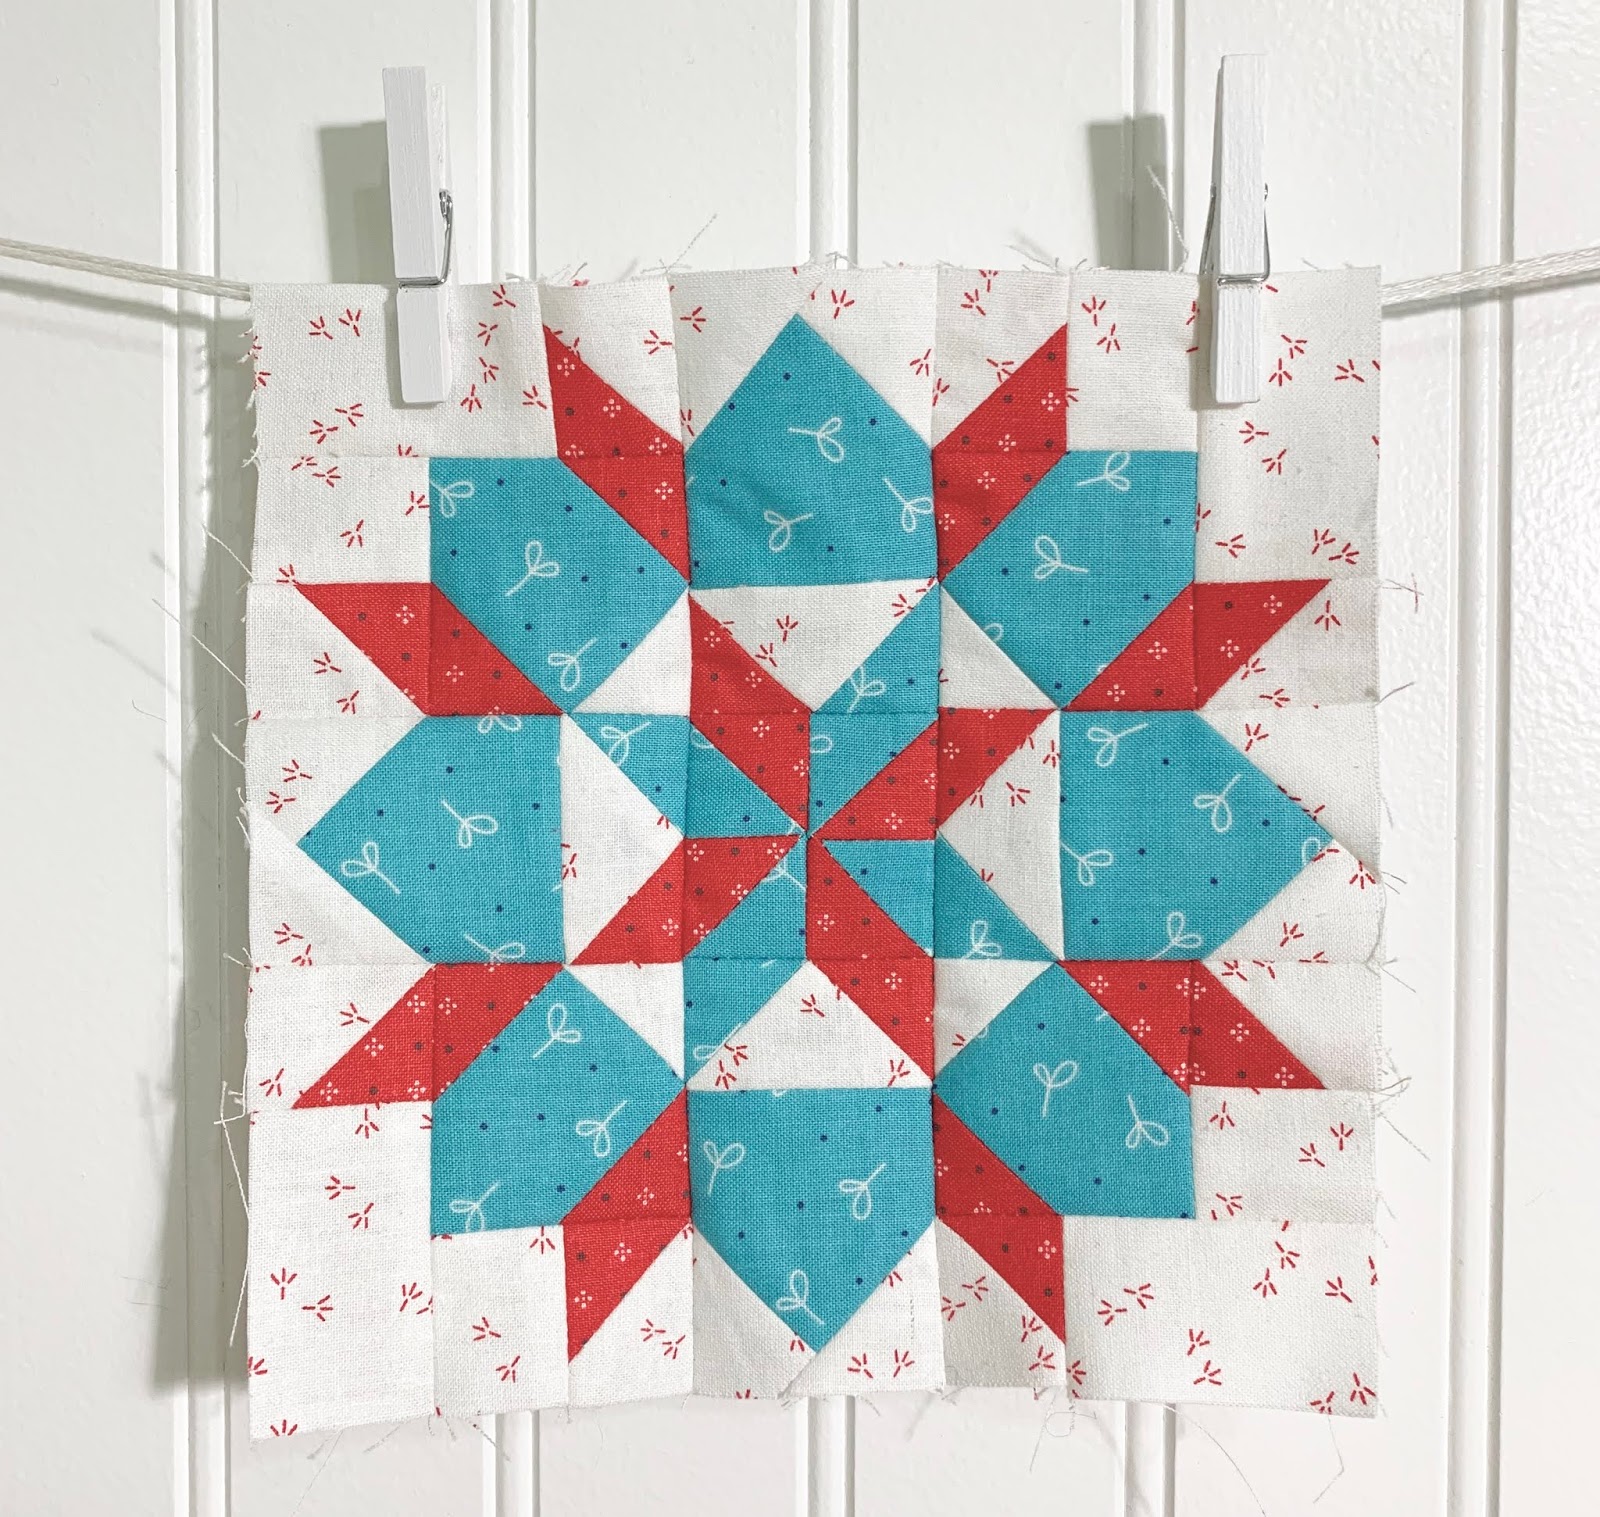
6" Grandma's Star Block
made with 3 of the prints from
Farm Girl Vintage

P.S. This block has a lot of pieces
(which makes it sew fabulous!)
and I always press my seams open
when that's the case.

6" Farm Girl Blocks
are so tiny and cute...
but if you are the
12" Farm Girl Block type...
Here you go!!

Isn't it amazing how different
blocks look in these 2 sizes...
and of course different prints too:)
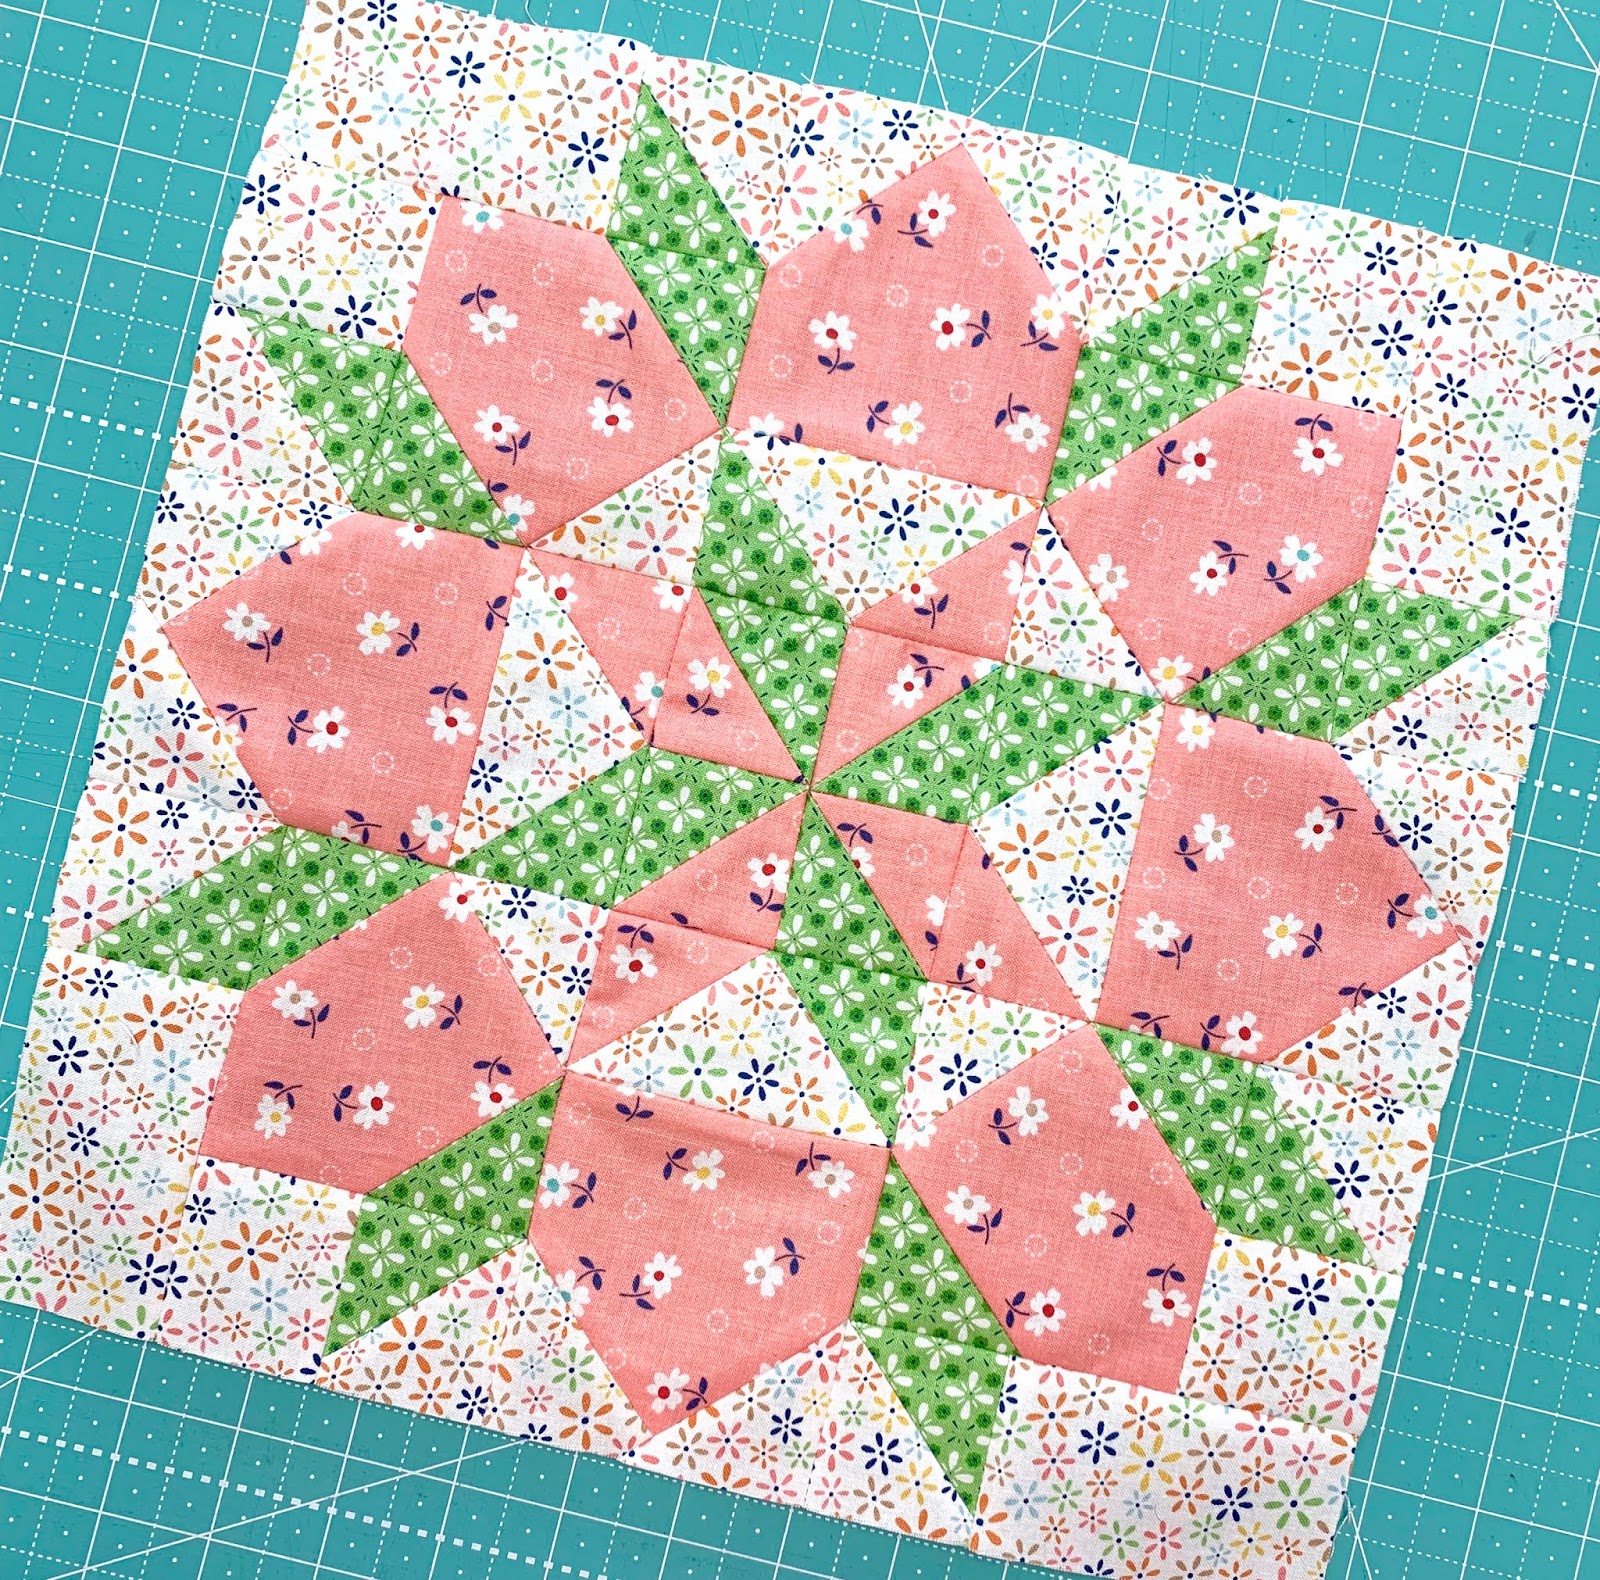
I will be using the 12" size
for the quilt that I'll be making
and use the 6" size for something else:)
I've chosen the 12" size for the
step by step tutorial...
but keep in mind that I sew
the 6" size exactly
the same way as the 12"

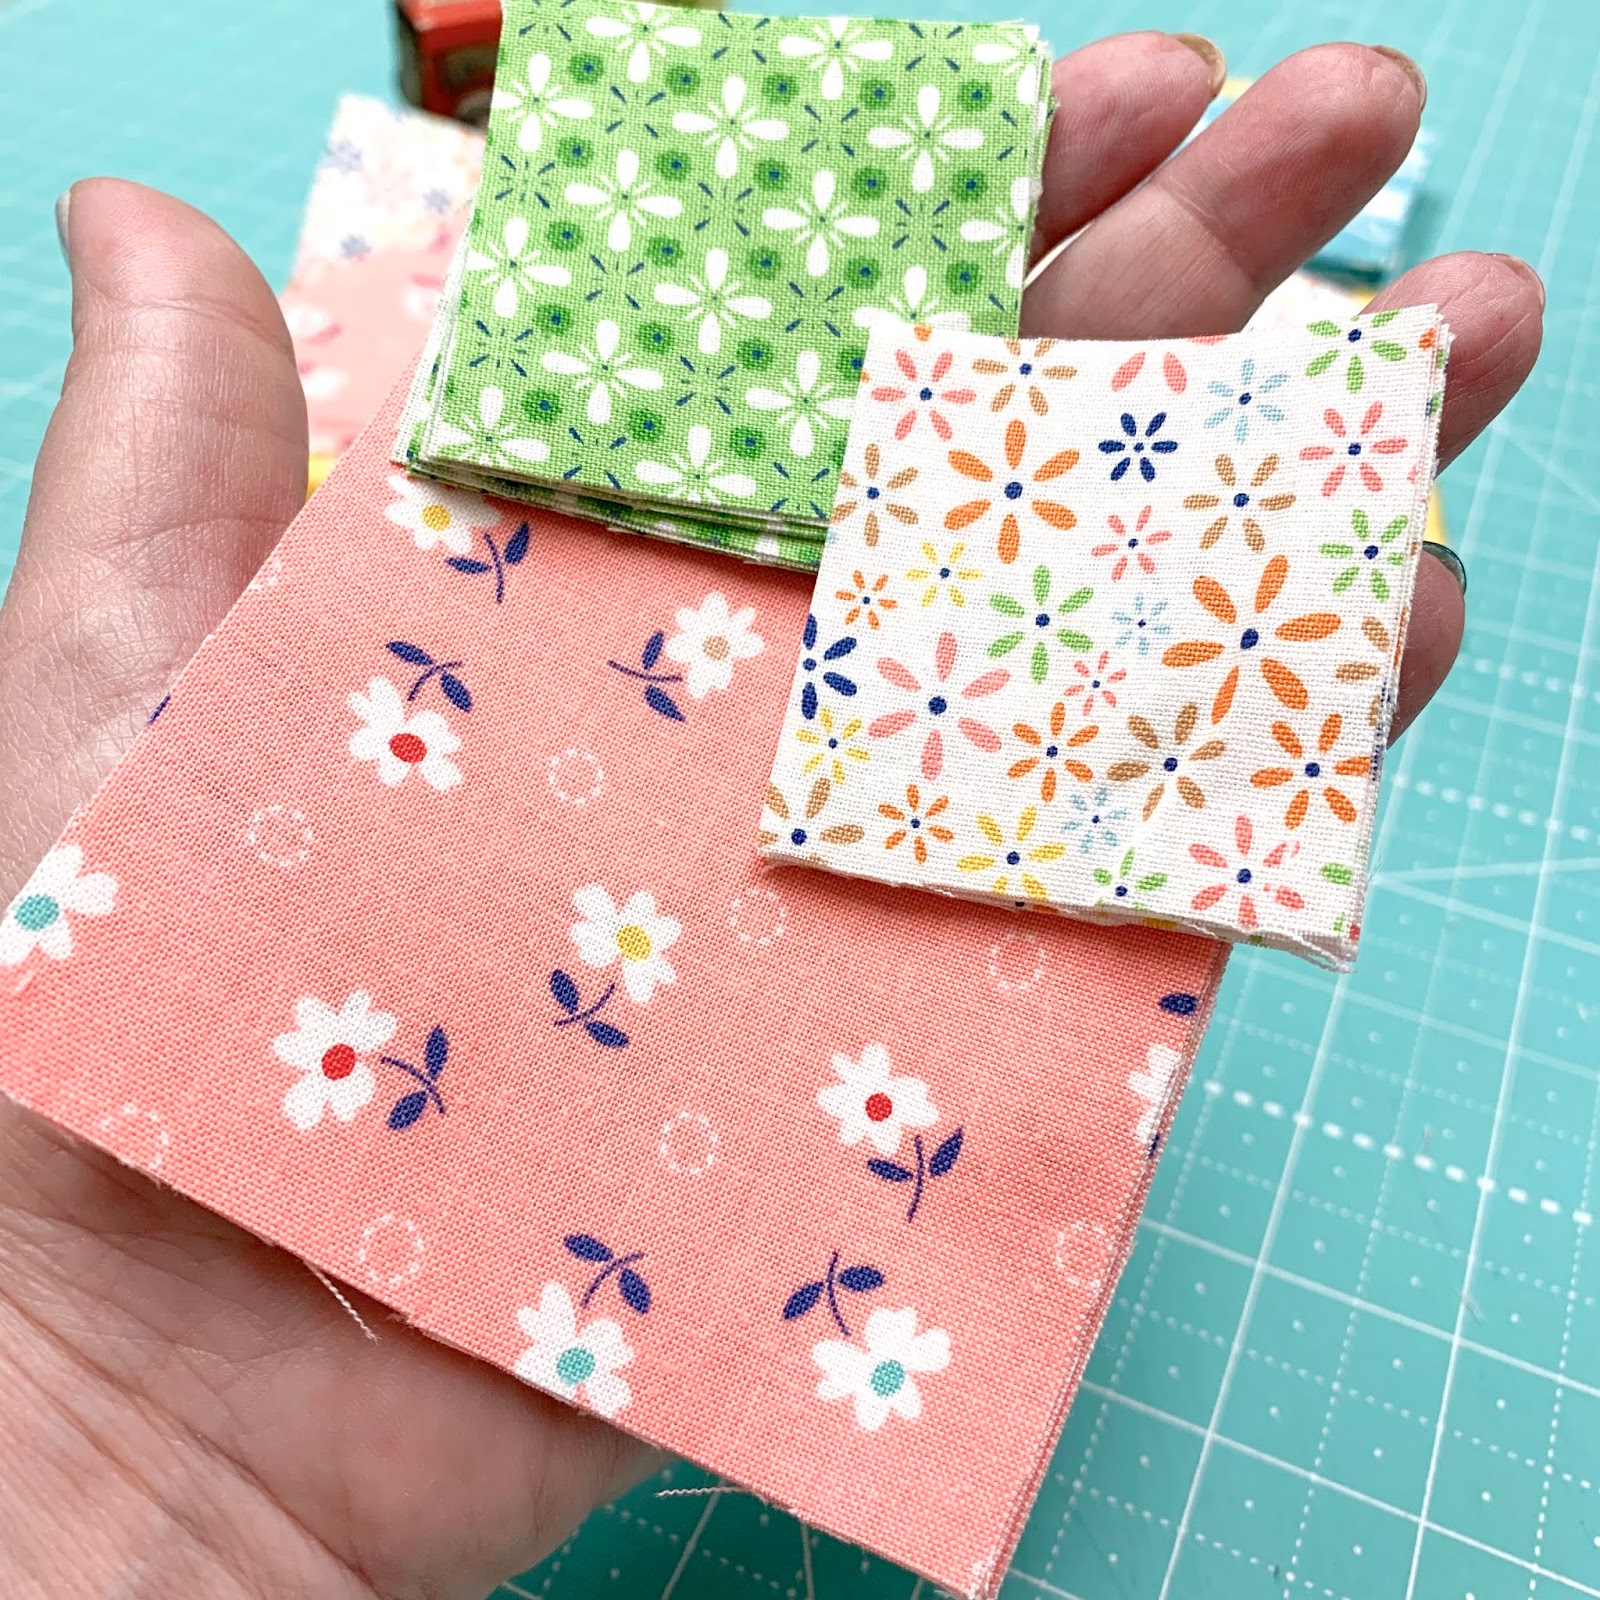
I chose 3 more prints from
Farm Girl Vintage to make the 12" block.
I also cut squares for the
"E" corners just in case I wanted them...
from the fourth print
that you see (the text)
it's one of my new widleback prints ...
it's 108" wide and is called
"Farm Life" and is perfect for all your
Farm Girl quilt backing
and of course I use it for
piecing blocks as well!
It comes in 3 colors:)
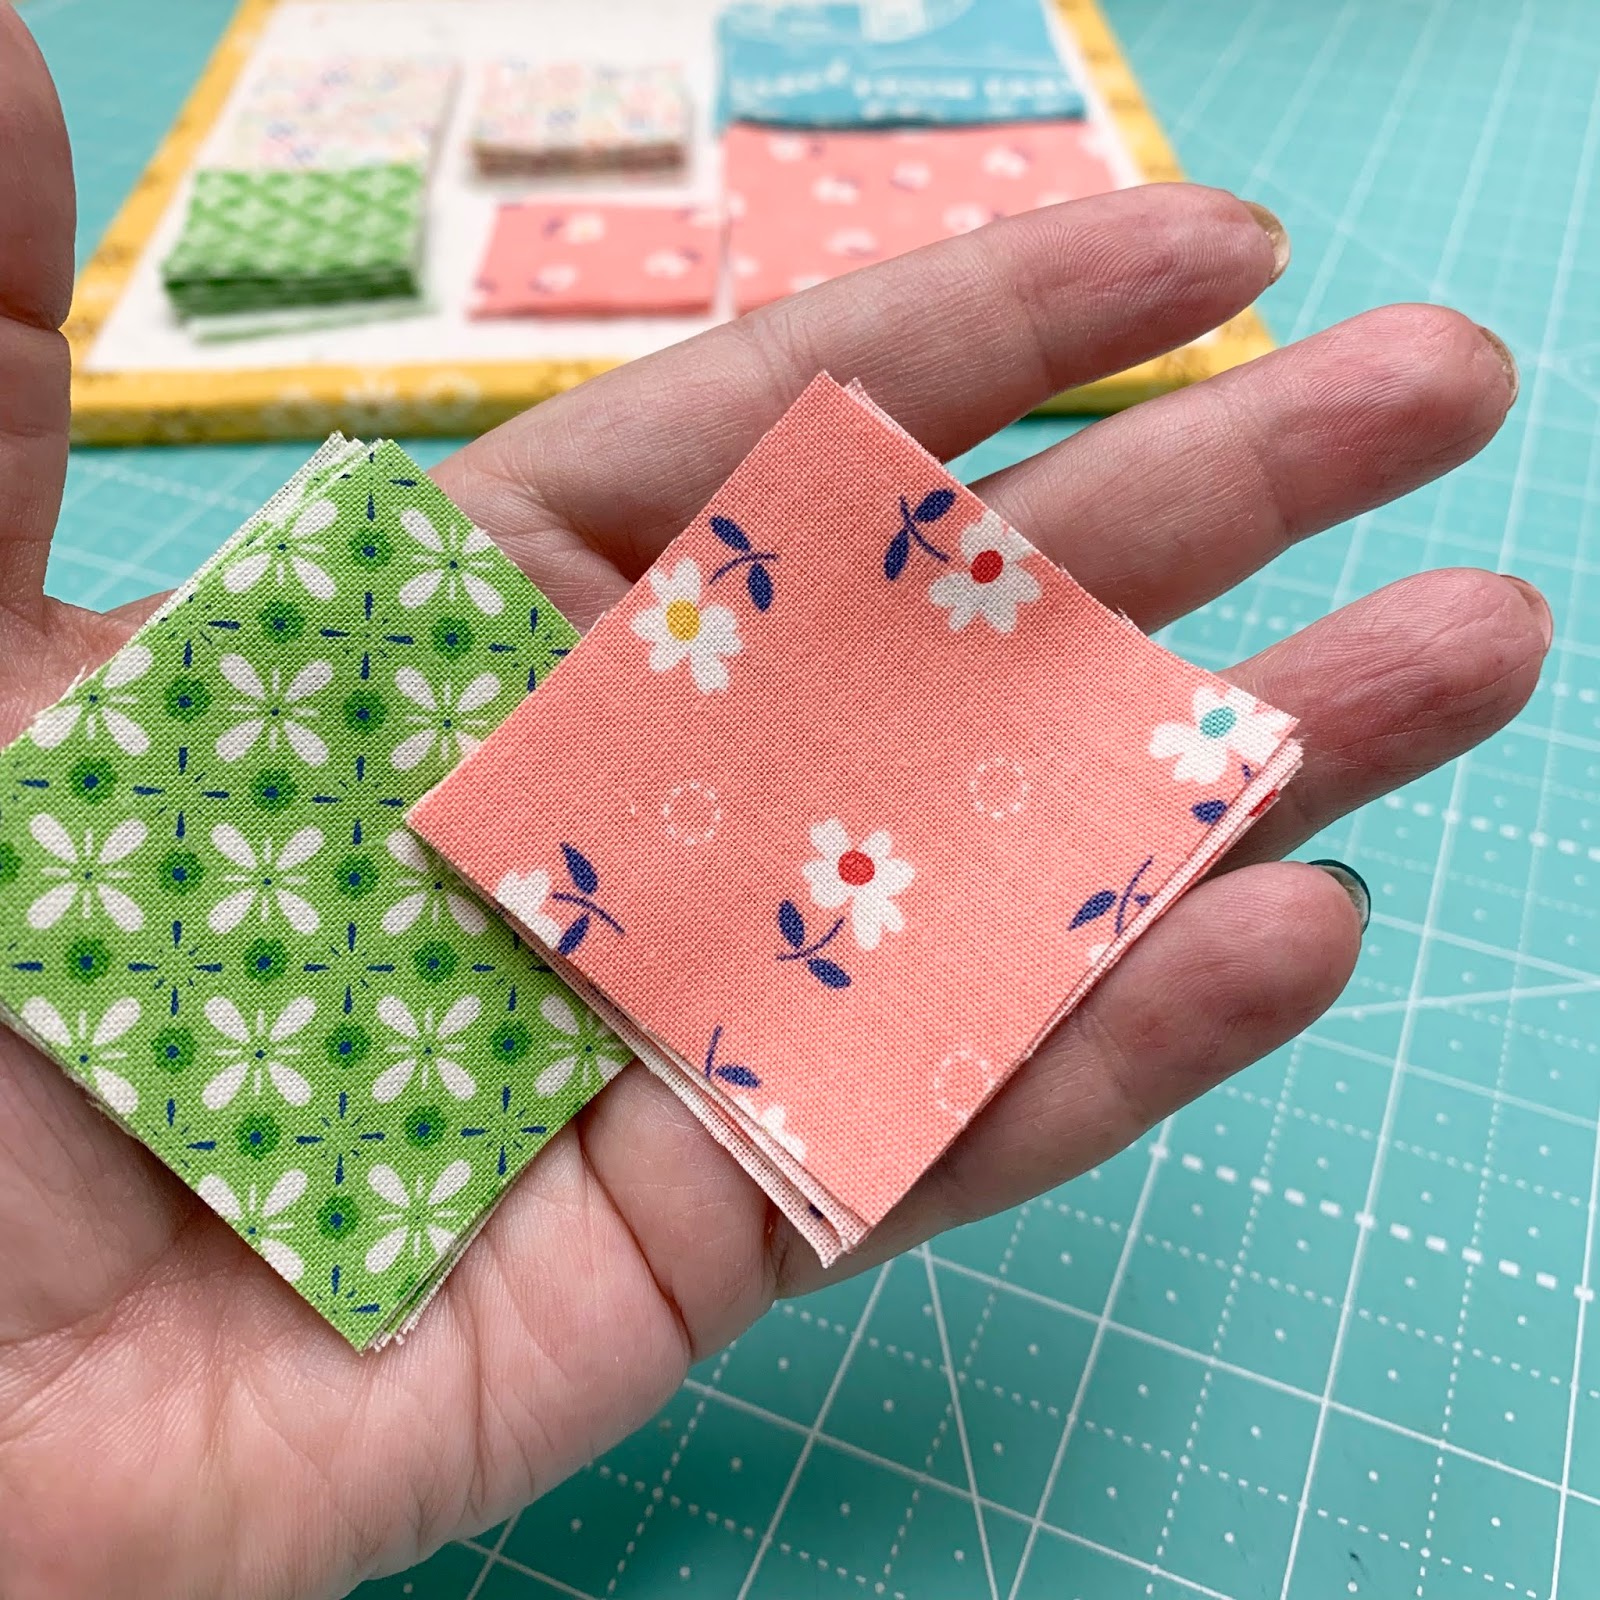
I used just a little bit
larger scaled prints
for the 12" as opposed to the 6"
and the fun "tiny floral" print
from the collection for the background.

Cutting for 12" Grandma's Star:
Background
Cut 8 - 2" x 3 1/2"
Cut 24 - 2" x 2"
Fabric One (mine is coral)
Cut 8 - 3 1/2" x 3 1/2"
Cut 8 - 2" x 2"
Fabric Two (mine is green)
Cut 24 - 2" x 2"
If you are making the "E" corners
cut 4 - 3 1/2" squares.
First we are going to make a pinwheel
for the center out of 4
half square triangles.
Take 4 each of the 2" squares
and pair them up with right sides together.

Sew a straight line from corner to corner.
You can mark a line on the squares
but I like to spend my time sewing
and not marking so I use my
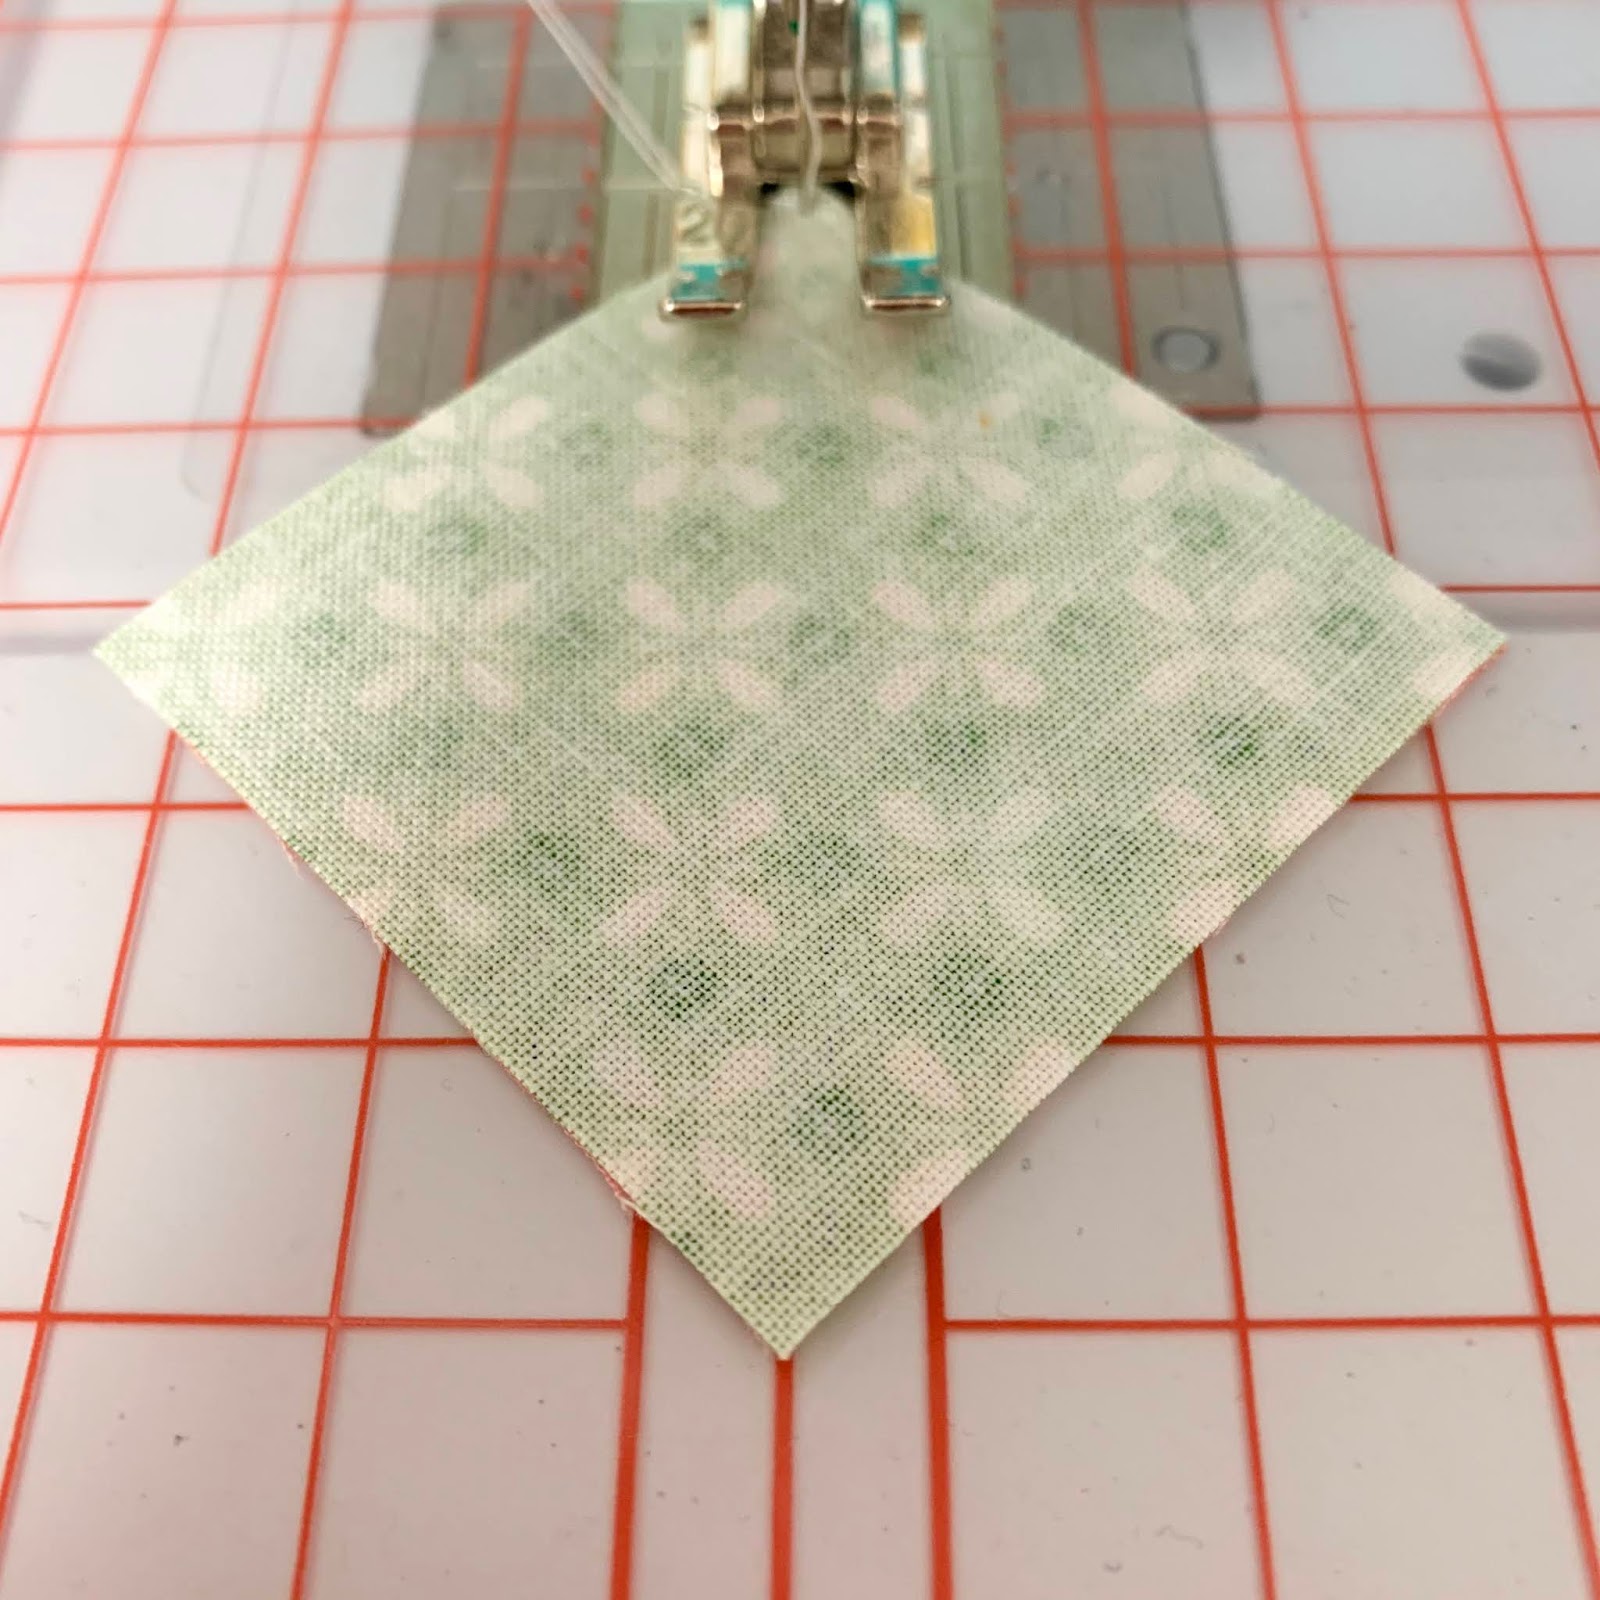
And simply follow the center line
as it's being fed through the
machine like this.
to see how and why to use it
with your machine:)

I also like to save time and thread
by chain stitching as much as I can:)

Trim an approximate 1/4" seam allowance
off of one side like this...
And press open!

Sew the 4 half square triangles together
and sew a cute pinwheel...
making sure to place each triangle
going the right direction
as needed for the block.

Open seams and set aside until later.

Now we are going to make the
remaining 8 half square triangles
in the block using 8 each of
these two 2" x 2" squares.
Sew them the same way as the others...

Trim and press open as well.
Set them aside for later.

Now grab these prints...
4 of the rectangles and
4 each of the squares.

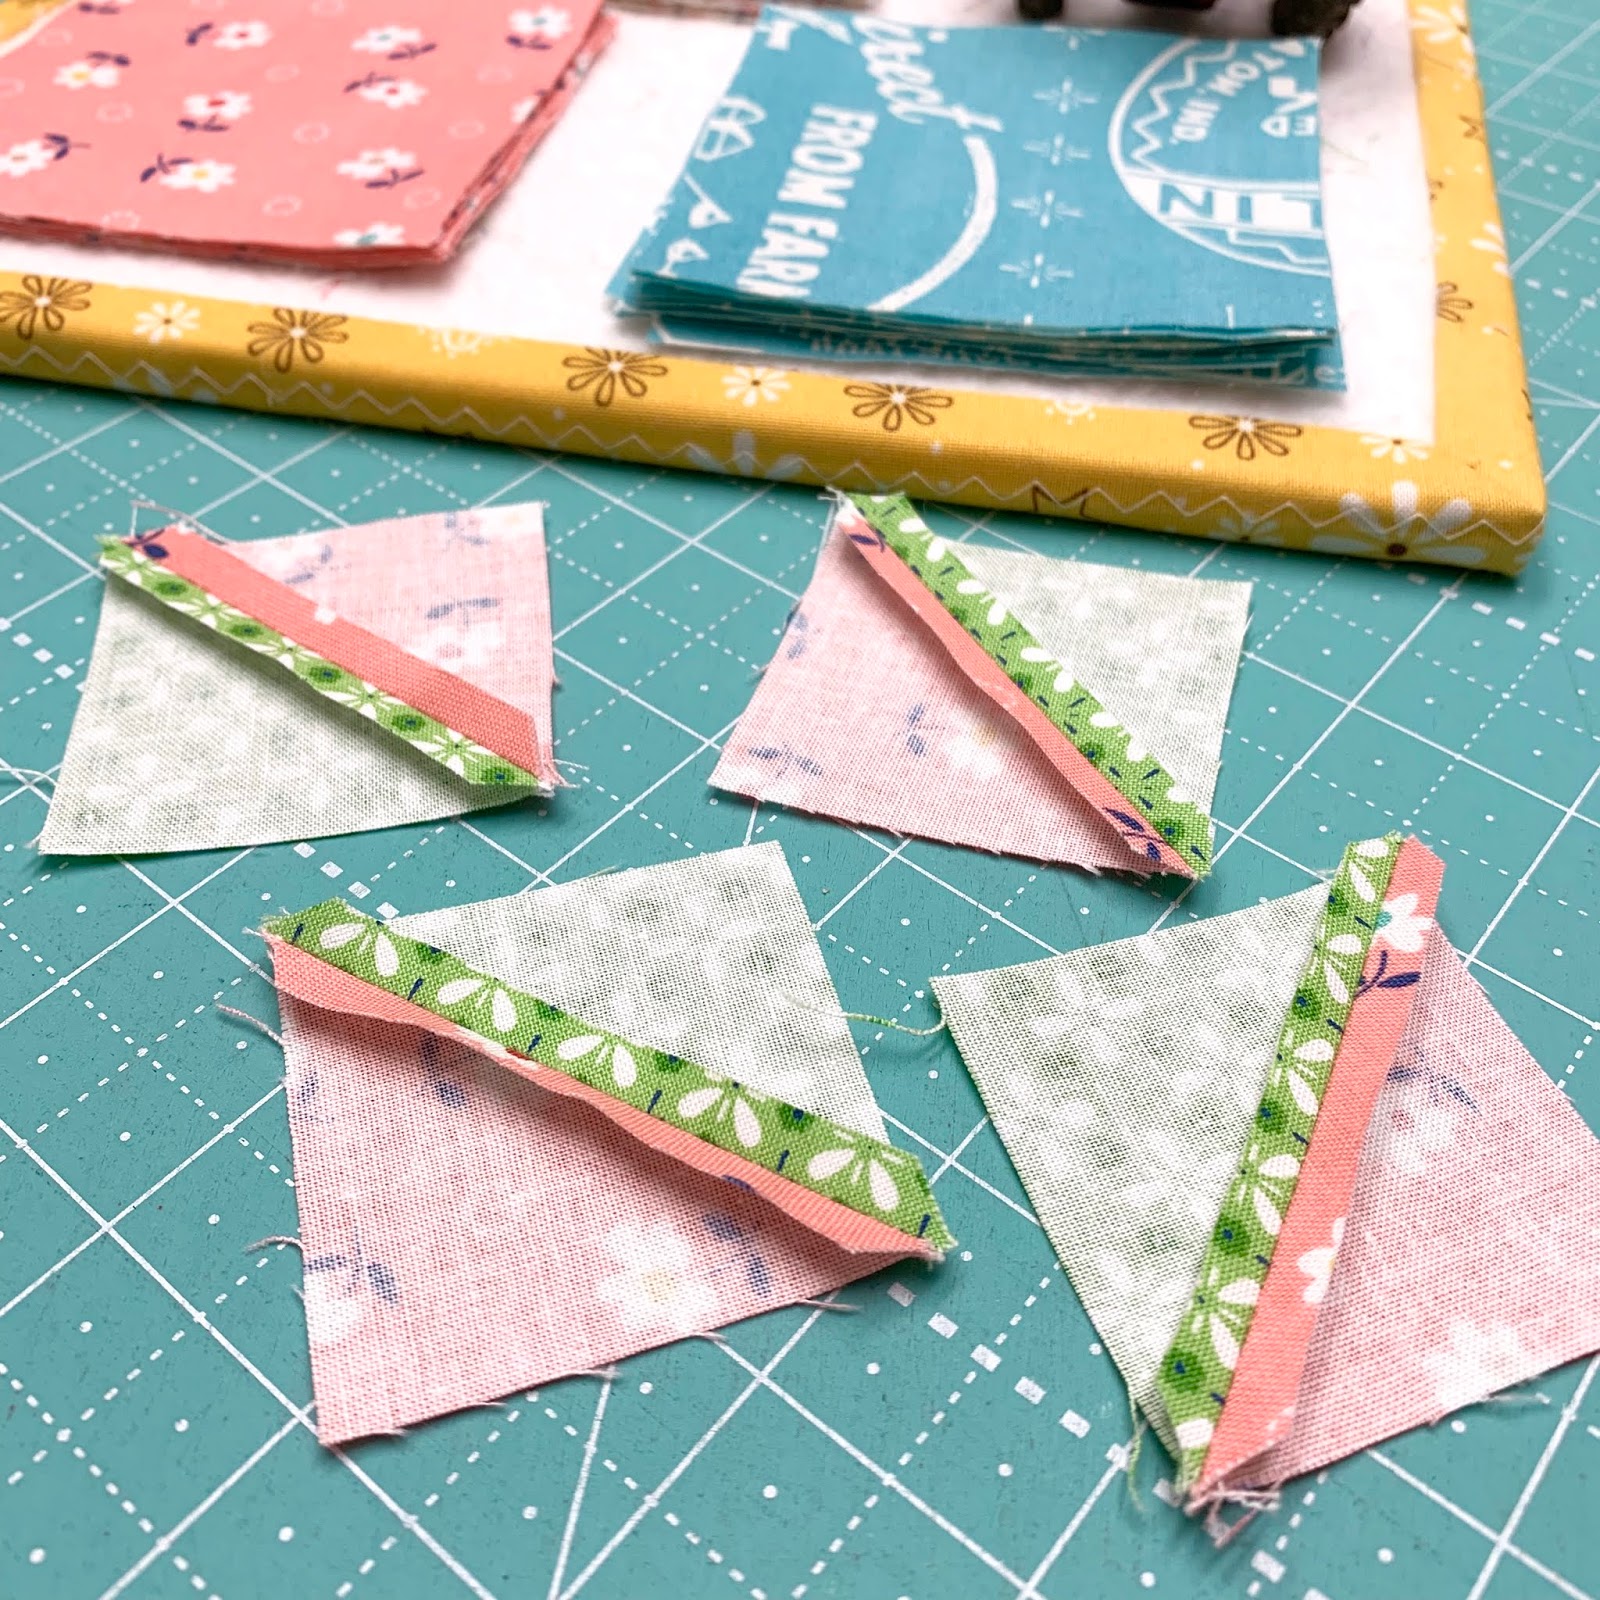
We are going to make 4 flying geese
using the easy corner triangle method.
Sew the coral squares onto
one side like this...
marking a line or using the
Seams Sew Easy
to sew from corner to corner.
Take note that you will need to
trim and press
the coral triangles BEFORE
you can add the green triangles
to the other side.
Set these 4 aside for later.

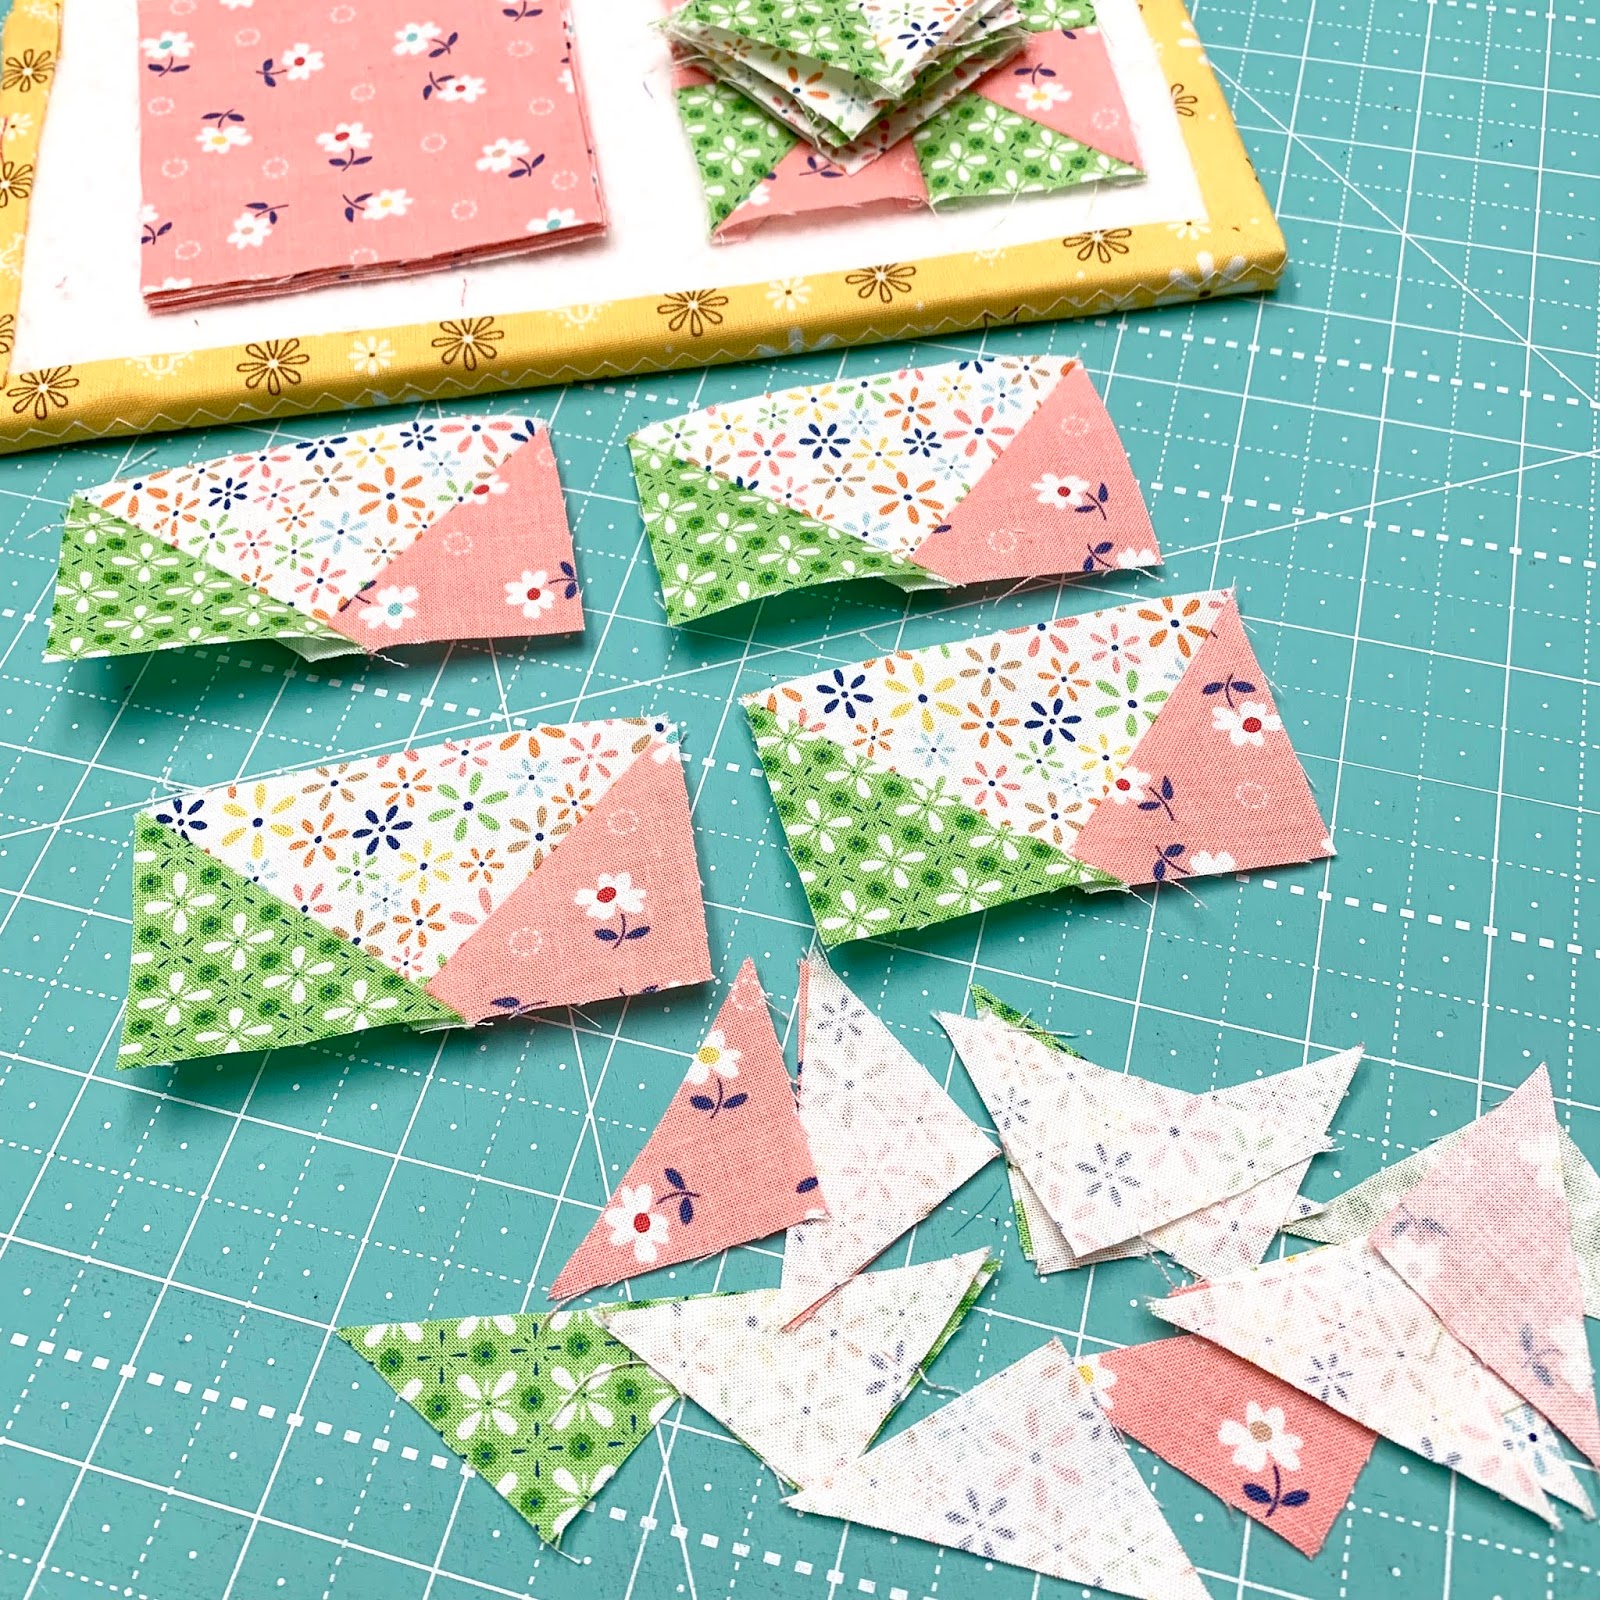
Now grab 4 of the 3 1/2" squares
and 8 of the 2" background squares.

Sew an easy corner triangle
on each top corner of
the squares like this...
remembering that you have to complete
one side before adding the other.
Set these 4 segments aside.
Grab the 4 remaining 3 1/2" squares...
use 8 green squares and
4 background squares
for the next segments.
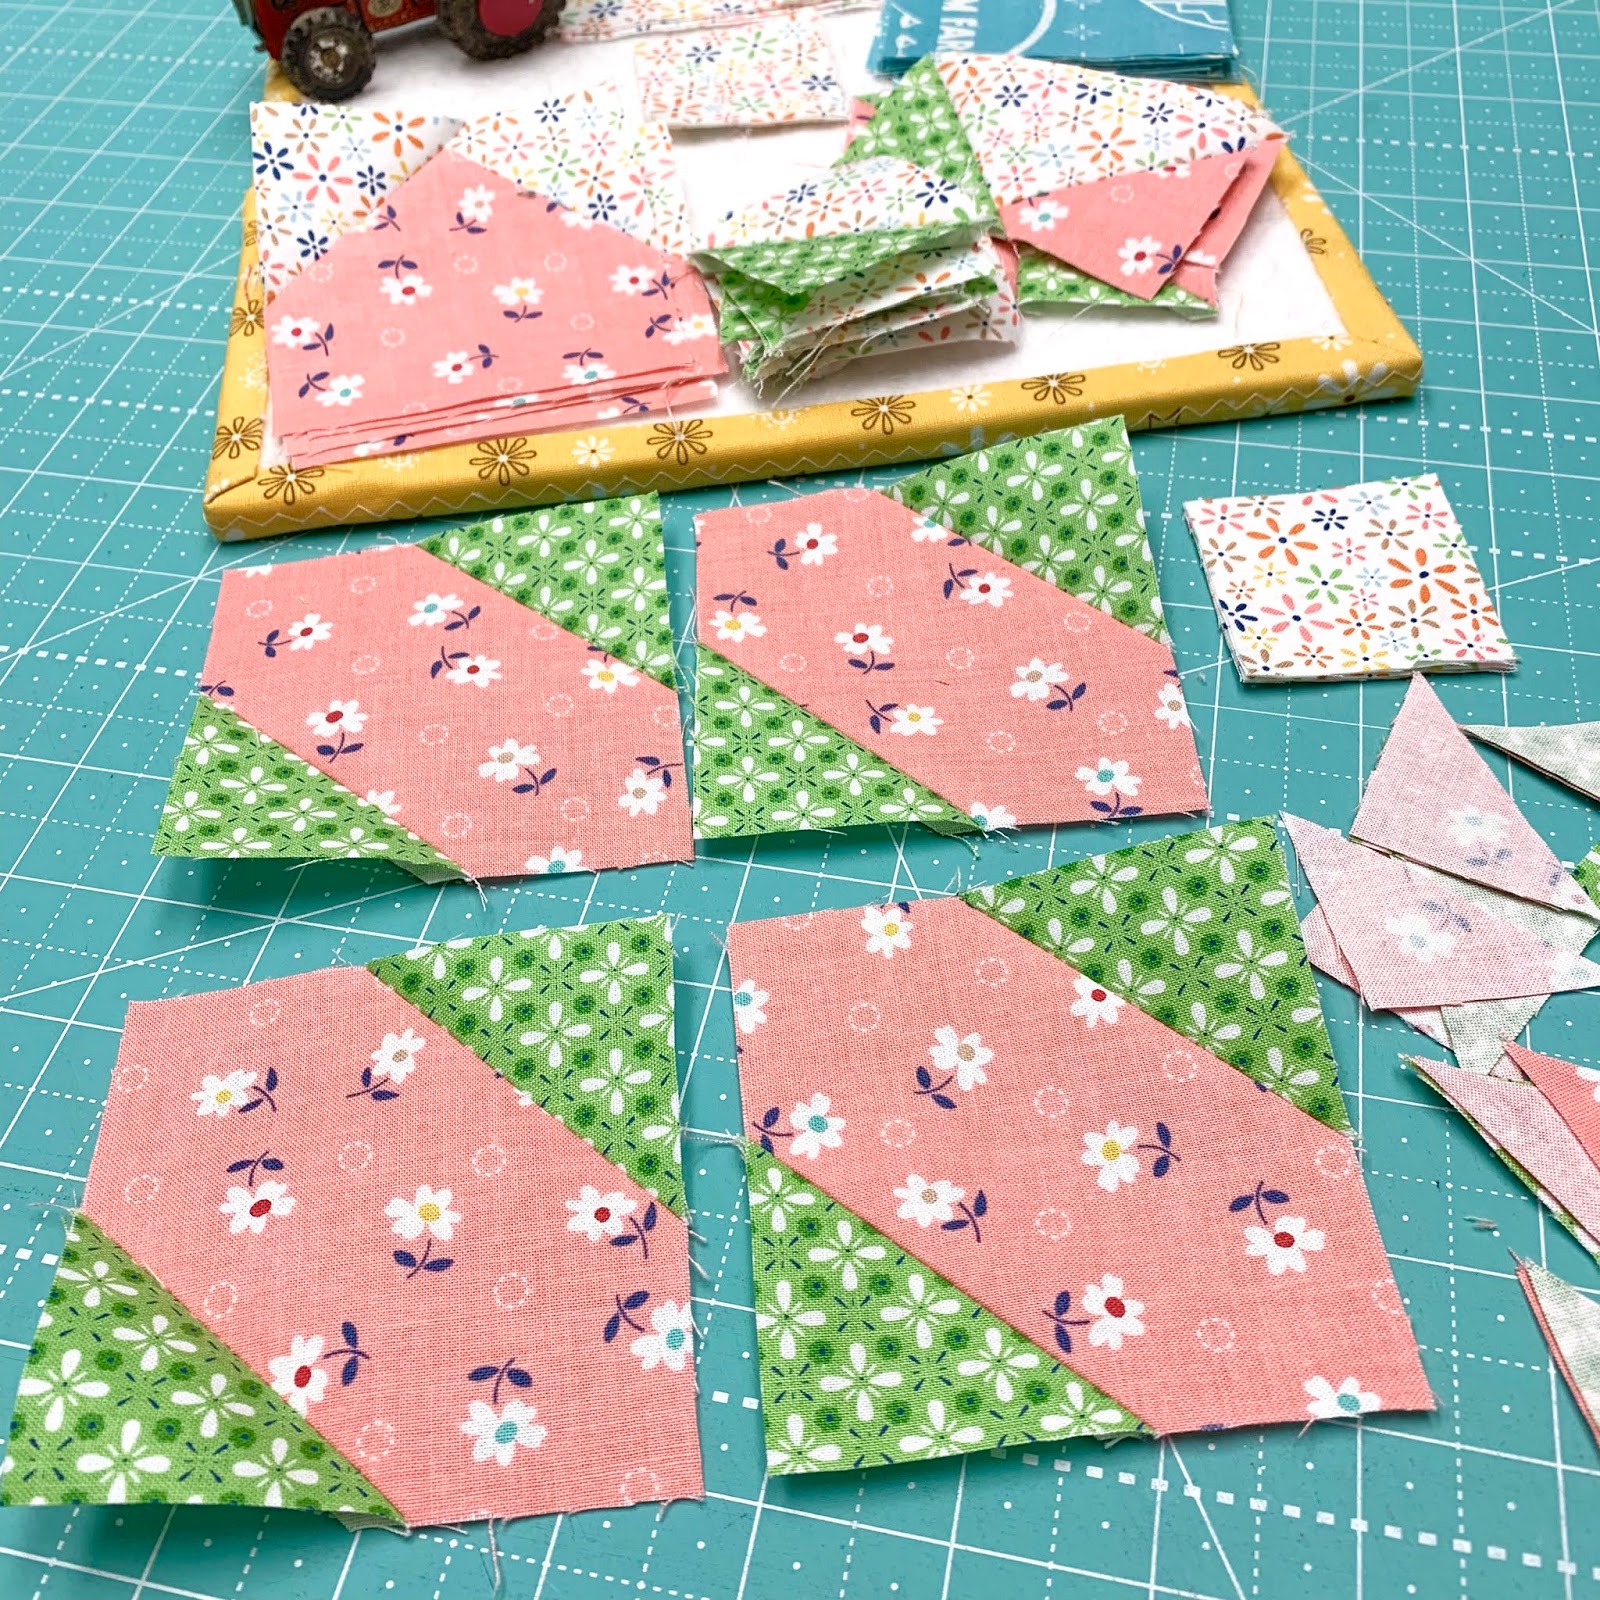
Sew a green easy corner triangle
onto each side of the
coral squares like this.

Now add a background easy corner triangle
onto the top of each one.
Set aside.
You are doing great!
We are getting closer to
having each block segment completed:)

Grab the 8 half square triangles
that you already made and
lay them like this
with the remaining 4 background
rectangles and 4 background squares.
Sew them together...

to look like this!
You should have 4 segments each.

Okay!
Great job.
Sewing this block takes time...
but is easy when you break it down
into smaller sections...
and now we can start sewing
those smaller sections together!

Sew these 2 sections together
like this for a total of 4...

Like this.

And these 2 sections
for a total of 4...

Like this.

Now add this section to the top...

like this.
You will have 4.

YaY!
Now you can lay the block out
into what is basically a nine patch:)

Sew into 3 rows like this.

And then sew the rows together
to complete your block.
Whew and Yeehaw!
Sewing this block is like
making one cute little quilt
all within it's self and I love it:)

Grandma's Star
12" x 12" finished.
Of course your block will measure
12 1/2" square at this point
which is unfinished size.

I haven't added the 4 - "E" corners yet
because I haven't quite decided yet
if I am going to.
(sew many possibilities!)
It may become a pillow...
or if it goes into a quilt
I will definitely add the corners
because when all of the rows are sewn together
it will make each star
look very circular and I love that:)
All you need to do when adding them is sew them diagonally across each corner of the block and trim.
They are just another Easy Corner Triangle that is optional!
Your 6" Grandma's Star
will measure 6 1/2" unfinished.

P.S. I made my pincushion
several years ago using a
cute little vintage toy tractor:)
Those are my vintagey sewing style

I super love this block.
I hope you have fun with this
very long but very fun tutorial...
and maybe you will try your hand
at making both sizes.
The 6" size is fiddly but fun
and is totally do-able.
And as you can see...
it's totally worth it!!

Thanks sew much for joining me
for my very first
"Vintage Block Along"
tutorial with my
favorite Farm Girl Vintage
fabric collection!!
There are plenty more
vintage block tutorials to come:)
Until next time...
Have a Quilty Kind of Day!!
xx
Lori
***UPDATE***
We are now finished making all of the blocks...
If you are just joining us...
click on each block
to go to the tutorial:
5. Rhinestone
6. Vintage Lily
7. Star Shine
8. Humble
9. Egg Money
10. Quilting Bee
11. Sunday Star
12. Sweet as Honey
13. Bear Hug Block
15. Memory
16. Farmers Daughter
19. Picnic
20. Sparklers
21. 4th of July Flag
22. Playing Card
23. Penny Candy
24. Mercantile
25. Family Reunion
26. Parade
27. Shade Tree
28. Wildflowers
29. Crossroads
30. Leftovers
31. Peony
32. September Star
34. Six Sisters
35. Twirl
36. Wash Day
37. Fall Flower
38. Fall Social
39. Holiday Lights
40. Winter Flower
41. Checkers

20 comments:
Adorable fabric, adorable block, adorable red tractor pincushion!! Thank you for the tutorial.
Forgot to say I know those Workbasket magazines-I have a whole tub of them that were my mom's!
I enjoyed reading about your time growing up and quilting with your mom, grandmother,great aunts and other women.
Such a great history that needs to be told to the next generation. And, I agree with you, “grandmothers are so important.”
Great tutorial. Beautiful pictures. I may just try my hand at that cute 6” block!
Thank you for sharing.
Happy New Year!
You are amazing. Love your creativity and of course your fabric!
Lori, this was a beautiful and touching story. Thank you for sharing about the warm relationship you had with your sweet grandma Crane. It made me realize I need to sit and write down all of the memories I have of my grandma Parrish- she’s been gone since 1990 and I miss her so much. This block is beautiful and I will definitely be making an entire quilt with the 12” size. I’m very proud of you for creating yet ANOTHER wonderful fabric line and extremely excited for “us” to get to play along. Big hugs my friend!
You are such an inspiration, love your quilts and fabrics, buttons,etc..I cannot get enough of Lori Holt, but what was so sweet and inspiring was your message about your grandmother, I have five granddkids and I am so much a part of there lives, I have always taken care of them so they will not have to be put in day care, my oldest grandchild is 19, and he calls me every day, out of the five I have 1 granddaughter who is 6, but I make sure I stay a part of there lives. We are who we are because of the past and the people who inspire us. Thank you so much for the memories and yours.
Sharing a vintage quilt block on the eve of the new year - awesome! I love this fabric line. My grandma was also a quilter, but we always lived too far away for me to learn from her. Now I'm 60 and finally learning about quilting.
I couldn't love this blog post more....the story, the quilt pattern and the fabric...all divine!
You are right this IS the perfect fabric collection for your Grandma's Star.
Can't wait to try the 6". I love fiddly things.
Grandmas are soo important in life and I also miss mine everyday. My grandma was also a quilter between packing lunches to go out to the field doing barn chores patching jeans and baking. She had a very bad habit though of not writing things down so I don’t have patterns and such like you do but making these blocks and reading your stories makes me think of her. ❤️
I love your story about your Grandma. They are special!!! I miss my Grandmother so much. It has been many years now and I remember all the fun things we used to do.
Thank you for sharing this block. I am going to make it in honor of my Grandmother.
My grandma who taught me to sew was also Mildred❤️ She passed away when I was in 5th grade but I still remember her fondly and the many things she taught me. This is a wonderful block and I can’t wait to make it. Thanks for doing this special sew along Lori!
My mom got the Work Basket magazine for years and years. I was born in November 1950, so was thinking I need to make this quilt. I am a quilter and my mom was a quilter and hand quilted all of her quilts. My mom has been gone for 5 years now and I miss her everyday. The things you showed of your grandmas's looked like my mom's things even the picture of your grandma looks like a picture of my mom, same hairstyle. My mom was born in 1916, is that close to the year that your grandma was born? I really enjoyed reading your posts and pictures.
I just love your sew along. and reading story. Thjank
I remember those Workbasket magazines growing up. My grandmother loved those! Wish I had them now!!
Thanks Lori for an adorable block. I had such a fun time sewing this one together.
Thank you SEW MUCH! I love it
Is there a video tutorial. I’m such a visual learner it will take me ages to struggle through the written instructions.
But if there’s not I’ll defi try and wrangle your text instructions cause I love it so much. Thank you
You ought to do a book with these patterns. I would buy it in a heartbeat! I just started following you and I am so happy. God bless, Let ri Holt, and thank you for having these in 2021!
Yes I would love to have a book with all these patterns. I have started collecting your books and your patterns are so easy to follow.
Post a Comment