

Good morning!
Here's another blog post to help y'all
"Bee Prepared"
for the Bee Happy Sew Along!
If you are just joining us..
and then
to get caught up on all info so far:)

As you know...
the majority of the blocks in the quilt are appliqué...
but there are a few pieced ones and so I thought I would show you how to do those
before the sew along begins on August 28th just to get a good head start:)

Keep in mind that
just because I am
showing you now...
does not mean you have to
have them finished before the 28th.
After you get your kit...
and you have done all of the cutting...
and if you have time...
great!
If not...
when it's time to start
you can always
refer back to this post
because it will remain here
and you can find the link
to each and every week
on the right sidebar
here on my blog:)

First up is the flag:)
It's easy peasy simple piecing.

You already know the
sizes to cut the
pieces from the
instructions in the
Sew Along Guide
to download it
if you haven't done that yet.

Lay out all of your pieces
on your design boards
and make sure that you
have them all cut and ready:)
Before piecing...
you will need to
appliqué the star
onto the blue 5" square.
Trace the
D-14 Sew Simple Shape
onto the co-ordinating size of
Sew-In Interfacing
(size chart is in the guide)
If you are new here
and this is your first time doing
my easy appliqué method...
to see the video tutorial
from my last sew along ...
for the Sweetie Pie Quilt:)
FYI - I'll be doing
another video tutorial
on week one of this
sew along as well!

After you you have sewn and trimmed...
you will need to give each
cleavage area between the
star points a quick clip.
Clip just once...with small sharp embroidery scissors ...
all the way to your stitch line
but not into your stitches.
You will need to do this
in order for your
star to lie flat:)

After turning and
shaping with the
point to point turner...
Press your star on
the front side only:)

Center it onto the
5" background square
and appliqué
by hand or by machine.
Either way...
I always use thread
that matches the piece
that I am to appliqué.

***NOTE***
There are several rectangle blocks
as well as square blocks in this quilt.
For all of the rectangle blocks
I have given you instructions
to cut each background
the exact size
that they need to be
when sewing the blocks together
after appliqué is completed.
For ALL square blocks...
I have had you cut the
backgrounds bigger...
and then after appliqué
trim them down.
I much prefer to cut
backgrounds bigger when appliquéing
and so for the square blocks
that is entirely possible...
because they are super easy
to trim up afterwards
because of "exact size"
square rulers available to us.
However...
the reason I did not
have you cut backgrounds larger
for the rectangle blocks
is because there are NOT
"exact size" rectangle rulers
for these and so I cut mine
the exact size needed
and was just very careful
when doing appliqué and embroidery
so as not to fray the edges:)

I used a 4 1/2" Trim-It Ruler
for the star block.
After using the lines on the ruler
to center the star...
I always trim along the
top and the right edge first...

Then turn my little mat and
trim the two remaining edges.

Now that your star block
measures 4 1/2"square...
go ahead and sew your
strips together into
2 sections like this.
Make sure that you
cut accurately and use an
accurate 1/4" seam allowance when piecing your blocks throughout making the quilt.
If you do...
your blocks will be the
size necessary to sew into the quilt:)

Finish putting your flag
together like this...
and you have your first block
for the Bee Happy Quilt completed.
YaY!!
It should measure
8 1/2" x 10 1/2"
at this point.
Now put it in your pile of
"Fun and Done"
and lets move on
to the pinwheel blocks!

There are 8 pinwheel
blocks in the quilt.

I have had you cut
2 - 3" squares from print
and
2 - 3" squares from background
for EACH pinwheel block.
Pair them up like this
and I'll show you how to
make the red pinwheel!

Grab a background square
and a print square
with right sides together
and sew 1/4" on each side
on the diagonal
from corner to corner.
You could draw a line
from corner to corner
before sewing...
but I don't have to
because I use my
Seams Sew Easy Guide
I simply place the corners
on the line to the left side
(which is exactly 1/4"
from the center line)
and sew.

Then I turn my square around
and do the same thing again
on the other side.
(I always chain piece and do all of my squares at the same time)

I end up with two sewn lines
exactly 1/2" apart...
or in other words...
1/4" from each side of
the center of the squares
on the diagonal.
Give them a quick press
to set the seams.

Cut apart between the
sewn lines like this.

Before you press them open...
use a 2 1/2" square ruler
to trim them up.
Place the center line
of the ruler directly onto
your sewn seam like this.
Everything that you see
sticking out from beyond
the edges of the ruler
will need to be trimmed off...
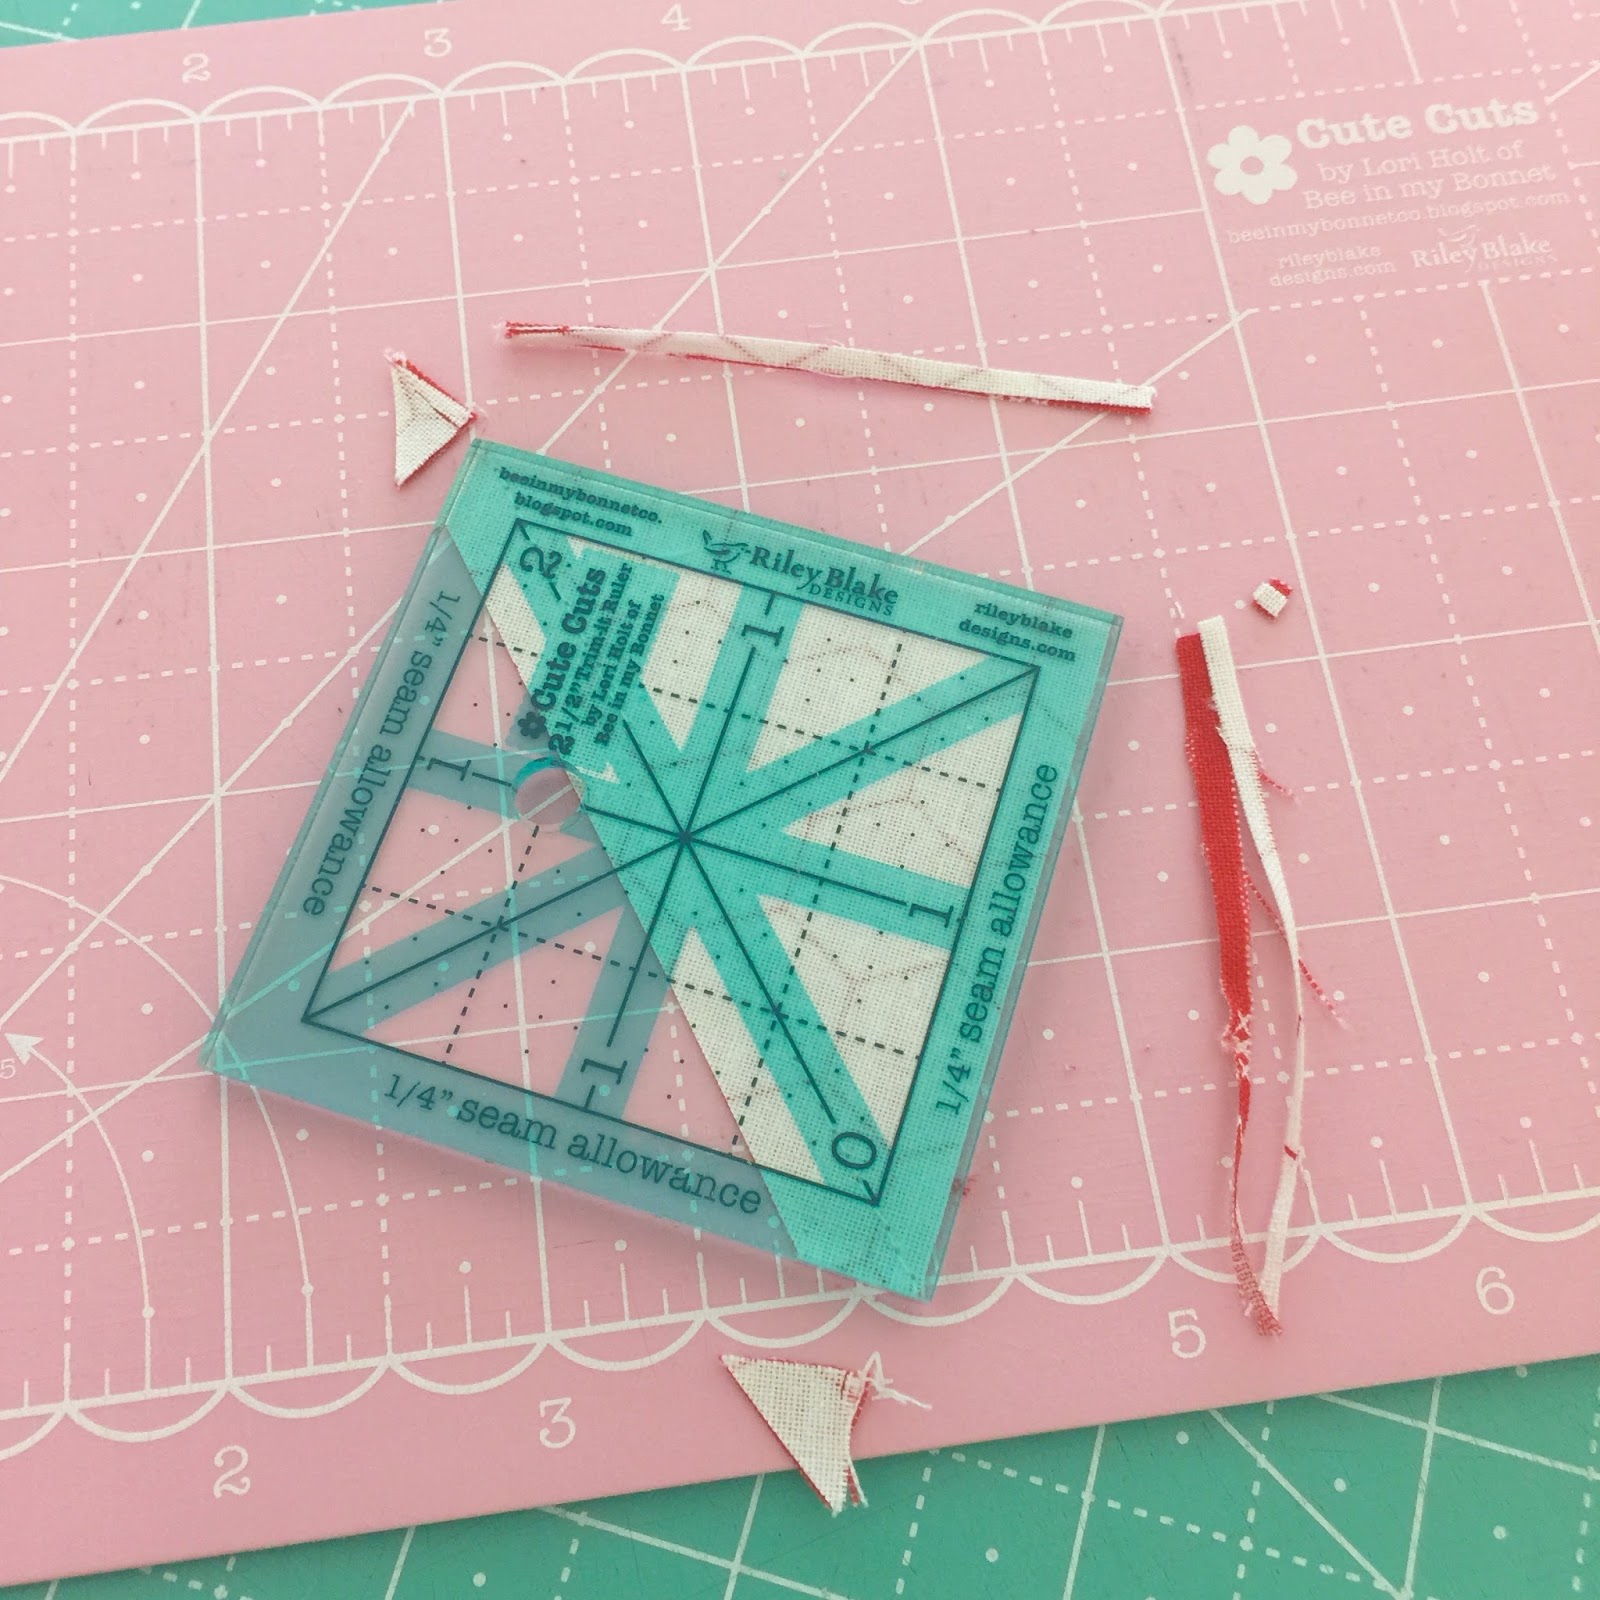
Like this!
Using a cute little
small mat
that is easy to turn
really helps during this step:)

Now you can open up your
half square triangle
and press the seams open.

And now you have a
super cute and super accurate
half square triangle
that measures 2 1/2" square.
Trim up the other half and...

You will have two!
Repeat the trimming and pressing
on the other matching sewn square...

until you have a total of
4 half square triangles.
Lay them out on your
design board like this...

And sew them together
to make a pinwheel.
YaY again!
Your pinwheel should measure
4 1/2" square at this point.

I really LOVE pressing my
seams open on small blocks
because they lie super flat!
Sometimes we quilters concentrate
so much on the sewing...
that we can overlook how important
the pressing is.
Good pressing
is an important step for
keeping your blocks accurate!
If you have bulky and unevenly
pressed seams...
chances are that your block
will be smaller than it should be:)
***Another Tip from Miss Bee***
Do not use steam or starch
on your pieces AFTER
you have cut them
because when you apply moisture
and then heat to cotton fabric
it shrinks!
You don't want your blocks
to be too small...
so only use starch or steam
BEFORE cutting your pieces out...
and after they are cut...
keep them dry:)
Remember:
Moisture + Heat = Shrinkage

I really love this method on
making quick and accurate
half square triangles...
and it's the method that I teach
in my books as well.
Inside of my
Scrappy Project Planner
you will find a chart on
what size squares to
start out with for all different
sizes of half square triangles:)

With easy cutting...
and just a little bit of trimming...
the results are perfect every time!

Here are all eight
of the pinwheel blocks
needed for the
Bee Happy Quilt.
Next Monday...
I'll show you how to
do the Churndash Blocks!

Now that the
Bee Happy
Sew Simple Shapes
are here...
as well as the
rest of the fabrics...
y'all should be getting
your pre-ordered kits soon!
If you have not
ordered a kit yet...
check with your local quilt shop
or
simply do a google search
to find out who
has one near you:)
If you need any other supplies
for the quilt...
(all supplies needed
are listed in the guide)
check with your quilt shop
as well to see if they stock them.
Chances are...
if they are cutting kits
for the quilt...
they will have all of the
supplies needed as well.
If they don't stock them ...
I do have some (not all)
of the supplies needed
I hope you are happy
with this weeks
"Bee Prepared" tutorials
and are as excited to be
starting the quilt.
I'll be back next week!
xx
Lori

6 comments:
Thank you Lori!
Wow,, so cute blocks and great tutorial!!
Wow we better get going! Thx for all the work you did on this.
Sew glad to have a great quilt to work on now. Looking forward to receiving my quilt kit soon. In the meantime I have to can red haven peaches in my kitchen. I'll think about this quilt while blanching, cutting, peeling and cleaning up sticky syrup.
Thanks Lori!
I'm a little late on the "jumpstart," but I have 6 of my 8 pinwheels done! waiting for the fabric for the other two and the red for the flag. I'm so happy to "Bee" Sewing this with you! I've started a basket for my fun and done and there are 6 blocks in it! Sweet! Thank you for your fun blocks and quilts!
Now the quilt top is finished and I will eat the peaches for a snack while I quilt it and put on the binding. It was fun to work on a different method and the quilt looks pretty great! Thanks!
Post a Comment