

Well hello there!

Welcome to Week Five in the

This is the quilt we are making ...
Granny's Garden Quilt
76" x 86"

And we are using Granny Chic fabric:)

And Granny Chic Sew Simple Shapes:)

This weeks tutorials are blocks 17 thru 20...

So let's get planting!

Sew Simple Shapes for Block 17:
2 - I 5
3 - I 23
Use the 2" Circle Ruler from the set
for the 3 flower centers
Cut center stem 7" long and
press one end under
Cut side stems 2 1/2" long and
trim those ends on opposite diagonals.

After you have sewn and trimmed
you will need to clip in-between
each flower petal before turning.

Turn...shape and press:)

This is what my block looked like
when laying it out.
Of course I used the
10 1/2" Trim-It Ruler
for placement...

then I glue basted and pinned:)
It's all ready for applique!

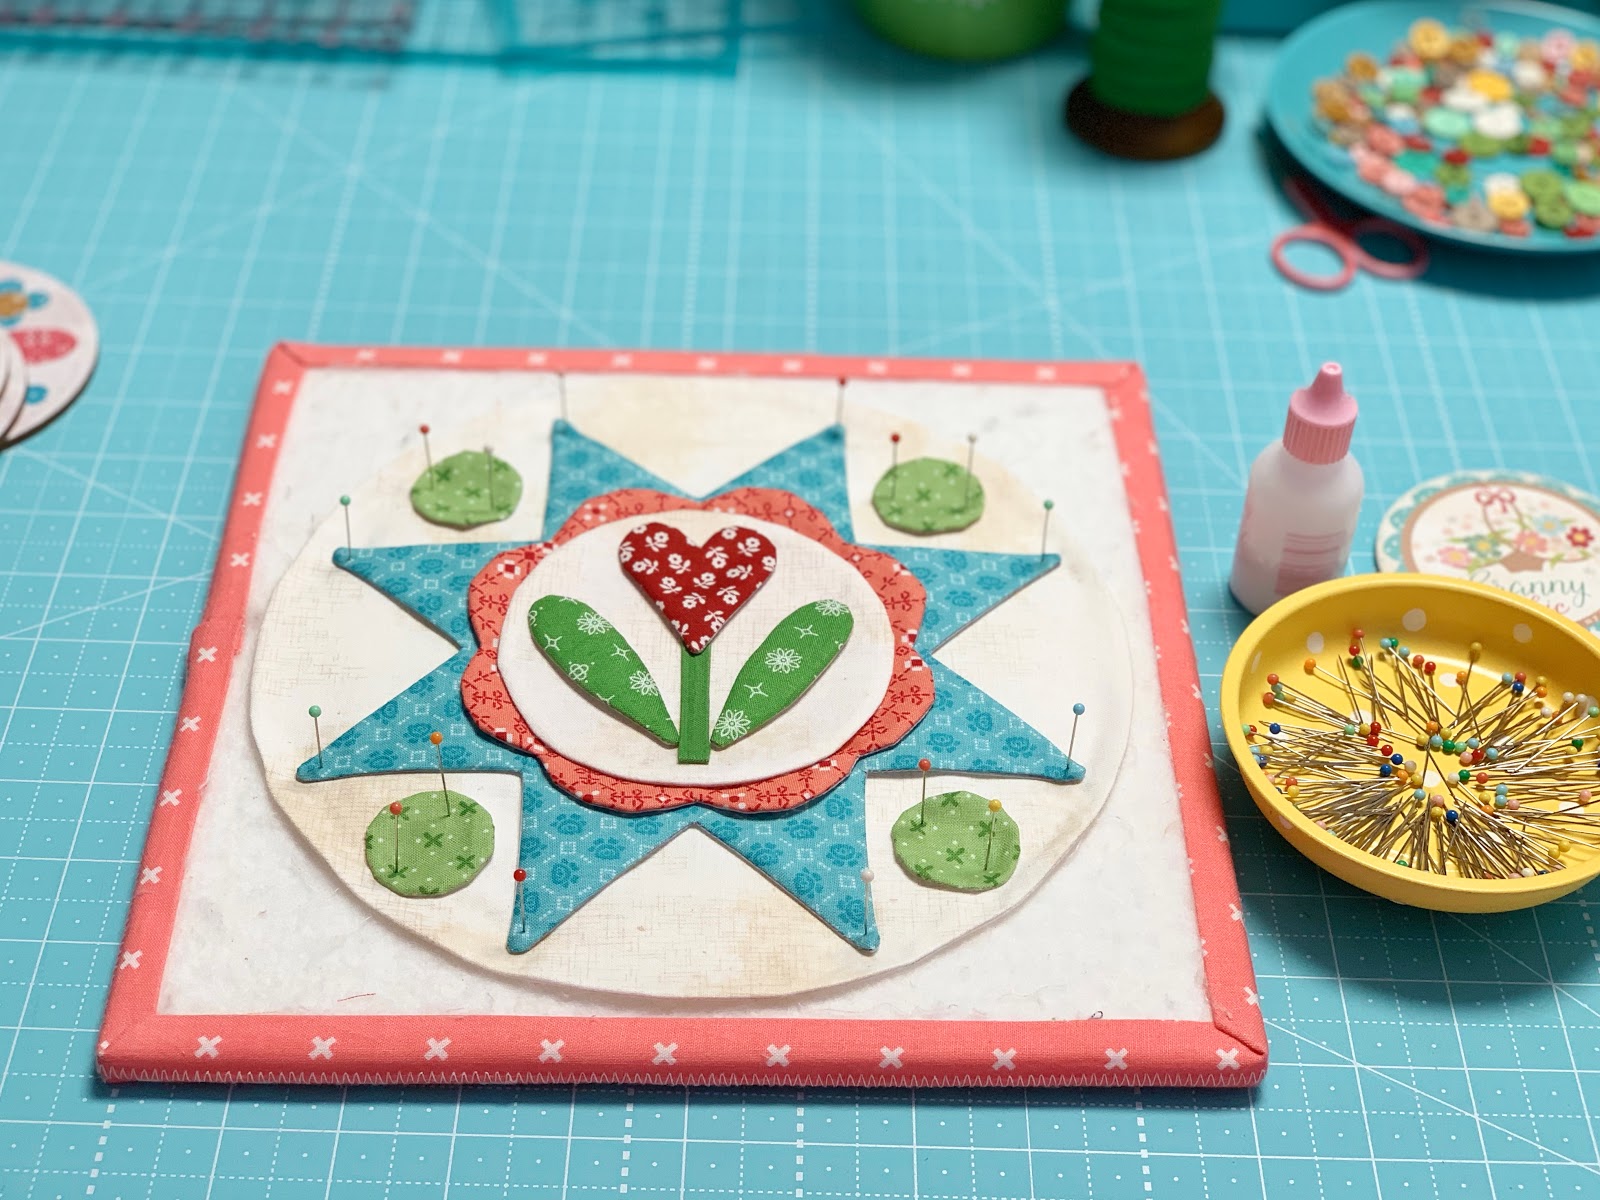
Sew Simple Shapes for Block 18:
4 - I 13
1 - I 21
1 - I 29
1 - I 30

Cleavage areas that need to be
clipped on this block are
on the star and the heart.

And now for the glue basting.

First I glued the four hearts
and the circle
onto the Shabby Cloud
octagon shape like this.
Notice that points of the
octagon are centered with the
center of the hearts.

Then I glued the octagon onto
the center of the star like this:)

I then placed it on the circle background
for pinning and glueing.

After my quilt is completed
I may put buttons in-between
all of the star points!

Ready for applique:)

Sew Simple Shapes for Block 19:
2 - I 2
1 - I 13
4 - I 21
1 - I 24
1 - I 30
Use the 4" Circle Ruler
from the set and make the
smaller Shabby Cloud circle.
Cut your stem 3" long and
press one end under.
(for some reason mine is not in my photo)

Cleavage areas that need to be
clipped on this block are on
the heart...flower and star.

I took a few close up photos of
turning this small leaf.
As I have said before...
on small pieces like this
I turn one half first like this
because I think its easier.

Also remember to turn the tool sideways
when gently pushing out any points
in each shape.
I think that really helps as well.

All turned and shaped...
it just needs a quick press!

Now for the basting:)

Just like the previous block ...
I did the heart flower
onto the center circle first.

Then glued that to the scalloped circle...

Then glued that onto the
center of the star like this.
*take note that this star is turned one quarter of a turn compared
to the star in the previous block:)
Time for pinning onto the circle
and then final glue basting.

Ready for applique:)

Sew Simple Shapes for Block 20:
1 - I 25
This is another dresden like I have
shown you before in previous blocks
which consists of these two aqua prints.
You should have cut 4 - 4 1/2" squares
from each one.
1 - I 27
Use the 2" Circle Ruler from
the set for the center.

We are going to make this dresden
just like I showed you previously
in Blocks 11 and 14.
Pair up the 4 1/2" squares ...

and sew from corner to corner...

to make a total of 4 half square triangles.
They should each measure 4 1/2" square.

Sew them together into an
8 1/2" square pinwheel like this.

Again...make sure that the cleavage
points are sewn right on the seams.

After sewing...
trim and clip the cleavage areas
in the dresden and the
medium circle with tiny scallops:)

Turned...shaped and pressed
and all ready to pin baste:)

I used my little Cute Cuts Ruler
to make sure that my circle was
in the center before I glued it.

And just like that...
Block 20 is ready for applique as well!

now applique...applique...applique and applique:)
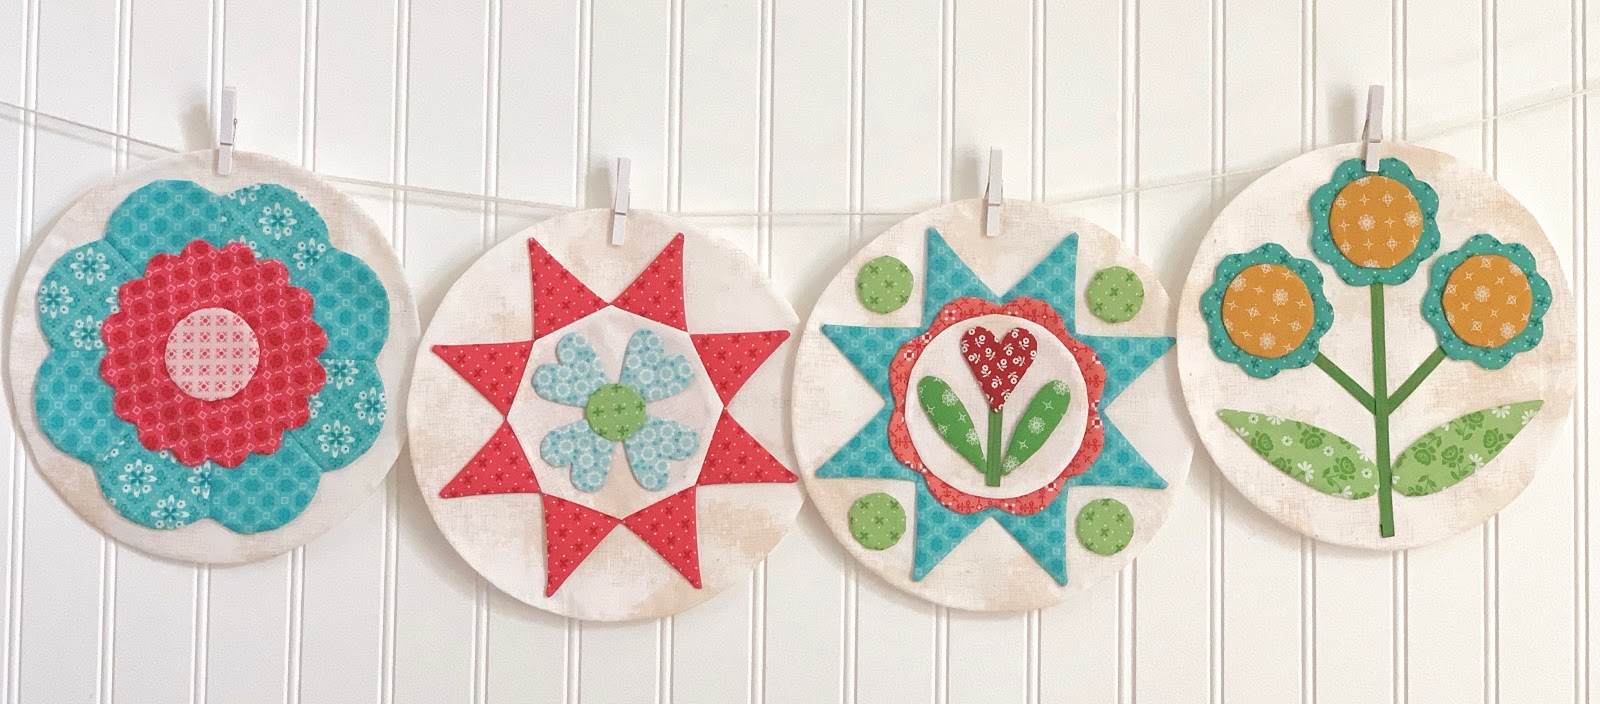
You have just planted four
more flowers in your
Granny's Garden Quilt.
I hope you are having as much fun
growing them as I am:)

They look so pretty on their
square background prints!
Thanks for joining me this week
and next week we will
plant four more flowers
for our quilt garden:)
xx
Lori
P.S. If you are just joining us
be sure to click on the links below
for the previous Granny's Garden
posts and tutorials.
1. Bee Prepared
2. Week One
3. Week Two
4. Week Three
5. Week Four

3 comments:
I haven't done interfacing turned applique for a long time but this quilt has returned me to it. The colors are so fresh and bright. Thanks for your inspiration.
Love the fabrics you chose. The blocks are sew pretty!
I want to try your interfacing appliqué! I’ve done needle turn appliqué for years- but it’s so time consuming! I could do so many more projects with this! 😁😁
Post a Comment