

Well hi there!
It's good to see you again...
thanks for stopping by!

It's week Six in the

We are using the


And my new
Farm Girl Vintage
fabric collection...

To make the
Farm Sweet Farm Quilt!
Today's tutorial is for the
Chicken Coop and Windmill Block:)

For this block we are piecing
the background to applique
the shapes onto...
but let's prepare the shapes first
so that they are ready to go!
Sew Simple Shapes needed:
10 - H4
4 - H15
1 - H22
7 - H31
1 - H36

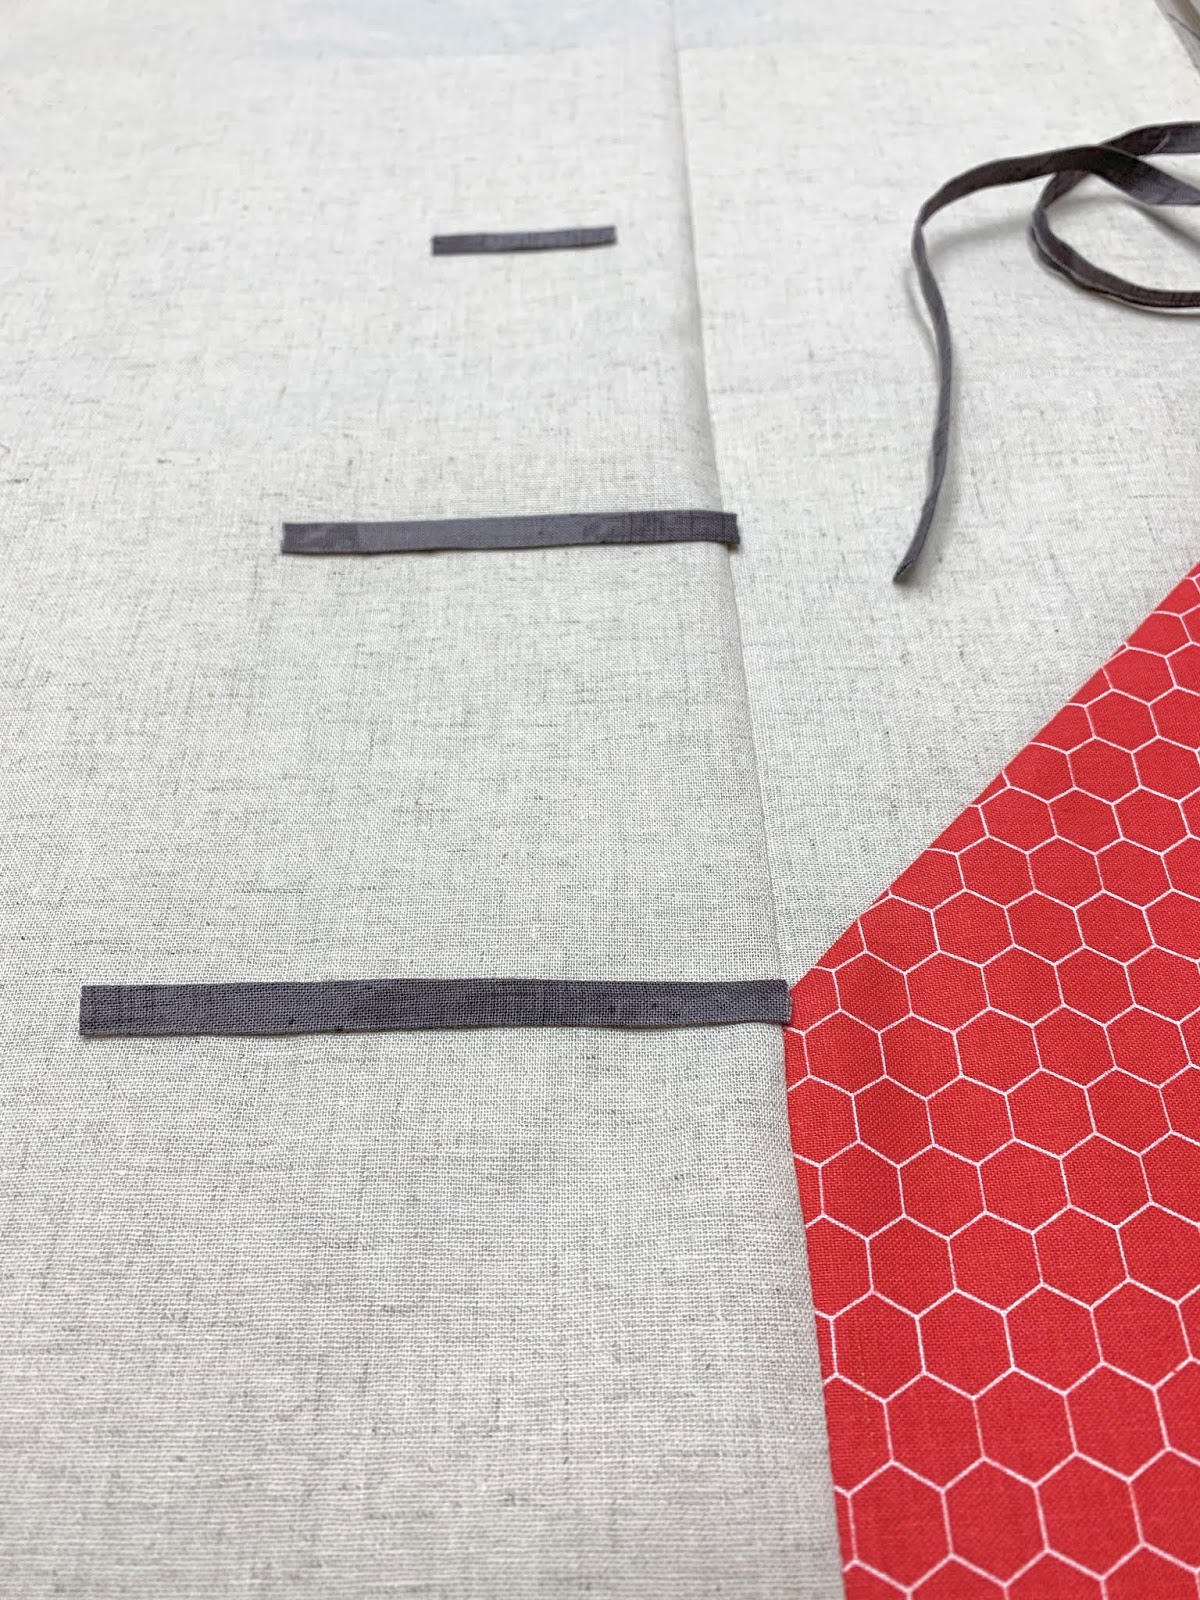
You will need to cut a
7" and a 4 1/2" piece
from your spool for the flower stems.
I also had you cut
2 - 5/8" x WOF strips
from the Steel Shabby print....

Run them through the
1/4" bias tape maker...
these are for the windmill:)

Trace your shapes onto the
interfacing and pair them up
with the fabric that
they belong to and sew!
The hen and baby chicks overlap
into the barn block so
we will do them next week:)
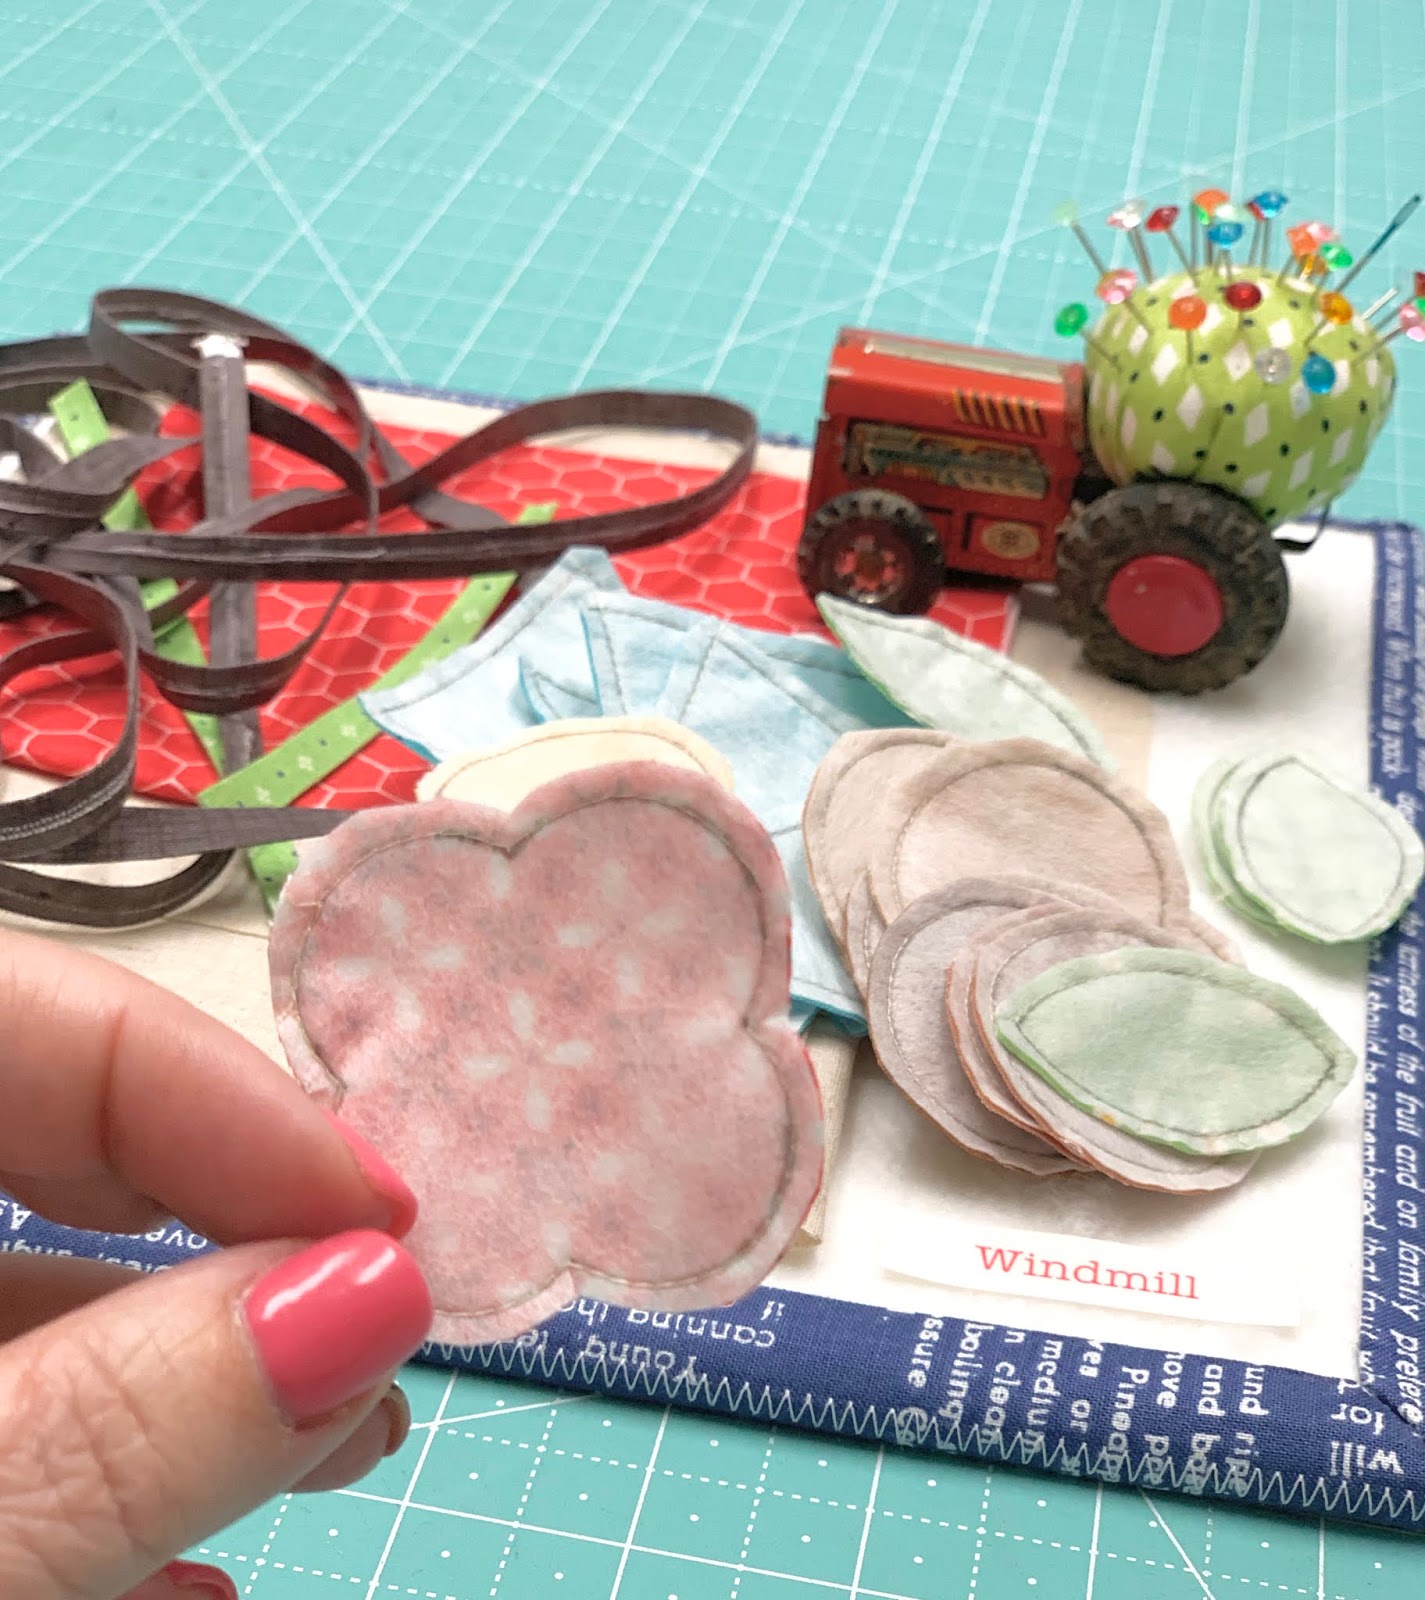
After trimming you will need to
clip the cleavage areas
in the flower shape before turning.

Turn and shape all of your appliqués:)
Trace the swirls onto the
3 Cinnamon circles because you will
want to embroider those
before you applique:)
You can choose to do yours in
Nutmeg for a subtle look...

or in the white like this.
I used 3 strands and a backstitch:)

Set your shapes aside and
let's piece the background.
The piecing diagram is
on page 13 of the guide.

You will need to sew an
Easy Corner Triangle
to form the top of the chicken coop.
Draw a line from corner to corner
on the linen square like this.
Normally you would do this
on the wrong side of the fabric
but there is no wrong or right side
to linen because it is a woven fabric...
not a printed fabric:)

Place it on one end of the red print
and sew on your marked line.
Keep in mind to place it so that the
line is going the right direction...

So that when you trim off
the seam allowance...

And press it...

And lay it back out it looks like this:)
Now you can sew the pieces together.
Use an accurate 1/4"seam allowance...
easy peasy!!

Now we are ready to lay out the appliqués.
One more thing first though....
We are not trimming down the
background of this block because
this is the size it will
need to be before sewing it
into the quilt
(14 1/2" x 24 1/2" at this point)
You may carefully want to do a zig zag
around the edges of the linen only...
being careful not to "fold in"
any of the edges when doing so.
DO NOT serge these edges.

Tape together pages 24 and 25
of the guide on the dotted line
where it says.

Tape these pages to your
and line up your fabric with
the outline of the chicken coop.
Now you can see through it
to glue baste the strips.
Do these 3 strips first.
Trim them so that they end
in the middle of where the
side strips will be
so that they will cover those raw edges.
On the bottom strip...
just clip when you get to the
chicken coop on the right side.
None of the edges on these
1/4" wide bias strips
will be pressed under.

Now do the "X" ones next.
Again...
trimming so that the side strips
will cover the raw edges.

Now lay down your side strips.
On the bottom left...
you can trim it about 1 1/2" up
from the bottom if you would like
because the log will cover that raw edge:)

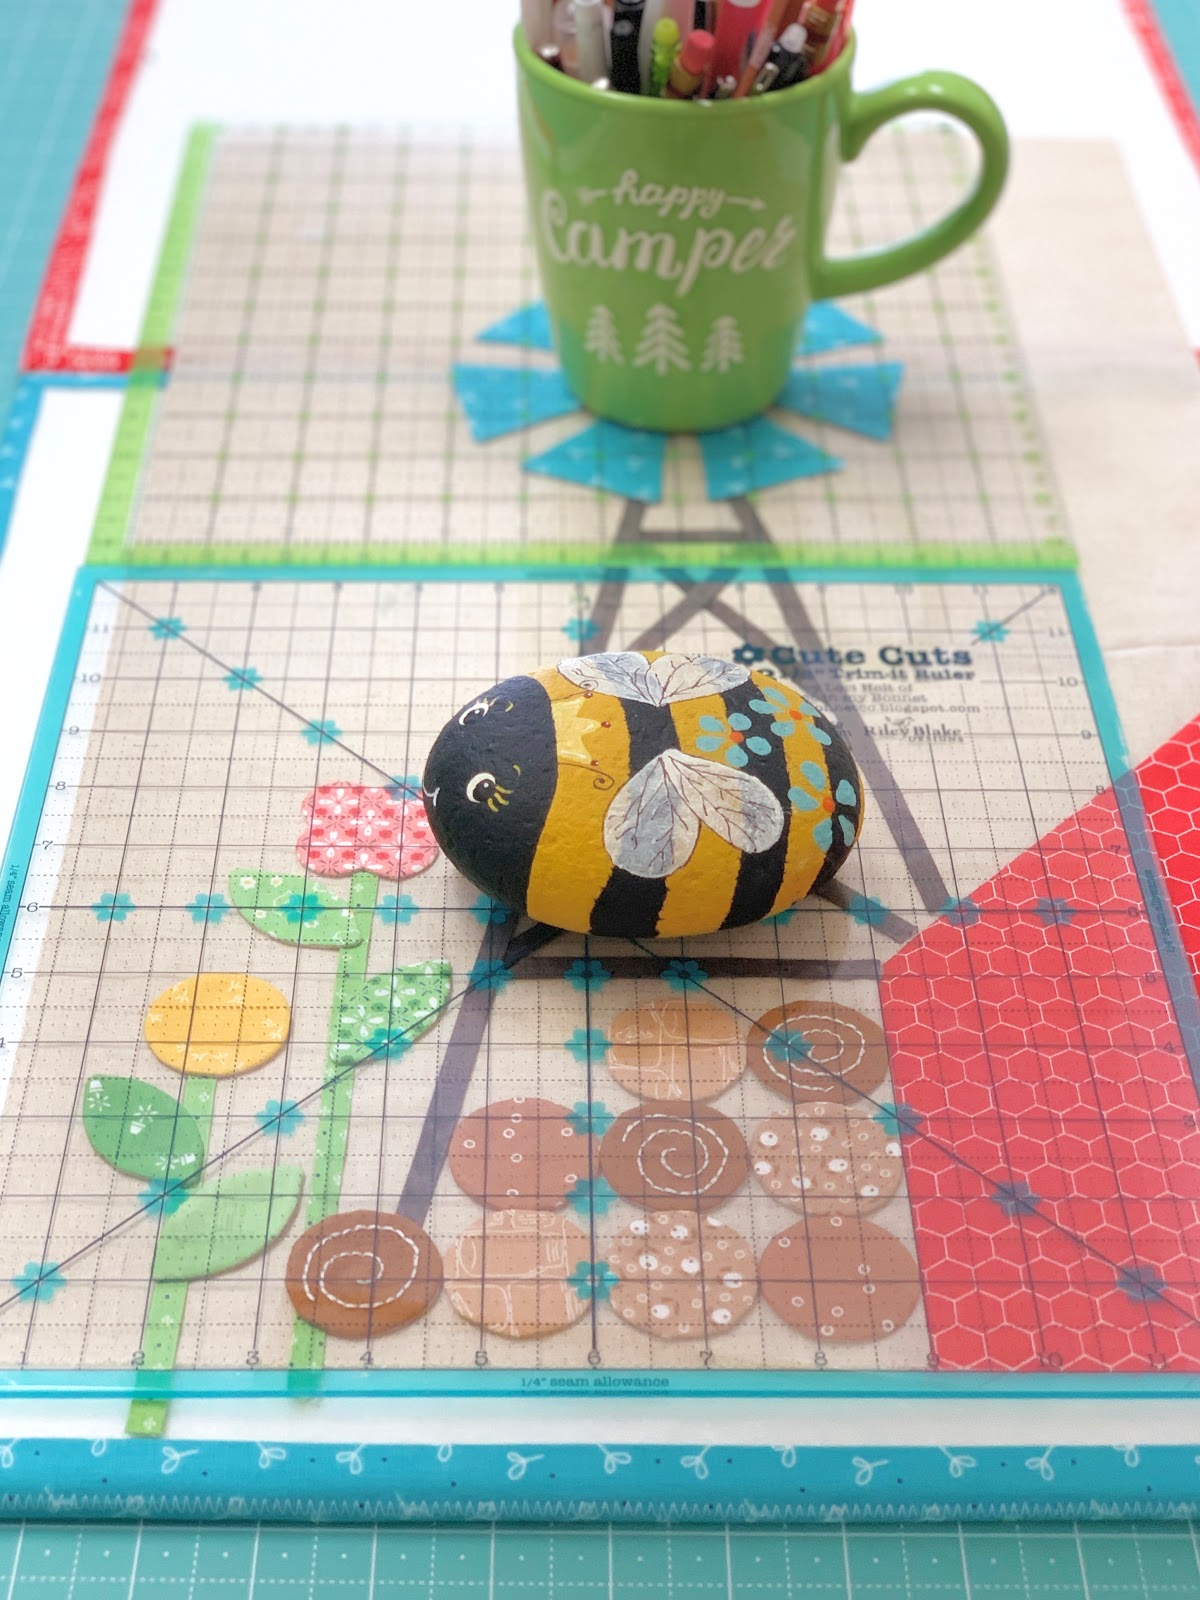
I used 2 large design boards like this
for pinning my appliqués:)
Lay out the circles for the
stack of firewood starting on the
bottom row on the left and just
put them next to each other.
***IMPORTANT***
Make sure that you measure up
1/4" from the bottom so that when
you sew the blocks together
you will NOT sew over the bottom
of the stack of firewood:)

The flowers are easy peasy...
the leaf on the left side is
3/4" for the edge.

Here's a close up of the windmill blades.
Keep in mind that you will be
sewing a 1/2" Cute Little Button
in the center and you want
that button to cover the
inside points of each blade.

Just for easy reference...
the top blade edge measures
about 4 3/4" from the fabric edge:)
After you have Sue glued
everything down...
it's time for the rulers
and heavy objects
while the glue dries:)

All ready for applique!
But maybe one more thing first...

I asked you to cut
2 - 1" x WOF strips
for the roof of the barn.
Included with that is enough
to also be used for
the roof of the chicken coop as well.
If you want to get a little ahead you can run those strips through the 1/2" bias tape maker...

And add your chicken coop roof now.
Press one end
under and then glue baste
it on top of the chicken coop.
Now you can applique it down
at the same time you do
the rest of the block:)
Okay...fast forward
to a few days later and
it's all appliquéd!
After I finished my block...
I decided not to sew the
buttons on yet until I've
joined it to the barn block.
Then I'll do both blocks
at the same time.
That's it for this week...
join me next week
for a barn raising!
xx
Lori

No comments:
Post a Comment