Today is the big finish post ...
where I show you close up photos of
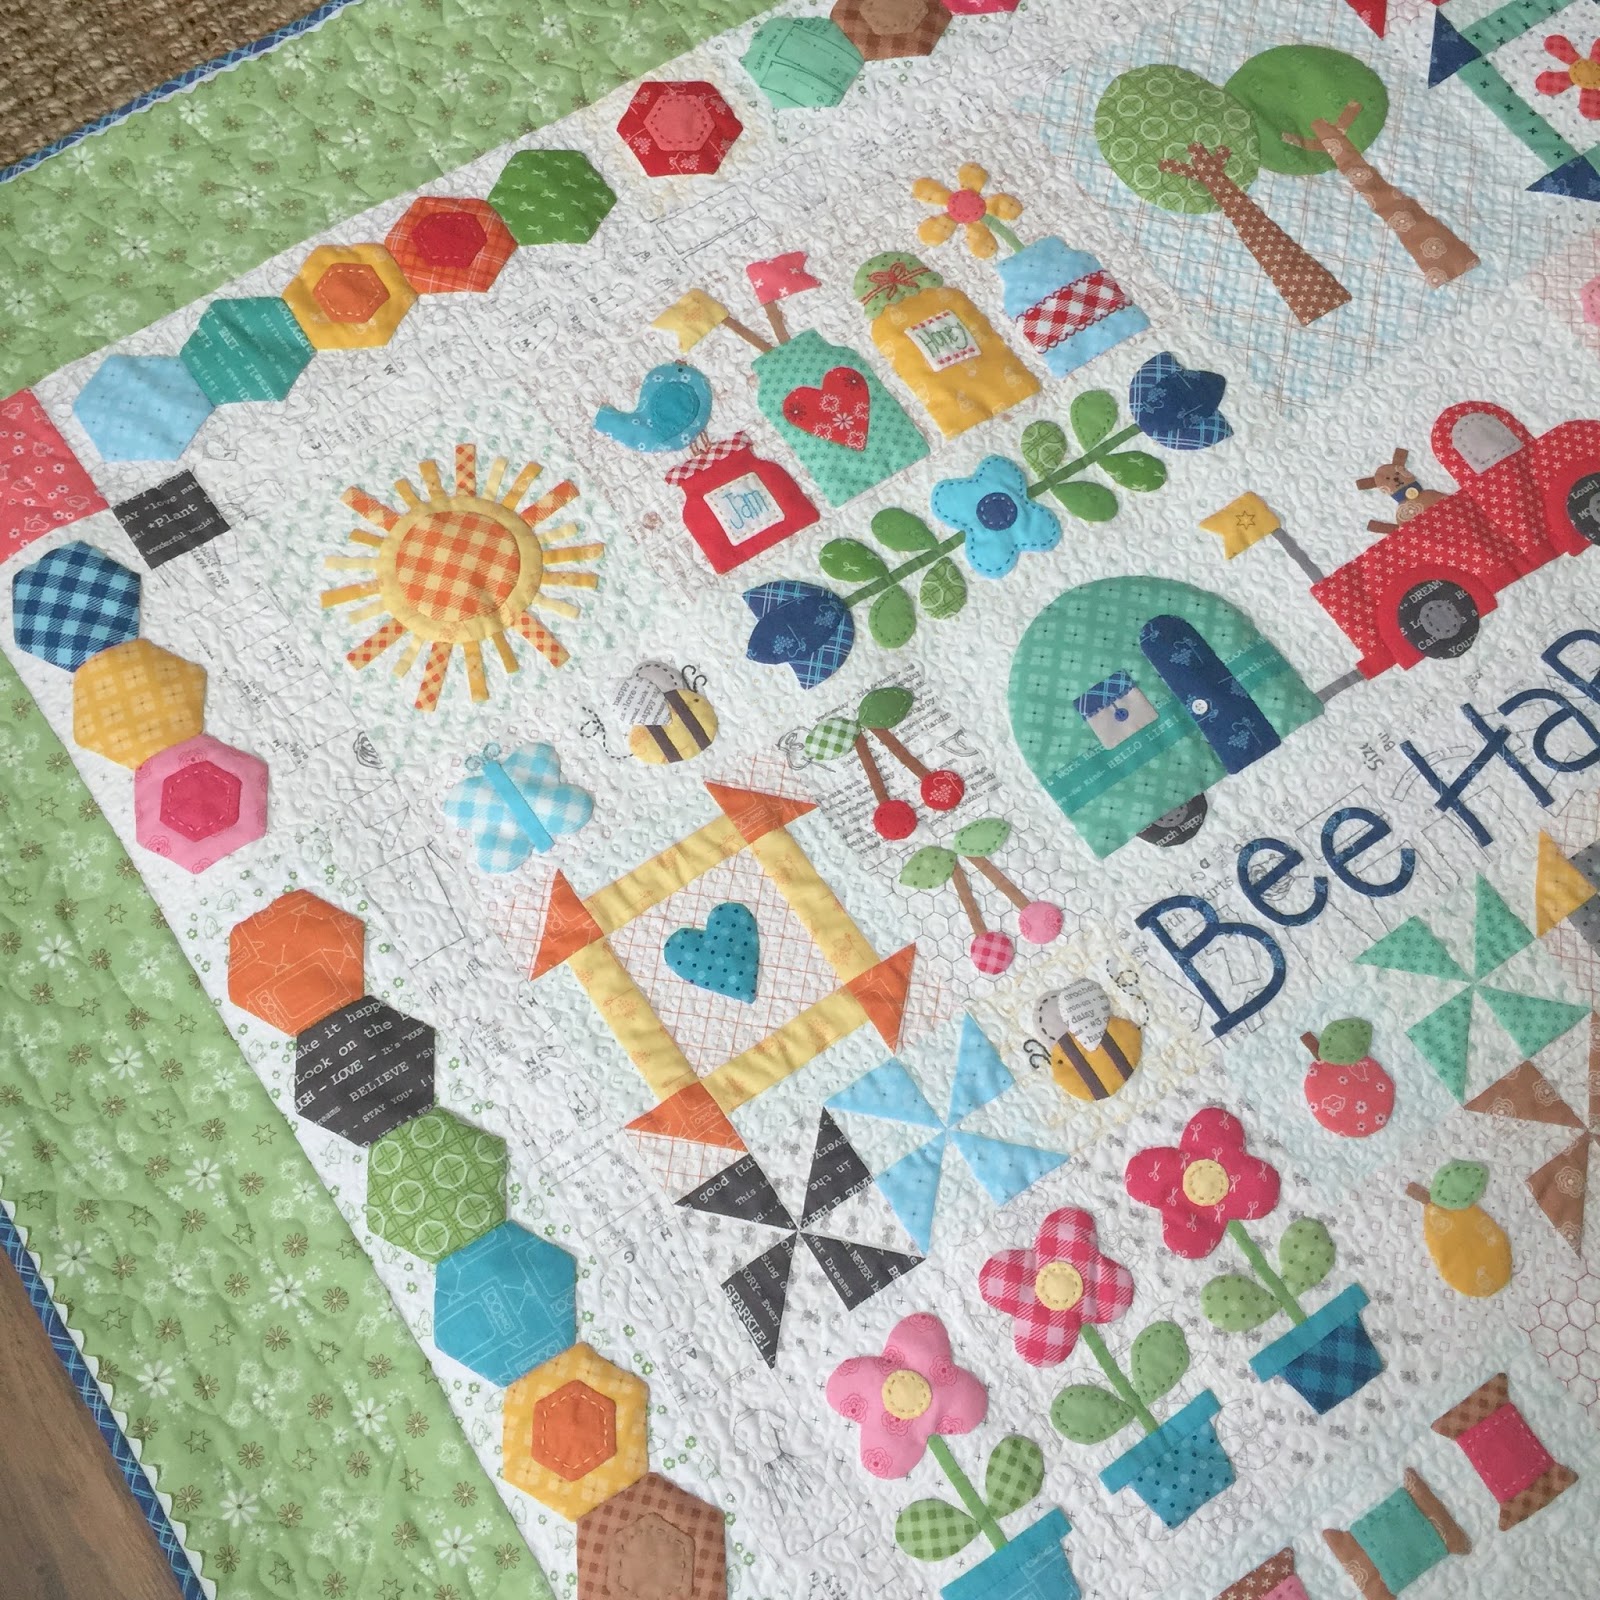
my Bee Happy Quilt
after it's been quilted:)
YaY!!
But before all that...
let's take just a second to
talk about the
Vintage Trim!
This is the large size and
is what I used to
put inside the binding.
I absolutely love putting ric-rac
in my quilt binding
and I do it a lot!
It's super easy peasy
and if you have
never done it before...
to see my tutorial
from a while ago
on how to do that:)
I designed the large size
especially to
fit inside the 1/4"
seam when binding...
so that the other half
would stick out just the right amount
and show cute little scallops:)
The color that I used in my
Bee Happy Quilt is CLOUD
and matches the CLOUD solid in my bundle.
There are 8 colors so far
and all are named the same as the coordinating solid
to make it easy to match up!
CLOUD - NUTMEG - RILEY RED - RILEY AQUA
PEONY - BEEHIVE - DENIM - RILEY GREEN
Both small and large sizes come on a
super cute wooden spool...
I wanted it that way because I have plans
to use the spools for fun things!
You can get my Vintage Trim
at your favorite quilt shop!
Okay...back to the quilt.
Here it is hanging at The Lodge
where I taught a retreat
for quilt shop owners.
We sure had a lot of fun!
Can you see how cute the
Vintage Trim looks in the binding?
I think it adds just that extra cute detail.
I laid my quilt out on the floor
to take several photos for you...
so that you can see the quilting.
My friend Juli quilted it for me
and as usual...
I love it!
I asked her to quilt small swirly lines around the appliqués...
and the piecing...
to give each piece a nice pop!
I really love how it turned out...
and I love each and every detail from the appliqué
to the embroidery...
and then the added embellishment
of the Cute Little Buttons.
It's been so fun!
Thanks again to everyone participating:)
I have said all along that
"this is not a race"
and it's perfectly normal
for everyone to be
going at their own pace.
If you are just getting started...
or right in the middle ...
or almost finished...
remember that there is
a link to each and every blog post
of this sew along...
right here on my blog.
Simply look on the right side bar
and scroll down to find the
Bee Happy Sew Along...
and click on the post
that you would like to read!
Okay...
get ready for
a BUNCH of photos!
Remember way back when...
I told you to keep all of your
leftover bits together
after cutting your quilt
from the kit?
I sure hope you did...
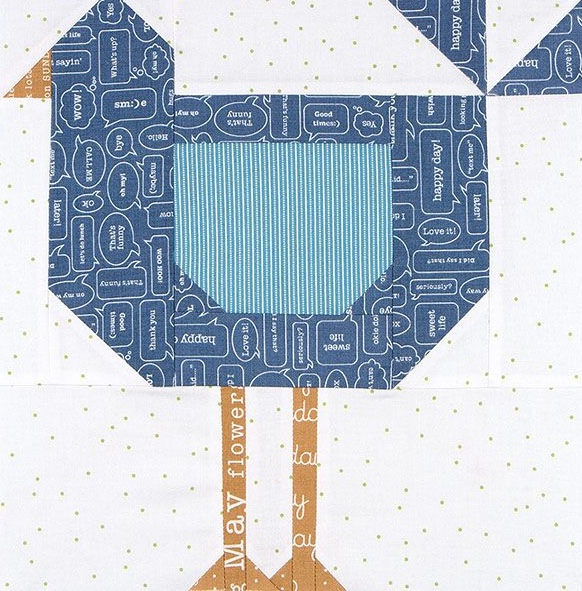
Because now you can make
a bunch of my
Bee Blossom Blocks!
I really wanted to use up
the leftover squares
from the two gingham panels
and that's where
this quilt was born:)
I paired the ginghams up
with the leftover bits of the prints
to make Bee Blossom Blocks!
Each block takes 2 of the same gingham
(you can get 2 from one square)
and 2 of the same print.
I grabbed my D-20 and traced two of them
onto a 3 3/4" square of my
Sew-In Interfacing.
I did all of the same usual steps
and made two D-20 shapes that matched.
You can make as many sets as you want...
I decided to add a bit more fabric
and make 100 sets for 100 blocks!
Remember that however many
sets of gingham petals that you make...
you will need to make a set
from leftover coordinating prints
so that you have a total
of four petals per blossom:)
I used a few of the prints
to sub for the gingham...
as you can see in the
lower left red block
and the
upper right green block:)
So after I made all of the petals...
I prepared for the backgrounds:)
I cut 6" squares out of all
the leftover backgrounds that I could...
And then I cut 3 1/2" squares
from the rest that were
too small for a 6" square.
I pieced four of those smaller ones together to use for backgrounds as well.
Those background squares end up
a little bigger than the
6" background squares
but it doesn't matter...
because all of them get
trimmed down after appliqué anyways:)
For the 6" squares...
I pressed them in half twice
so that I could center the petals
when basting for appliqué.
For the 4 patch backgrounds
I did not press because
they were already divided into 4's:)
I placed all of my gingham petals
on the top right and
bottom left when basting:)
After appliqué...
I used my
5 1/2" Trim It Ruler...
and used the lines for
easy peasy centering ...
and trimmed them all down to
5 1/2" square.
I did all of the
4 patch background blocks first...
And then the rest!
What a cute little pile of
Bee Background trimmings:)
YaY!!
All 100 blocks are trimmed up
and ready for their blossom centers:)
I made 100 cute little D-1 circles
from the leftover bits of the
10" Stacker of Bee Solids.
You could totally use
Cute Little Buttons for
your centers if you wanted...
or use the D-2 Sew Simple Shape
for your circles
if you want them bigger.
I used my matching
Bee Basics Aurifloss ...
And did a running stitch
around the circles
using all 6 strands
for that "chunky" look:)
I super love the texture
and also the contrast
that stitching adds onto the solids!
One cute little circle
appliquéd onto each blossom!
You could totally just
layout your quilt for placement
and sew each block into rows now...
but I think it's much easier
to sew 4 blocks together first.
It makes the process go much faster!
After sewing 4 blocks together...
your new block of 4
should measure 10 1/2"
before sewing it into the quilt...
then it will finish at 10"
Because I have 100 blocks in my quilt...
I did 25 of the
"10 1/2" four blocks"
and sewed them into
5 rows across and 5 rows down.
I decided to add more background
fabric for borders.
I cut 2 - 5 1/2" x 50 1/2"
for the sides
and then added
2 - 5 1/2" x 60 1/2"
for the remaining sides.
My Bee Blossoms Quilt
finishes at 60" x 60":)
I just love a square quilt don't you?
They are so versatile!
They look great on any shape
of kitchen or dining table...
They fit nicely no matter if
the table is
round...oval...rectangle or square.
A square quilt always
looks great hanging...
Or folded over the back
of a sofa or chair.
Here's a peek at what Bee Blossoms
could look like as a runner
if you don't want to make
100 blocks:)
Cute...right?
Oh my goodness!
I almost forgot to tell you
about the binding!
Did you know that...
both of the gingham squares print
also look great as binding?
Just cut 2 1/2" wide strips
on the bias for super cuteness!
Of course...
you should trim off the quotes first
and save them for another cute project:)
I just love this as binding!
I used my 108" wide Coral Chicks
backing fabric and it
sure makes me smile!
And so does this
"meadow" of Bee Blossoms!
One more peek at the
gingham binding:)
I have all the heart eyes
for this quilt...
and I hope you do too!
I'll be back with a post in a few weeks
about my next
Sew Simple Shapes
sew along that starts up next year
after the holidays are over...
see you then!
xx
Lori