

Well hello again Autumn Lovers!
It's already week five of our sew along:)

I hope you all have been having fun making a few
Harvest and 4" Stars from last weeks tutorials:)
Todays tutorial is another applique block!

Grab your
Autumn Love
Sew Simple Shapes...

And your Autumn Love fabric...

And let's get started on this little guy!

Here are the Sew Simple Shapes
that you will need for
the Scarecrow Block:
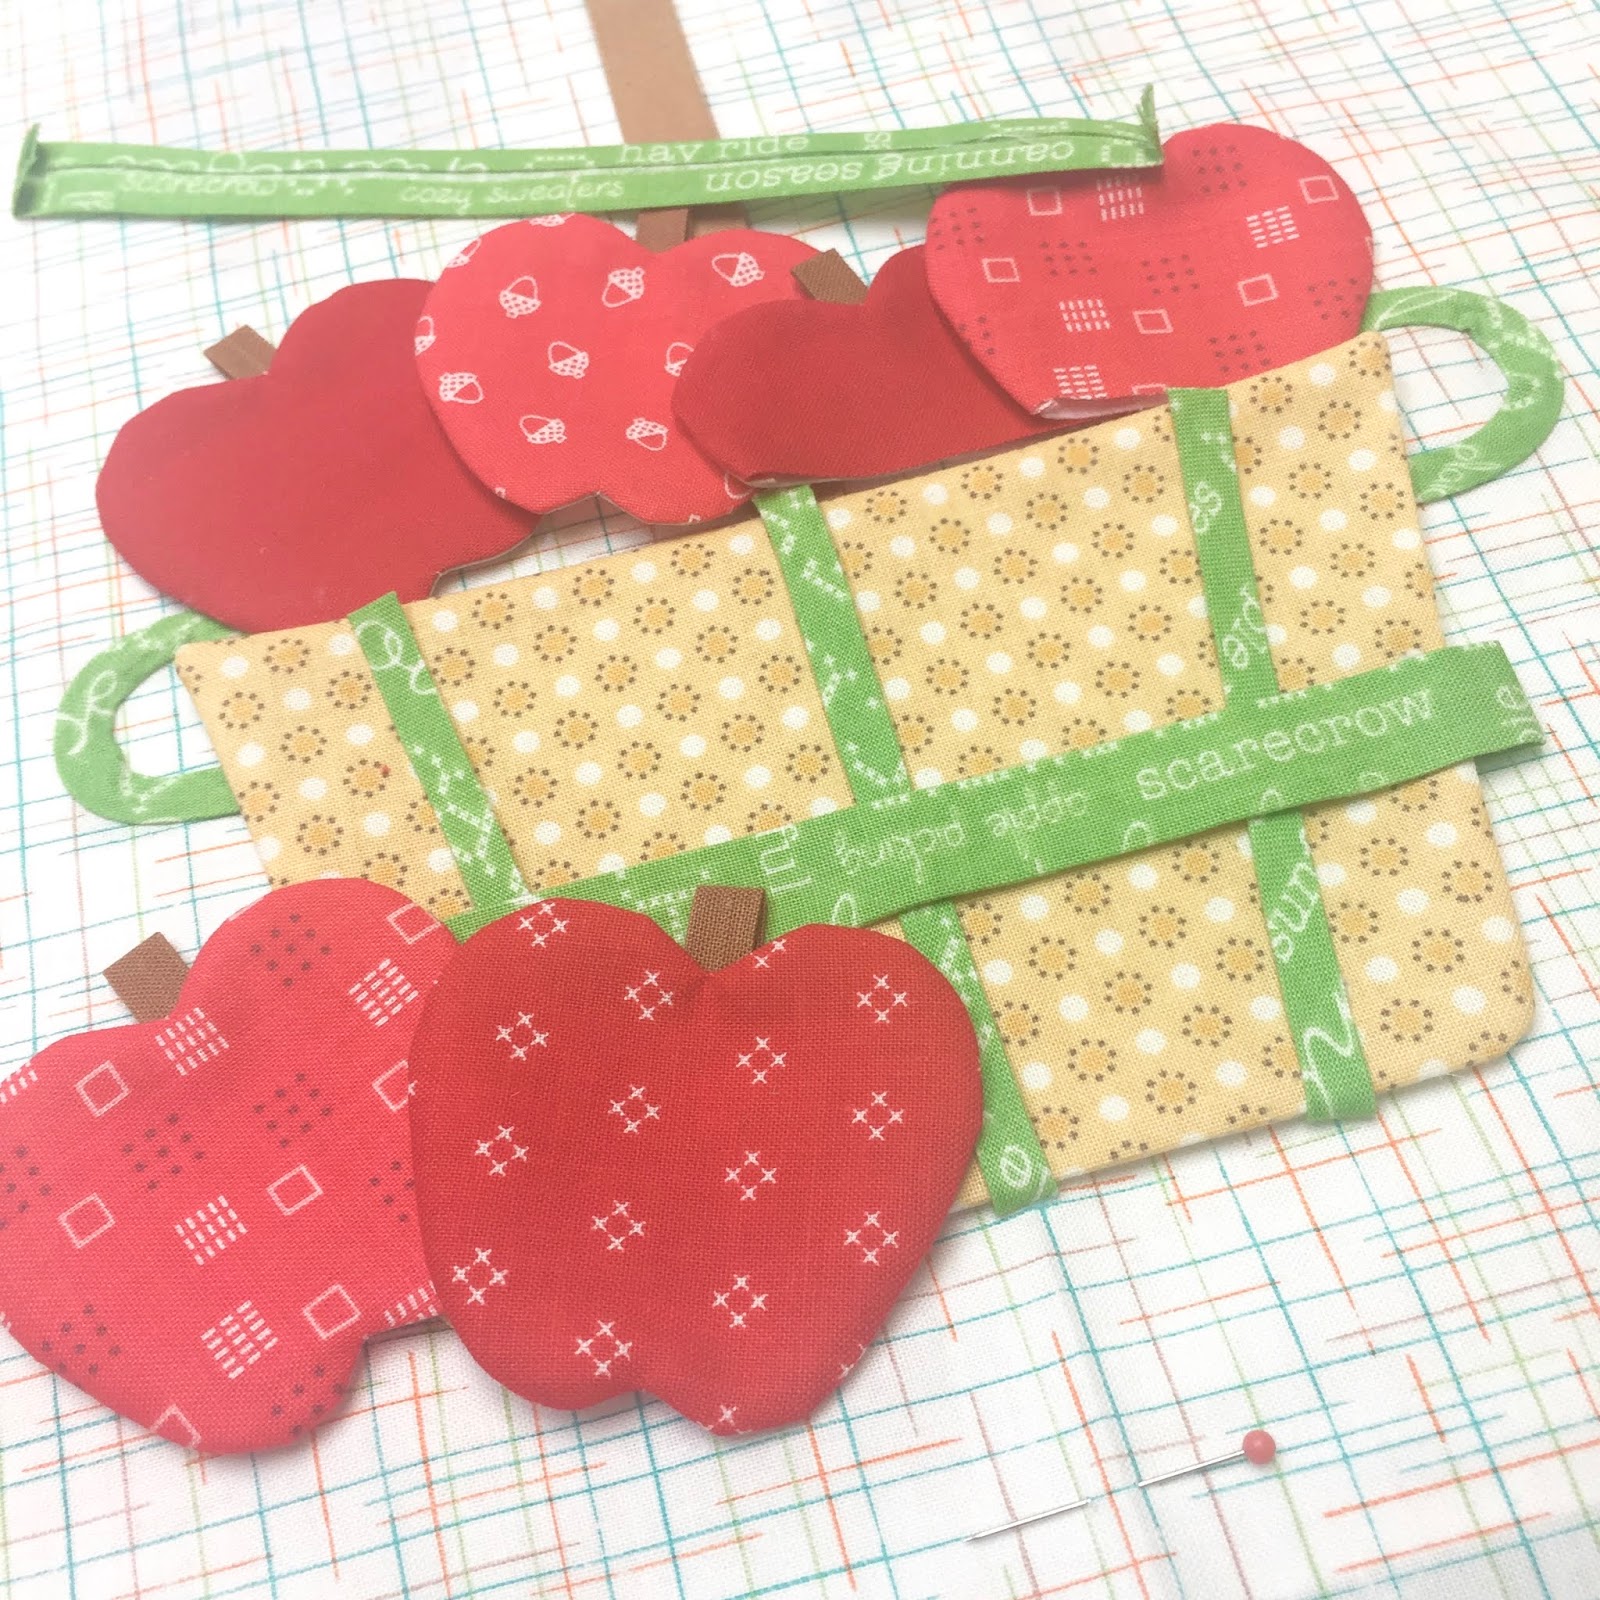
1 - F2
6 - F17
1 - F27
1 - F31
1 - F32
You will also need to trace the
Ruler Work pieces for this block
directly onto the interfacing...
just like you did for the wagon in week two.
The measurements are on page 14 of the sew along guide.
Cut your block background 12" x 22".

Subcut your strips
(after running them through the bias tape makers)
into the following lengths:
Nutmeg 1/2" Straight Bias -
One 10" - One 8" and Two 2" strips
Red Solid 1/4" - One 1" strip
Green Gingham 1/4" - One 6" strip
Steel Solid 3/8" - Two 2" and Two 3" strips
Cinnamon Solid 1/4" - Six 1" strips
Green Text 1/2" - Two 7" strips
Green Text 1/4" CUT ON BIAS -
(from the strips that I had you cut from the fat quarter)
Cut five 4" strips and press two of them super curvy for the basket handles:)

Grab the 2 1/2" square that you traced
onto the interfacing and draw a line
from corner to corner like this.
This is a sewing line:)

Pair it up with the red fabric and
sew a triangle like this.
Trim and discard the excess:)

Turn...shape and press.
You just made his cute little neckerchief:)

Sew the rest of the traced Ruler Work shapes after
matching them up to their correct fabrics.

Grab your Sue Glue...your hat fabric and the 1/4" bias strip.
Glue baste the strip down the center like this.

Now place the traced hat on top so that the hatband is where it belongs and sew!

Trim and clip the two cleavage like this.

Turn...shape and press:)

After sewing all of the remaining shapes...
clip the inner curves on his overalls
and the two cleavage in each apple before turning.

All shaped and pressed!

I pressed my background in half both ways and
measured 5" from each side and 10" from the center
for the top and bottom and pinned.
This way I had a 10" x 20"
to use as a guide
when placing my pieces.

I stayed 1/2" inside the pinned edges when laying out the shapes for glue basting.

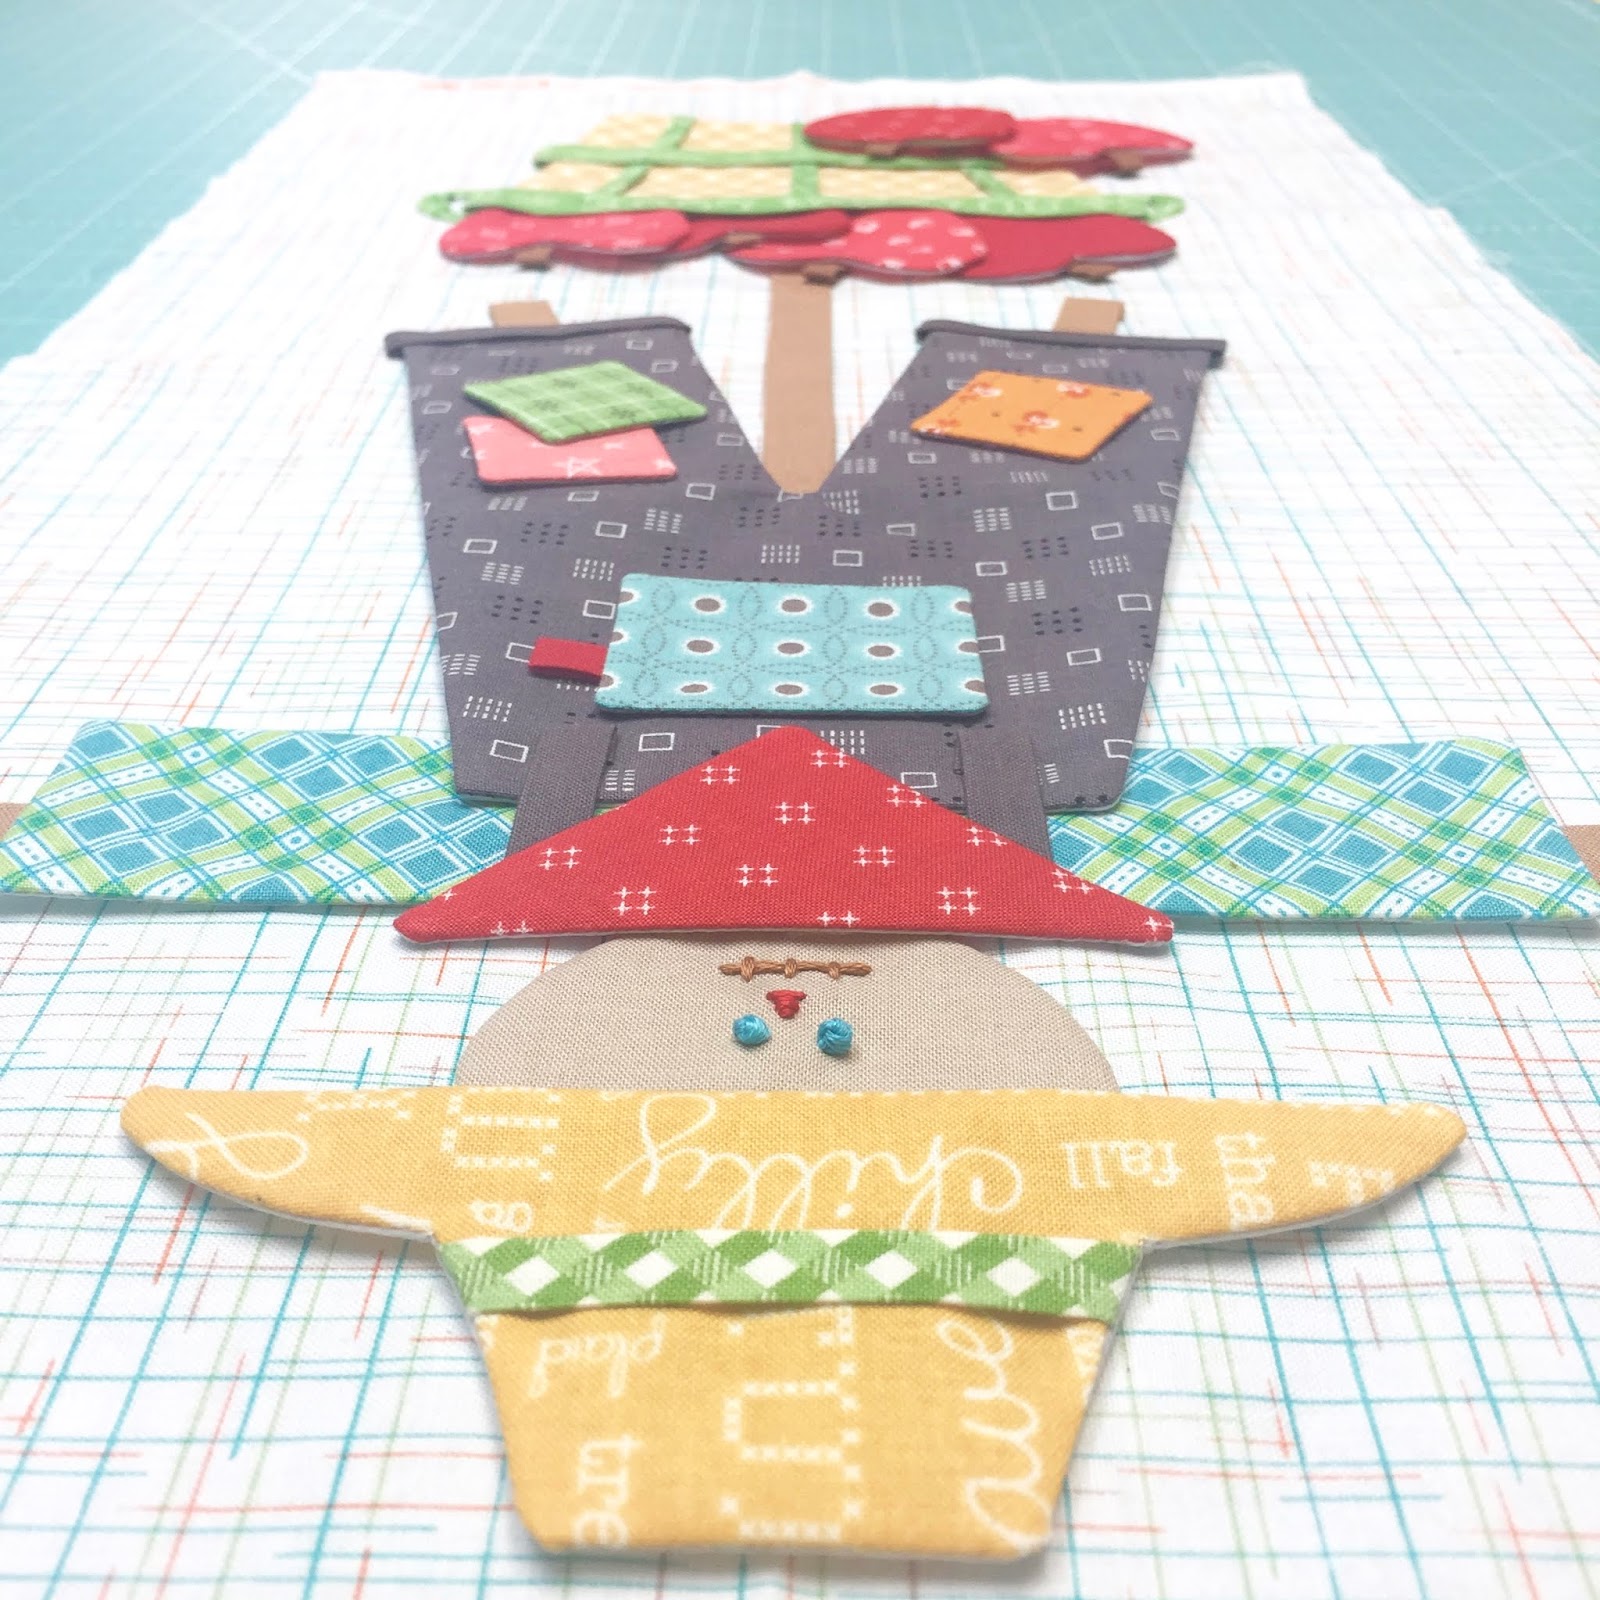
I started by placing the basket a little over 1" up from the pins.
(two apples will go lower than the basket and will be 1/2" away from the bottom pins)

I placed the hat 1/2" down from the pins at the top.

I then glue basted the 8" long strip in the center on top of the basket like this.

Then I placed my apples...

I pressed the 1" stems in half and tucked them in the top of each apple.

I trimmed the bottom of the apples that over layed the top of the basket.
I pressed just one end of the 3 green strips...

And glue basted like this.
Trim the excess off the top.

I also pressed under just one side of the 1/2" green strip and glue basted into place.
The raw edge tucks under the apples on the left.
I glue basted the handles ...tucking the raw edges under the basket and handles and then placed the final green trim across the top edge and glue basted.

Ruler and Queen Bee time!

Tape page 18 from your guide onto the light box.
I always use washi tape for this step because it peels off my light box and paper without tearing it r leaving a residue:)

Trace your scarecrow face:)

Just a reminder...make sure when you print the pattern that your printer is printing at the correct scale.
You can check it by measuring the square on the bottom left.
If it measures 1" it is correct.

Embroider your scarecrow face:)
I use all six strands of my Aurifloss.
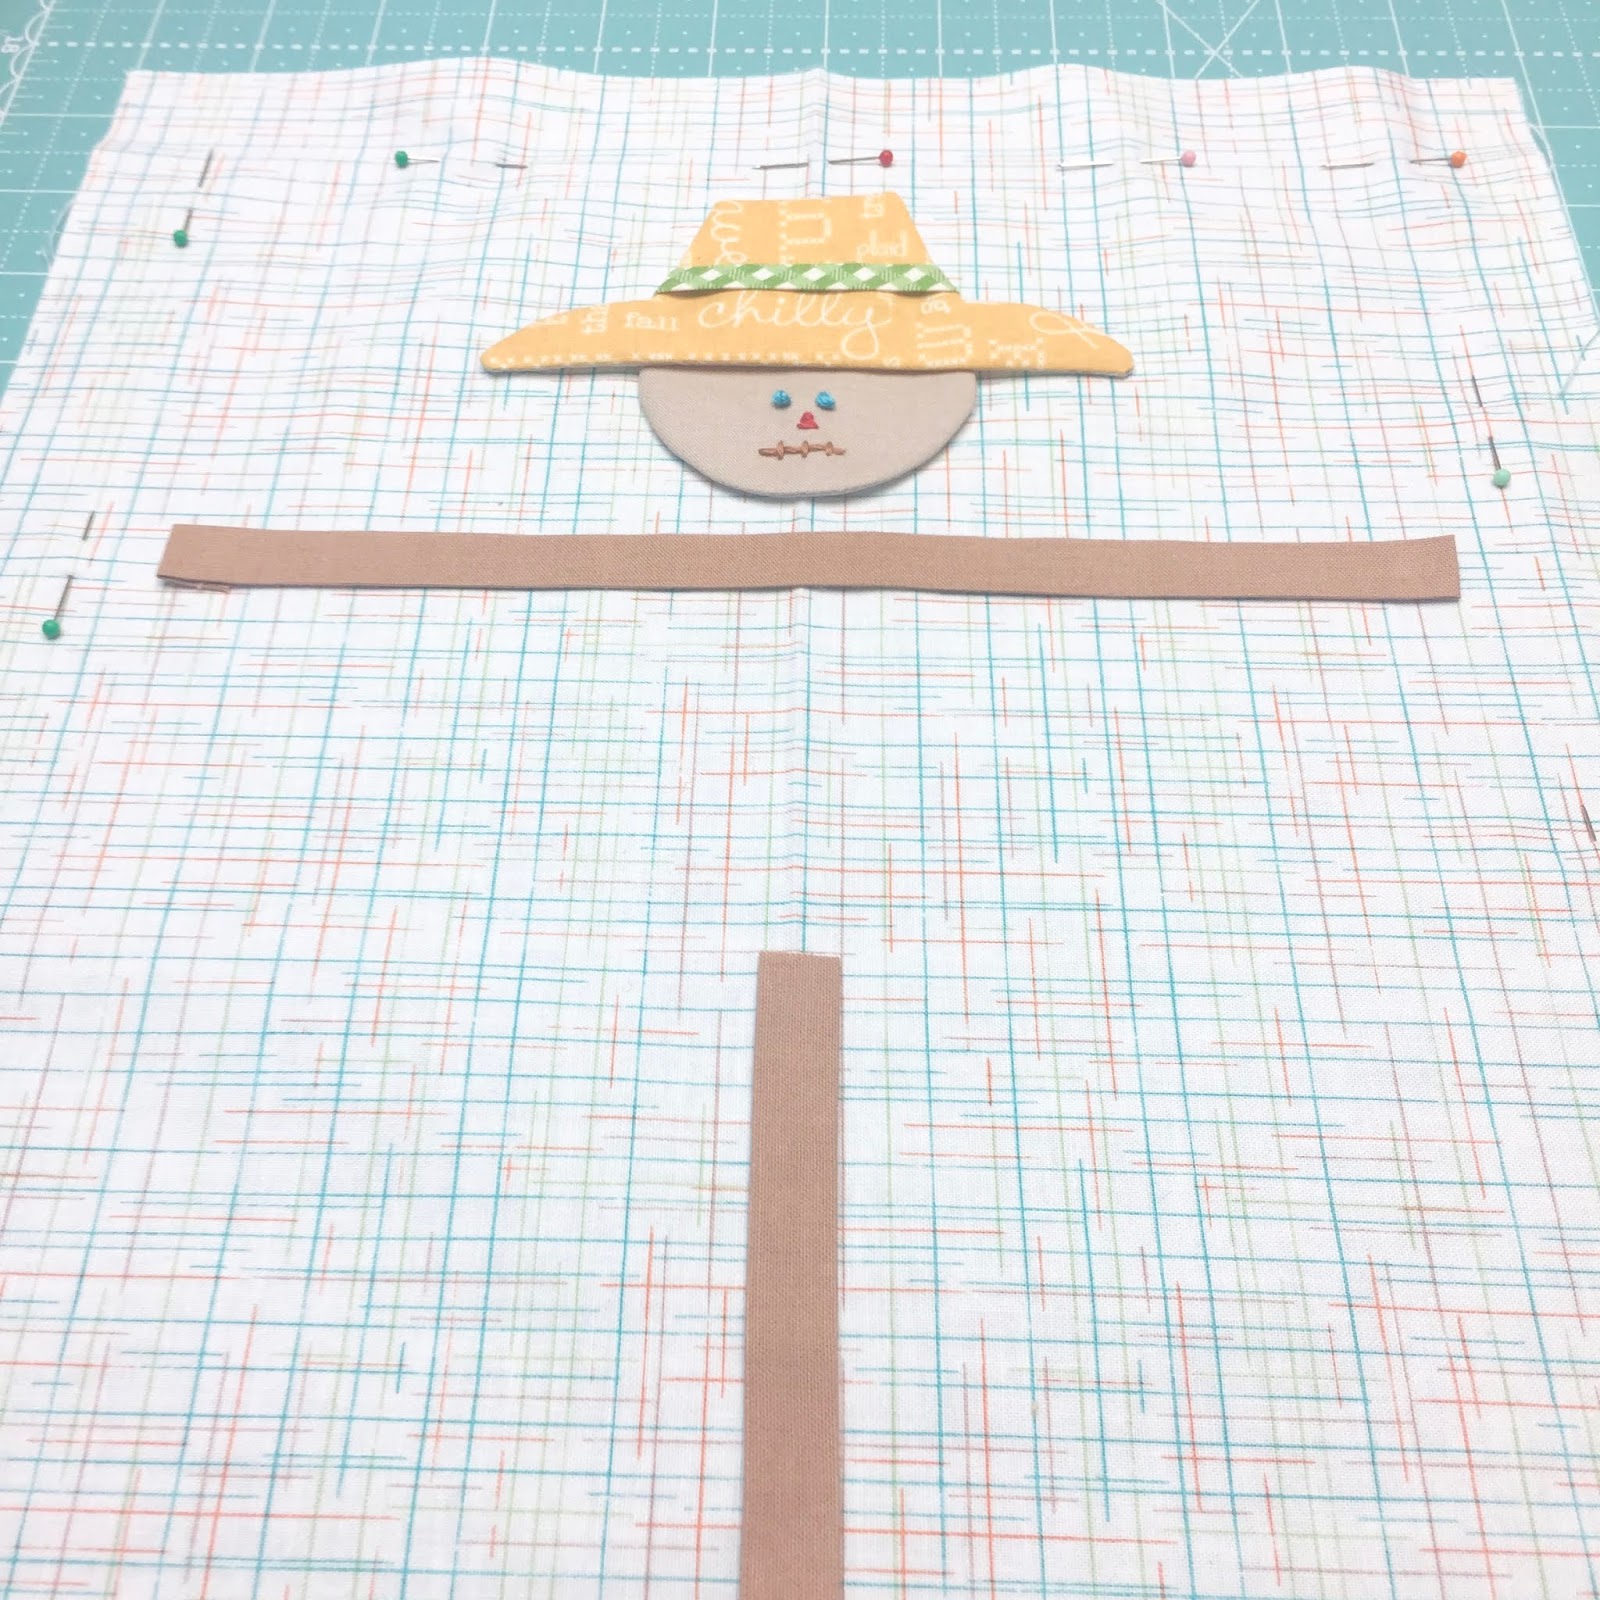
Tuck it under the hat and glue baste:)
Place the 10" strip for his arms (after pressing each end under 1/4")...

And then start layering like this...


Trim strips where they tuck under as needed:)

Glue baste all of his cute pieces down...

And let it dry flat:)

Now you can remove the pins and he is all ready to applique!
I thought a few super close up shots would be fun and helpful:)


You can use the embroidery pattern in the guide to trace the "straw" lines or you can just draw them on. They are just random pieces of straw coming out of your scarecrow after stuffing him... haha!
Use all 6 strands of the gold Aurifloss and each piece of straw is one long stitch...

Like this:)

After applique I used my 10 1/2" Trim-It Ruler to trim my block to 10 1/2" x 20 1/2" beginning at the top...

And working my way down.

Then I used my 8 1/2" x 24 1/2" ruler
to trim up the top and bottom.

I chose two small
honey colored buttons
from my Cute Little Buttons
for the overall straps:)

YaY!!
"Scarecrow Block"
He should be 10 1/2" x 20 1/2"
BEFORE you sew him into your quilt:)

I'll see you back here next week
when we will be
making two more blocks:)
I'm having a fabulous time
making this quilt
and I'm sew grateful
to all of you
who are sewing with me!
xx
Lori

6 comments:
The scarecrow block is so cute! Enjoy your day!!
TOO STINKIN CUTE!
He is so cute!
So lovely, I like also your queen bee so fun have a good day
Applique wasn’t in my vocabulary except for machine Applique on my embroidery machine. I sat back and watched all the bloom blocks, the cozy Christmas blocks, the adorable sew simple shapes, and Be Happy. I was drooling....finally got up some guts, made a simple shapes block, loved it, and now I can’t quit making these adorable blocks!! Absolutely adorable scarecrow😊. Can’t wait to make one of my own! Thx for the detailed tutorials. I call myself a newbie, and I’m hooked😉
Me encanta. gracias
Post a Comment