

Hi there cute people:)
Today we are going to make
another block because its week two!
If you are just joining us...
for more info on this sew along!

Today's block is in the top row middle...

WAGON BLOCK

Here are all of the
Autumn Love prints that we are
using in the Wagon Block:)

Grab your precut block and your traced pieces...and let's begin!
All Sew Simple Shapes for this block are:
4 - F-1
2 - F-2
3 - F-5
2 - F-6
1 - F-14
1 - F-18
3 - F-21
1/4" wide green cut on the bias-
10" and 3 1/2" long
1/4" wide red -
7 1/2" and 1 1/2" long
1/4" wide dk.gray-
4 3/4" long
and 1/2" dk.gray-
1 1/2" long
12" square background

You should also have traced a
2" x 6 1/2" rectangle
directly onto the interfacing.
We will be doing this
"Ruler Work"
for pieces that are rectangles.
Instead of making a lot of these
sizes into sew simple shapes...
it's just as easy to trace them
and cut down on the
number of shapes in the set:)
All of the Ruler Work measurements are on page 14 of the guide:)

On the two F-6 shapes that we are
using for these flowers...
we will do a little modifying.
Measure in 1 1/2" from the
curved side and draw a line...

Like this!

When sewing...
stitch on this new marked line
and ignore the "V" part:)

After sewing and trimming
all of your shapes...
you will need to clip the
inner curves on the sides
of the pumpkin stem and
clip the cleavage areas
in the two flowers and the star.

Now you cut the "X's" in the
interfacing and turn them
right side out.

Shape and press all of your
cute pieces for the wagon block:)

Press a curve in the green stems like this.
Press the ends under 1/4"
on the two red strips.
Press one end under 1/4"
on the 1/2" wide dk.gray strip.

Arrange pieces onto the
background square that is
placed on a design board.
Start layering your shapes
according to those that go underneath.
For example...
stem goes under pumpkins...
side pieces of pumpkin go down first
before the center piece etc.
Always use the 10 1/2" Trim-It Ruler
to lay out your shapes so that your design does not "GROW".
Remember to stay within the
"window" inside the ruler:)

After placing your shapes...
pin them so that they do not shift
and then lift up the edges...
place little dots of "Sue Glue"

I trimmed off part of the
bottom of my pumpkin pieces
and one side of the one on the right
to save bulk underneath the wagon:)
After glue basting I removed my
applique pins and placed my
ruler on top and then my
cutie pie Queen Bee
until the glue dried ...
about 15 minutes.
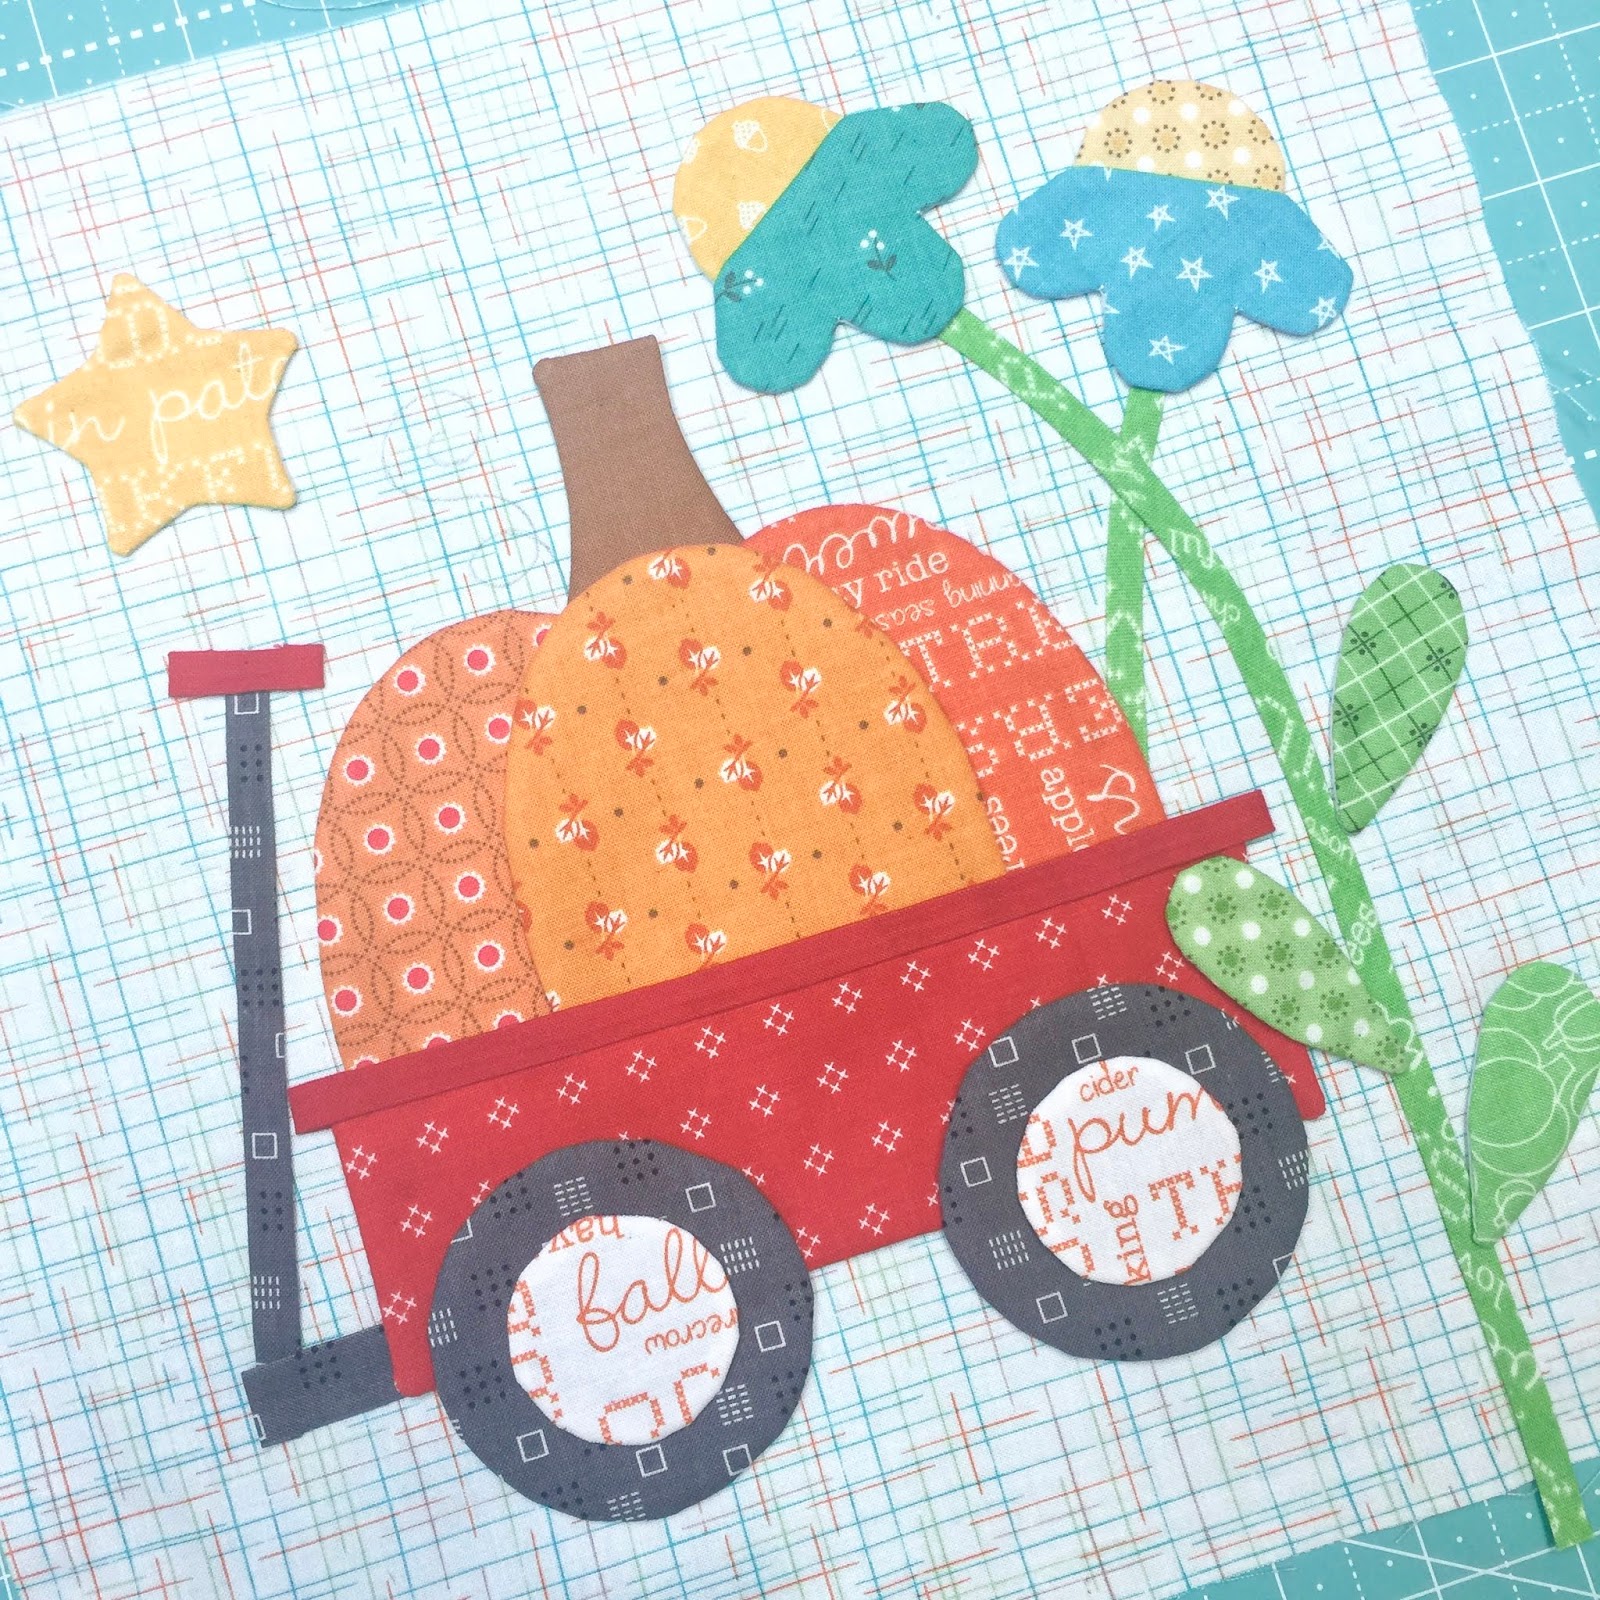
All ready for applique!

Chunky pumpkin in a little red wagon:)

Use the light box and trace
the stem for embroidery.
Use 6 strands of my Dk.Green Aurifloss
and a backstitch:)

After you applique...
press from the back.
After trimming up your block
to 10 1/2" square...
you can sew 2 red buttons
onto the wheel centers.
I use matching Aurifloss to sew them on.
You can also save this step until
after your quilt is quilted...
it depends on how you are
quilting it and/or the
preference of your quilter:)

YaY!
Block Two aka Wagon Block is completed!
Sew darn cute:)
Gotta love a pumpkin in a wagon right?
Next week we will put one in a bucket!
See you back here then...
xx
Lori

2 comments:
Complimenti, adoro tutti i tuoi lavori ♥
Hello Lori!
I just purchased my quilt kit today! I am so excited to be getting this quilt.
It is adorable and its mine! Yeehaw!!!
I've never made an applique quilt before but after watching your videos, I've got this.
Thank You so much Lori for this gorgeous quilt kit.
Post a Comment