

"GARDEN TOOLS BLOCK"
" CLIMBING VINE BLOCK"
"BEES BLOCK"

Welcome to Week Thirteen of the
"CALICO GARDEN"
Sew Along!
Join me here each week
when I will be doing tutorials
on the blocks for the quilt.
Of course because we are all sewing
from all around the world
we all have different time zones...
But I will be posting each Monday
right here on my blog
and you can follow my tutorials
any time each week that
is convenient for you.
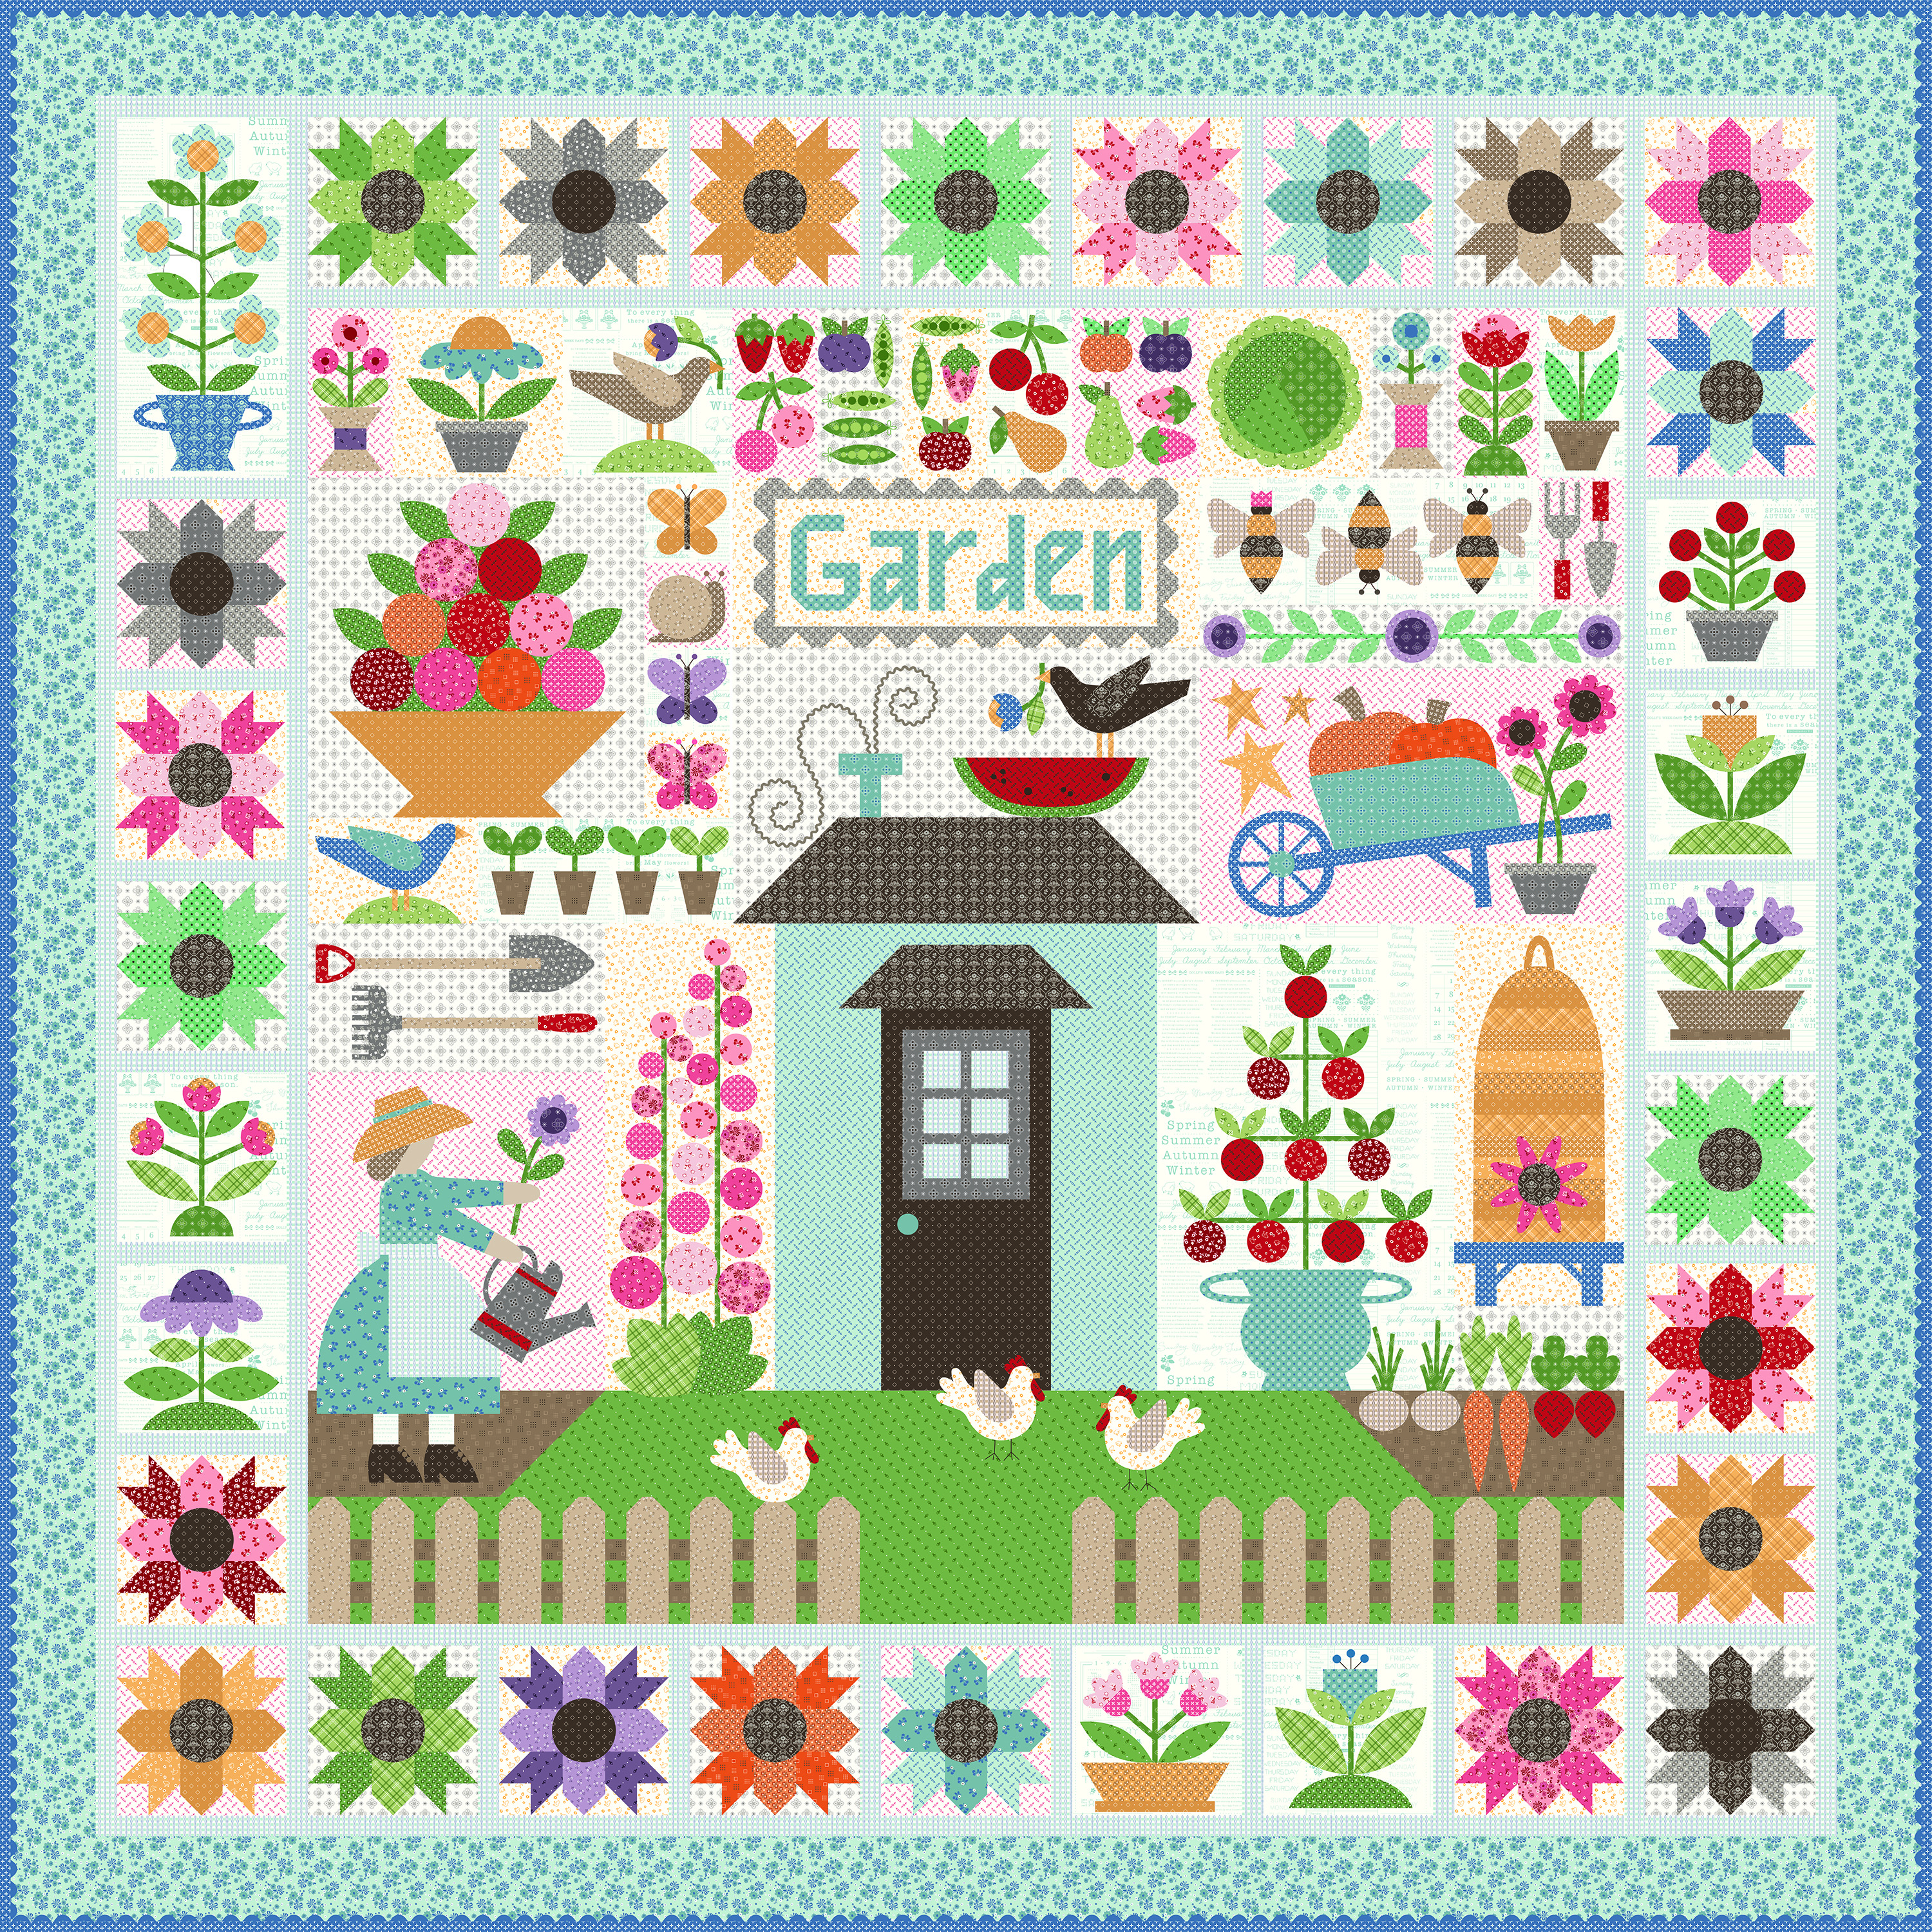
We are making the
Calico Garden Quilt
90" x 90"

The quilt is made with my latest fabric
collection called Calico...
I hope that you all have all
received your templates and
fabric kits by now...
and that we are all ready to begin!!
If you still need them ...
just do a quick google search for
"Calico Garden Quilt Kit"
to find shops who still have some left.

We are also using the
Calico Garden
Sew Simple Shapes
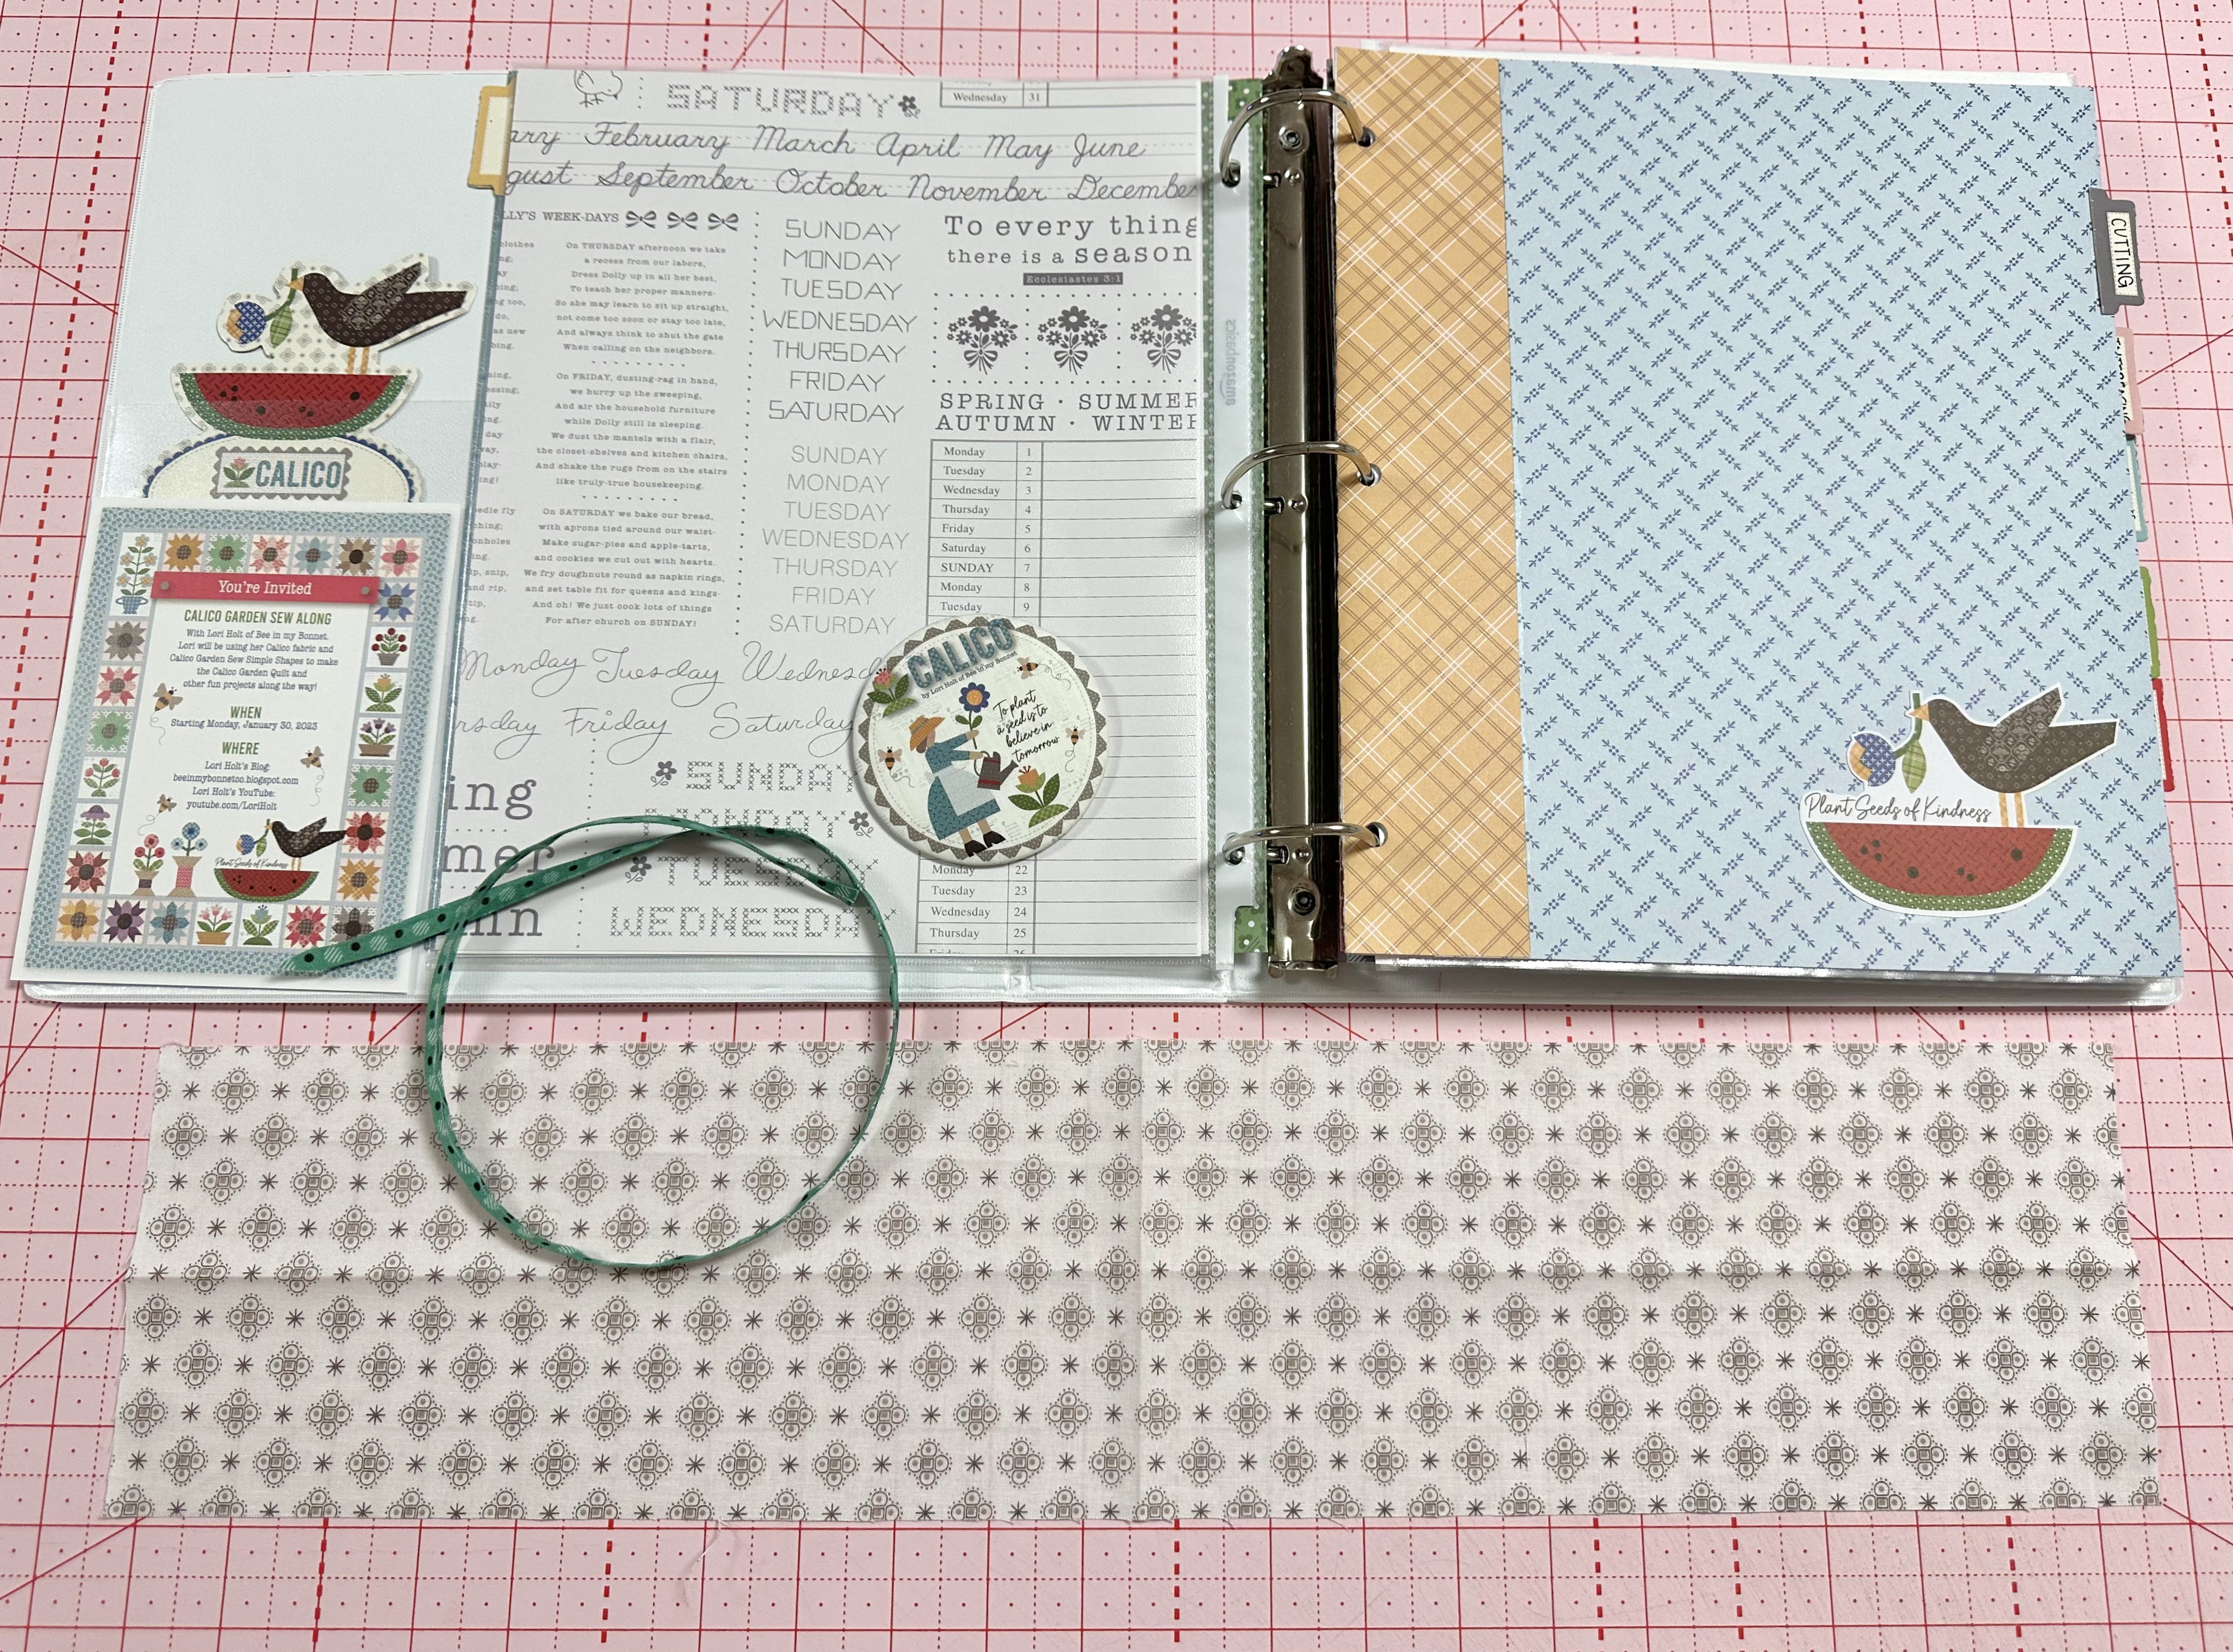
I have posted the
post which details all of the supplies
for the sew along and how it works.
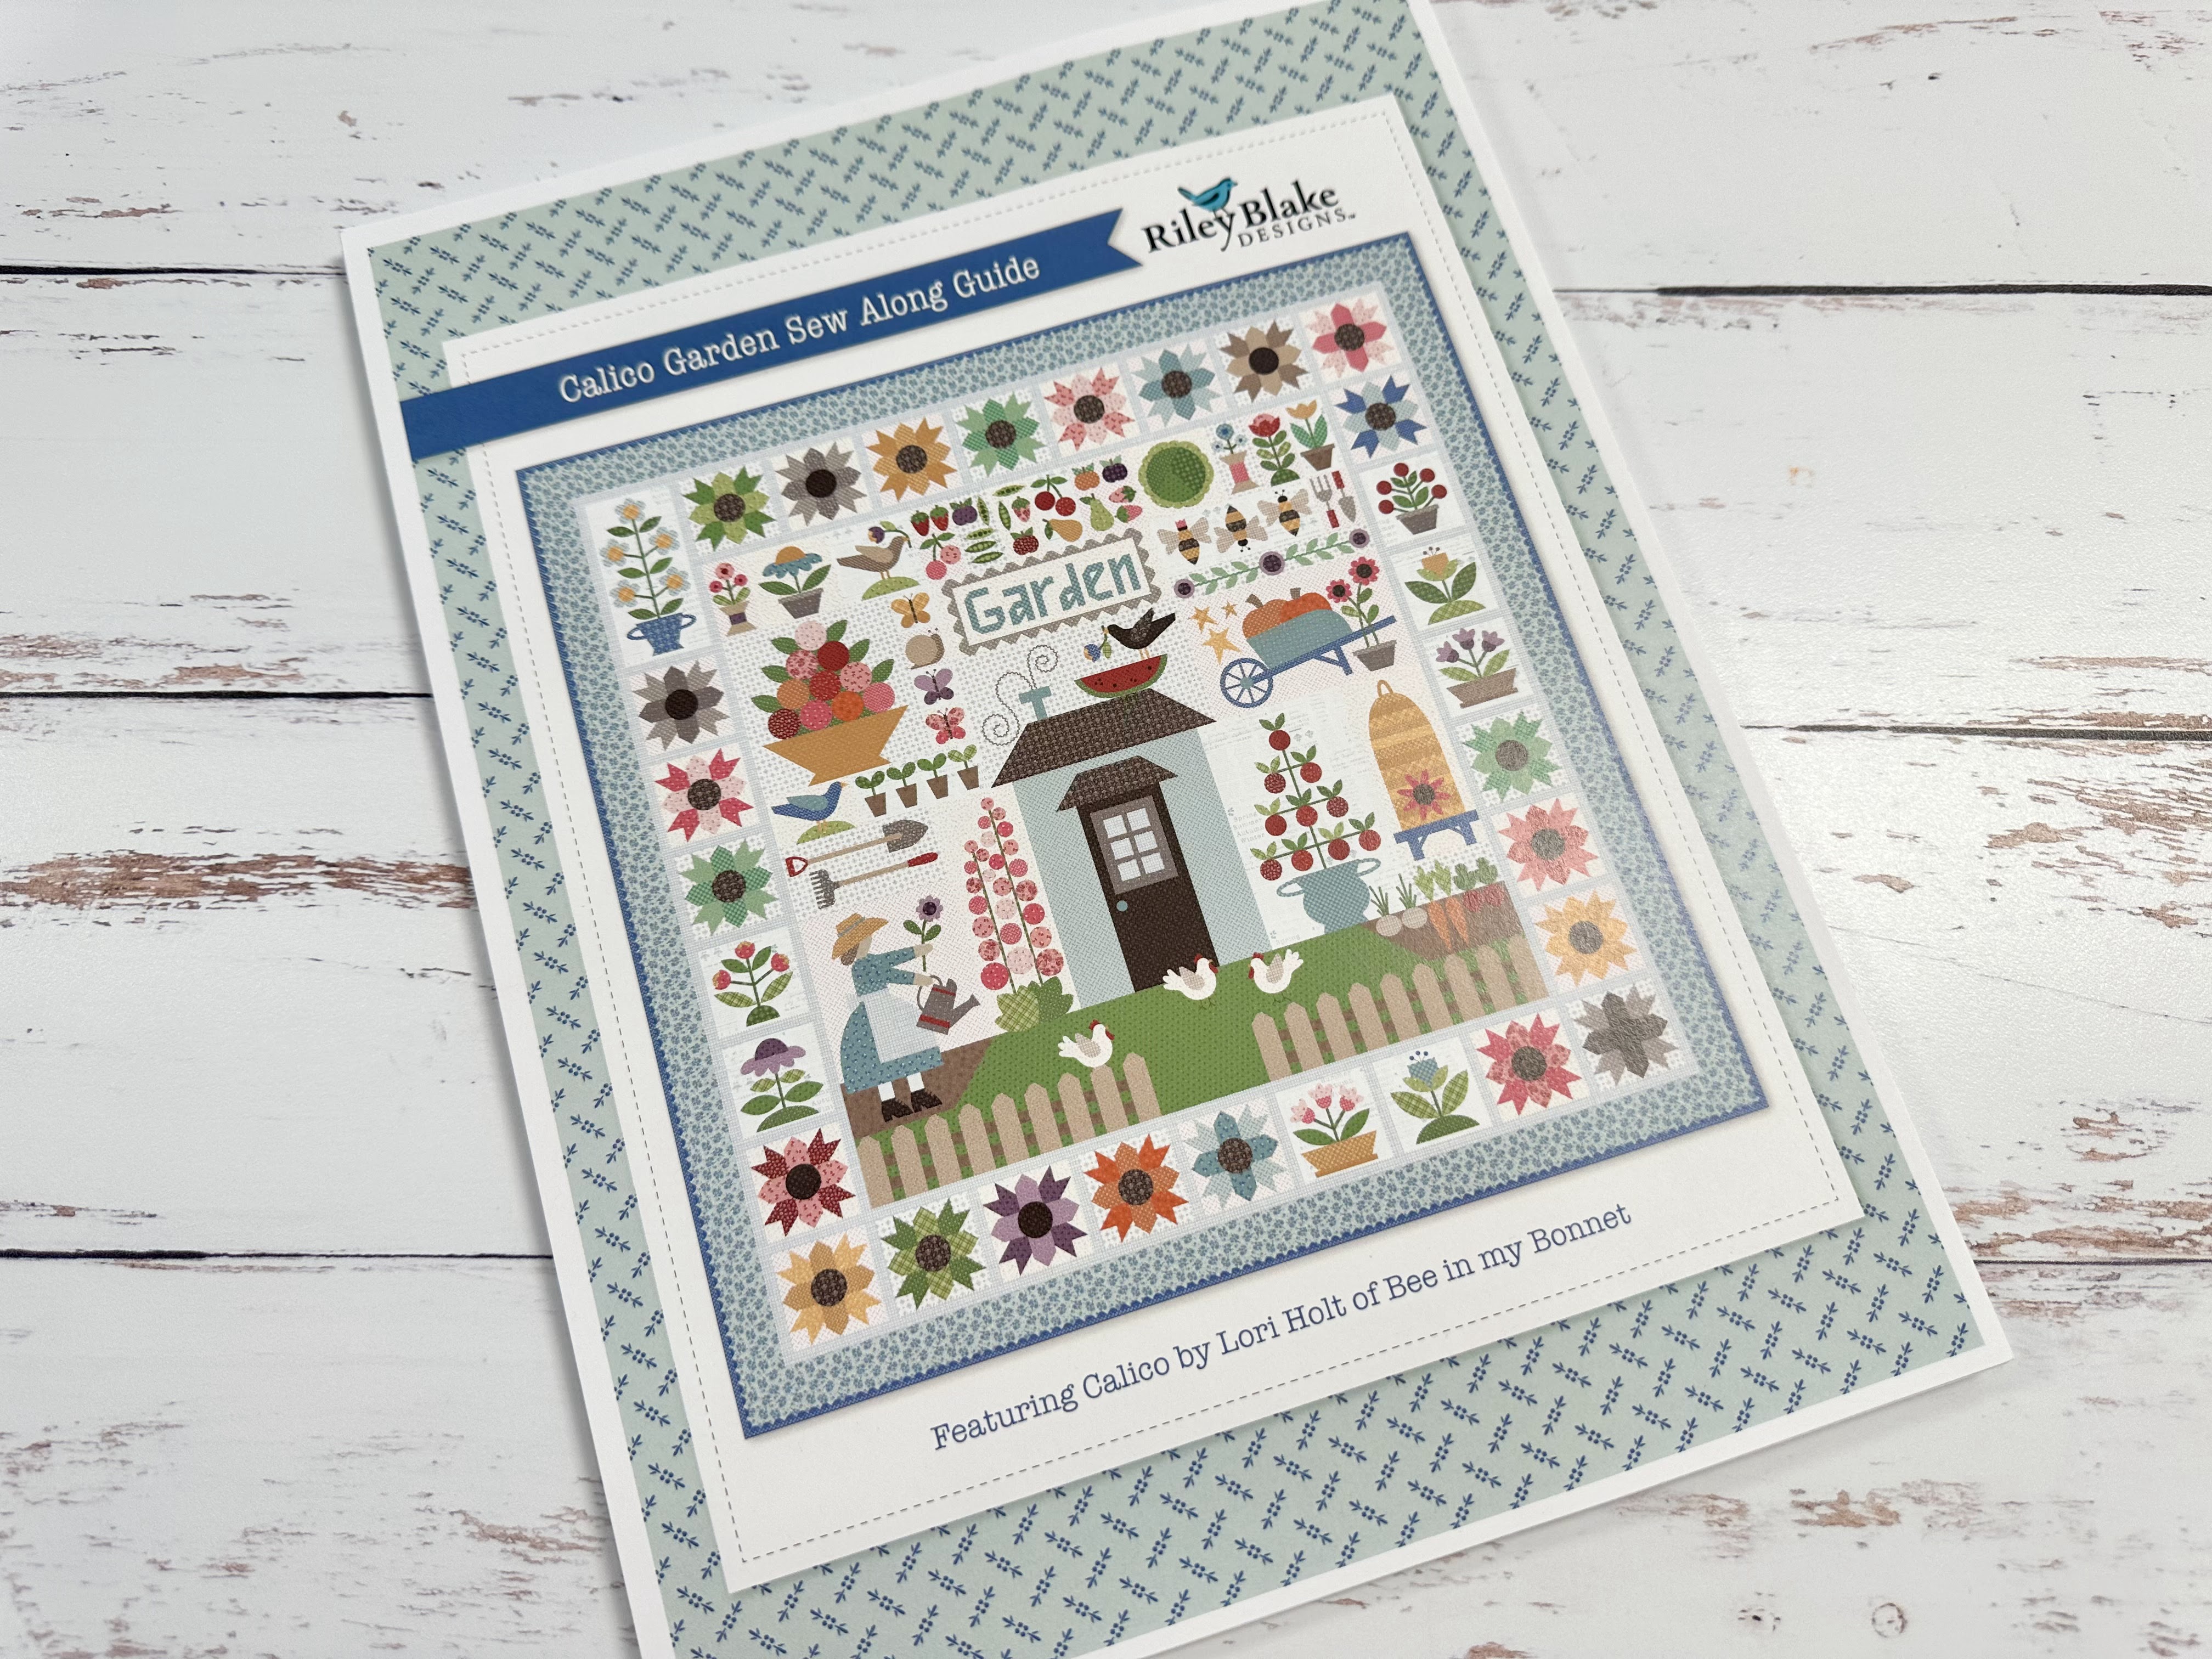
I have also given the link there
for the free PDF Download
of the Sew Along Guide
to download the sew along guide.
As per the sew along guide
cutting instructions
you should have everything for
this weeks blocks
all cut and ready to go!
As per usual for week one in my
Sew Simple Shape Sew Alongs
the FIRST week tutorial is a video.
Because I now have my own
I have posted the
Blue Coneflower Block
Tutorial there.
to visit my channel and watch the
tutorial and I hope that you love it!
Pretty please leave me a comment
over there and let me know:)
If you like what you see
and my other videos there...
click on subscribe and click on the bell
to be notified whenever
I post another tutorial:)

that I showed you
how to make in my video:)

for the tutorial on my
PURPLE CONEFLOWER BLOCK

to go to my tutorial for the
CALICO STAR FLOWER BLOCK

to go to my tutorial for the
Morning Glory Blocks

to go to my tutorial for the
PRIMROSE BLOCKS

to go to my tutorial for the
RED ROSES and MUMS BLOCK

to go to my tutorial for the
Forget Me Not Block

to go to my tutorial for the
PICKET FENCE and GRASS BLOCKS

to go to my prepping tutorial for
HENS and ROOT VEGGIES

to go to my tutorial on the
HOLLYHOCKS and
RAKE and SHOVEL BLOCK

to go to my tutorial for the
GARDEN GIRL

to go to my tutorial for the
BEE SKEP BLOCK

to go to my tutorial for the
TOMATOES BLOCK

Last week we made the
Click on the name of the blocks
to go to these tutorials!

to go to my tutorial for the
WHEEL BARROW BLOCK

This week we are making three blocks!
GARDEN TOOLS BLOCK
CLIMBING VINE BLOCK
BEES BLOCK

Let's start with the Garden Tools:)
Here are my fabrics and Shapes
for the block all cut...
all traced and ready to go!
Here is a list of the
Calico Garden
Sew Simple Shapes
needed for this block:
1 - O-74
1 - 0-76
You will need 3 pieces of 2 1/4" long
prepared 1/4" straight bias.
Press one under of each.
You will also need 2 pieces of 2" long
prepared 1/4" straight bias
strips for under the big red handles
For the red handles you will need
2 - 3/4" prepared
straight bias from the red print
each measuring 2" long after
each end is pressed under.
Cut your background
6" x 8"

My two shapes are sewn and pressed...
and no clipping was needed.
Now let's go lay out the block!

I did the hand shovel first.
I glued it to measure 5 1/2" long.
The hand rake will measure
the same length as well
but will be easier to put it
together on the design board.

After pinning the shovel down
onto my background I pinned the
rake tines 1/2" away from the
shovel handle and even with the top.

The tines on the hand rake are
1 1/2" long and then tucked underneath.

Remember that both are 5 1/2" long
and they are about 3 1/4" wide together.

Pinned and ready for Sue Glue!
When dry it's time for applique:)


After your Block is appliquéd...
press it from the back and use the
6 1/2" Trim-It for the height...
the 4 1/2" Trim-It for width
and trim it down to
4 1/2" x 6 1/2"

Here are my fabrics and Shapes for the
Climbing Vine Block all cut...
all traced and ready to go!
Here is a list of the
Calico Garden
Sew Simple Shapes
needed for this block:
2 - 0-1
1 - O-3
2 - 0-4
1 - 0-5
12 - 0-66
You will also need a 17" long strip
of prepared 1/4" straight bias
Cut your background
5" x 22"
and press it in half both ways
to make the centering and
placement of your shapes easier.

Okay!
My shapes are all sewn
and turned and pressed:)
No clipping before turning was needed
on any of these shapes either.

I have everything that
I need to pin and glue baste...
except I will need to
grab a larger design board.

Start by finding the center of your
17" long stem and pin it to the center
of your background that has been
pressed in half both ways.

Then glue it down:)
Also glue the centers of the flowers on.

Center and pin the large flower.
Measure 6 1/4" away from the center
flower and pin the outside flowers...

Like this.
From end to end of small flowers
should be about 19" long.

I pinned and glued the
6 leaves on the right side...
now I'm doing the left side
and showing you how I did it!
First measure 1/4" away
from the center flower and pin
one corner of the first leaf.

Now measure 2" apart and
pin the other two leaf corners.

Now place your ruler on the edge
of the fabric on the 1 1/4" line.
This is your guide for how far the
leaves should pivot out from the vine.
Pin the other corner of
the leaves to the rulers edge.
Now glue into place.

You will do the same thing for
the three leaves on the other side
with the exception of
the FIRST measurement.
Measure 3/4" from the
center flower for this side
and then measure 2" from that
and pin the next leaf etc.

Remember to use your ruler as your guide
(1 1/4" in from edge)
for the outside edge of leaf placement.

All pinned and ready to glue!
When dry...remove the pins
and you are ready for applique.


After your Climbing Vine Block is appliquéd
press it from the back and use the
3 1/2" Trim-It for the height...
the 20 1/2" Trim-It for width
and trim it down to
3 1/2" x 20 1/2"

Okay!
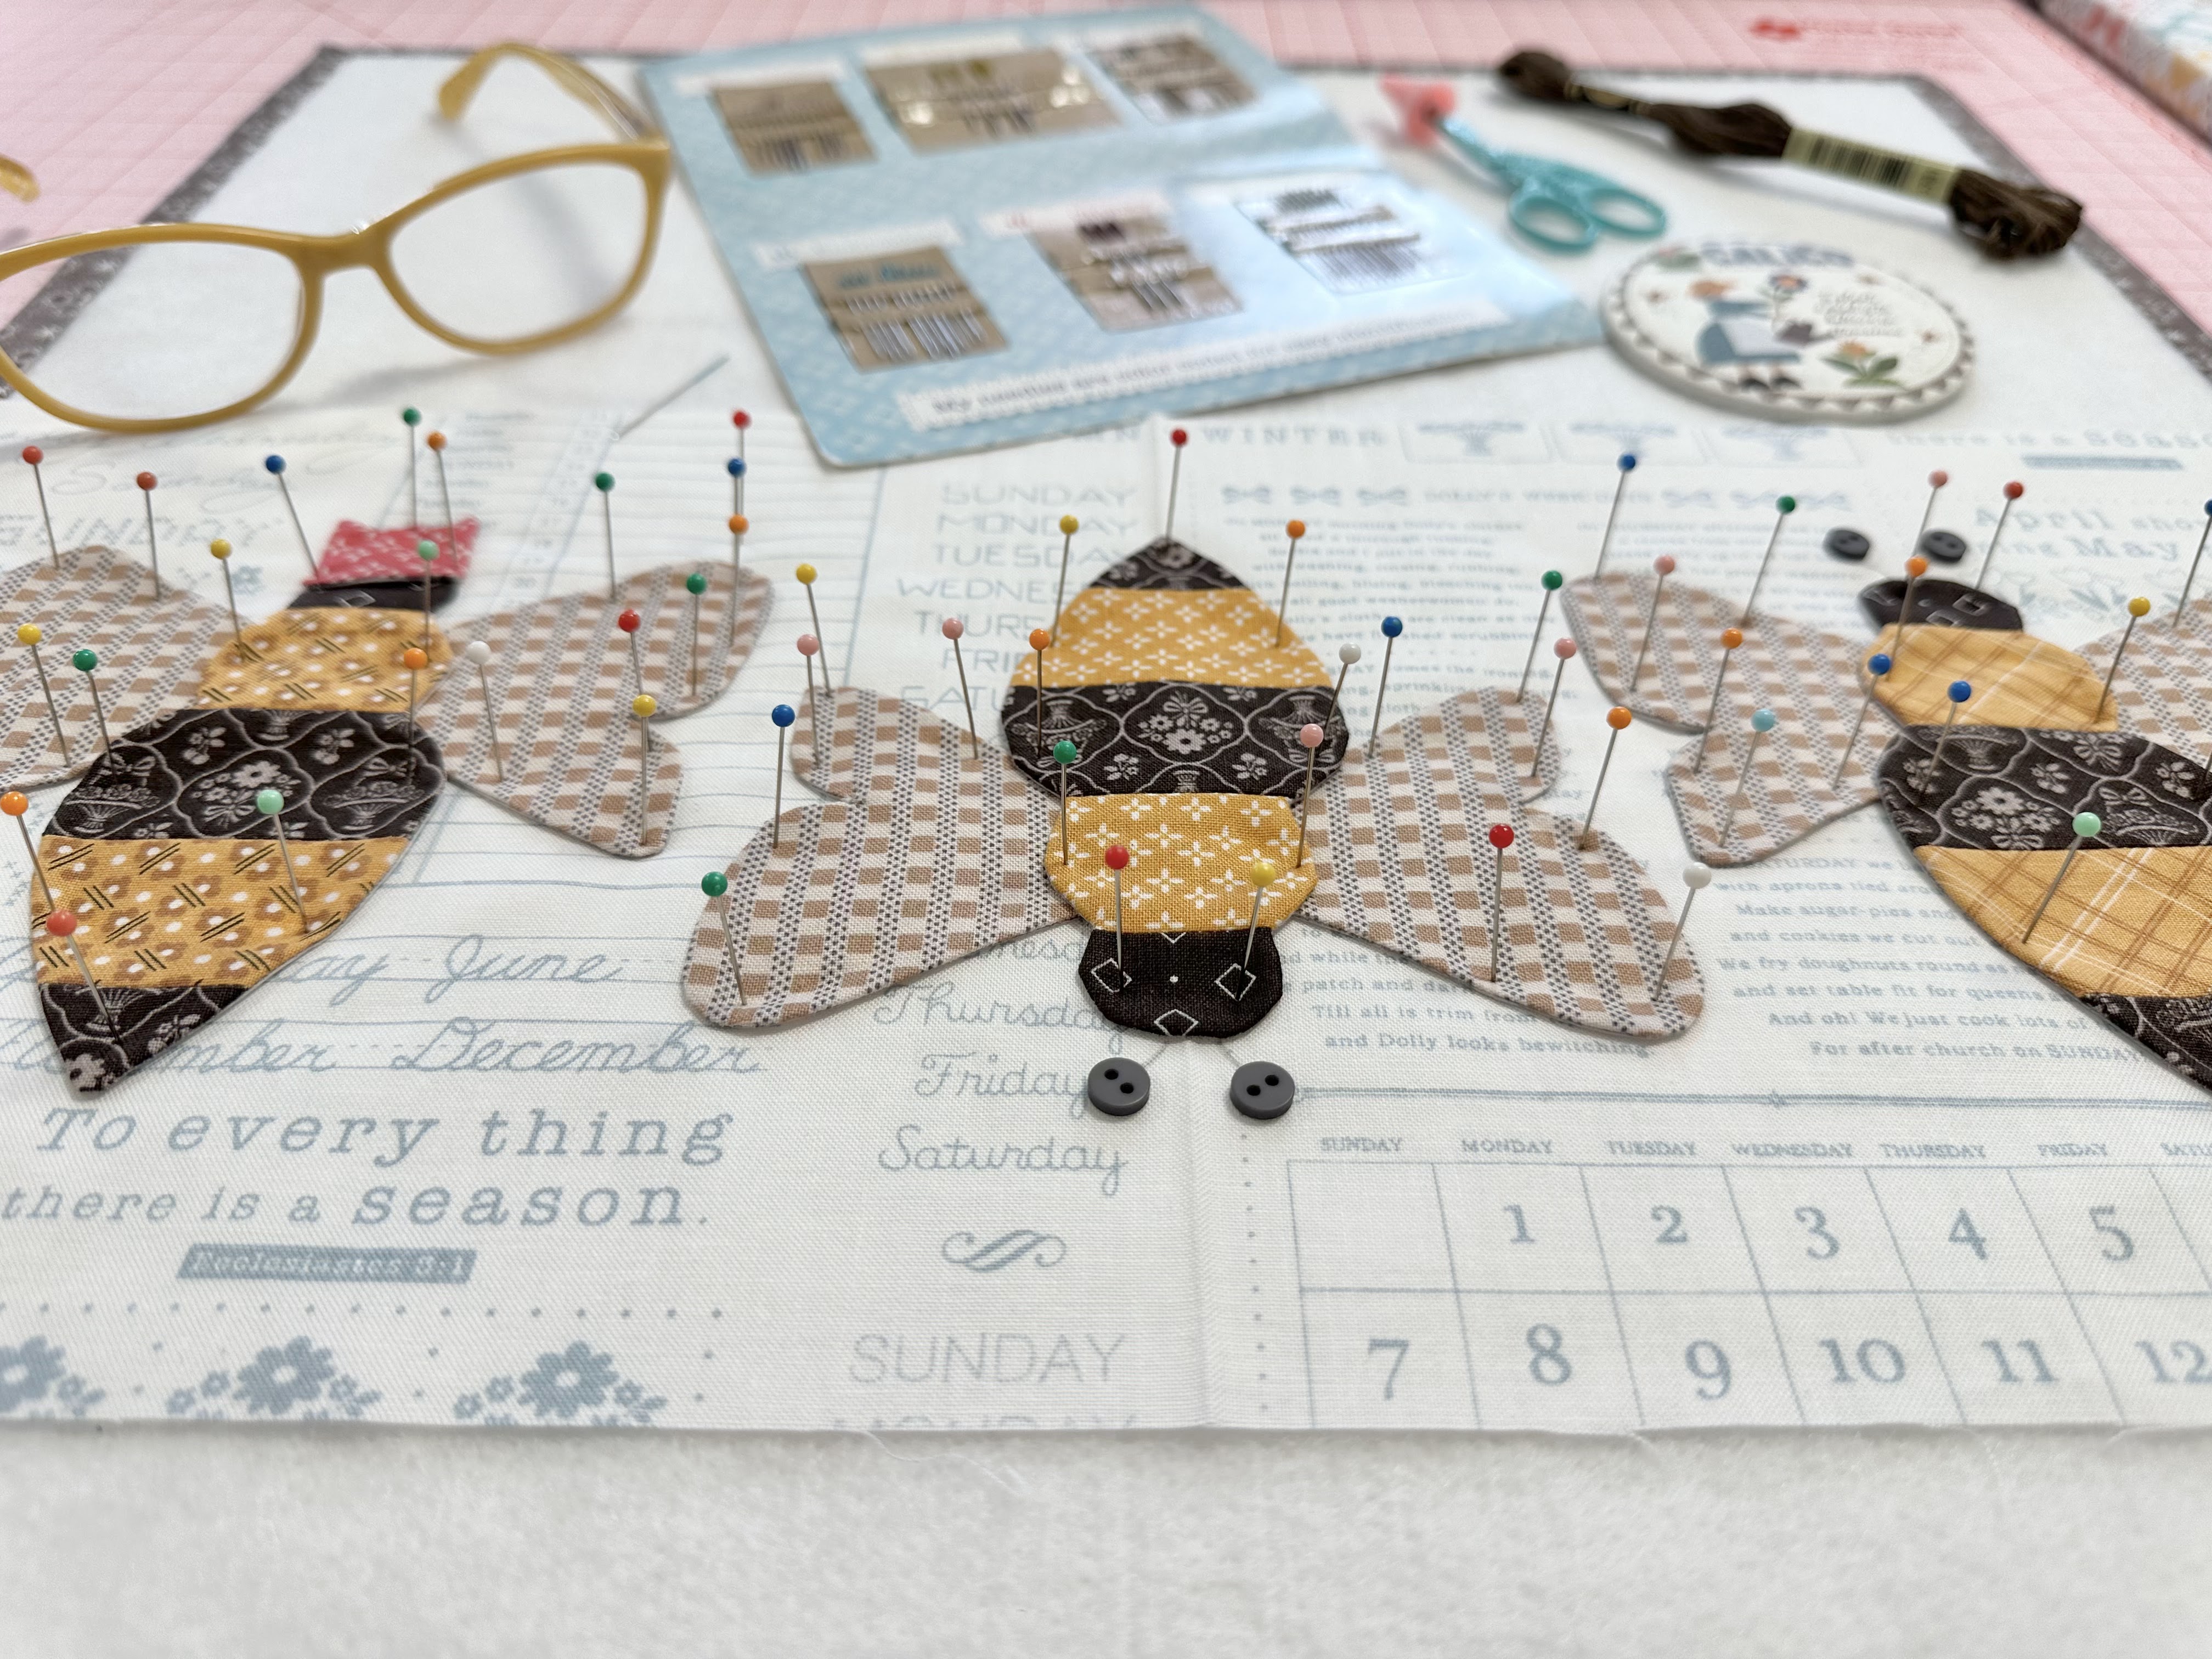
Let's make some bees for our garden:)
Here are my fabrics and Shapes for the
Bee Block all cut...
all traced and ready to go!
Here is a list of the
Calico Garden
Sew Simple Shapes
needed for this block:
3 - 0-67
6 - O-68
(trace 3 wings reversed)
1 - 0-69
Cut your background
8" x 18"
***Make sure to trace
3 of your wings reversed!
Let's go over to the machine...
you will need to sew your strips
together for the bees BEFORE
you sew the shapes...
just like we did for the bee skep.

Sew them together using an
accurate 1/4" seam allowance.
Press seams open for less bulk.

Now pin traced Sew-In Interfacing
onto the sewn stripes lining up
the head and top of body inner curves
with the sewn seams like this.

*TIP* from Miss Bee:)...
When sewing the crown for the queen bee,
sew around it twice with a smaller stitch.
This will help when turning and shaping
because it's small.

All of my shapes are sewn and trimmed.
Each shape has cleavage areas that
will need to be clipped before turning.

All shaped and pressed:)
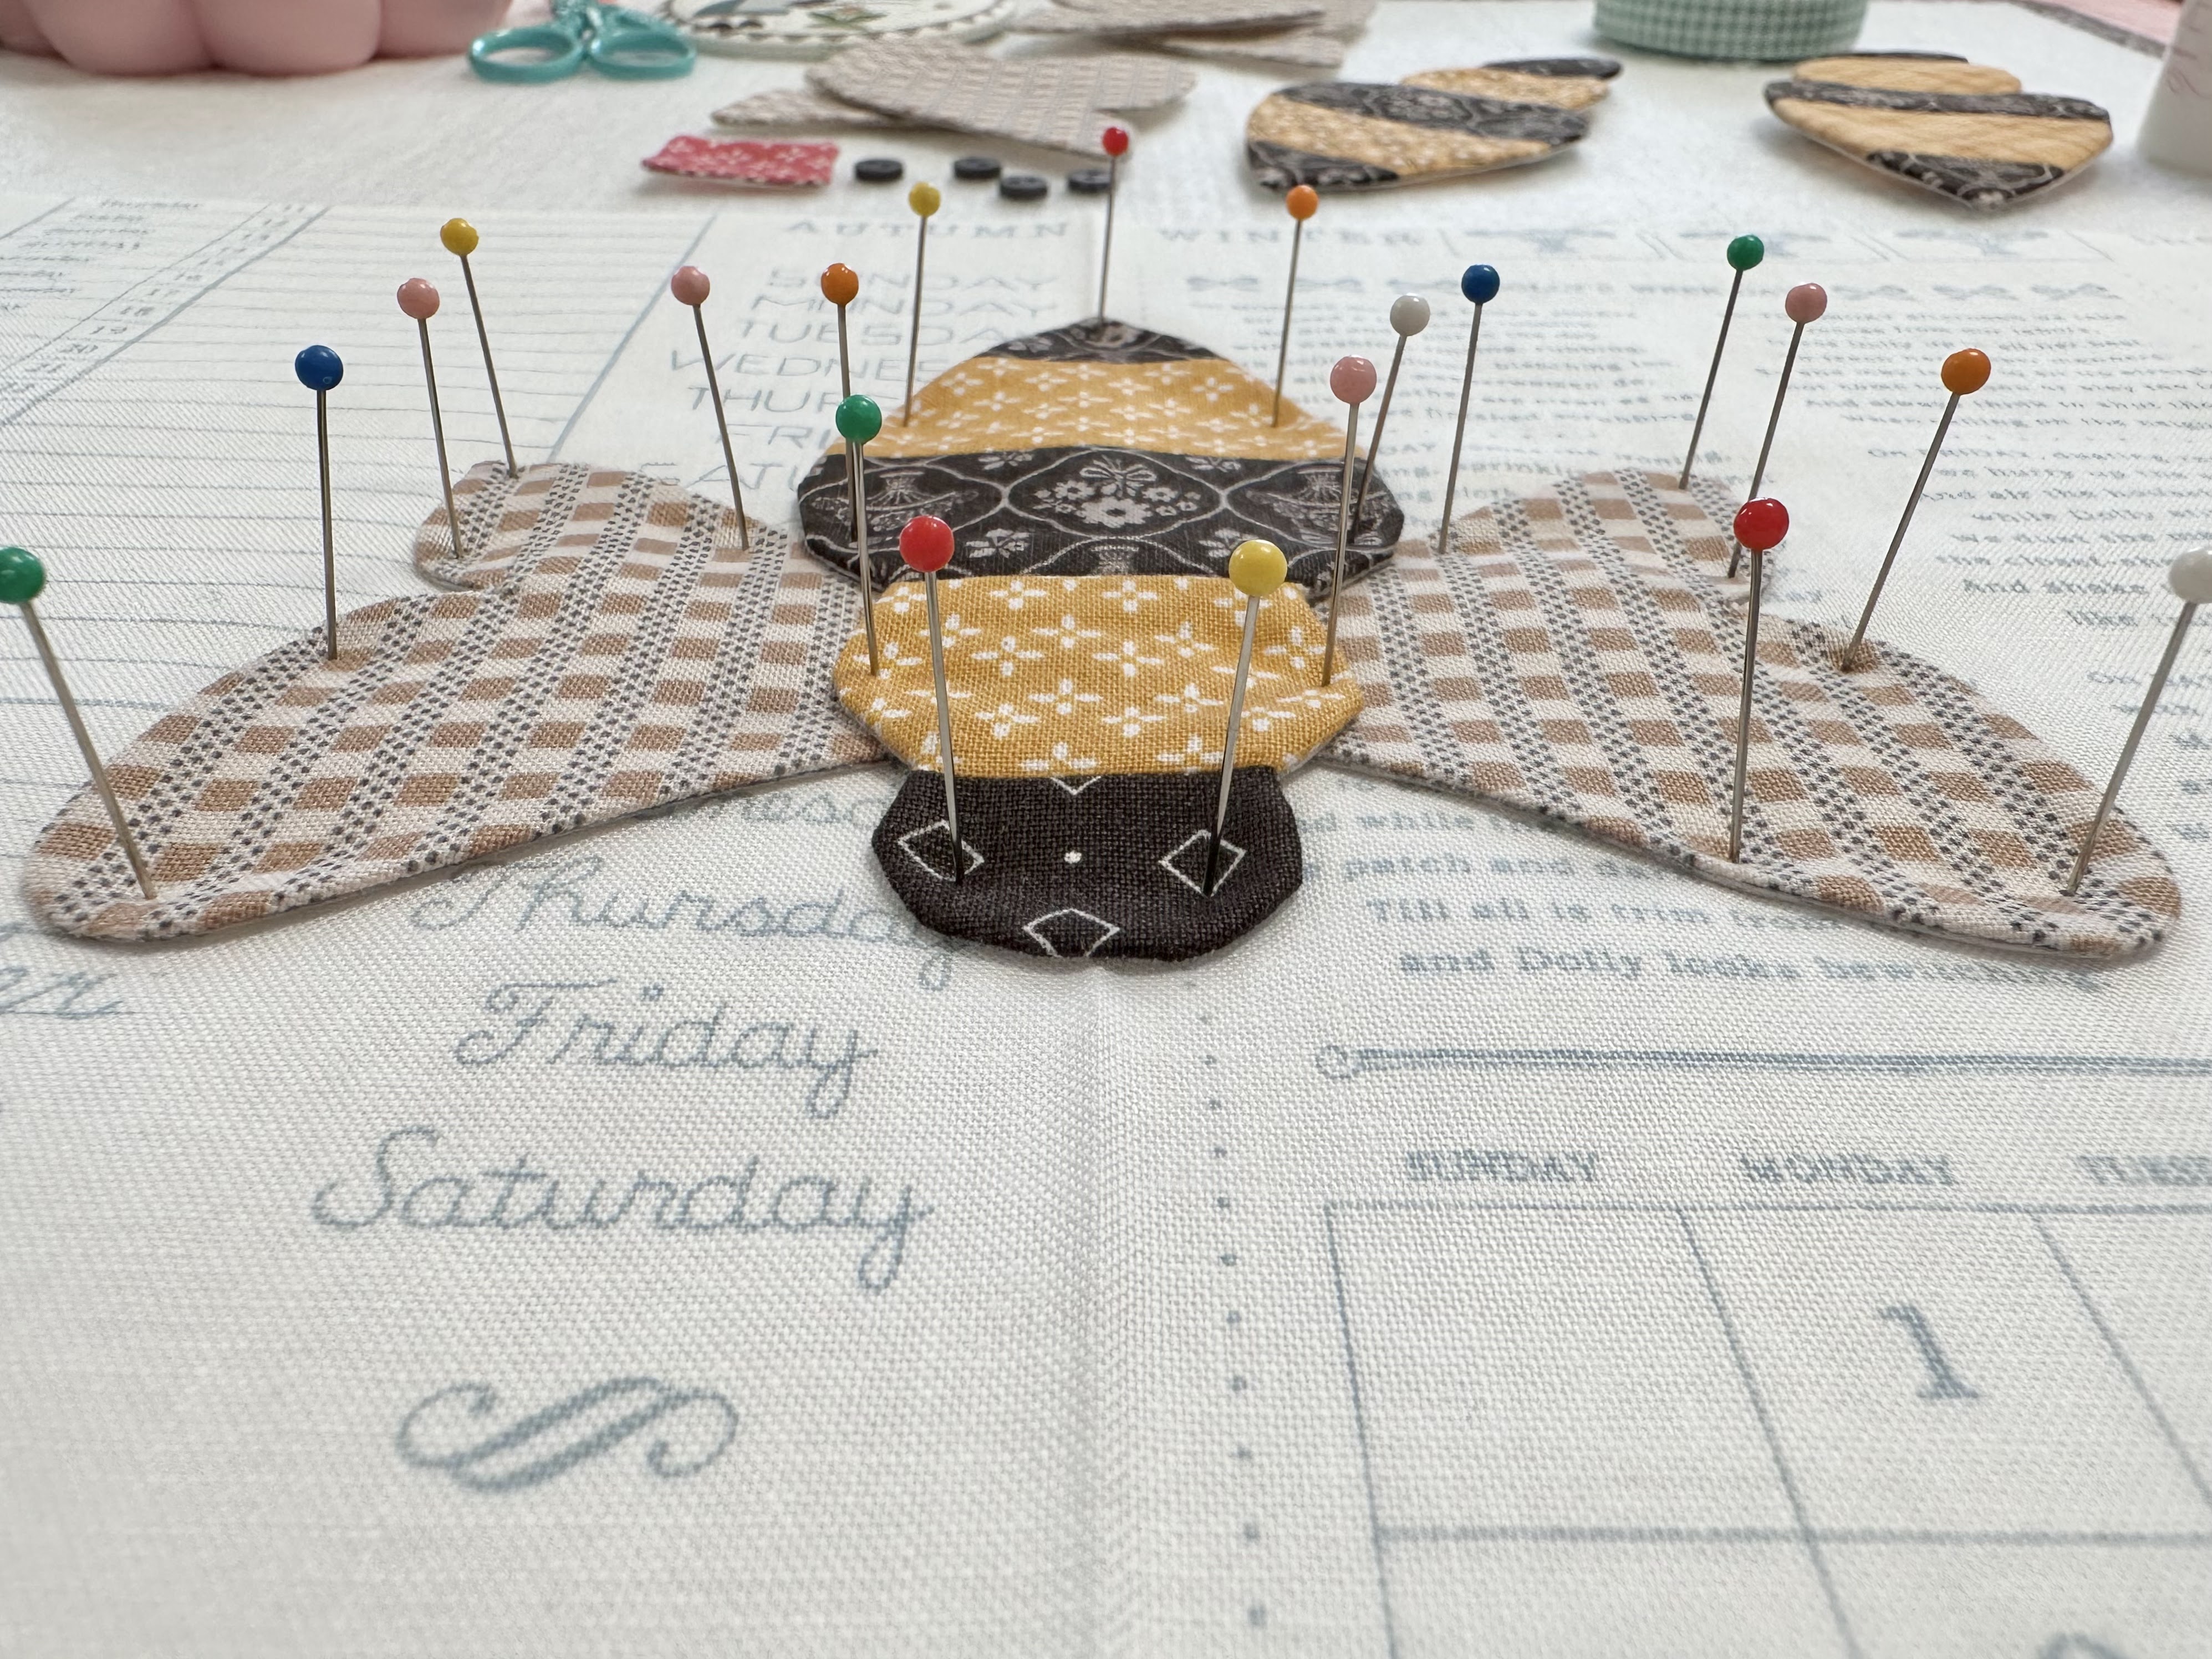
I'm so excited to layout this block!

I pressed my background
in the middle so that
I could center the first bee.

Notice that the center bee is upside down:)
Center him on the pressed fold and
measure in 1 1/2" from your
background edge and pin the bee bum:)
Only put one pin in his bum
to keep him in place but you want to
be able to pivot him...
you'll see why in a minute!

Next place the wings touching in the
center of the top yellow section
of the bee body and pin
only on the outside of wings.

Now pivot the bee away
while you glue down the wings!

Now pivot the bee back into place...
and pin and glue!
That's how you will do the
other two bees but you need to know
where to place them first.

Measure 1 1/2" in from the edges
of background for the bee bums again
and measure 4 1/2" away from the
side of the center bees head.
You can see this measurement on the ruler:)
Place one pin in again for pivoting:)

Repeat for the other bee on the left side.

Pin the wings just like the first bee.
Another good measurement to know
is from wing tip to wing tip
of all three bees measures 15 inches.

All pinned and glued!

Now it's time for the queen bee crown!
Measure in 1 1/2" from the background
as before and place her crown:)

Measure in 1 1/2" from the edge to
place the buttons on the other bees.
I just drew the antenna just now on mine
but of course there is a pattern
for tracing in the guide:)

Same on the other bee
for the buttons and antenna.
Okay now I'm ready to embroider the
antenna and sew on the buttons
but I need to let the glue dry
for about 5 more minutes
and then take the pins out.

I'm using my Nifty Needles...
they are all color coded and
the aqua ones are for embroidery.

Embroidery done and buttons on!
Remember that it's up to you and/or
your quilter when the buttons
go onto your quilt.

My Bee Block is ready for applique!!

After your Bee Block is appliquéd...
press it from the back and use the
6 1/2" Trim-It for the height...
the 16 1/2" Trim-It for width
and trim it down to
6 1/2" x 16 1/2"


Sweet as Honey!!

All of this weeks blocks together...
how cute!


Thanks again for sewing with
me this week for the
Calico Garden Sew Along
I'll meet you right back here
on my blog next week for
two block tutorials!
Garden Block...
Butterflies and Snail Block:)
Until then...
Happy Calico Garden sewing!!
xx
Lori
