
"GARDEN GIRL"

Welcome to Week Eight of the
"CALICO GARDEN"
Sew Along!
Join me here each week
when I will be doing tutorials
on the blocks for the quilt.
Of course because we are all sewing
from all around the world
we all have different time zones...
But I will be posting each Monday
right here on my blog
and you can follow my tutorials
any time each week that
is convenient for you.
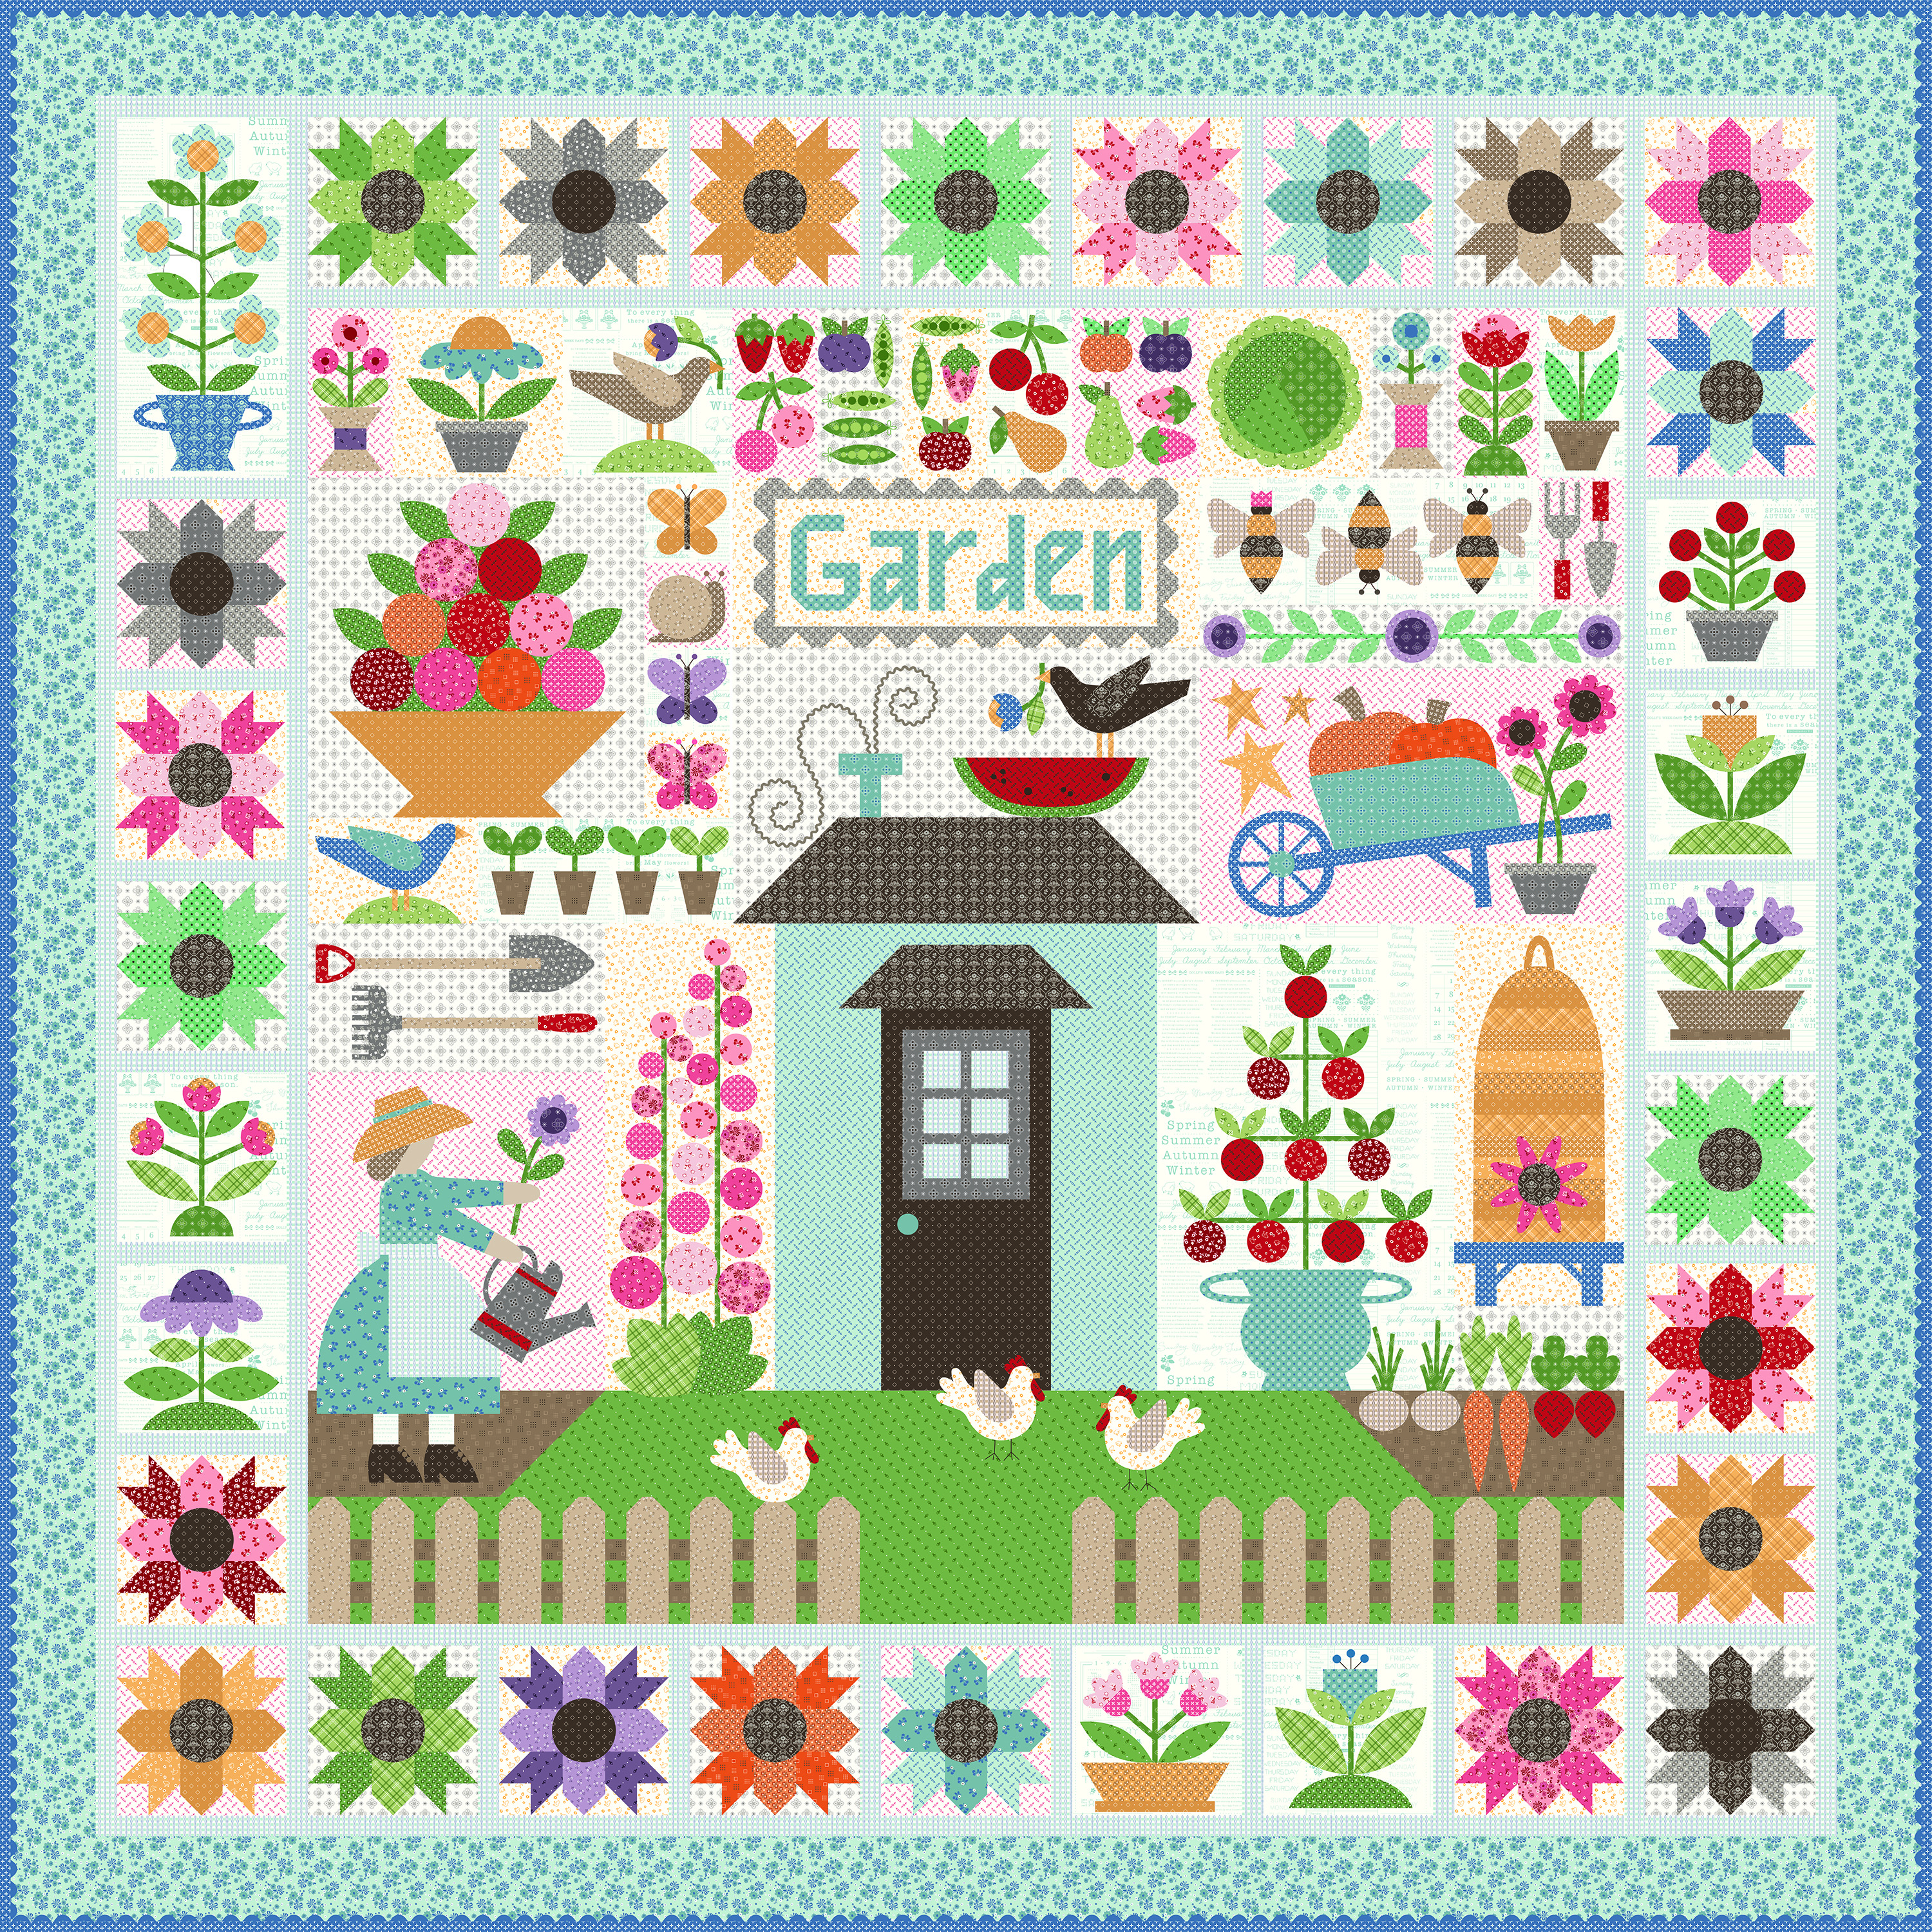
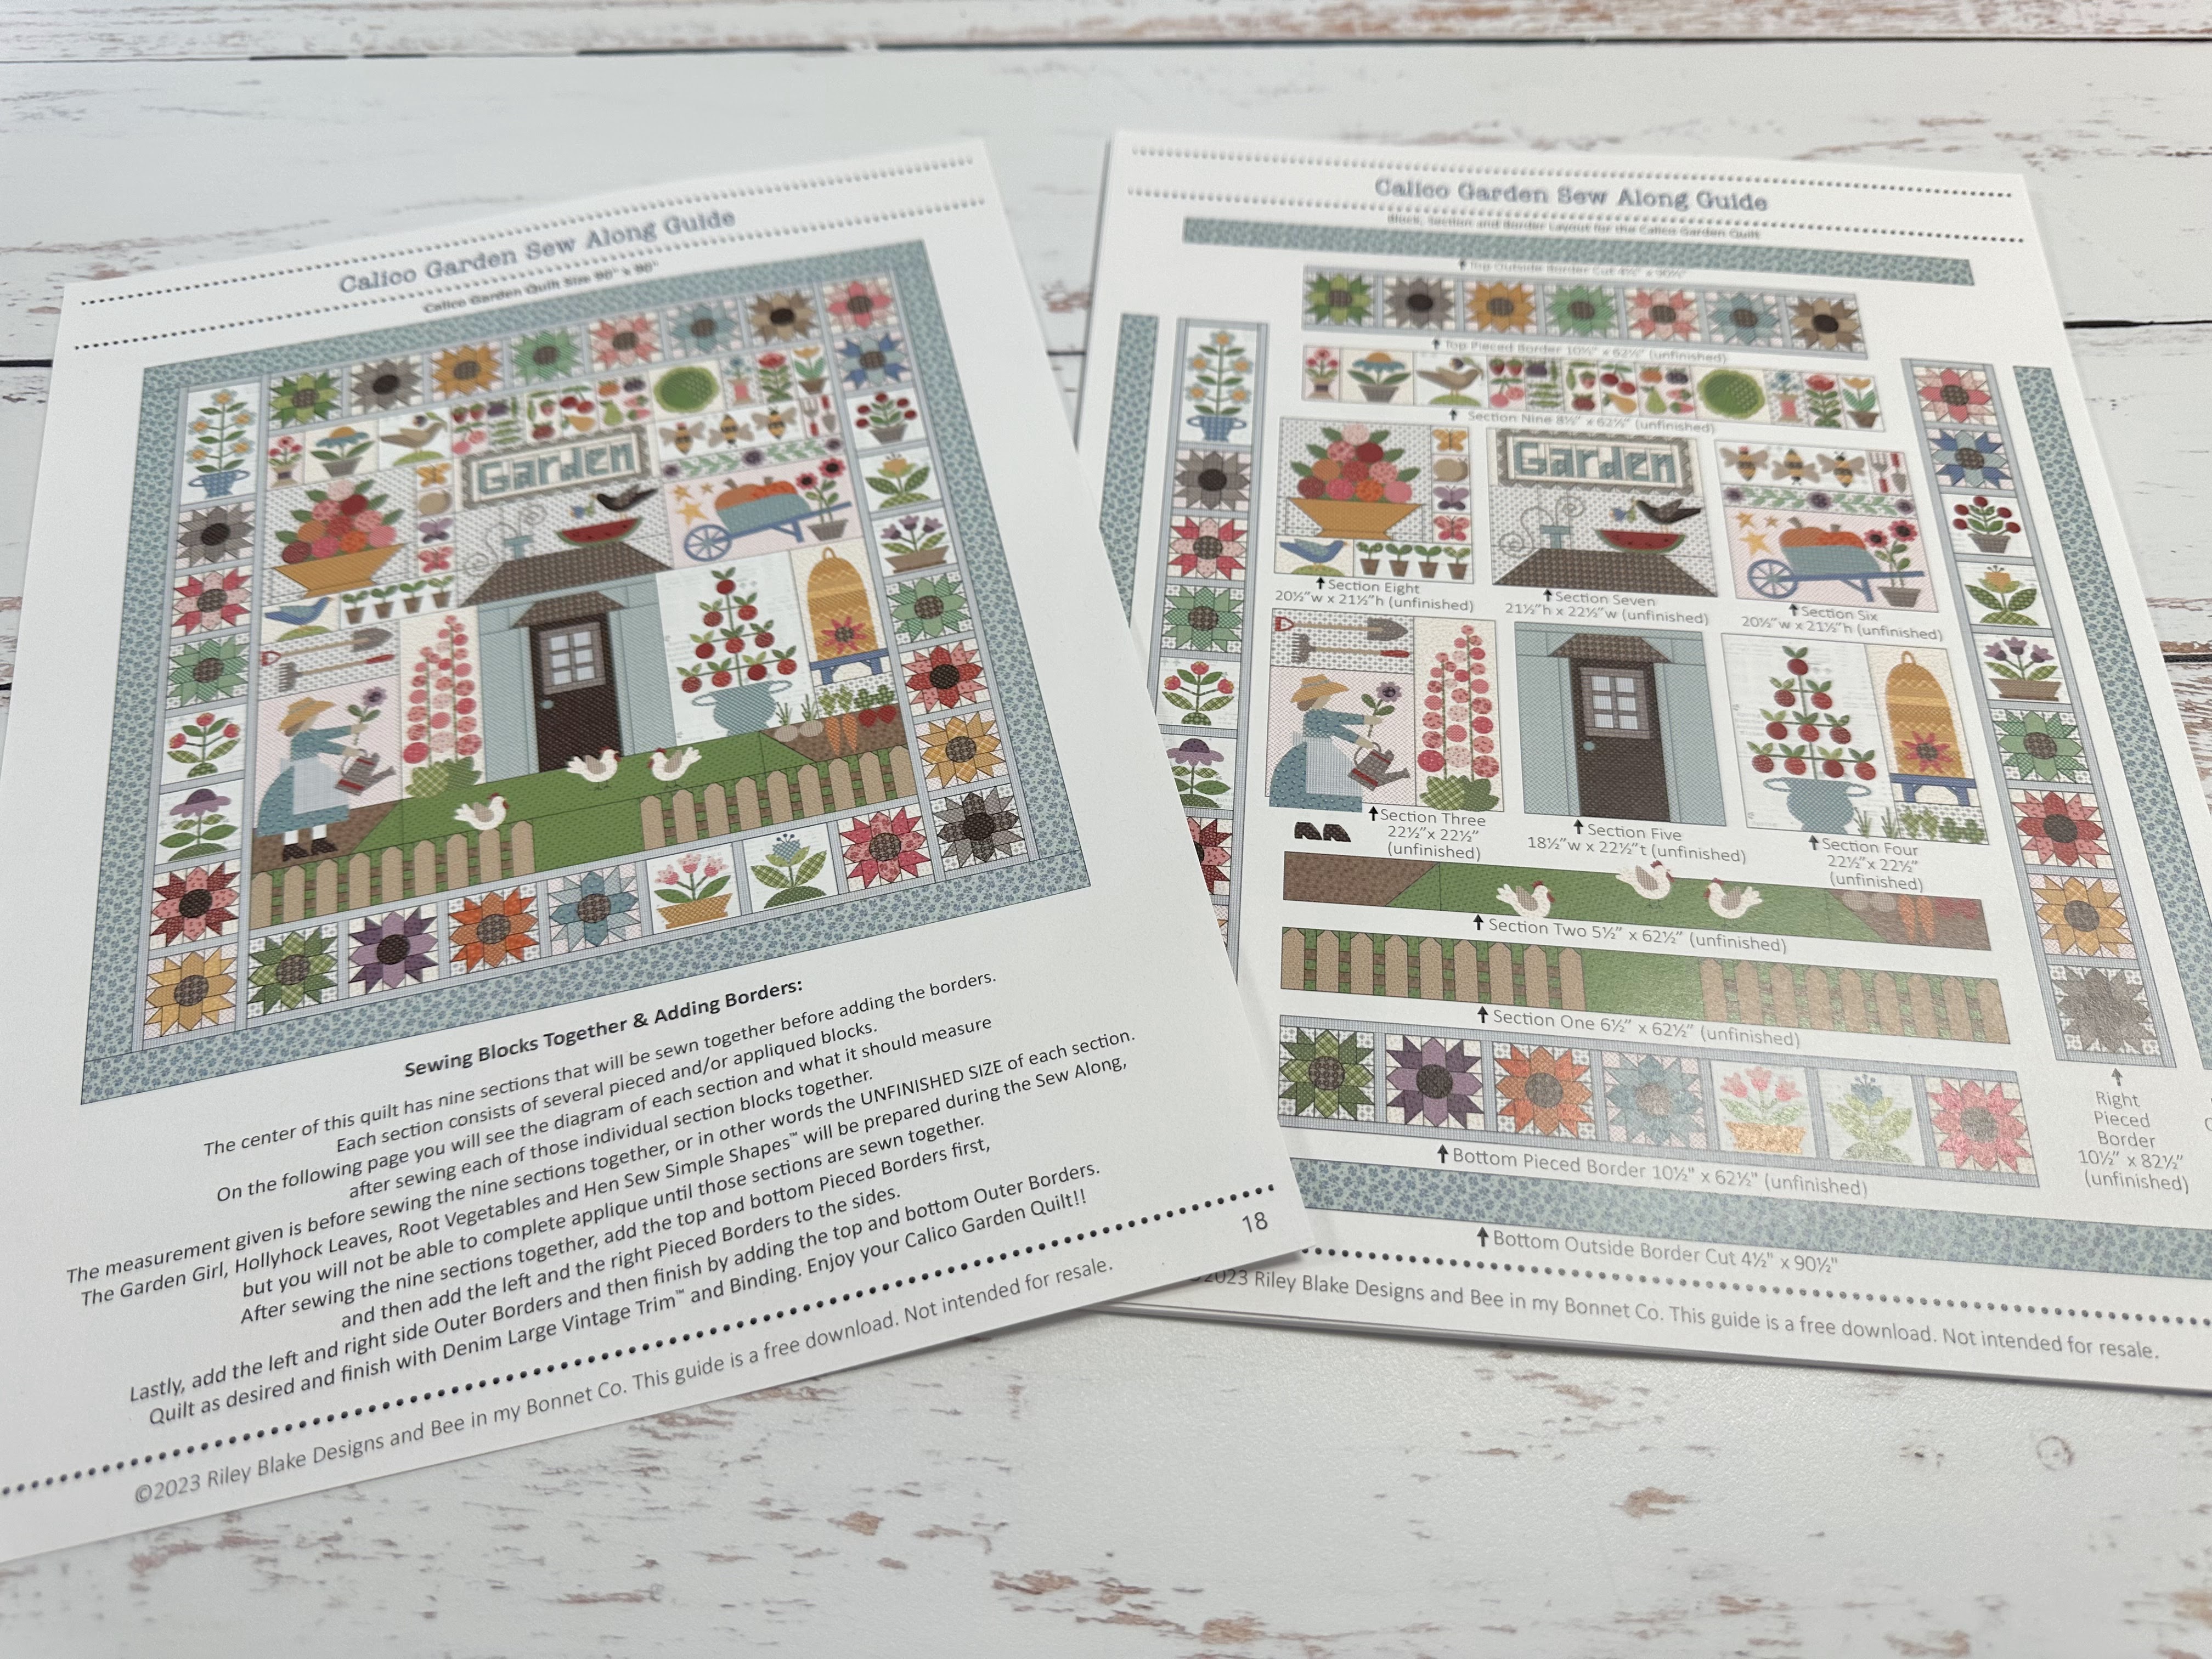
We are making the
Calico Garden Quilt
90" x 90"

The quilt is made with my latest fabric
collection called Calico...
I hope that you all have all
received your templates and
fabric kits by now...
and that we are all ready to begin!!
If you still need them ...
just do a quick google search for
"Calico Garden Quilt Kit"
to find shops who still have some left.

We are also using the
Calico Garden
Sew Simple Shapes
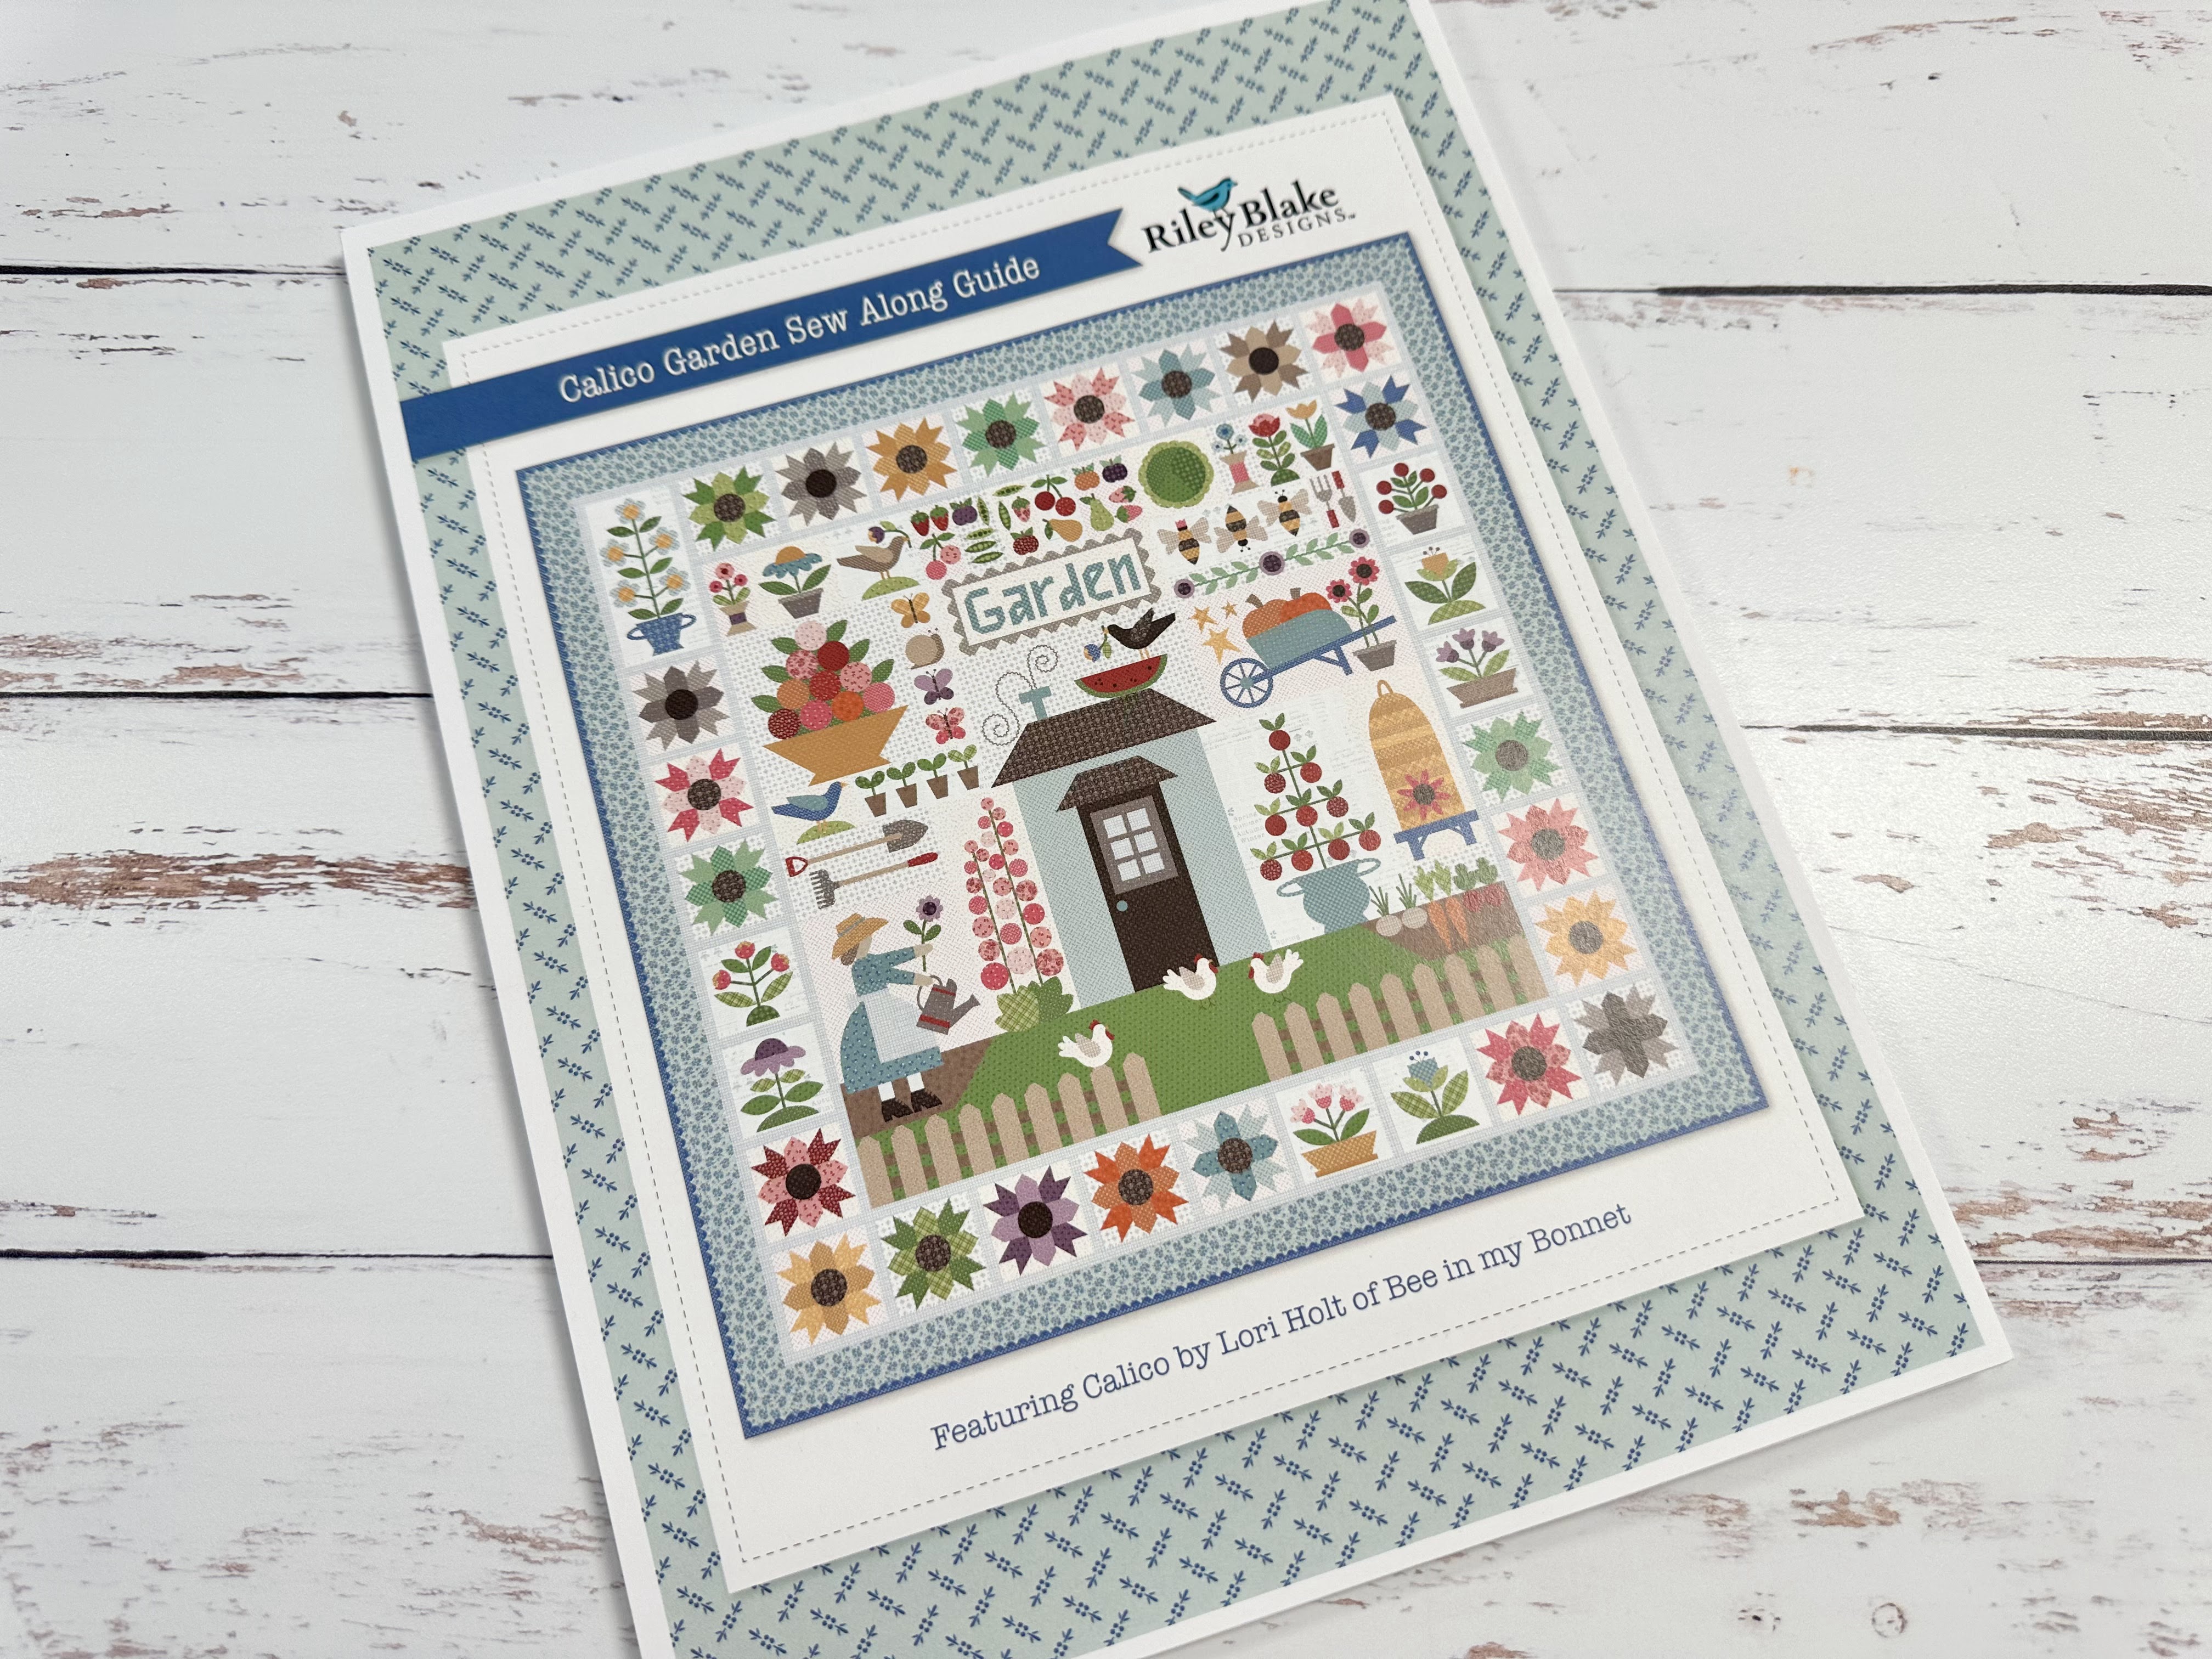
I have posted the
post which details all of the supplies
for the sew along and how it works.
I have also given the link there
for the free PDF Download
of the Sew Along Guide
to download the sew along guide.
As per the sew along guide
cutting instructions
you should have everything for your
Garden Girl
all cut and ready to go!
As per usual for week one in my
Sew Simple Shape Sew Alongs
the FIRST week tutorial is a video.
Because I now have my own
I have posted the
Blue Coneflower Block
Tutorial there.
to visit my channel and watch the
tutorial and I hope that you love it!
Pretty please leave me a comment
over there and let me know:)
If you like what you see
and my other videos there...
click on subscribe and click on the bell
to be notified whenever
I post another tutorial:)

that I showed you
how to make in my video:)

for the tutorial on my
PURPLE CONEFLOWER BLOCK

to go to my tutorial for the
CALICO STAR FLOWER BLOCK

to go to my tutorial for the
Morning Glory Blocks

to go to my tutorial for the
PRIMROSE BLOCKS

to go to my tutorial for the
RED ROSES and MUMS BLOCK

to go to my tutorial for the
Forget Me Not Block

to go to my tutorial for the
PICKET FENCE and GRASS BLOCKS

to go to my prepping tutorial for
HENS and ROOT VEGGIES

to go to my tutorial on the
HOLLYHOCKS and
RAKE and SHOVEL BLOCK

Okay...let's get ready to
prepare the Garden Girl!

Here is my Garden Girl Block Kit.
This one is a big kit with many
shapes and so that's why we are just
doing this block during this week.
Everything is all cut...
all traced and ready to go!
Here is a list of the
Calico Garden
Sew Simple Shapes
needed for this block:
2 - O-1
1 - O-24
2 - O-25
1 - O-26
1 - O27
1 - O-28
1 - O-29
1 - O-30
1 - O31
1 - O45
2 - O-51
1 - O-52
1 - O-53
2 - O-63
1 - O-74
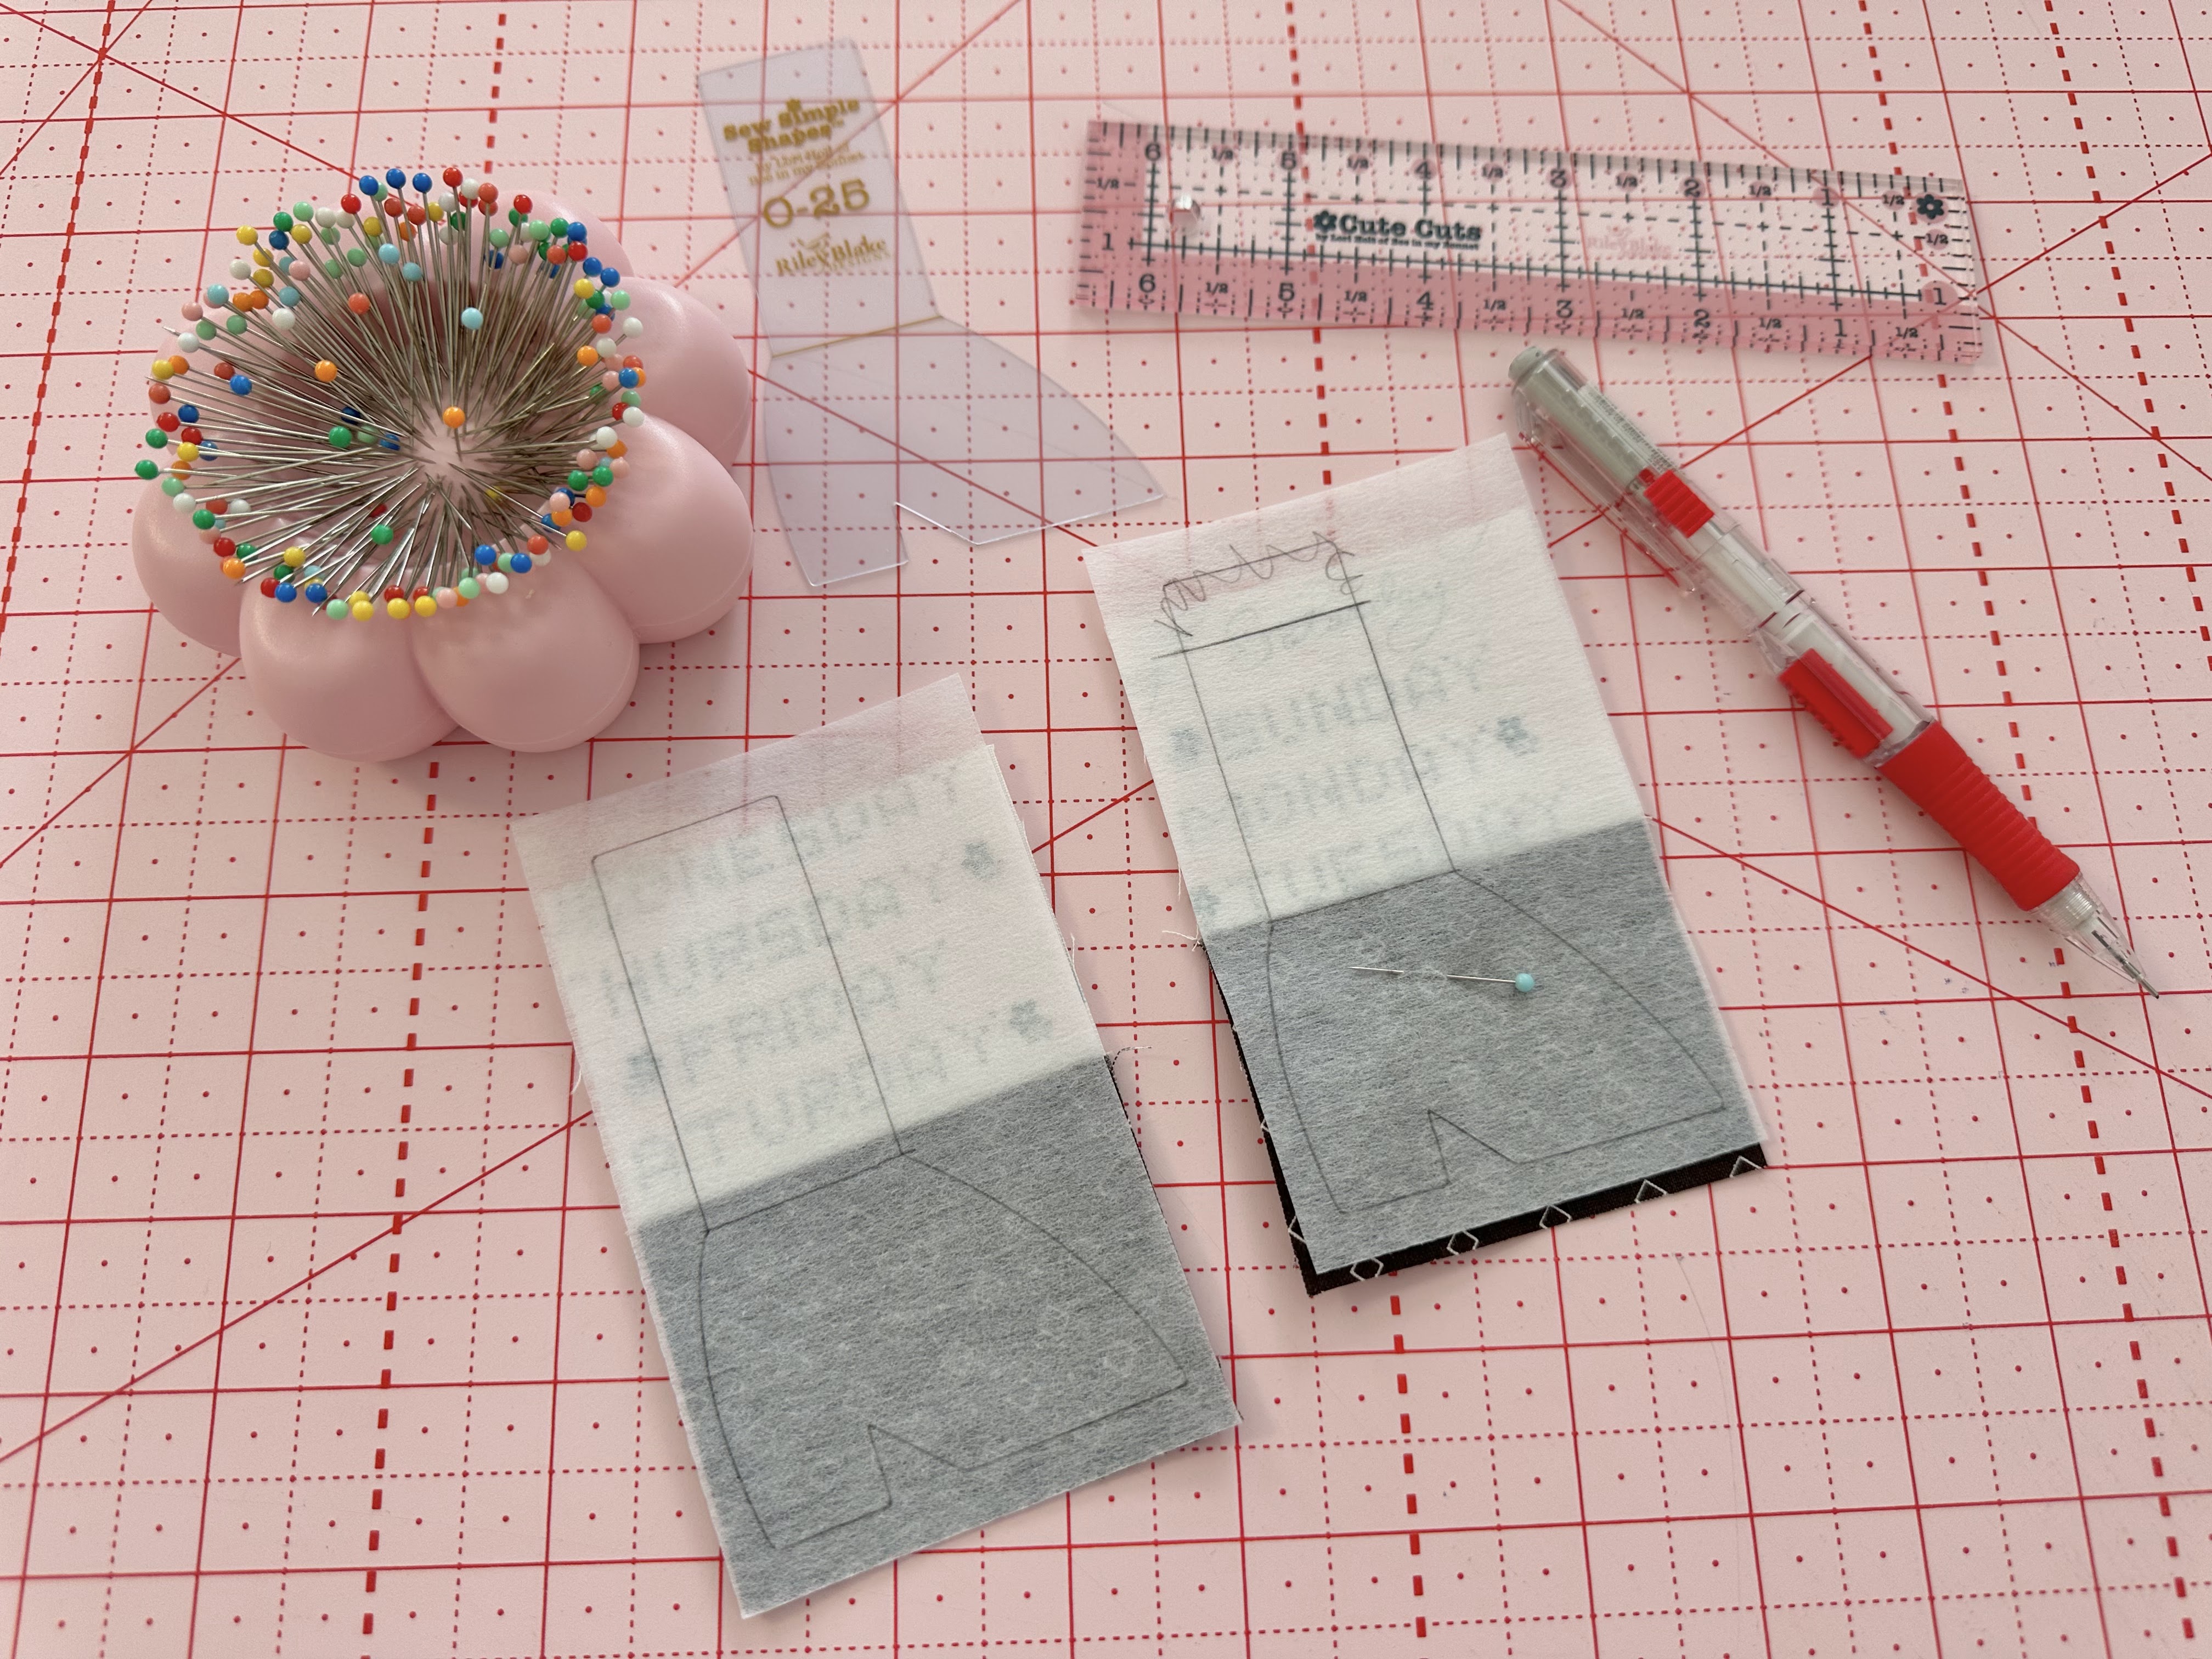
You will need to cut and prepare
these two 1/4" straight bias strips-
Watering Can top stripe:
1 - 4" long
1 - 4"long for her hat and press each end
under so it measures 3" finished
and then press in half.
You will need to cut and prepare
1/4" on the bias for flower stem
1 - 6" long strip with one end pressed
under and a slight curve:)
You will need to cut and prepare
these two 1/2" straight bias strips-
1 - 4" long for her apron waistband that
measures 2 3/4" long after
both ends are pressed under.
1 - 4" long for the bottom stripe
on the watering can.
***Another NOTE***
I had you cut the background for
the Garden Girl 17" x 17"
as per the sew along guide
but as you know from my
Root Veggies tutorial that
I've decided it will be
much easier to applique them after
the sections are pieced...
So with that being said...
you will need to cut that background
to exact piecing size which is
14 1/2" wide x 15 1/2" tall
and sew it to the bottom of the
Rake and Shovel Block
AFTER
that block has been appliquéd and
trimmed down to
7 1/2" x 14 1/2"
***NOTE***
There are several "specialty" things
as far as tracing and piecing that
you will need to do before
sewing some of the shapes.
I'll explain each one in detail
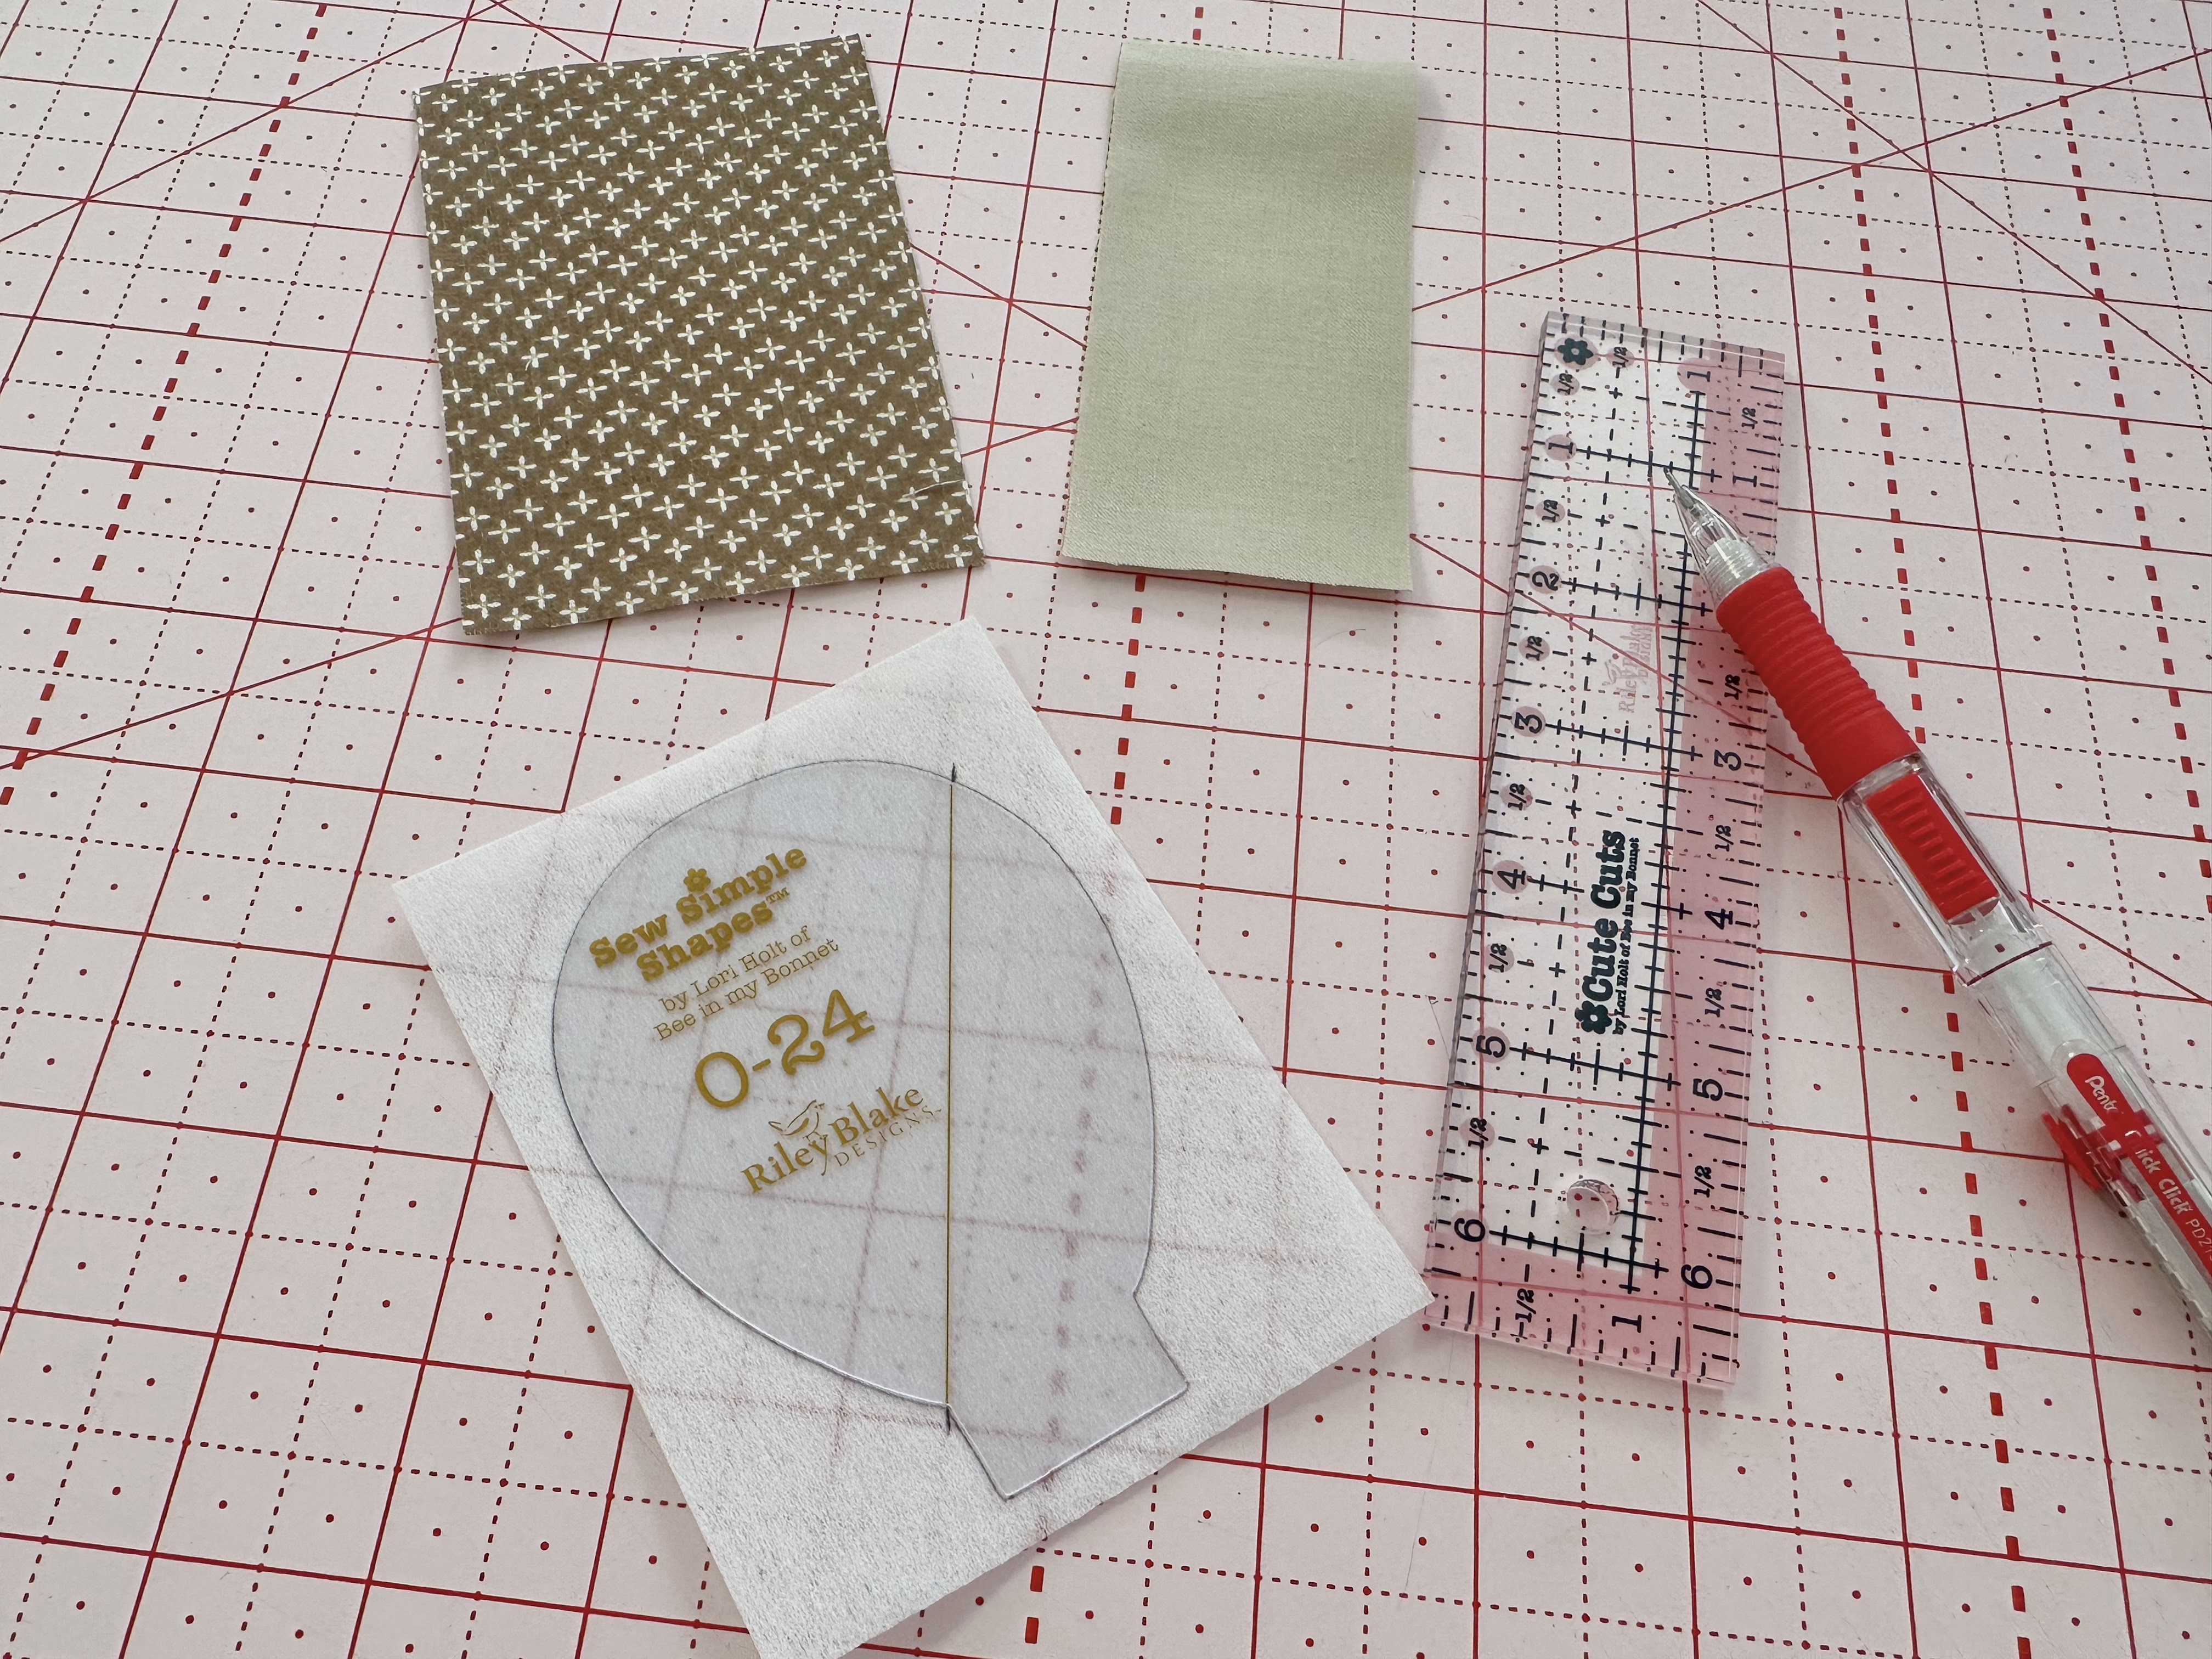
starting with O-24 the
Garden Girl hair/face combo:)
Start by sewing the two fabrics together
using a 1/4" seam allowance.
When tracing O-24 onto interfacing
make a small mark on each end
of diagonal line like this...

And then draw a line onto interfacing
just like the one on the O-24.

Press your seams open like this
on the face/hair combo fabric:)

with the drawn line on the seam line.
Now just sew it like you normally would!!

Now for O-25 (her shoes and stockings:)
Sew the fabrics together using
a 1/4" seam allowance
and press your seams open.
Also draw a straight line onto your
interfacing like the one on O-25.
One more marked line is required
for lining up:)
At the top of your traced line
on the interfacing...
measure down 1/2" and draw a
new sewing line across the top.
Now you can place onto your fabric
where it needs to go on the fabric seam
like the one that you see
here on the right.

Pin into place and sew!

Next is O-51 her hands and sleeves combo.
You can sew the hand fabric onto the
bottom of the fabric like this
and that will work fine...
Or if its easier you can cut two fabric
pieces that are as wide as the
blue fabric which is 3"
There is plenty of the Beach
Confetti Cotton from the 10" square
to do this if you want to.
Pictured here is 2 1/2" x 3"
if you want to do the same.

Remember to press seams open
regardless of either fabric
cut size that you choose.

Line up the fabrics and the bottom
of the traced interfacing and
pin into place for sewing!!!

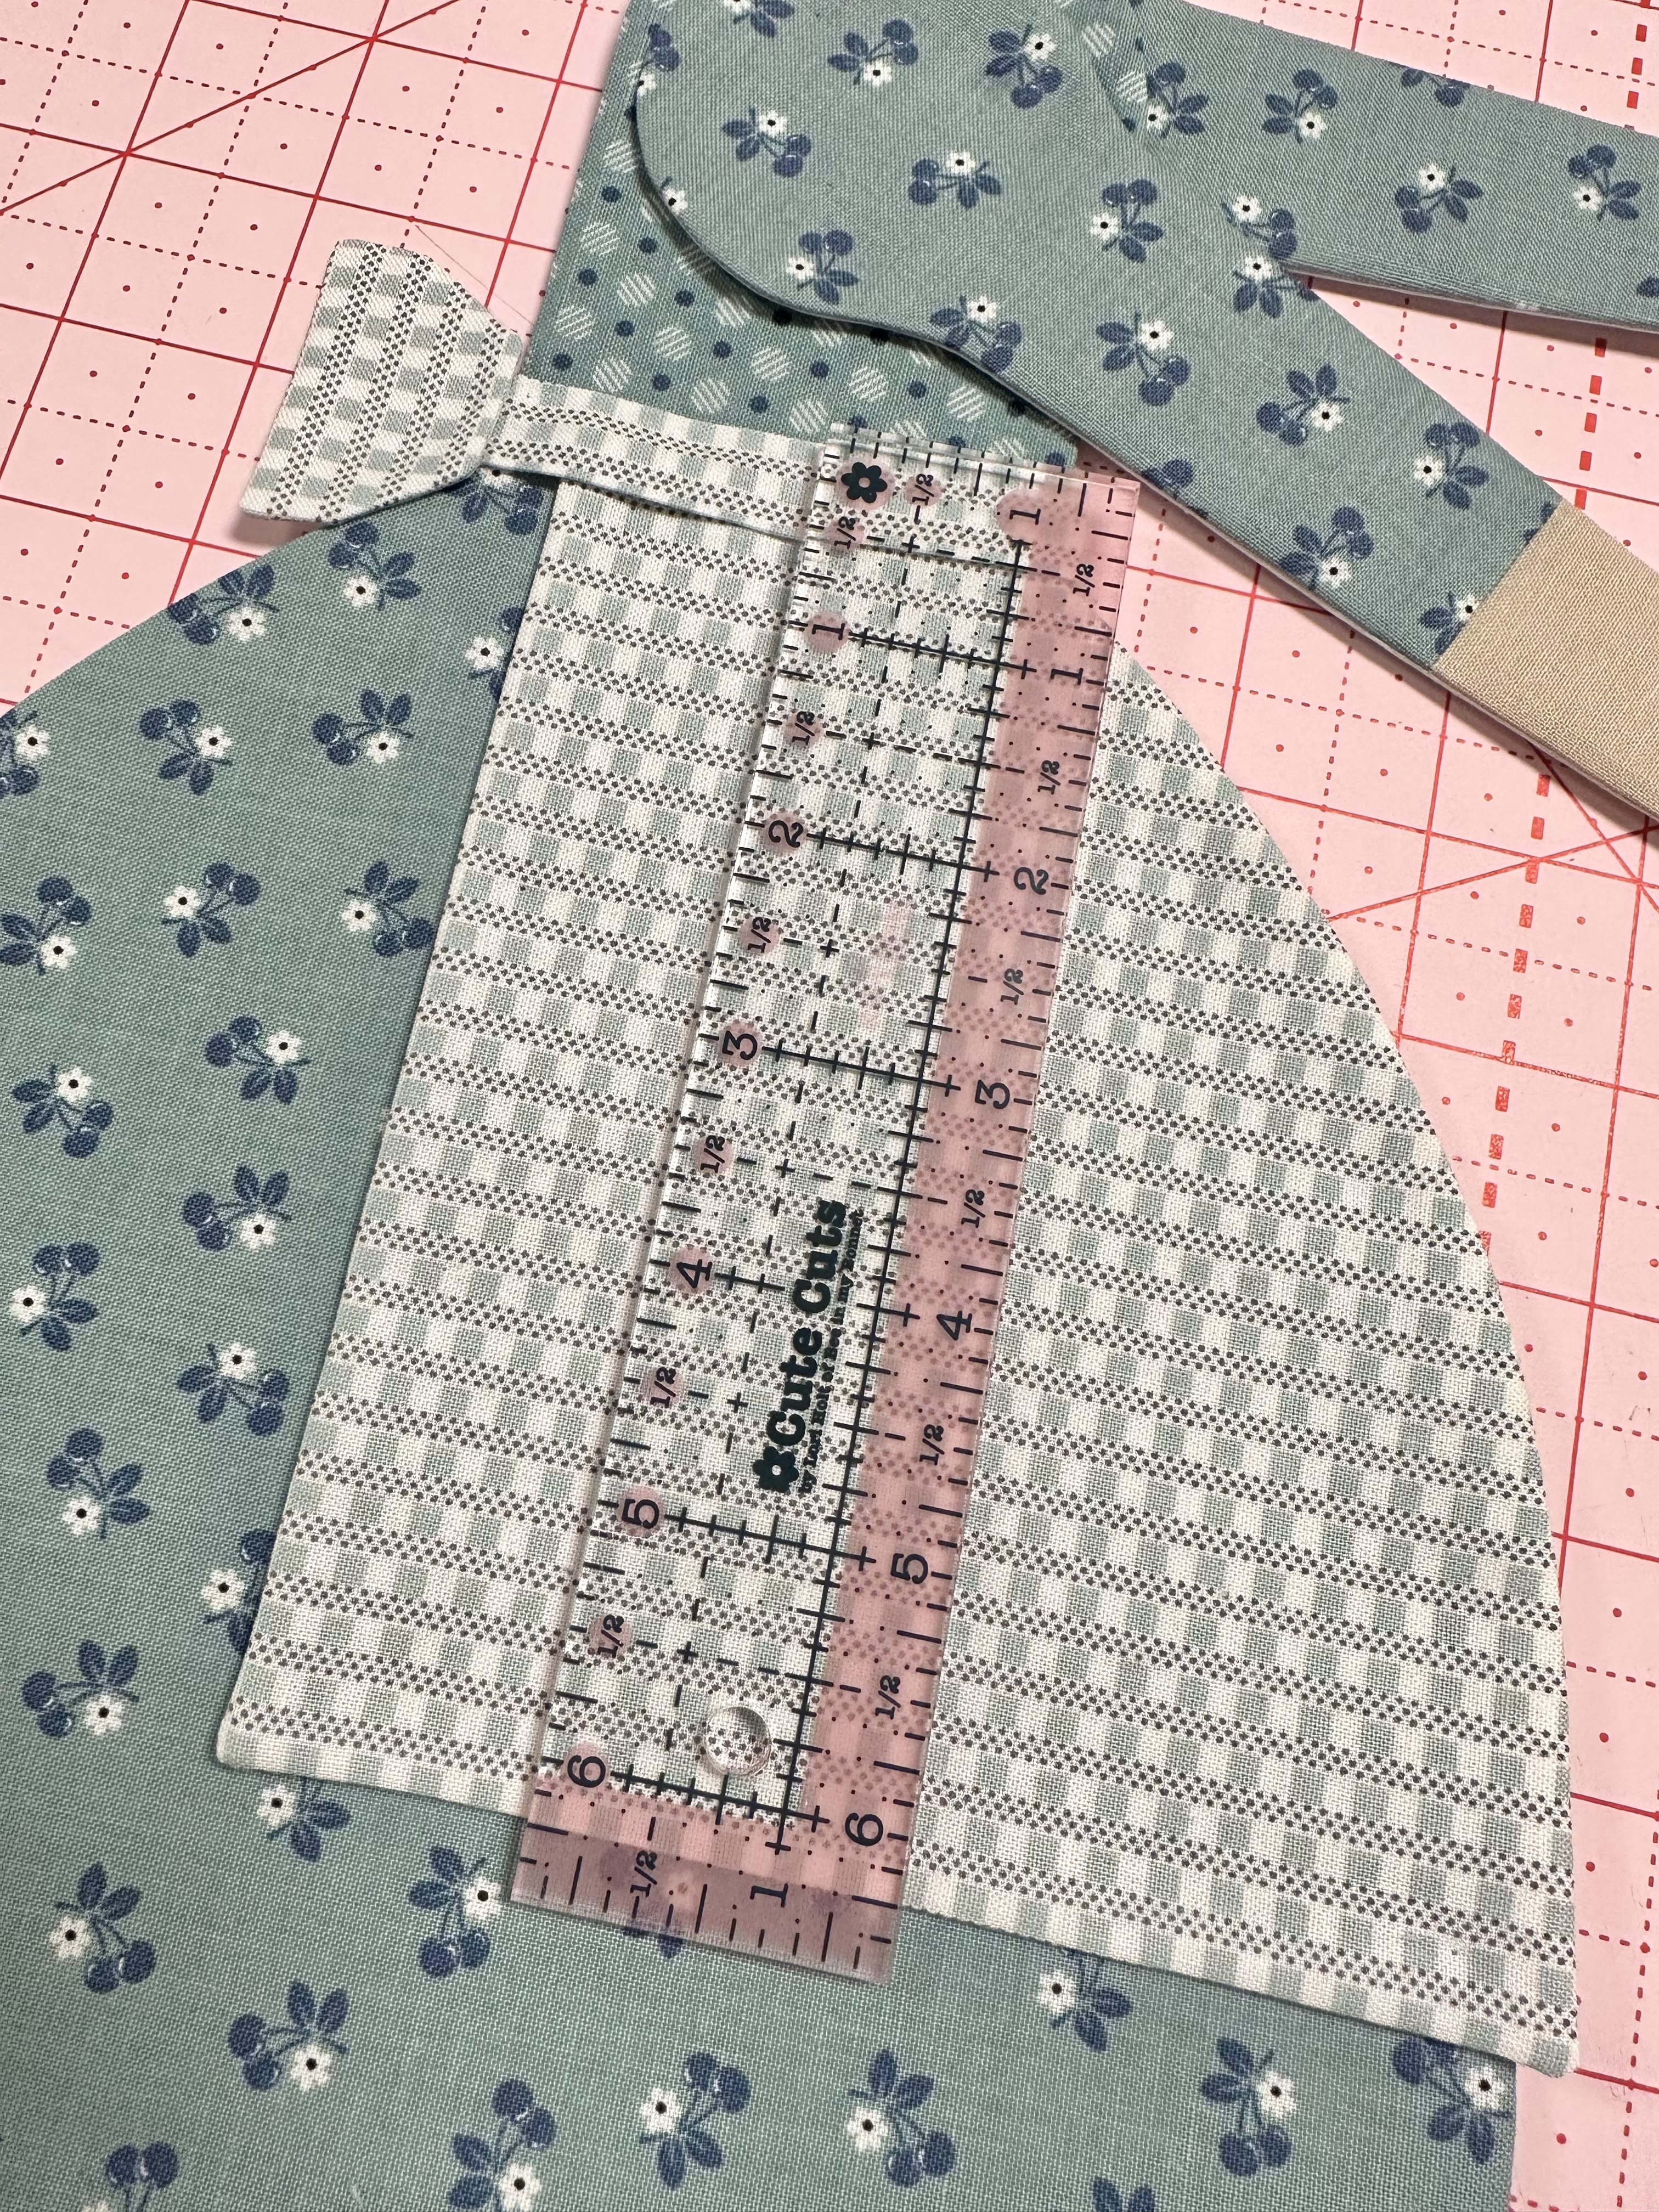
Okay the last piece for "specialty"
prepping is the Watering Can.
Measure 1" up from the bottom of fabric
and Sue Glue the 1/2" wide stripe.
Then measure 2 1/4" up from that stripe
and Sue Glue the 1/4" stripe.

Now pin into place and sew:)

Here are all of the shapes that need
cleavage and inner curve areas
clipped before they are turned...
and shaped and pressed.
Some of these cleavage areas are deep
so bee sure to use the seam roller
in these areas like I've talked about.

Here are the remaining shapes that need
no clipping all sewn and ready to go!
Let's go over to the work table
and glue some of them together
in preparation for applique:)

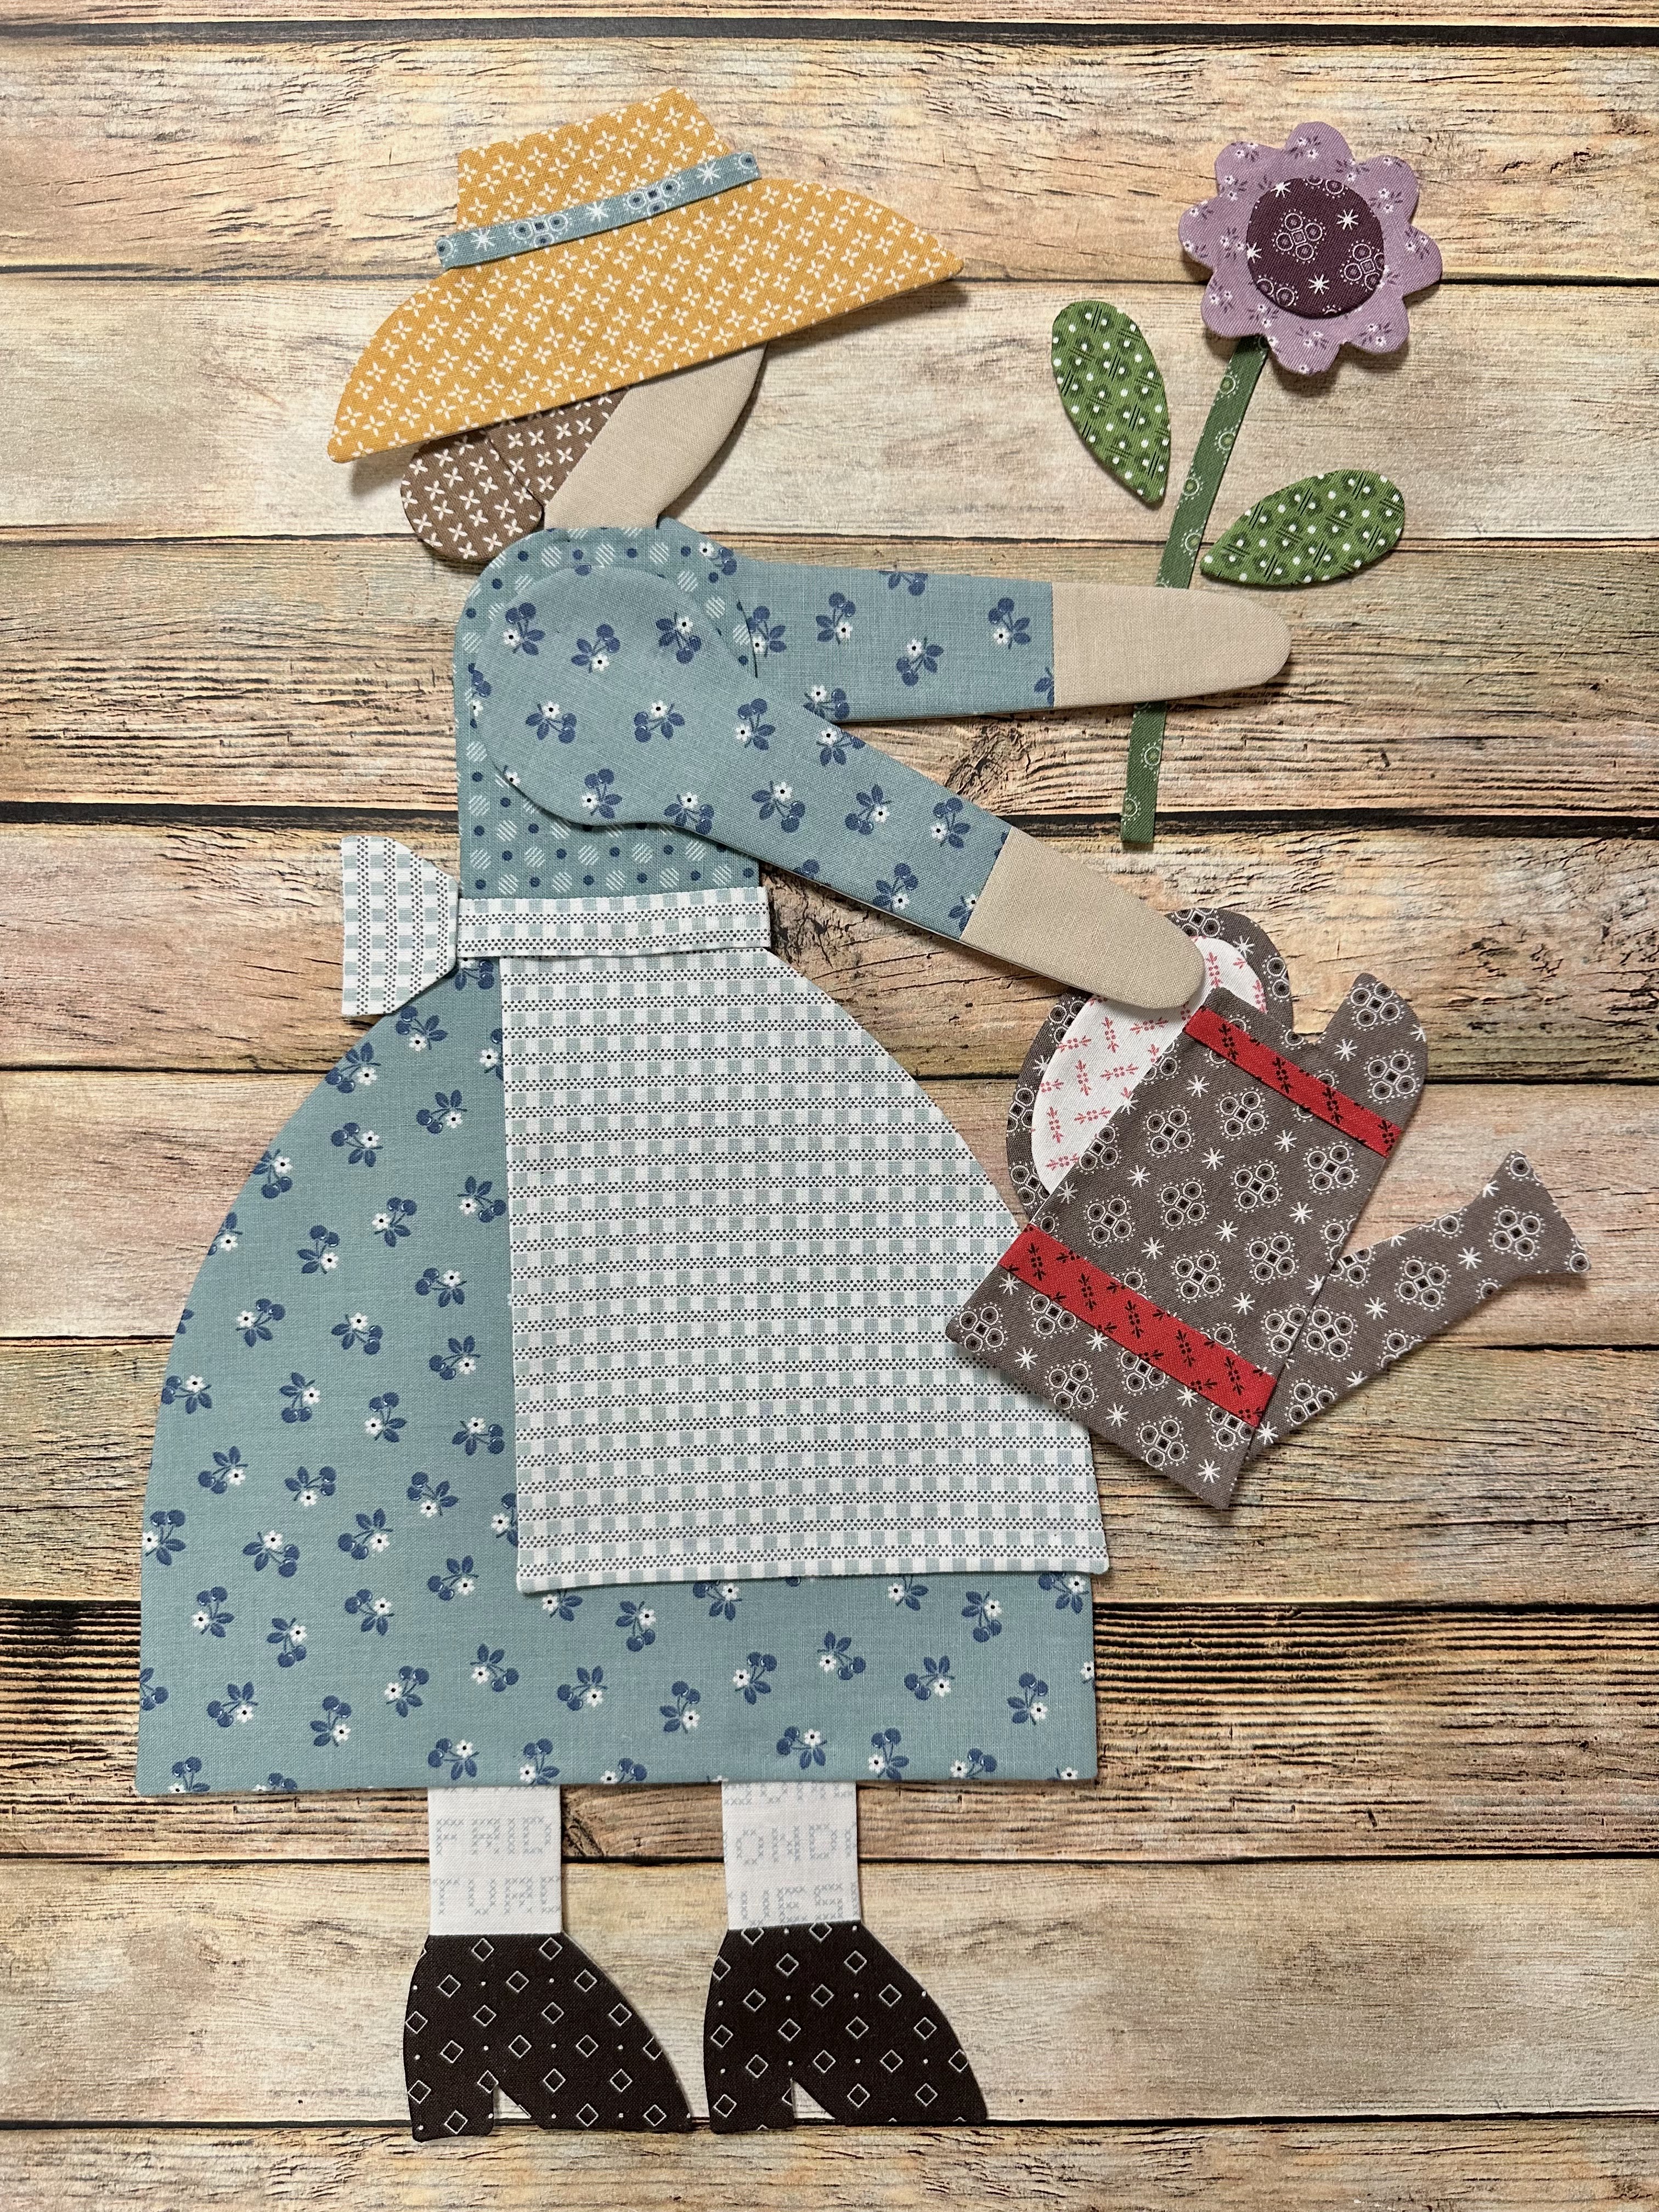
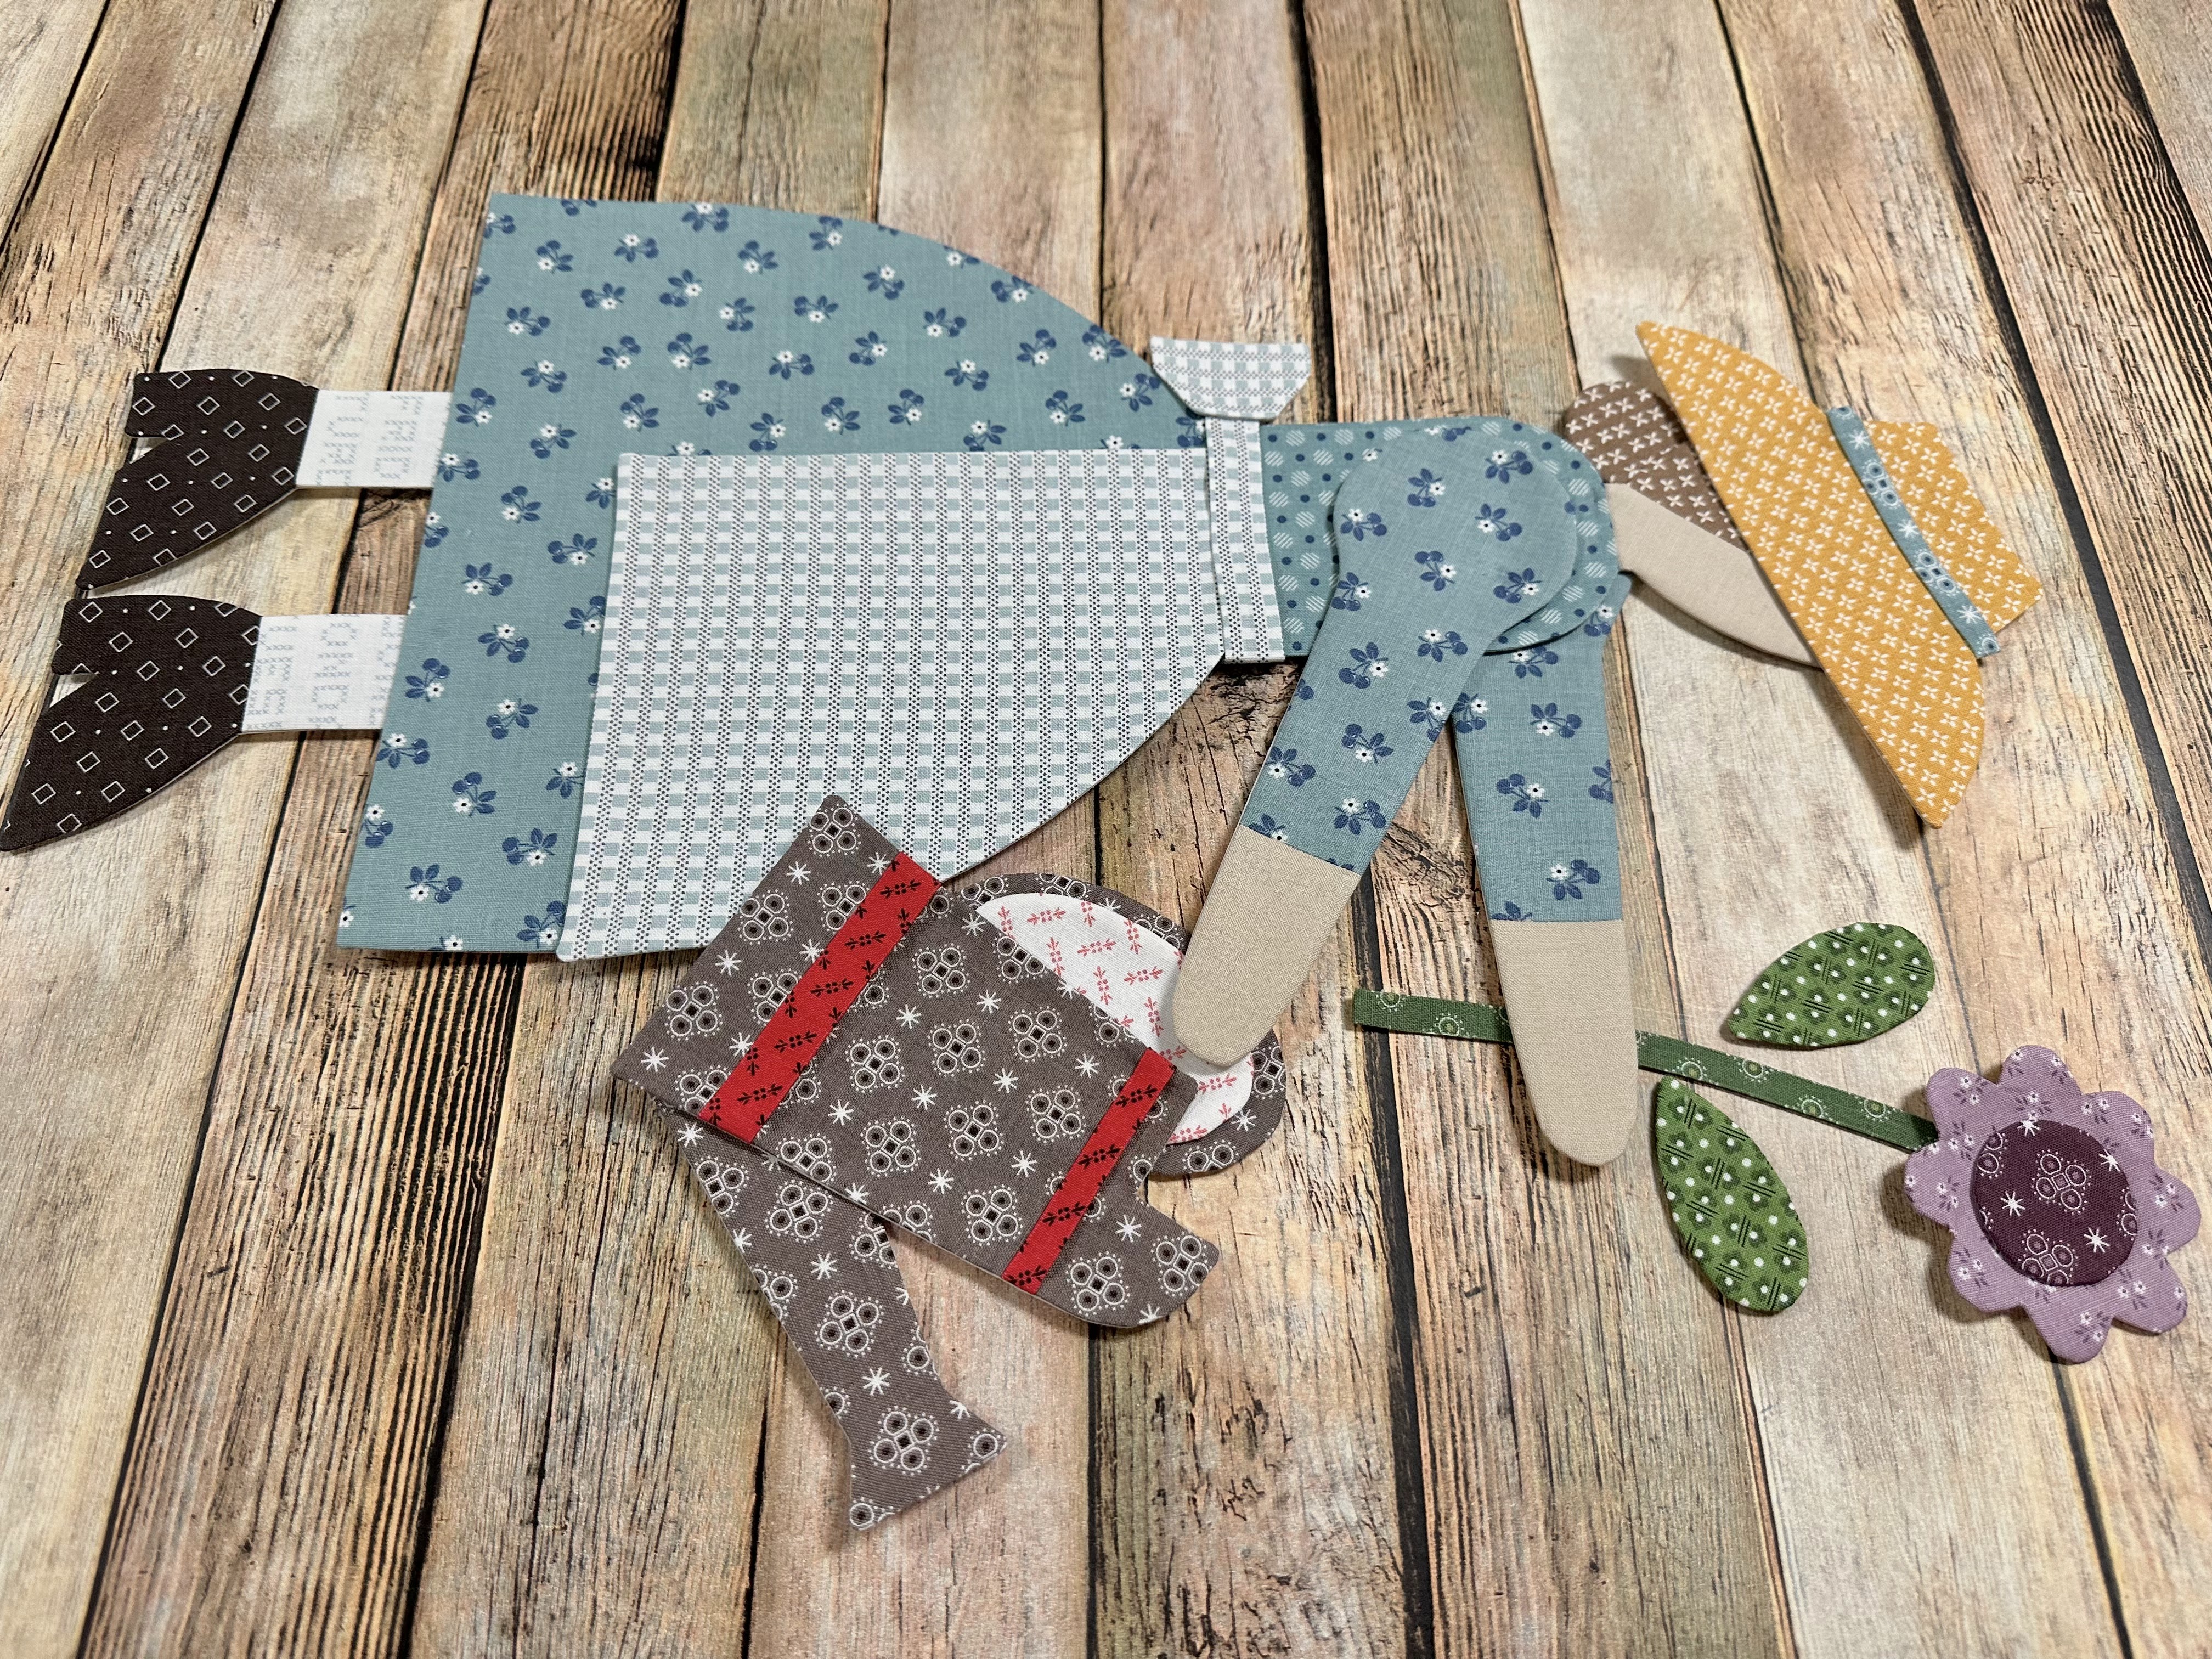
Wowzers looks at all these shapes!!!
It reminds me of playing paper dolls:)
Of course...
we will not be able to applique
the Garden Girl onto the Soil/Grass
until that section of the quilt is
sewn together but we can assemble
her and the watering can and Sue Glue
them in preparation:)
First I glued the hat band...
the two ovals for the watering can handle
and the flower center onto the flower.

Then I glued the watering can together.
Pictured are the measurements that
may help you when you glue yours!

Watering can is fun and done:)

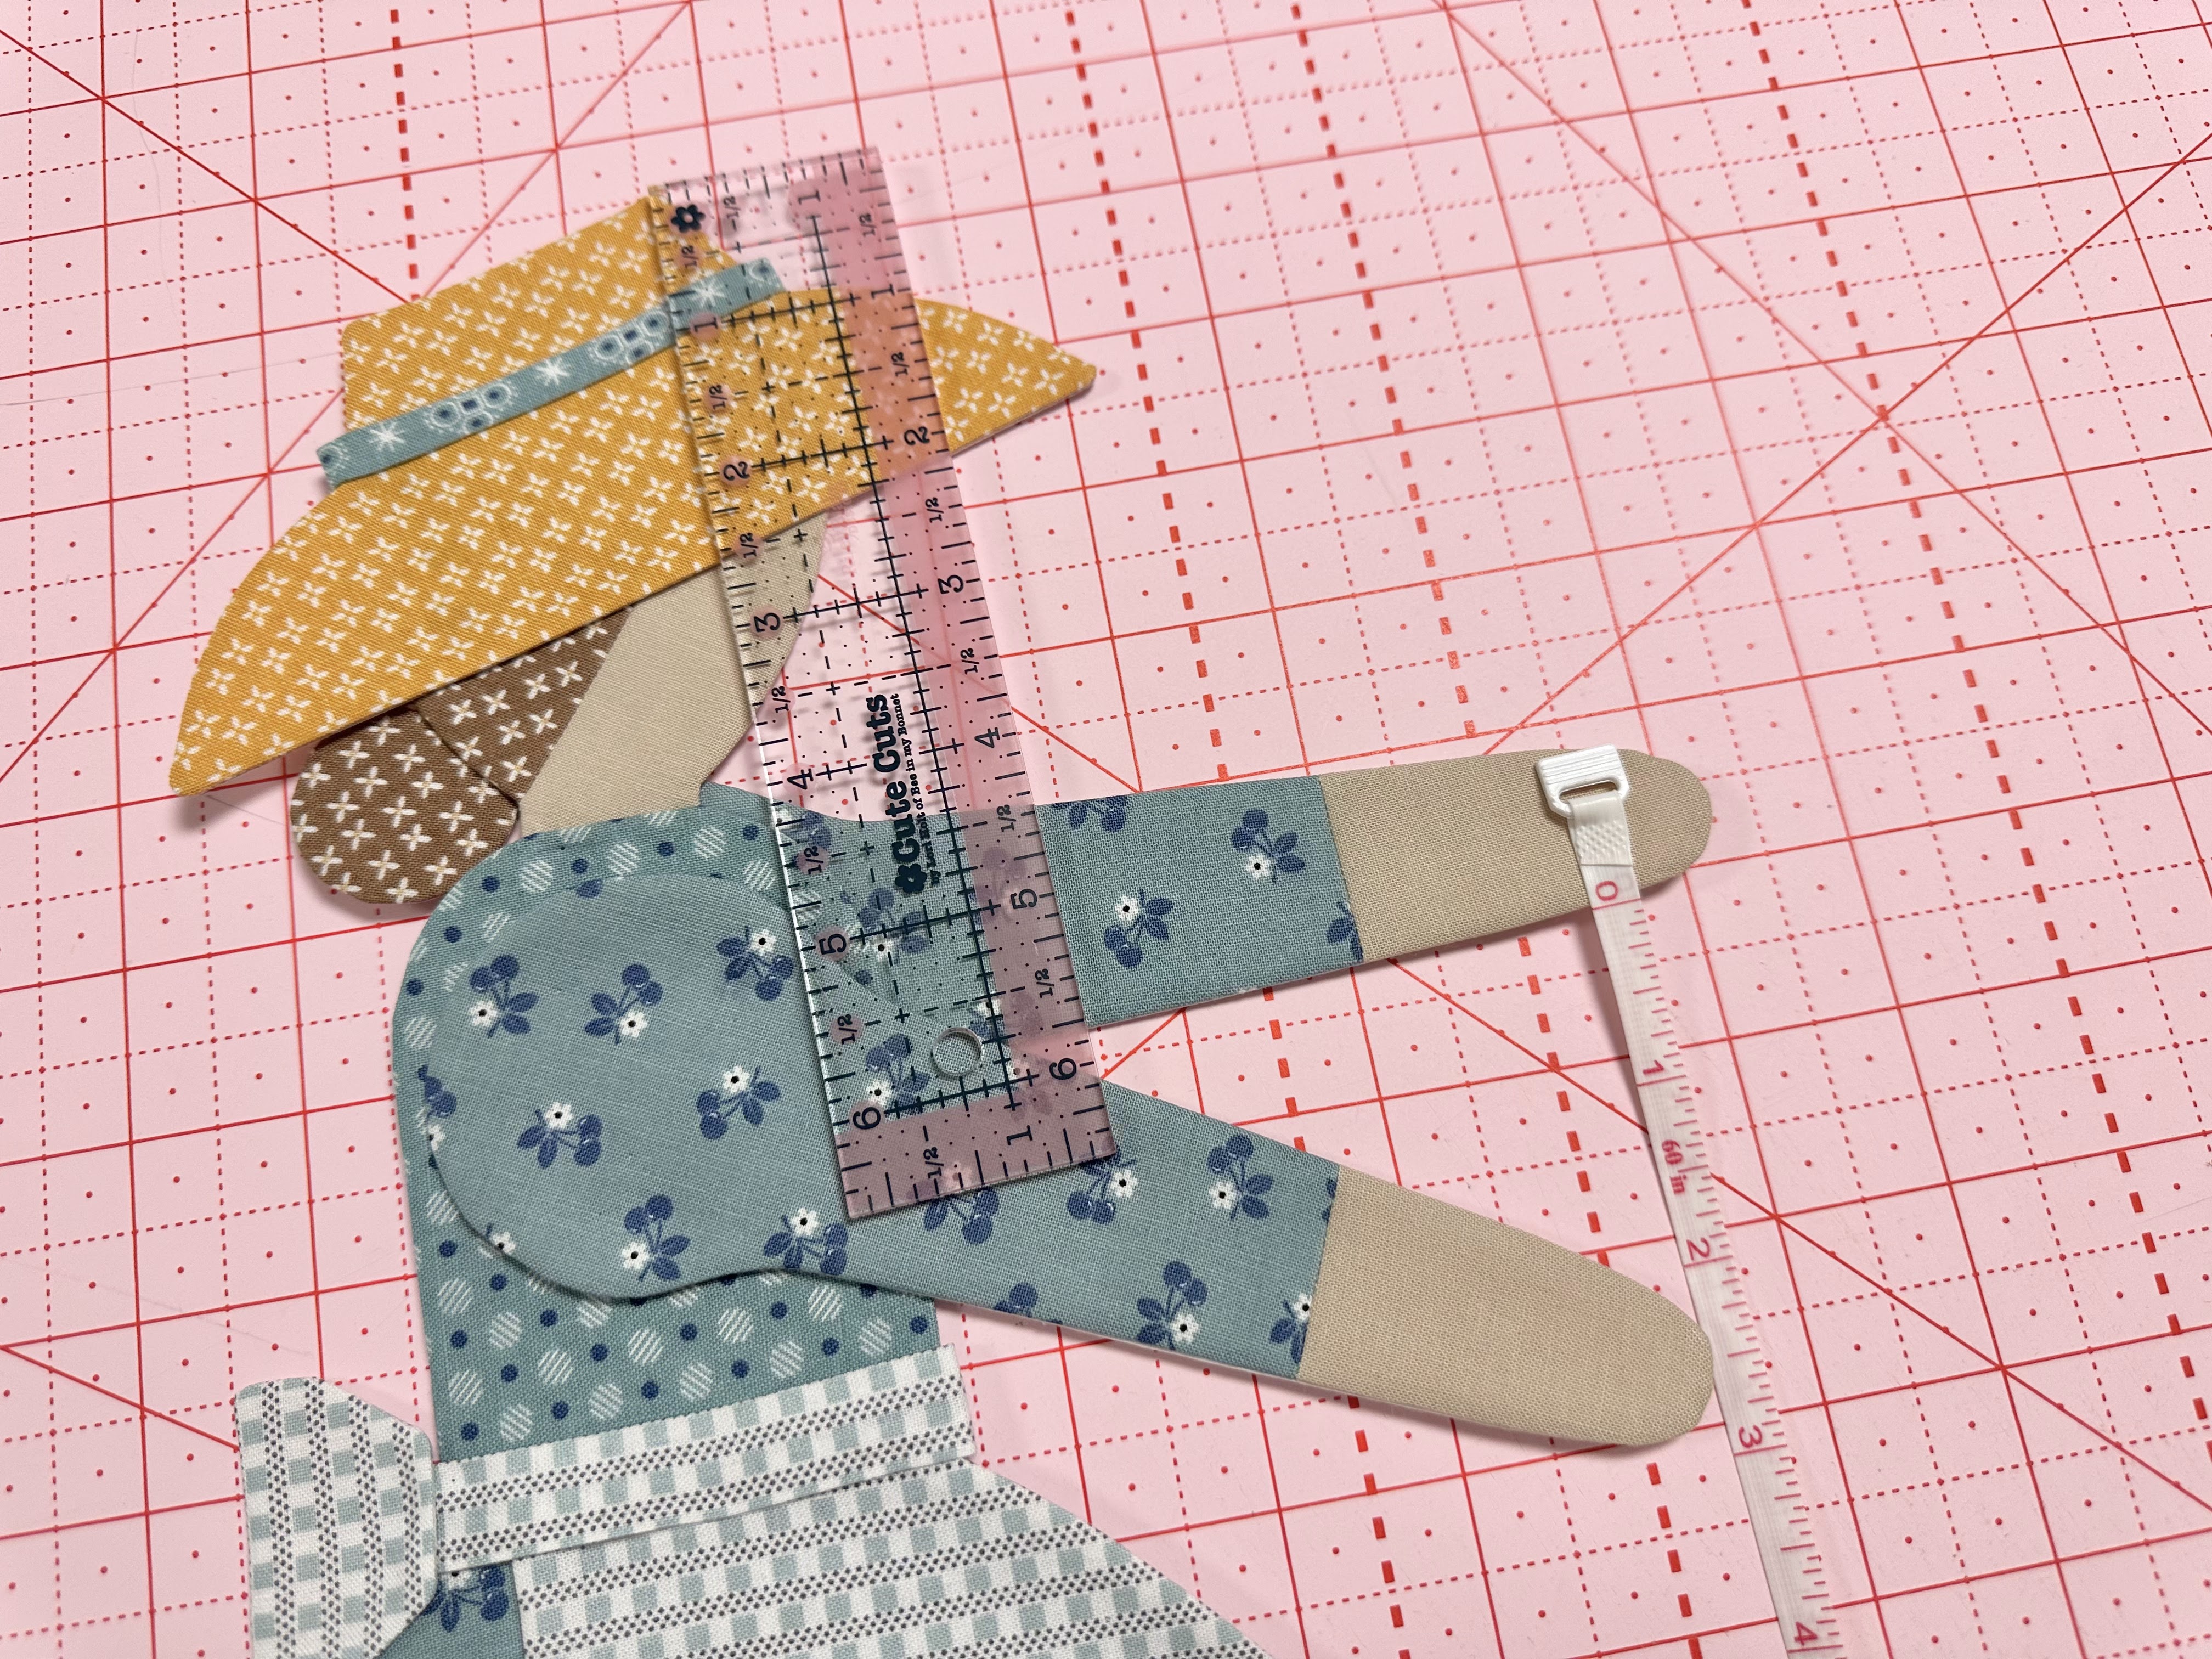
I assembled my Garden Girl
until she measured 18 3/4" tall.
I took a bunch of photos with a
bunch of measurements so that you can
assemble your Garden Girl too!

I started measuring for you from
the bottom up starting with her shoes:)
I hope the following photos help!


Okay...back to the final measurement
photo where she is 18 3/4" tall:)

I'm not going to be able to
glue the flower together or the
watering can under her hand because
I want to wait for those until
it's actually time to applique
and I can see how they look for placement
next to the Hollyhocks Block.
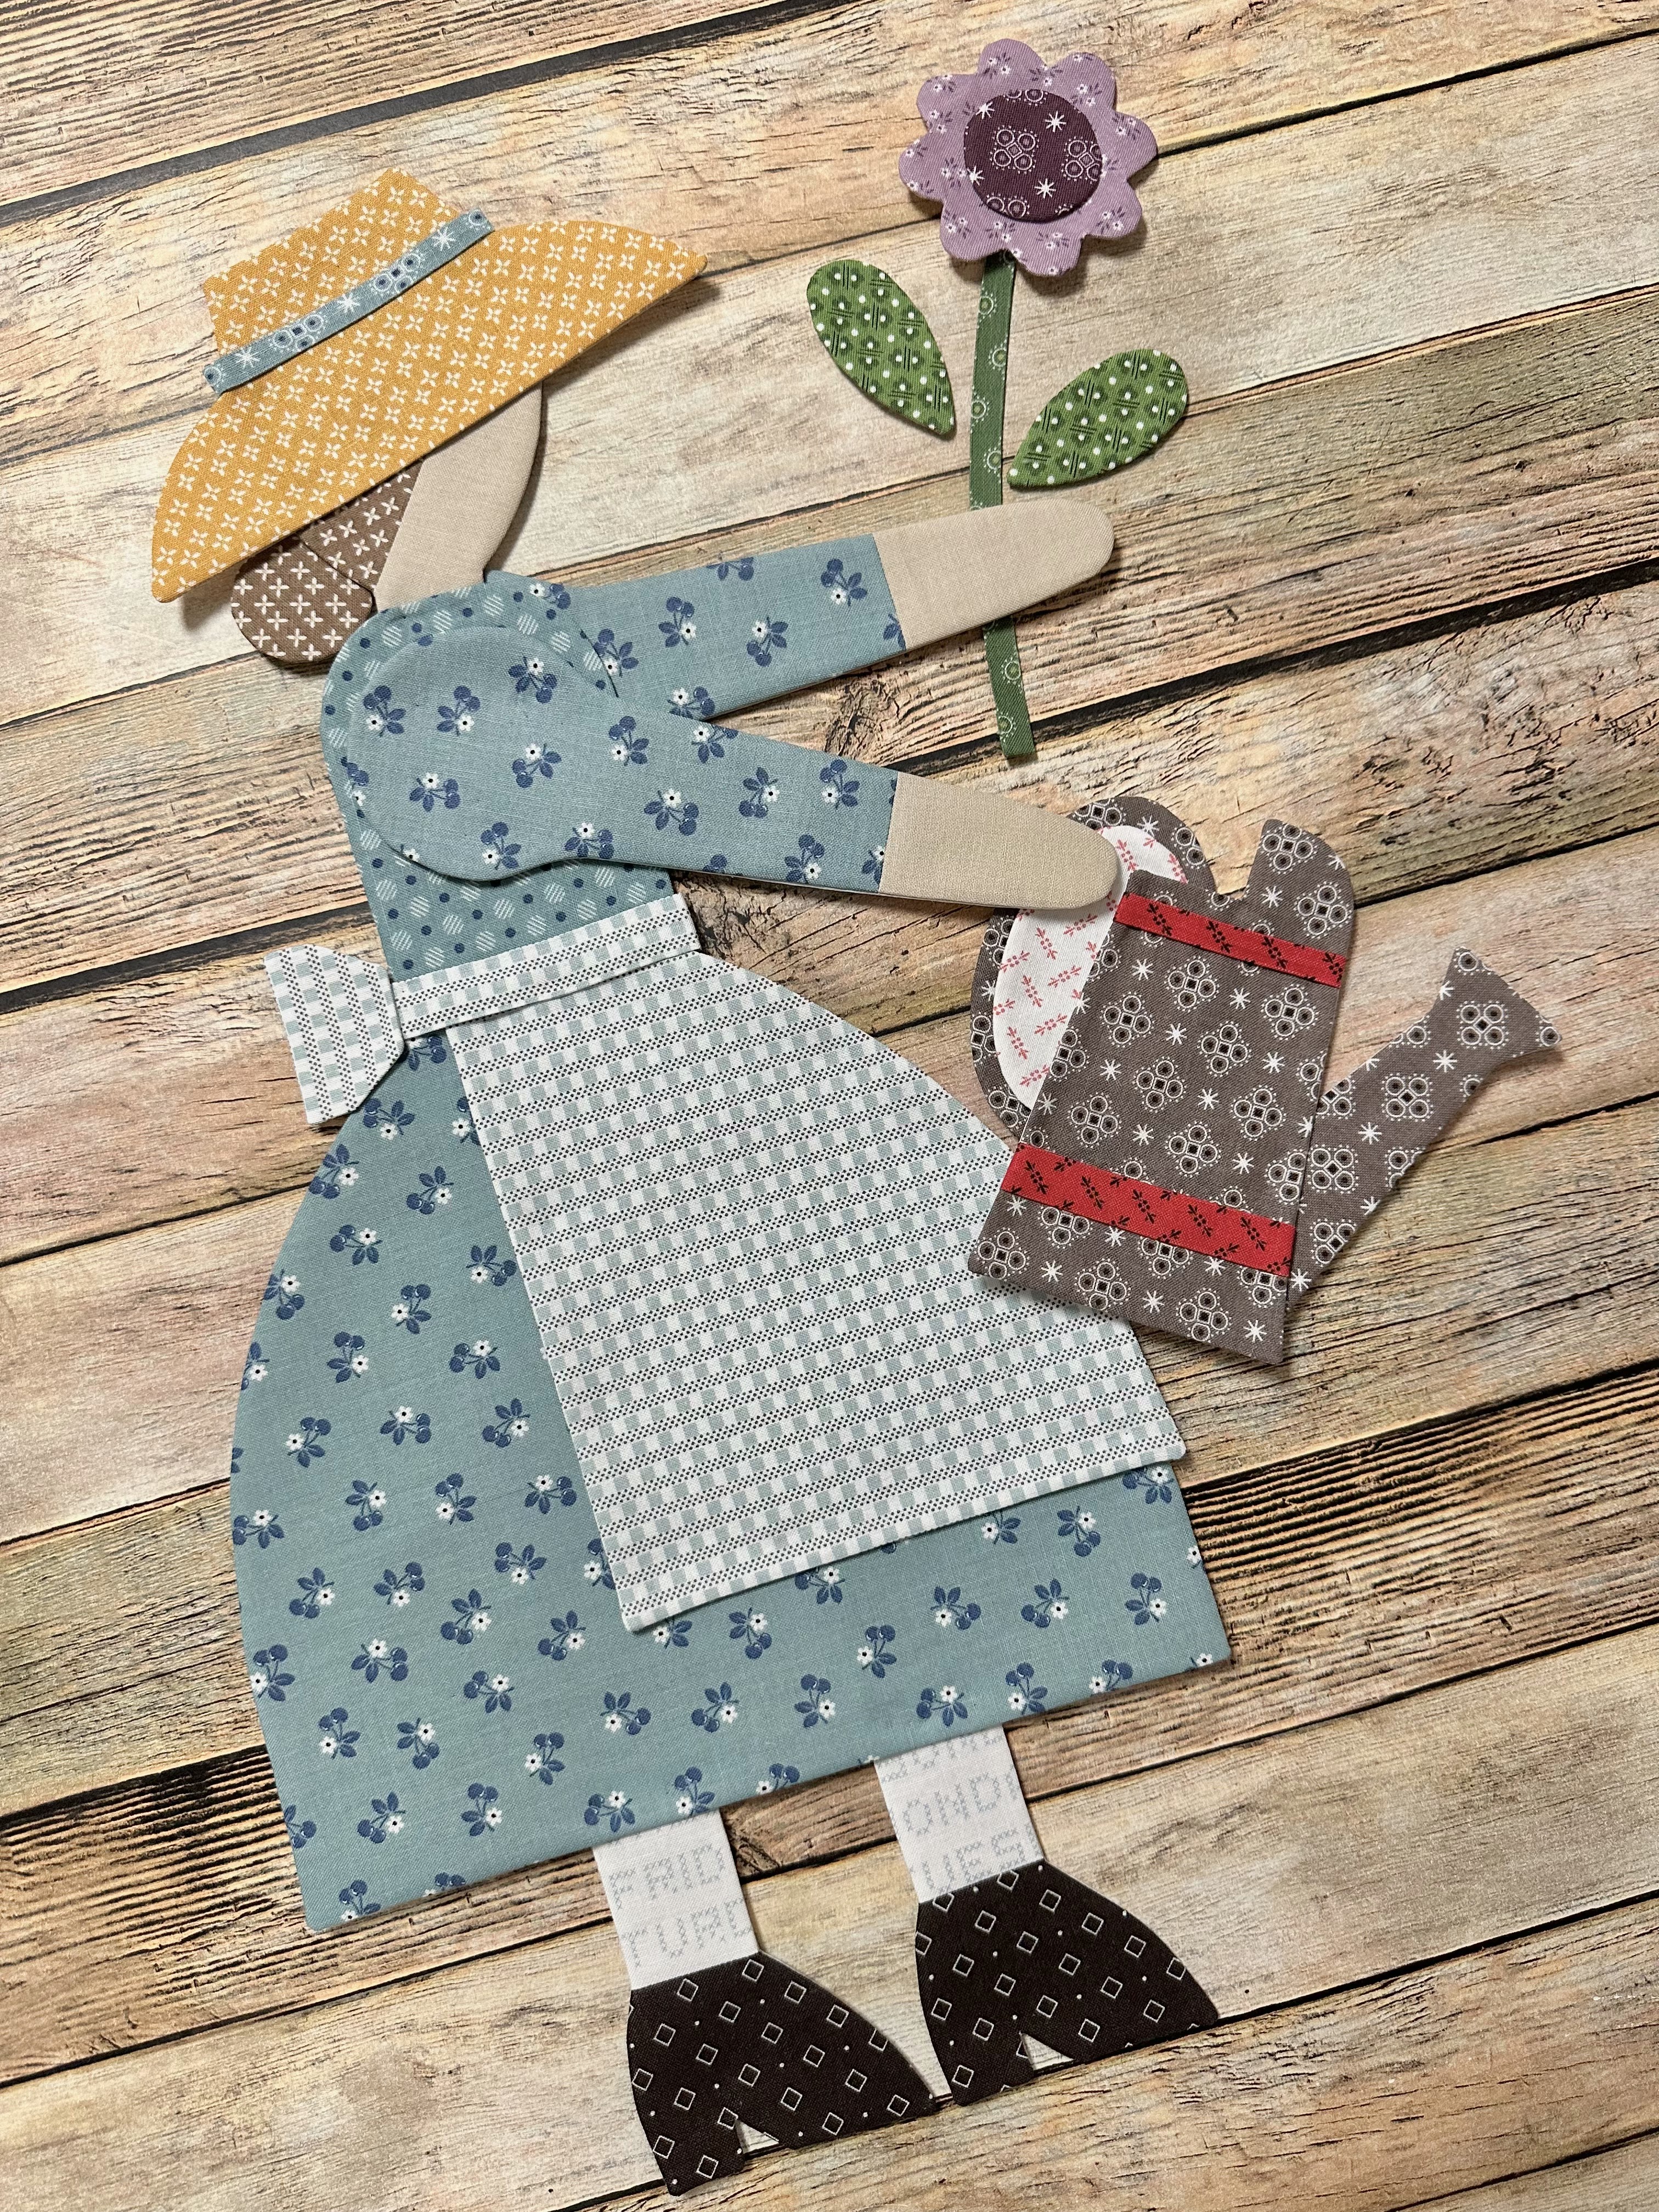
But I just had to place them in her
hands to take these photos for you.

If you are sewing 1/4" Cute Little Buttons
onto to her shoes you could do it now
or after applique...
or after quilting...
that depends on you and/or your quilter!

Sideways view...

Upside down...
Other sideways view:)

Isn't she cute???...I just love her:)
Take note that when it's time
to applique her
(after we sew the sections
above the grass all together
and then sew them to the grass)
That 1" of the bottom of her dress
as well as her stockings and shoes
will overlap onto the soil block.
She'll look adorable watering
her hollyhocks!!!

That's it for this week!!
I hope that you have fun playing
paper dolls and prepping
your Garden Girl for applique:)
Thanks so much for joining me for the
Calico Garden Sew Along
I'll meet you right back here
on my blog next week for the
Bee Skep Block!
Until then...
happy Calico Garden sewing!!
xx
Lori

1 comment:
Thank you
Post a Comment