Thursday, April 11, 2019

NEW Book!!!...Introducing FARM GIRL VINTAGE 2!!


I am sew excited because
 it's time that I can finally
 announce what all of the
 "secret sewing" 
that has been going on is all about!

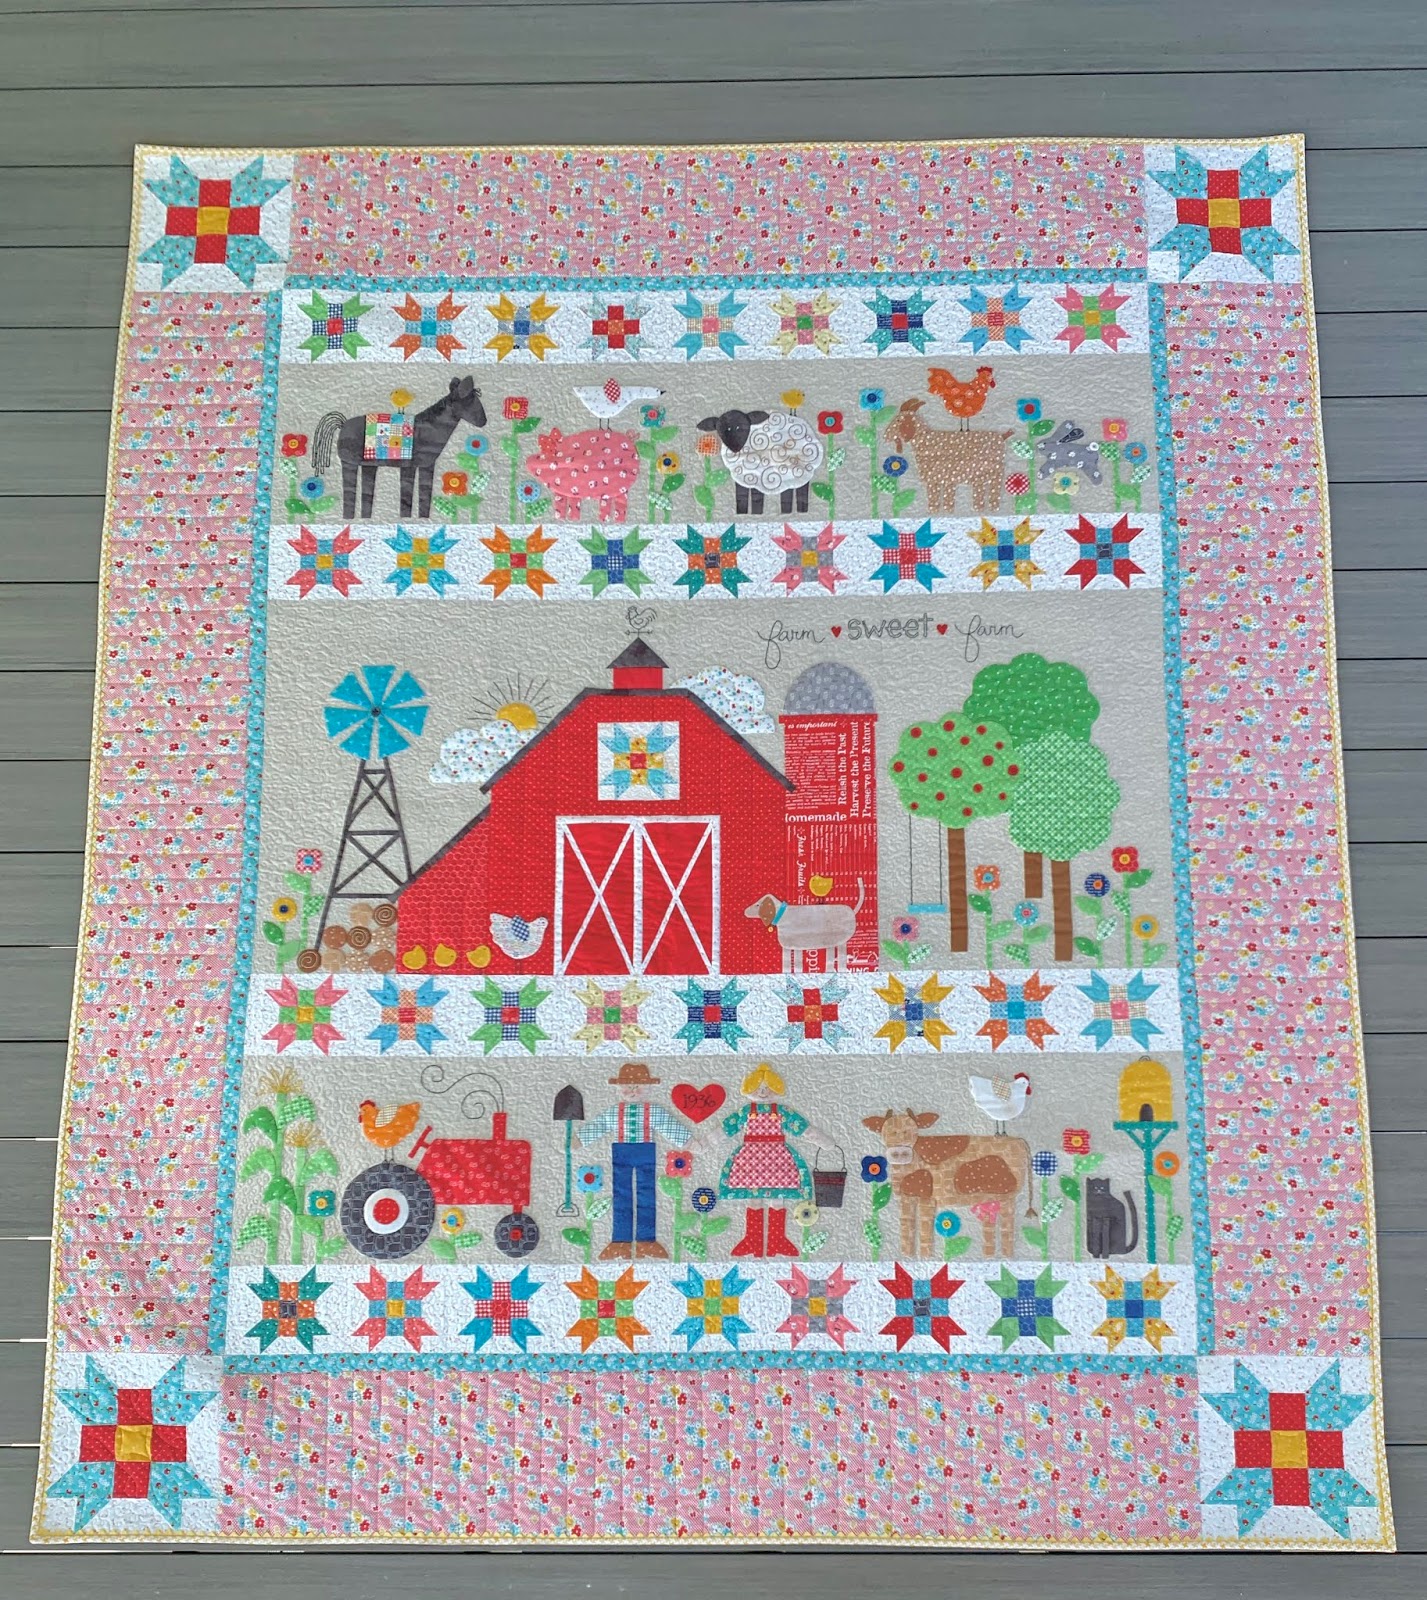
Introducing my next book

If you want to see all of the 
quilts and projects inside my new book


It's a perfect companion to
 my first 

When I did this first book 
I had so much fun with it 
and I knew right then and there 
that I would eventually do 
another one when the timing was right.


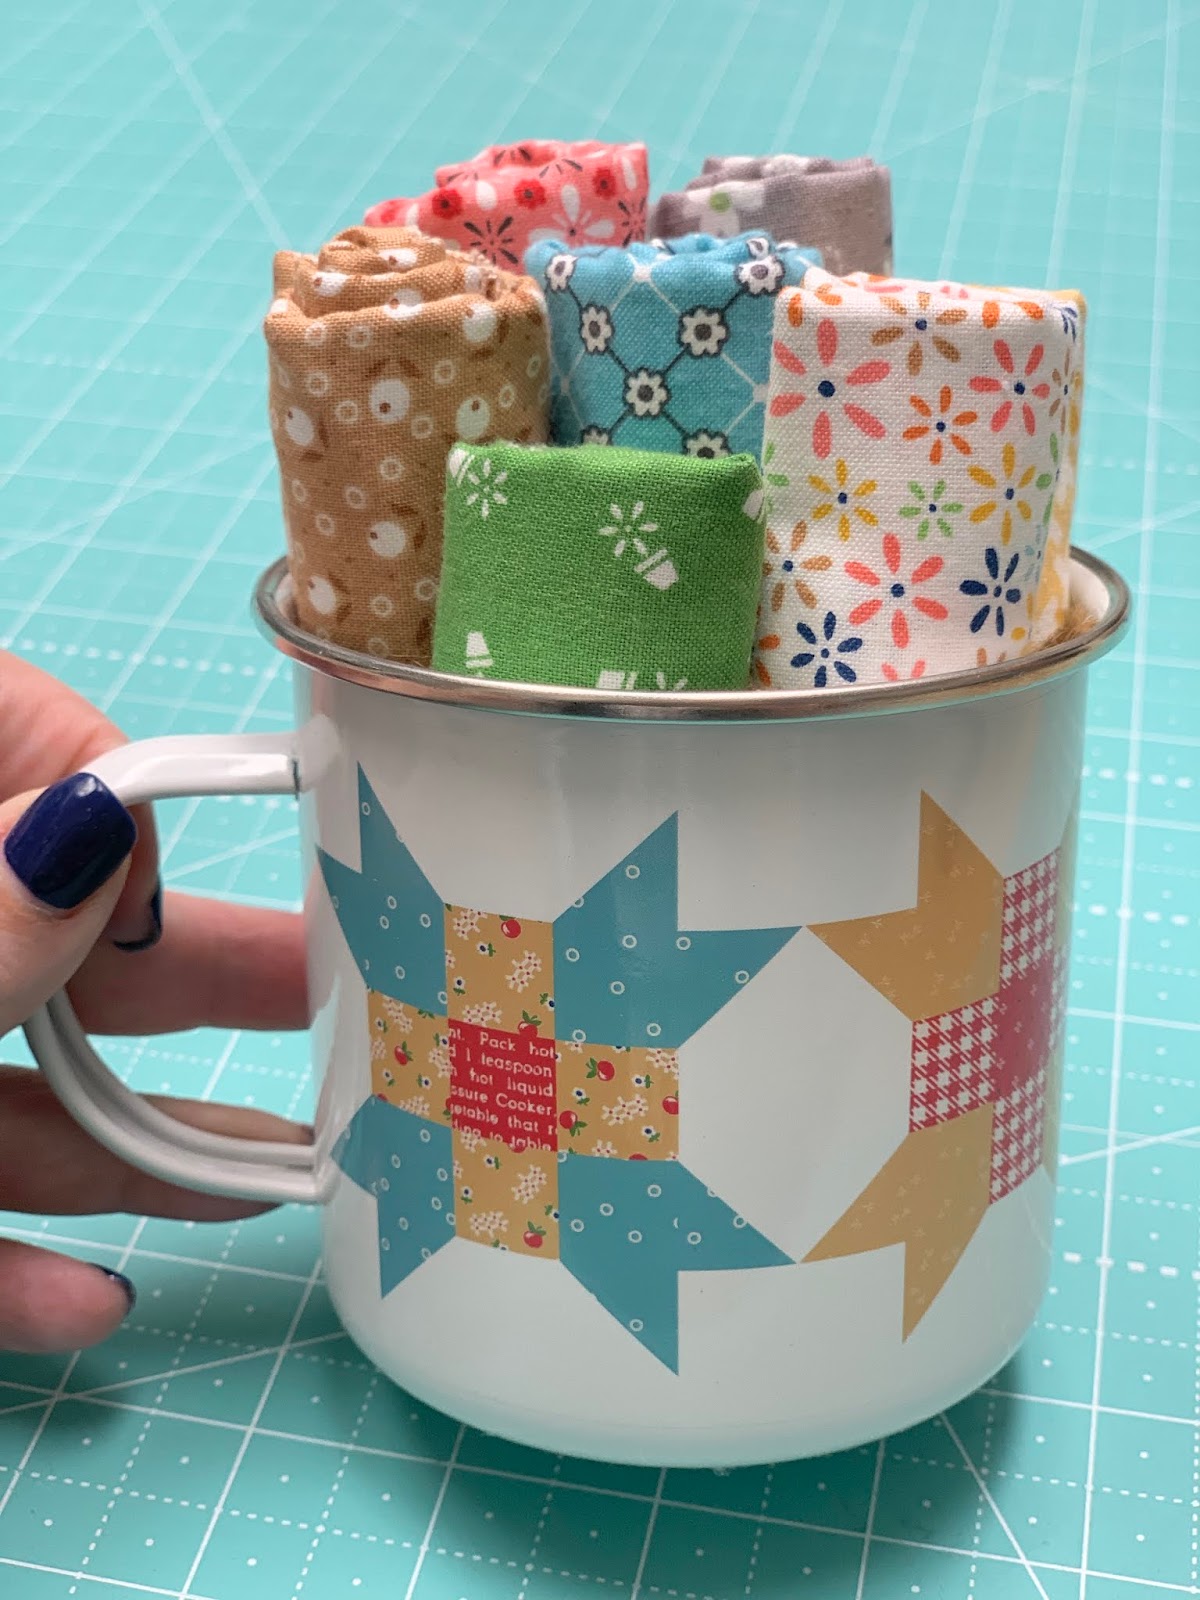
One of the things that I wanted to do
 for it was to design a fabric 
collection specifically for the book 
and so now you know another reason 
for my current fabric collection
 Farm Girl Vintage


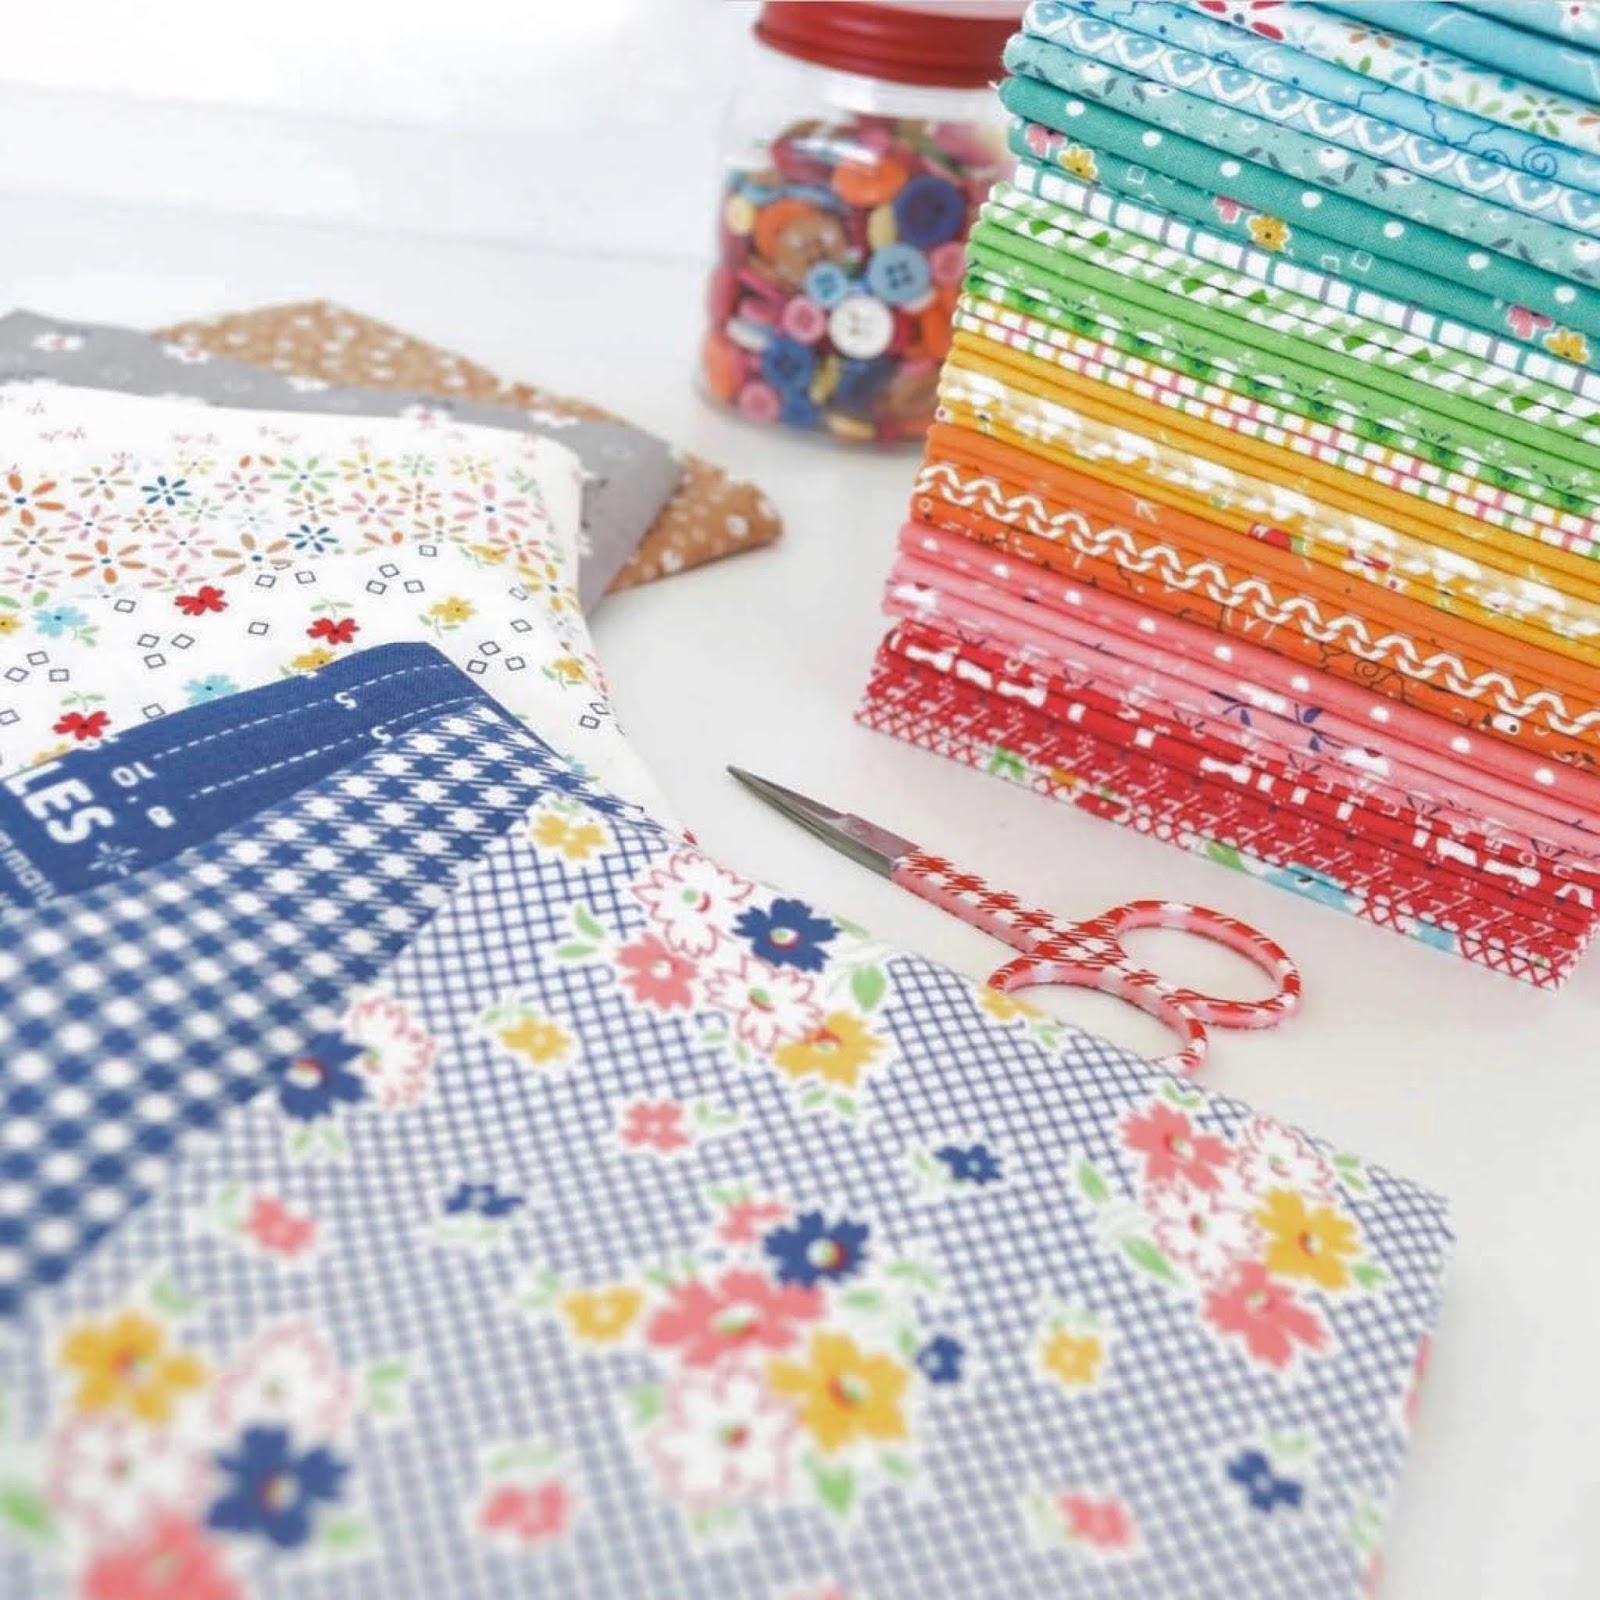
I made sure that there is
 a wide variety of prints...


In many of my happy vintage colors...


That reminded me of fabrics 
my grandma and her sisters
 made their quilts from.


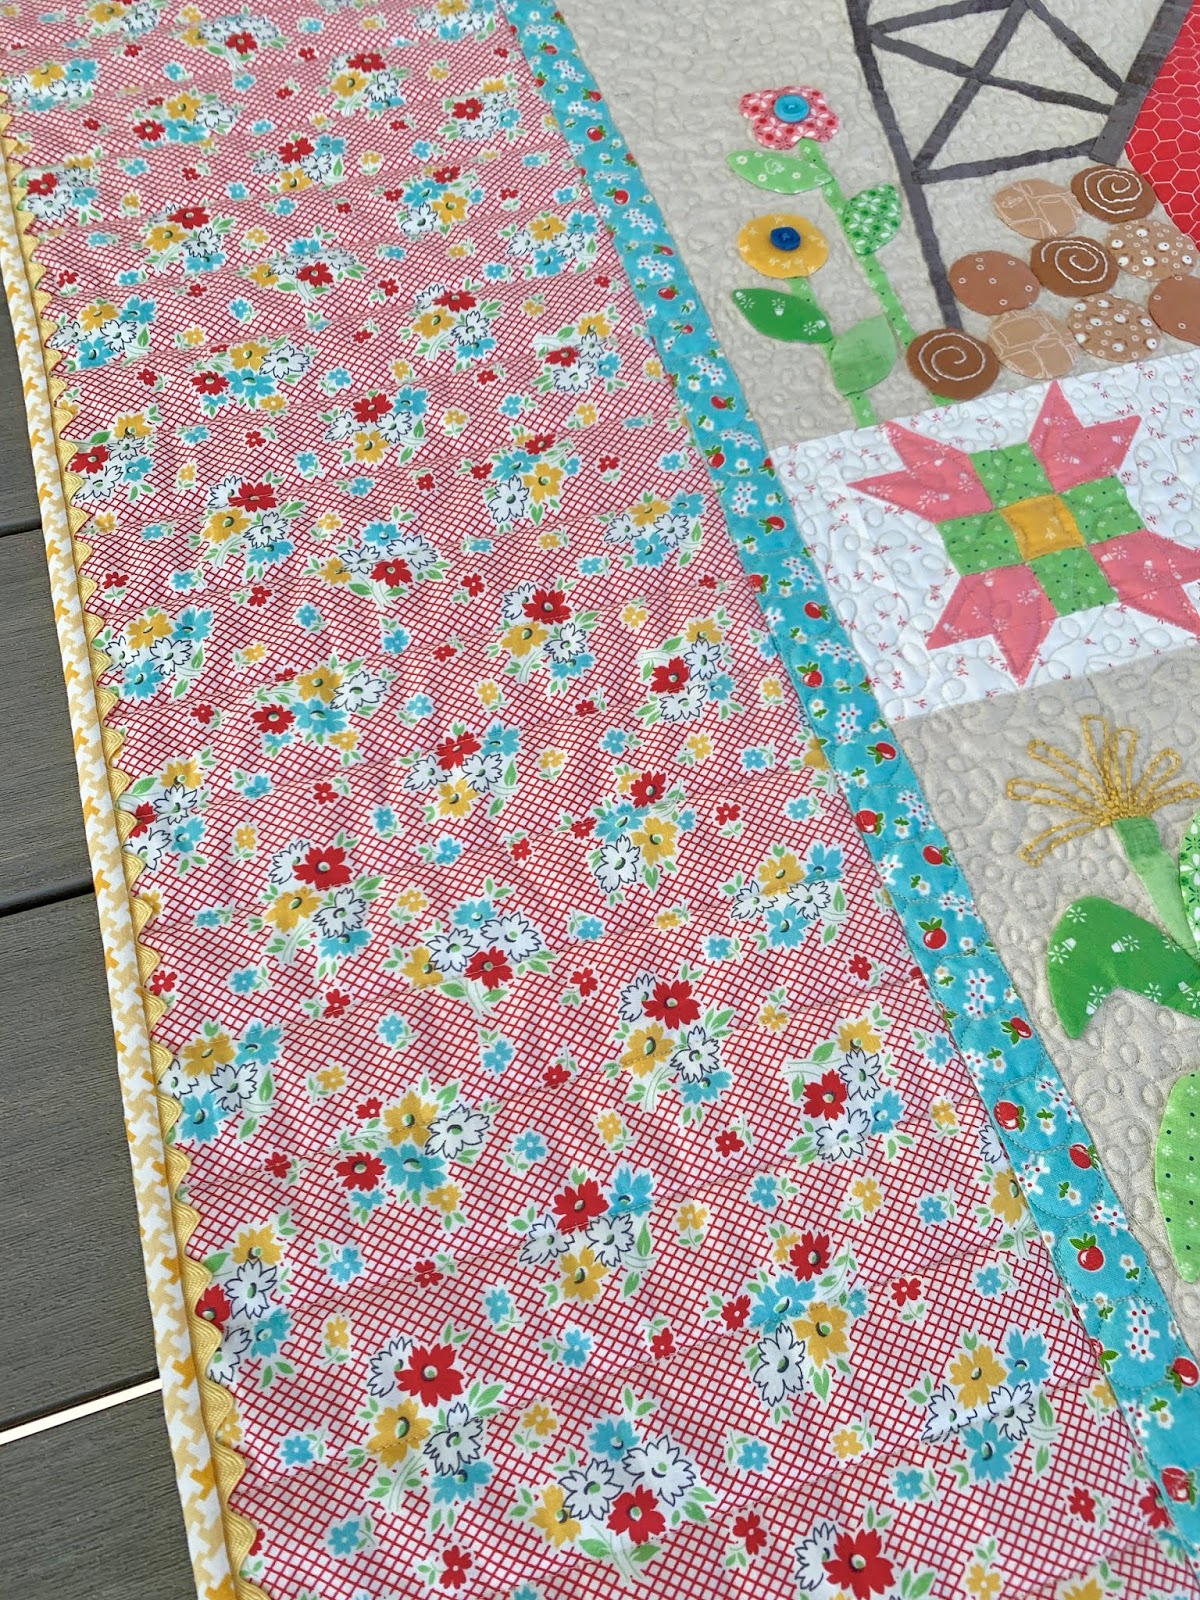
I love this collection and I can
 tell you that I have used it for
 literally every project in the book...


And I've used my 
Bee Backgrounds
 prints throughout as well.


A little info about the book...
will be spiral bound 
just like my other books.

It has over 200 pages and 
will be released in September.
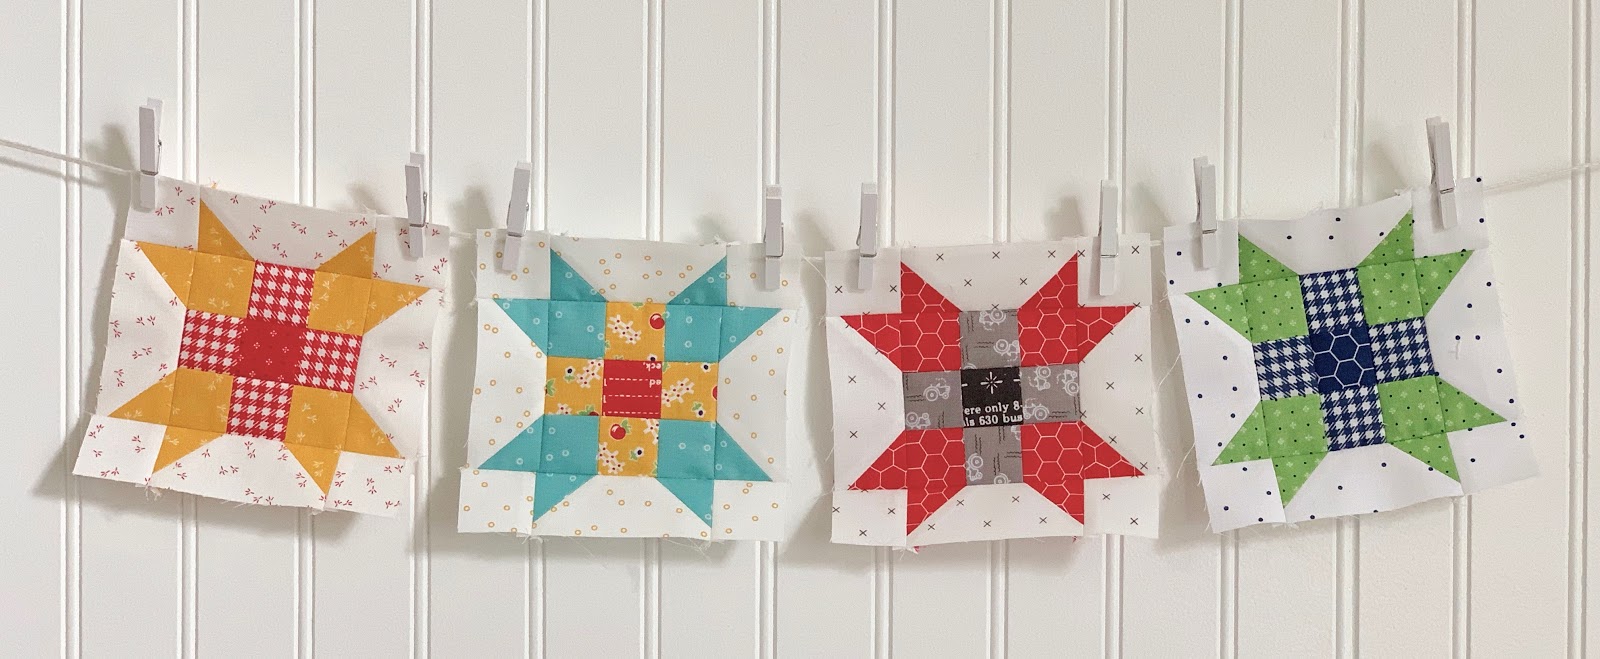
There are 45 Farm Girl Blocks 
in the book along with several 
other projects and new 
Mix and Match settings 
for you to play with!

The blocks also come in two sizes...
6" and 12" and can be used 
with all of my other books 
with the same size blocks:)

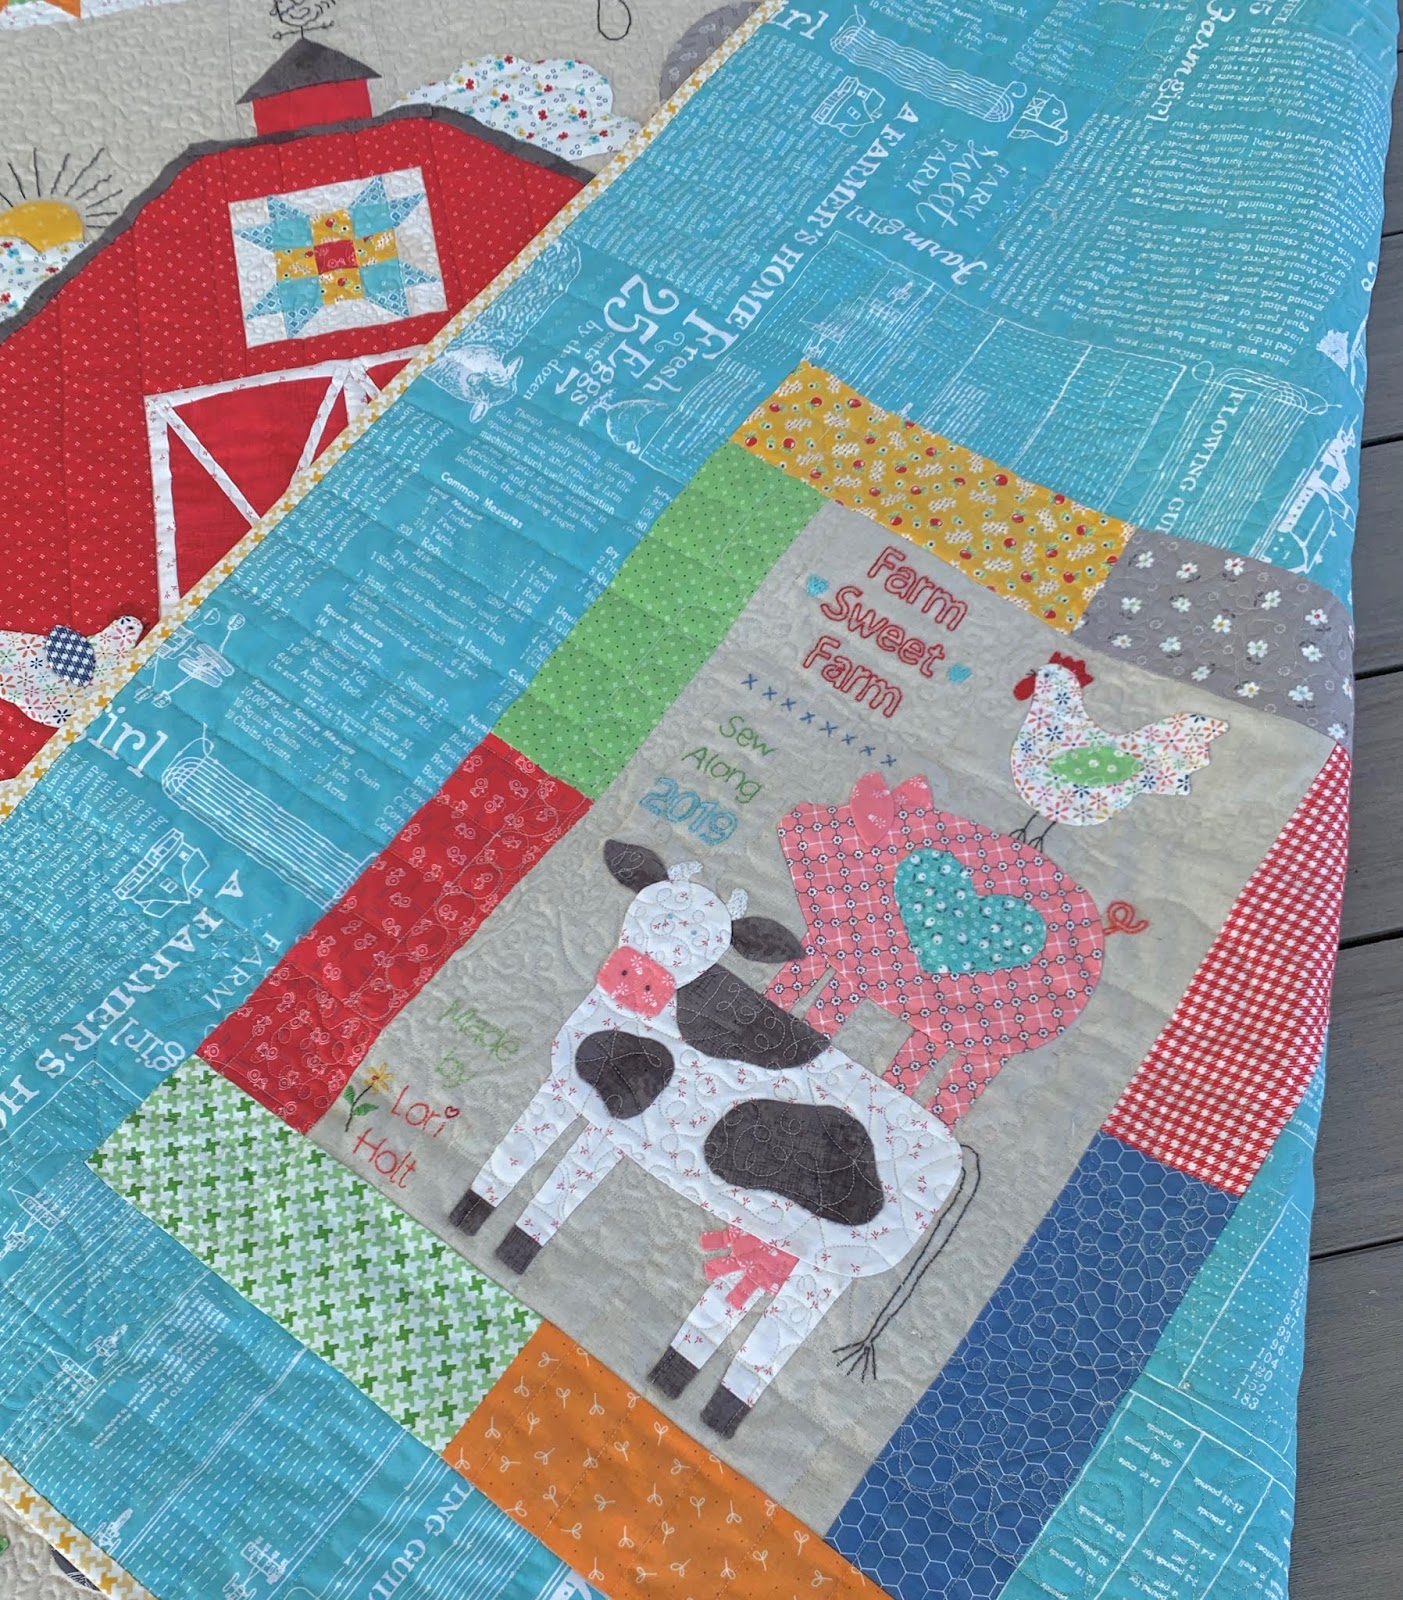
There are 50 blocks in the cover quilt
 and because there are 45 in the book 
I doubled up on five of them.

 I did that for this simple reason...
  I am hoping for the sew along 
that you will choose 5 blocks 
from my first book 
to pop into those 5 spots!

YES!! 
I said sew along:)

There will be an epic sew along 
and we will be bringing back
YeeHaw!!
You can pre-order your copy 
from the publishers if 
you would like by clicking 


Okay...
with all that being said 
I know today is Thursday and 
I have no vintage block for you:(

The photography for the book 
is taking place here in my home
 just like all or my other books...
and that will be in a few weeks.

As you can imagine...
I am super duper busy still sewing
 and getting everything ready for 
Kimberly and the girls to get here 
so I will have to skip a few 
Vintage Block Along 
posts until photography is over.

I pinky promise that the
will resume immediately afterwards!


Thanks so much in advance
 for your understanding ...
I appreciate all of your kindness 
and support that you always give to me
 and my designing schedule! 
In the meantime I will 
keep in touch with you via
and let you know everything that is
 going on here and show you pictures 
of the photo shoot as well!
Chat with you later...
xx
Lori


Thursday, April 4, 2019

Vintage Block Along - Week 16 - Farmers Daughter Block!


Hello again!
Today is Thursday and that
 means that it's time for 
another episode of the 
Vintage Block Along


I'm sharing another block with you
 from my Grandma's pattern basket:)


I'm using Farm Girl Vintage fabric 
for my vintage blocks and 
all of the blocks will 
eventually become a quilt ...
that is...
 when the Vintage Block Along is over:)

So far I don't see the end 
in sight yet lol sew...
 let's just keep making vintage blocks
 until I feel it's time to
 put them all together!


I'm also using my 
Bee Backgrounds Collection 
for the blocks. 
I do this often when making quilts
 because I love the style and the
 interest that using all different backgrounds in one quilt looks.

For this sew along that works out 
perfectly because I cannot give you 
yardage needed for the background 
of the quilt as I do not
 know it's size yet:)


The vintage block for this week
 is the good old tried and true
 Farmers Daughter Block
It has been known by many names
 over the years but my favorite
 and the name that Grandma 
always called it was Farmers Daughter...
and because I am a farmers daughter 
and also my Grandma's grand daughter
I decided to keep the name as it is:)


If you participated in my 
then this block is VERY familiar to you!

I used it in this quilt because 
of the name and the scrappy happy
 nature of the design made it perfect
 to go between the rows of applique.

Those are the 5" blocks and
 the ones that we are making this week.


I also made 10" blocks 
for the corners of my quilt.
I like how the 2 sizes work together:)


During the sew along 
I loved making these 
little blocks so much...
they are so happy and it's really fun
 to put all different fabric 
combinations together for each block.


This is the 10" size.
You can see that each block
 simply needs 3 different prints
 and a background.


I also sewed one of the 5" blocks
 for the barn in my
 Farm Sweet Farm Quilt.
Notice in this one that I 
actually used five prints...
a yellow...a red...a background
 and 2 different aquas.
You could do that as well 
if you wanted because 
"You are the BOSS of your own quilt!"


Just sew you know...
we will need to make 4 
of the 5" blocks for our quilt:)


Last night I posted
 this photo on my 
as a little teaser 
for today's episode.

This is my Farm Girl Tin Mug 
that will be available next month!


Isn't it cute with a few prints
 from Farm Girl Vintage inside?


The cup features 4 of the
 Farmers Daughter Block
 and because we need 4 
in our Vintage Block Quilt...
I thought it would be fun 
to make my four blocks exactly 
like the ones that are on the cup:)


I used 4 different 
Bee Backgrounds for the blocks.
Cutting for ONE block:
Background- 
Cut 4 - 1 1/2" x 3 1/2"
Cut 4 - 1 1/2" squares
Center-
Cut 1 - 1 1/2" square
Cut 4 - 1 1/2" squares 
to go on each side of the center
Cut 12 - 1 1/2" squares 
for the corners

for the tutorial that I did 
on how to make the 
Farmers Daughter Block 
during my 
Farm Sweet Farm Sew Along


FARMERS DAUGHTER BLOCK
5 1/2" x 5 1/2" 
BEFORE you sew them into our quilt


I love these blocks sew much 
and I hope you have fun with yours too!


Thanks for riding along
 with me during the 
Vintage Block Along...
See you right back here
 next week for 
another stop on our journey!
xx
Lori

PS. If you are just joining us...
Here is the list of blocks 
that we have done already.
Click on each one for the tutorial:

8. Humble
15. Memory

Monday, April 1, 2019

Farm Sweet Farm Sew Along - The BIG Finish and a Farm Sweet Farm Animal Stack!!


YaY!
Today is all about the 
big finish of the
 Farm Sweet Farm Quilt:)


I'm sew excited to 
show you my quilt finish...
I took a lot of photos at
 several different angles 
so that you could see how it
 looks all put together and 
also see the awesome job 
that my friend Juli Stubbs 
did with the quilting.
She always goes above and beyond 
and I'm thrilled with
 how it turned out:)

Scroll through each and every photo
 and when you get to the end
 I have a surprise tutorial for you!


I'm so happy that the weather 
was nice enough to take my quilt
 out on the deck for natural lighting.


I adore the yellow houndstooth
 print for the binding...


And I love how all of the little
 5" Farmer's Daughters blocks 
look so cute all in rows:)


I absolutely love how the 
BEEHIVE Vintage Trim looks 
tucked inside the binding.

If you haven't done this before...
check out this YouTube tutorial
 on how I do it.


Now for the surprise!
If you have participated in 
my other sew alongs then you know 
that I usually do a tutorial 
for a quilt label at the end...


And this sew along is no exception!


I used the 
to make a 
Farm Sweet Farm Animal Stack:) 


First I cut 
8 - 3 1/2" x 9 1/2"
scrappy Farm Girl Vintage prints.


Then I sewed them around a 
12 1/2" x 18 1/2" piece 
of the leftover linen background.


I made appliqués for the 
cow...pig and chicken 
just like we did in the quilt...


With the addition of a heart for the pig:)


I also decided to make 
this milk cow black and white 
and make hooves:)

I cut the piece for the legs
 5" x 7" and a strip for the hooves
 1 1/2" x 7" and sewed it to the bottom.

I pressed my seams open.


Then I simply traced the 
entire Sew Simple Shape legs 
like this and sewed them. 


After turning they look like this
 and are all ready to go!


I stacked my animals a little
 to the right of the block 
to make room for the 
embroidery on the left.

If you are not making your block 
for a label you could stack 
the animals more in the center 
and make an adorable 
mini quilt or a pillow!


I typed what I wanted my 
label to say and then
 printed it out.
I traced the embroidery on
 with a pencil and used my 


I think it's important to
 label your quilts...
even if you just simply put
 your name and the year.


Here is what it looks like 
with the appliqué 
and embroidery completed!


I love it it looks 
on the back of my quilt:)
To put it onto the 
back of your quilt just
 press the outside edges
 under about 1/4" and applique
 it onto the 
Farm Life 108" widleback.

I used the one in COTTAGE 
color for the back of my quilt 
but any of the 3 colors 
that it is available in would work!


I know that I always say this
 about each and every quilt 
at the end of a sew along...
but this is one of my very
 favorite quilts ever!

Thanks so much for joining me 
and as always...
the tutorials will remain on my blog
 for ever so just find the link
 for each week on the 
right sidebar here on my blog.
Remember that you must be 
viewing the full web version
 of my blog to see the right sidebar.

Even though this is the 
last tutorial for the
 Farm Sweet Farm Quilt...
I am still having fun and 
playing with Farm Girl Vintage fabric
 for another sew along 
that I have been doing called the
 VINTAGE BLOCK ALONG
and it's perfect for 
using leftovers from your kit!


Here are the first four blocks
 and we are up to 
block 15 right now...
and I'll be posting block 16 this Thursday.

Each block is a free tutorial 
of a vintage block from my 
grandma's pattern basket and 
they will all eventually become a quilt.
for week one and to read all about it.


And some other exciting news...
You are invited to join my 
Granny's Garden Sew Along 
that will start at the end 
of this coming August.
We will be using my circle rulers 
and a new set of Sew Simple Shapes...


To make my new 
Granny's Garden Quilt 
(76" x 86") 
out of my Granny Chic fabric collection
 that will arrive this summer.

The quilt consists of 
42 - 10" finished blocks that we will 
first applique shapes onto circles.

It will be super fun and easy...
if you did my very first 
sew simple shapes applique quilt called
 "BLOOM" you will love this one too!


Thanks again for sewing with me.
If you want to know what is 
going on with me and my designs 
from day to day you can 
catch up with me on my 


Tune in right here this Thursday 
for block 16 of the 
xx
Lori


Related Posts with Thumbnails