

Good morning!...
Hope you are ready for
another tutorial in the

I've chosen another block from
my grandma's pattern basket
to share with you:)


This block from grandma
is one that I have always loved.
Of course grandma and her sisters
pieced this block using templates
probably made with a cereal box:)
The angles are difficult
as many vintage blocks were.
I was determined that it
should go into this quilt and
our Vintage Block Along so I persisted...
and with some extra creative
quilty math my
"Egg Money" block was hatched!
It finishes at 12" x 12"
and you will need to
sew one block for the quilt.

In grandma's day,
gathering the eggs...

And taking care of the chickens
was a typical chore for a farm wife:)
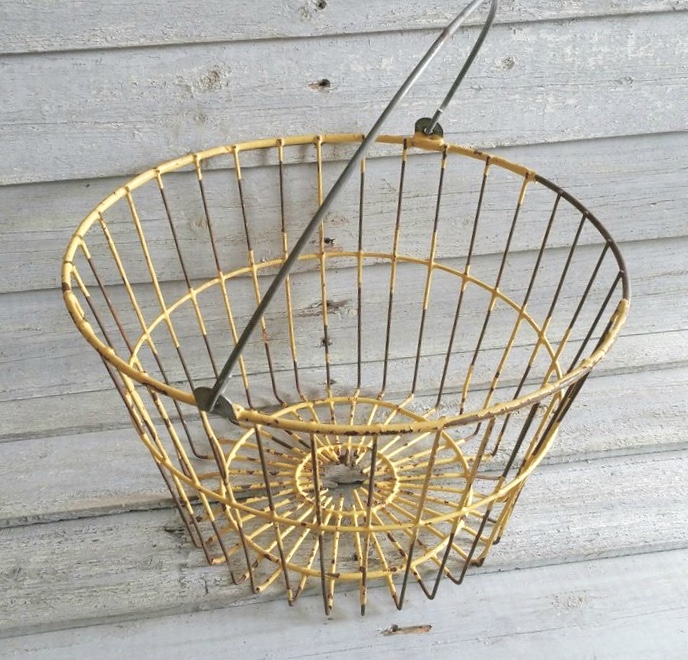
Eggs were gathered in
wire egg baskets
like this or if there were
just a few to gather
...they were often placed in
grandma's apron skirt or
slipped in the pockets.

I have grandma's egg basket
that she gave to me
from the barn out back.
I keep it in my kitchen
and have it filled with
these vintage rolling pins:)
Some of the pins have
original painted handles
and some I painted myself:)

Grandma's quilt blocks were pieced
with colorful feed sacks
after they were emptied or
from leftovers from making a dress.

Often yard goods and patterns
were purchased with the
carefully saved egg money:)

Nothing says farm life like
freshly gathered eggs
placed in the kitchen for
breakfast and baking...
but they also provided means
for special purchases:)

This is the kind of block
that grandma would typically make
with just one print and a background
and so that's what I chose to do too.
Using just one print really
makes the graphic design shine through:)

The print is one that reminds me
of something grandma would have
purchased to make an everyday dress.
She wore this color often
and I designed it with her in mind!
It was a perfect choice for the
Egg Money Block for my quilt:)

From the print you will need to cut:
8 - 3 1/4" x 3 1/4"
8 - 1 1/2" x 3 1/4"
4 - 1 1/4" x 1 1/2"

From the background cut:
12 - 3 1/4" x 4 1/4"
4 - 3 1/4" x 3 1/4"
4 - 1 1/4" x 3 1/4"
4 - 1 1/2" x 1 1/2"
1 - 1 1/4" x 1 1/4"

First make the center of the block.
It's sewn together like a 9 patch.
The center square is the
smallest background square (1 1/4")
and the four outside squares
are the 1 1/2" size.
The prints are the small rectangles...
(1 1/4" x 1 1/2")

I pressed my seams open:)

Now take the print rectangles and
place the background rectangle
in the center and sew.

Make 4:)
Set those segments aside and then
pair up the 3 1/4" squares
to make half square triangles.

Mark a diagonal line or use the
If you want to find out how
and why I use it
and how I put mine on my machine...

Trim the excess and press
for a total of four.

Now lay the segments out
on your design board and
sew them together like this.
Another 9 patch!

This is a cute block all on its own
but it becomes spectacular
with just a few more steps:)

Sew background rectangles onto each
side of the remaining 3 1/4" print squares.

Make 4:)

Press them in half to mark the
center and then press the
remaining four background rectangles
in half as well.

Place the rectangle onto the
printed square and line up
the pressed creases.
Pin and sew...

like this!
I know this segment looks
strange but stick with me:)

You will sew one to all four sides
of the block.
Sew two opposite sides first and press...
then sew the two remaining.

Before you sew them use the
here to make sure these seams line up.
I didn't pin them for the photo
because I wanted you to sew
which seams I meant.

This is what it looks like when you are finished sewing them on.
A little strange looking right?

Well...
just turn it a half a turn
and looky what we have here:)
It's starting to look
a little more like it should!

All you need is a
12 1/2" square ruler to trim it up.
I'm using my 12 1/2" Trim - It Ruler...
if you don't have one no worries.
Whatever 12 1/2" ruler that you use
just make sure that the block
is centered before trimming.

And there you have your
Egg Money Block:)
So much easier than templates!
Grandma was amazed with the
quilting tools that we have now.

I love this block so much.
To me it is so vintagey adorable!
It looks super hard to make
because of all the difficult angles
but as you just saw...
it's now totally do-able!
Another great thing about this block
is that you will not need to
worry about sewing off your points when sewing it into your quilt
because they are farther in than 1/4"....yay!

I used my very same
"turn and trim method"
when designing my
Great Granny Square Blocks.
This was several years ago
during the Great Granny Along
which was also a sew along
right here on my blog:)

I made 12" and 6" blocks...
and made runners and pillows too.

They eventually made their way
into my second book...
Another thing that I did
on my blog several years ago...
and also taught in my
Farm Girl Vintage Workshops
is my
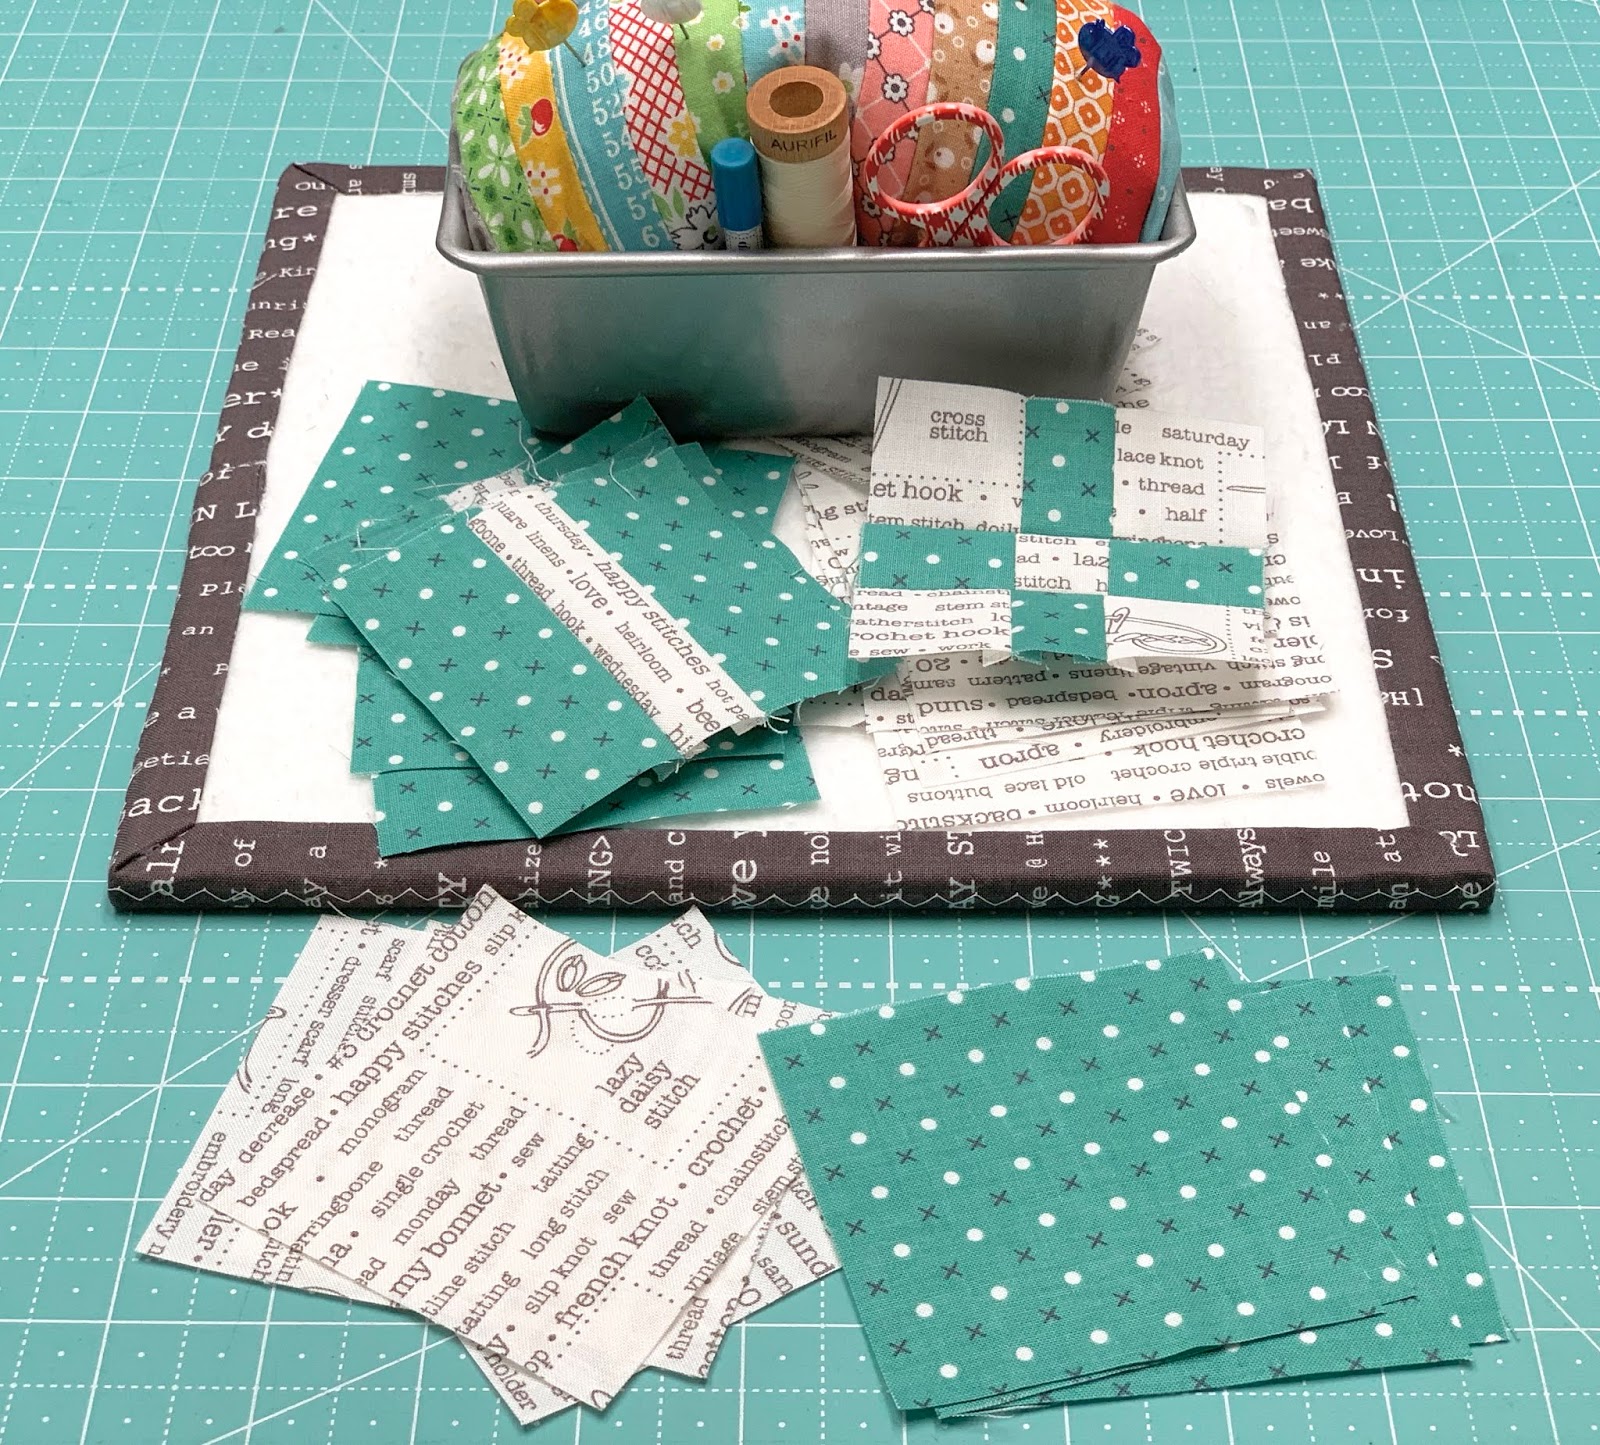
"Fresh Baked Bread Pincushion"
I thought I'd make a new one
with my Farm Girl Vintage fabric
and show you how I make them.

First you need a small loaf tin.
Sometimes I paint mine or
they are fine left alone as well.
For the "bread slices" ...
I cut 20 - 1" strips about 10" long.

I sewed them together and
pressed my seams open.
Basically I have a 10" square give or take.
If you didn't want your bread sliced...
you could just use a 10" square:)
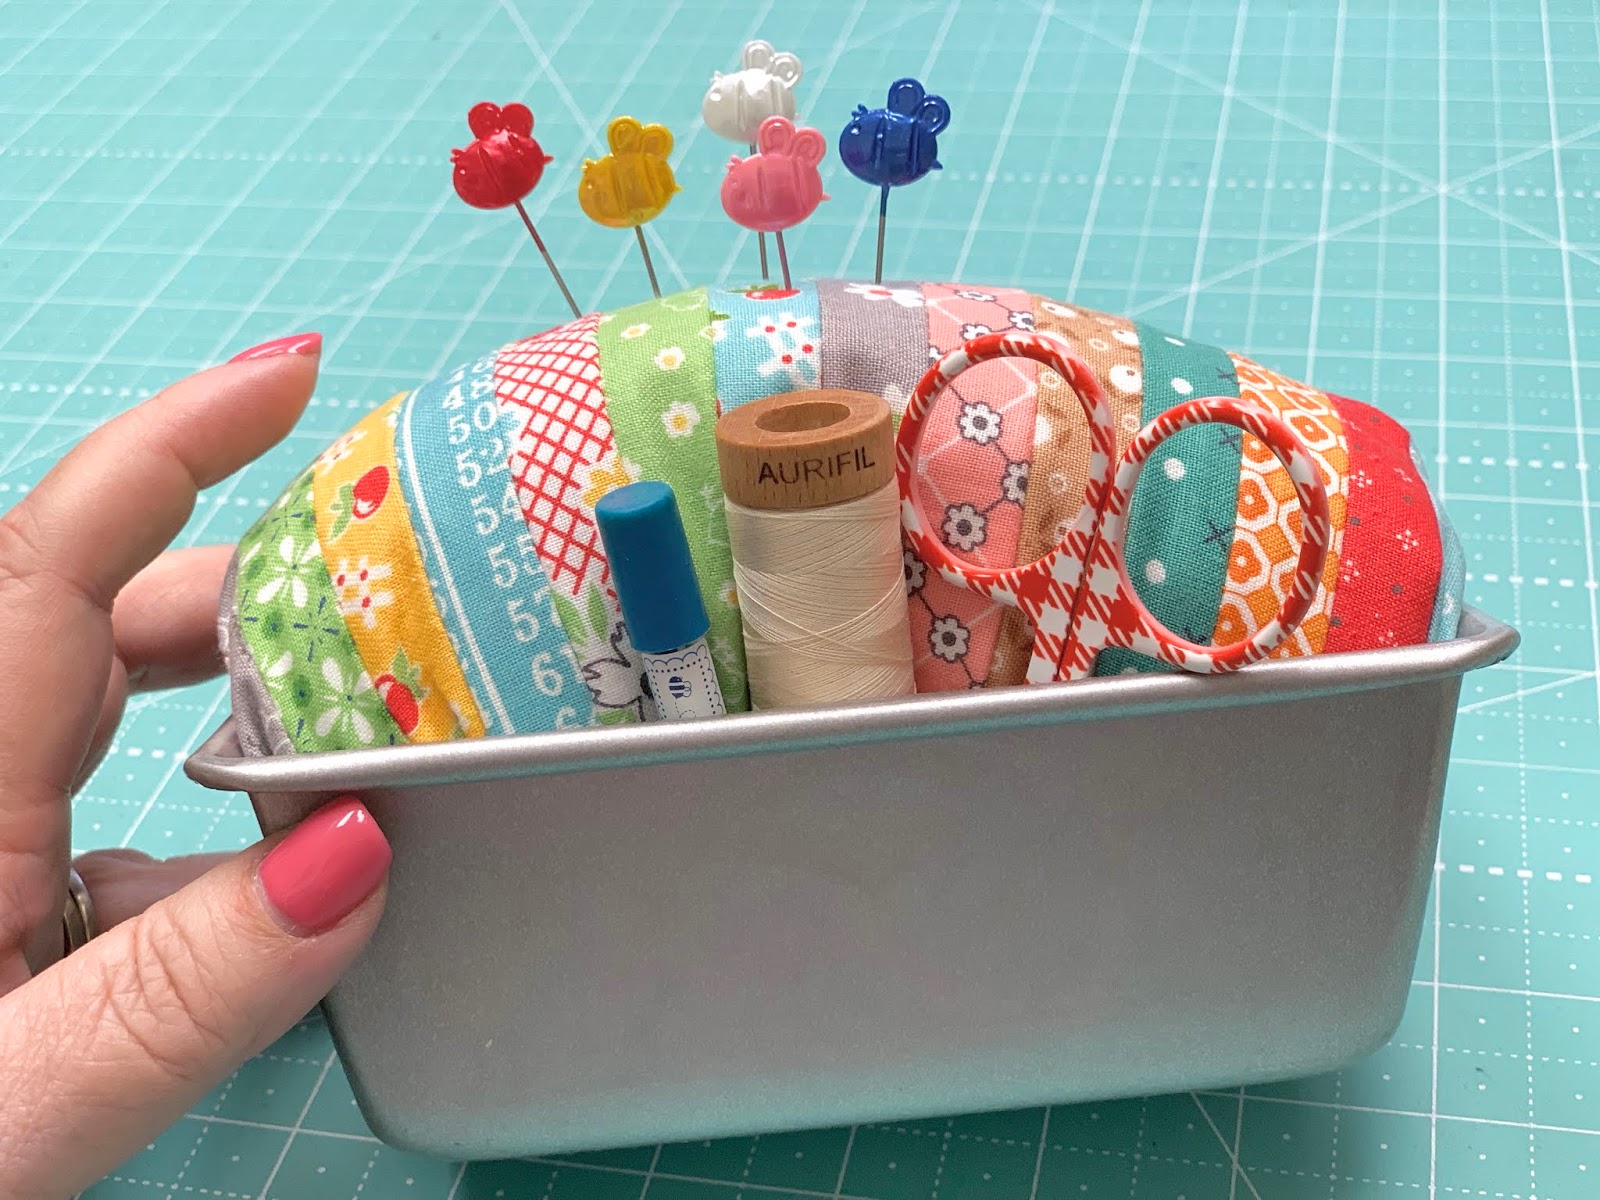
I make it just like I showed you
when I made my lady head vase pincushion.
Cotton thread...
and wool stuffing.

Just gather with large stitches
in about a 1/2" from the edges.
Pull up and add the stuffing.
Because this is a rectangle shaped pan
that's the shape's going for.

This is what the underside looks like...

And the ends.

Now just stuff it in the bread pan
and your bread is freshly baked!
I did use my glue gun
on the bottom of the loaf only.
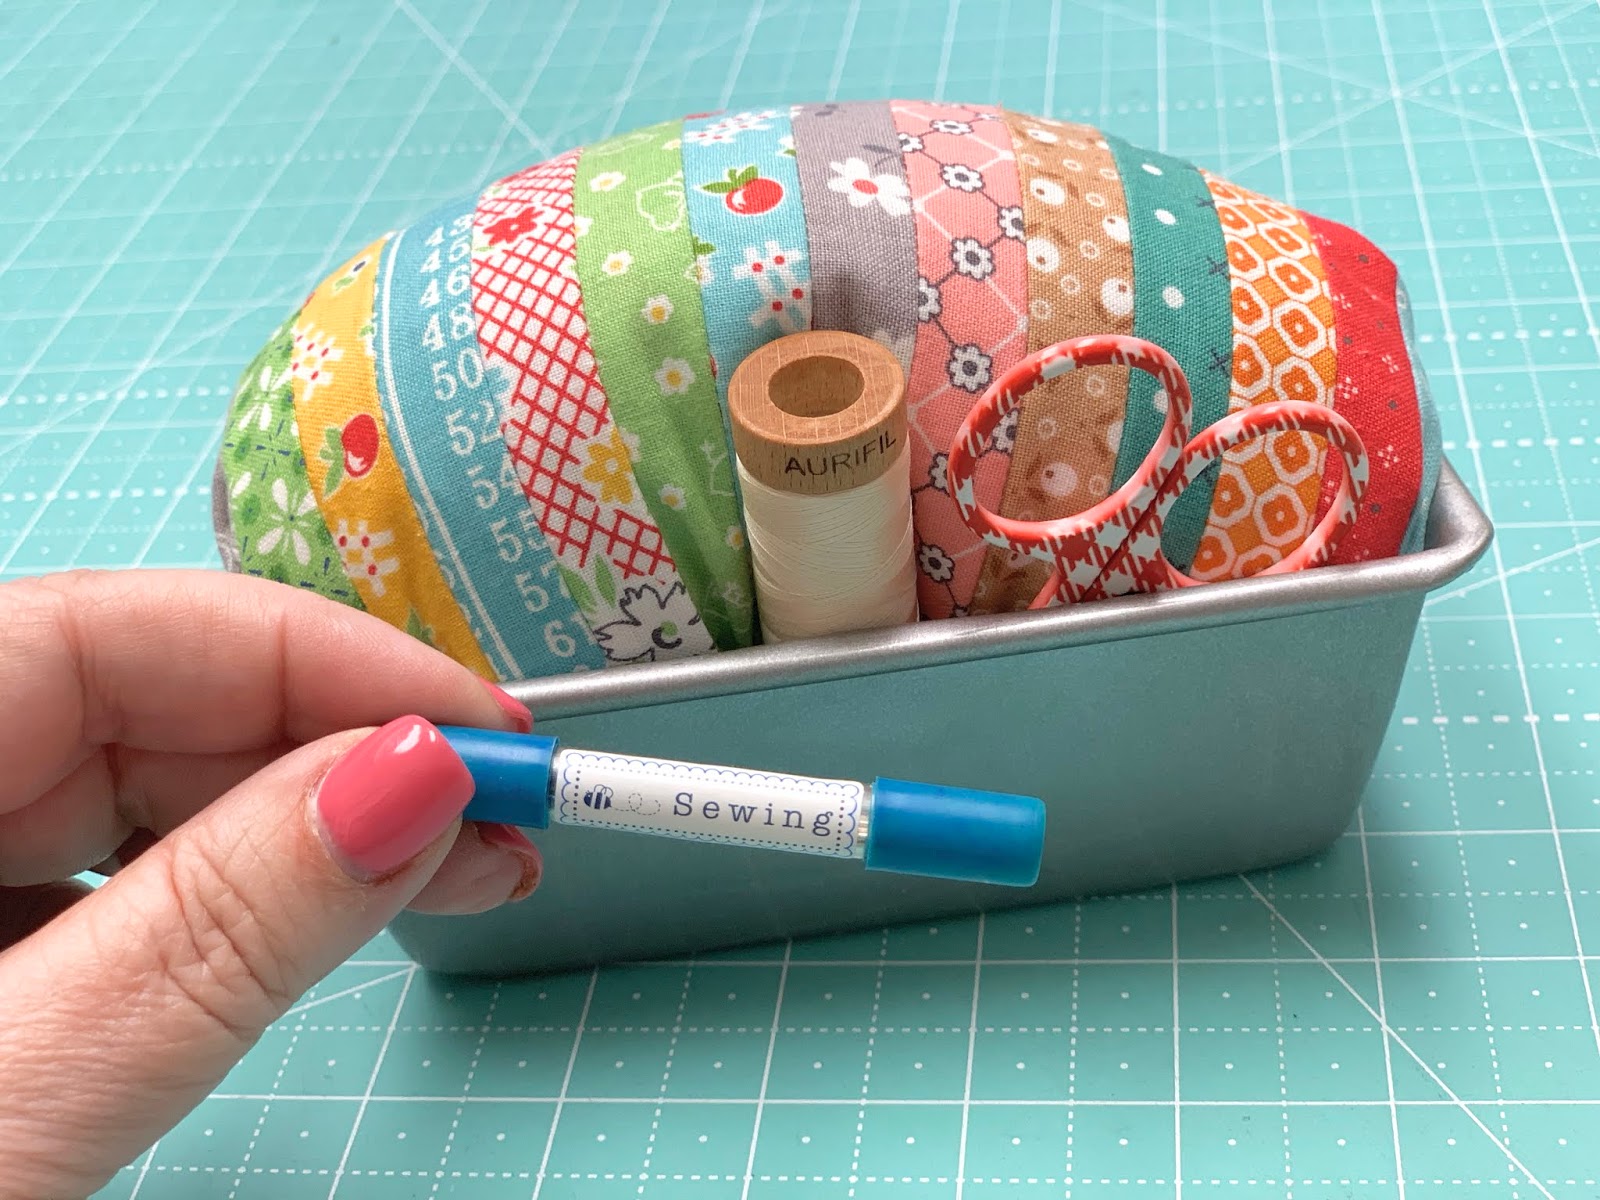
I like to keep my sides glue free
so that I can tuck my scissors...
thread and add a tube of sewing needles:)

And of course some bumble bee

Freshly Baked Bread Pincushion...
it's delicious and
Farm Girl Vintage cute...
not to mention handy!

I hope you enjoyed today's tutorials
and that you have fun
making your own Egg Money Block
and pincushion.
I will do my best to
be back here next Thursday
with another block from grandma's basket.
Thanks for farmin' with me!
xx
Lori
If you are just joining us...
click on each block
that we have already sewn
for that tutorial:
5. Rhinestone
6. Vintage Lily
7. Star Shine
8. Humble

7 comments:
Love the story of the egg money! The vintage fabrics in the old ad look fabulous.
Lori, I am SO loving this series! I never really knew my grandmothers- one passed away when I was very young, and the other lived in another state.... so I am living vicariously through you as you tell us about your grandma. Thanks so much for taking the time to do it! (i don't know how you manage to do all you do!) I see so much of you in her face! xoxo
Thank you so much for this great tutorial...love this block and story!
Love this block! Thanks for sharing.
Hi I was looking back at how to use your flower seam guide and
I noticed you have a red singer featherweight.Where ever did you find it??
Thanks,
Kelly
hi lori
thanks for this work of the vintage block
Thank you for sharing the vintage block! I love it! Your tutorials are so clear and concise!
Post a Comment