Monday, October 29, 2018

Autumn Love Sew Along - Week Eleven - Crows and Vines Block!!

Welcome to week eleven...YaY!
We are ALMOST finished:)

If you are just wanting 
to join in now...
it's not too late!
for all of the info 
about this sew along.


Today we are going to 
make the very last block:)


Crows and Vines!


Of course we are still playing with
 Autumn Love...
and yes...
I'm still in love with it!


Autumn Love 
Sew Simple Shapes
 for this block:
3 - F2
42 - F5 (yes 42 lol)
4 - F6
2 - F10
2 - F20
1 - F22
3 -F24
1 - F27
2 - F29
2 - 1" x 4" yellow acorn fabric strips 
for the crows beaks:)
Cut your background fabric
 12" x 36" or 12" x WOF works too:)
After the applique is completed 
you will trim it up to
 10 1/2" x 34 1/2"


Use two of the 5/8" wide strips 
that you cut
 on the BIAS from the green text print
 for the vines.
Start with 18"-20" long strips:)

Cut your prepared 1/2" strip 
(for the top of the vase) 
8 1/2" long and press each end under.

Cut 4 - 1/4" wide yellow strips
 2" long for the crows legs:)


Don't forget that when you 
trace your crow shapes...
that one is in reverse:)


They are facing each other in the block:)


For the bottom of the flowers 
we are going to trace a new sewing line
 onto your traced F20 Shape.
Measure in 1 3/8" from the bottom
 of your traced line and draw a line.
Repeat on the other end...
and the other traced shape.


Sew them like this...


Trim the seam allowance...
and now you have four!


Turn and shape:)


For the vase you will need to 
draw a line right down the center 
of your traced F22 Shape.
Use the center lines on the
 F22 Sew Simple Shape 
to mark the center of the shape.


Sew like this and trim off the excess:)


Turn and shape:)


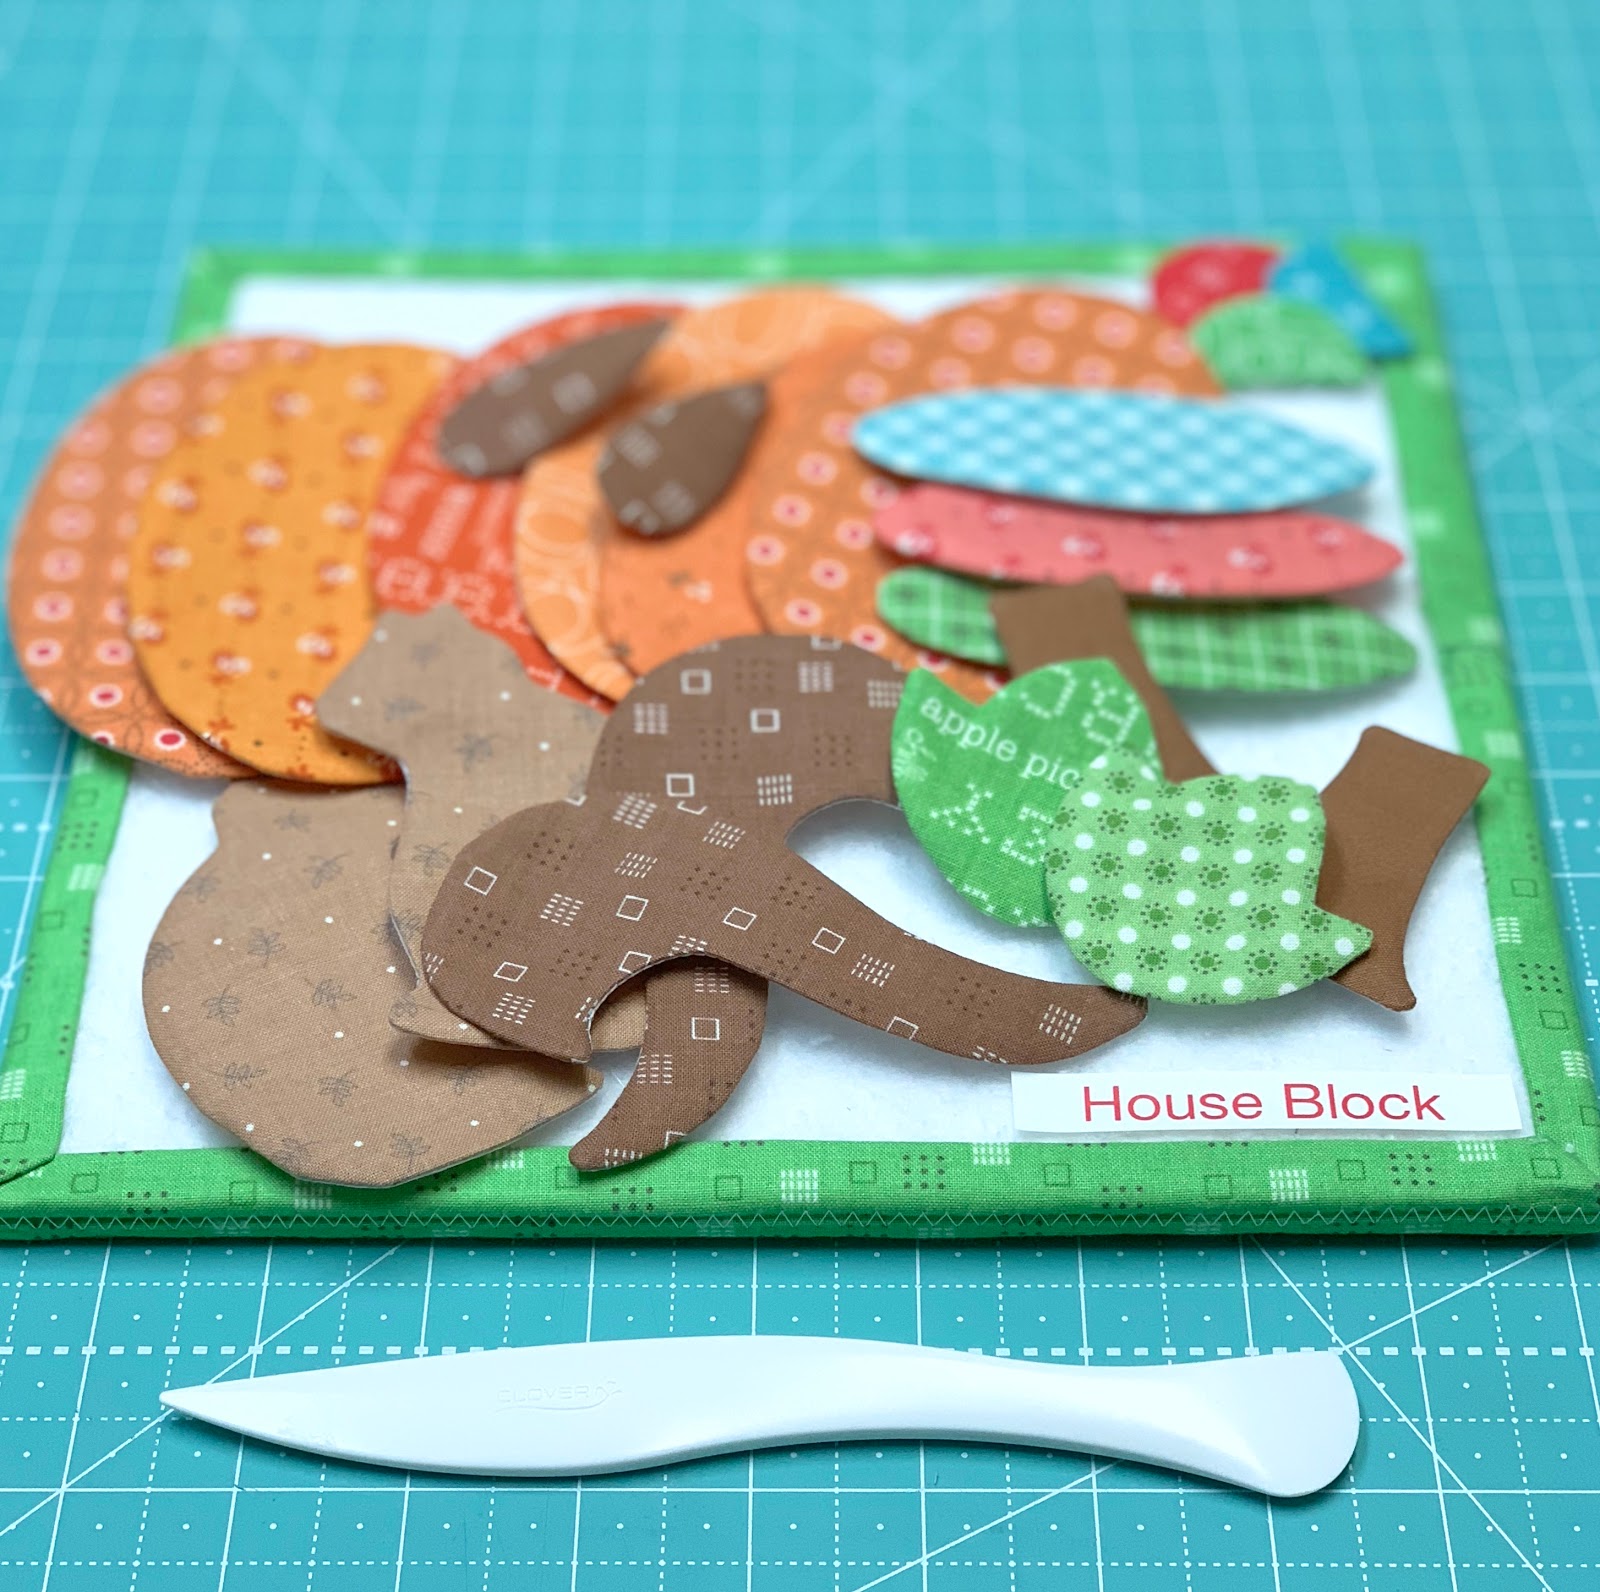
Here are all of the shapes 
for this block that have 
cleavage areas to clip before turning.
The crows also have inner curves to clip.


Sew and trim the remaining shapes...


Turn and press!!!


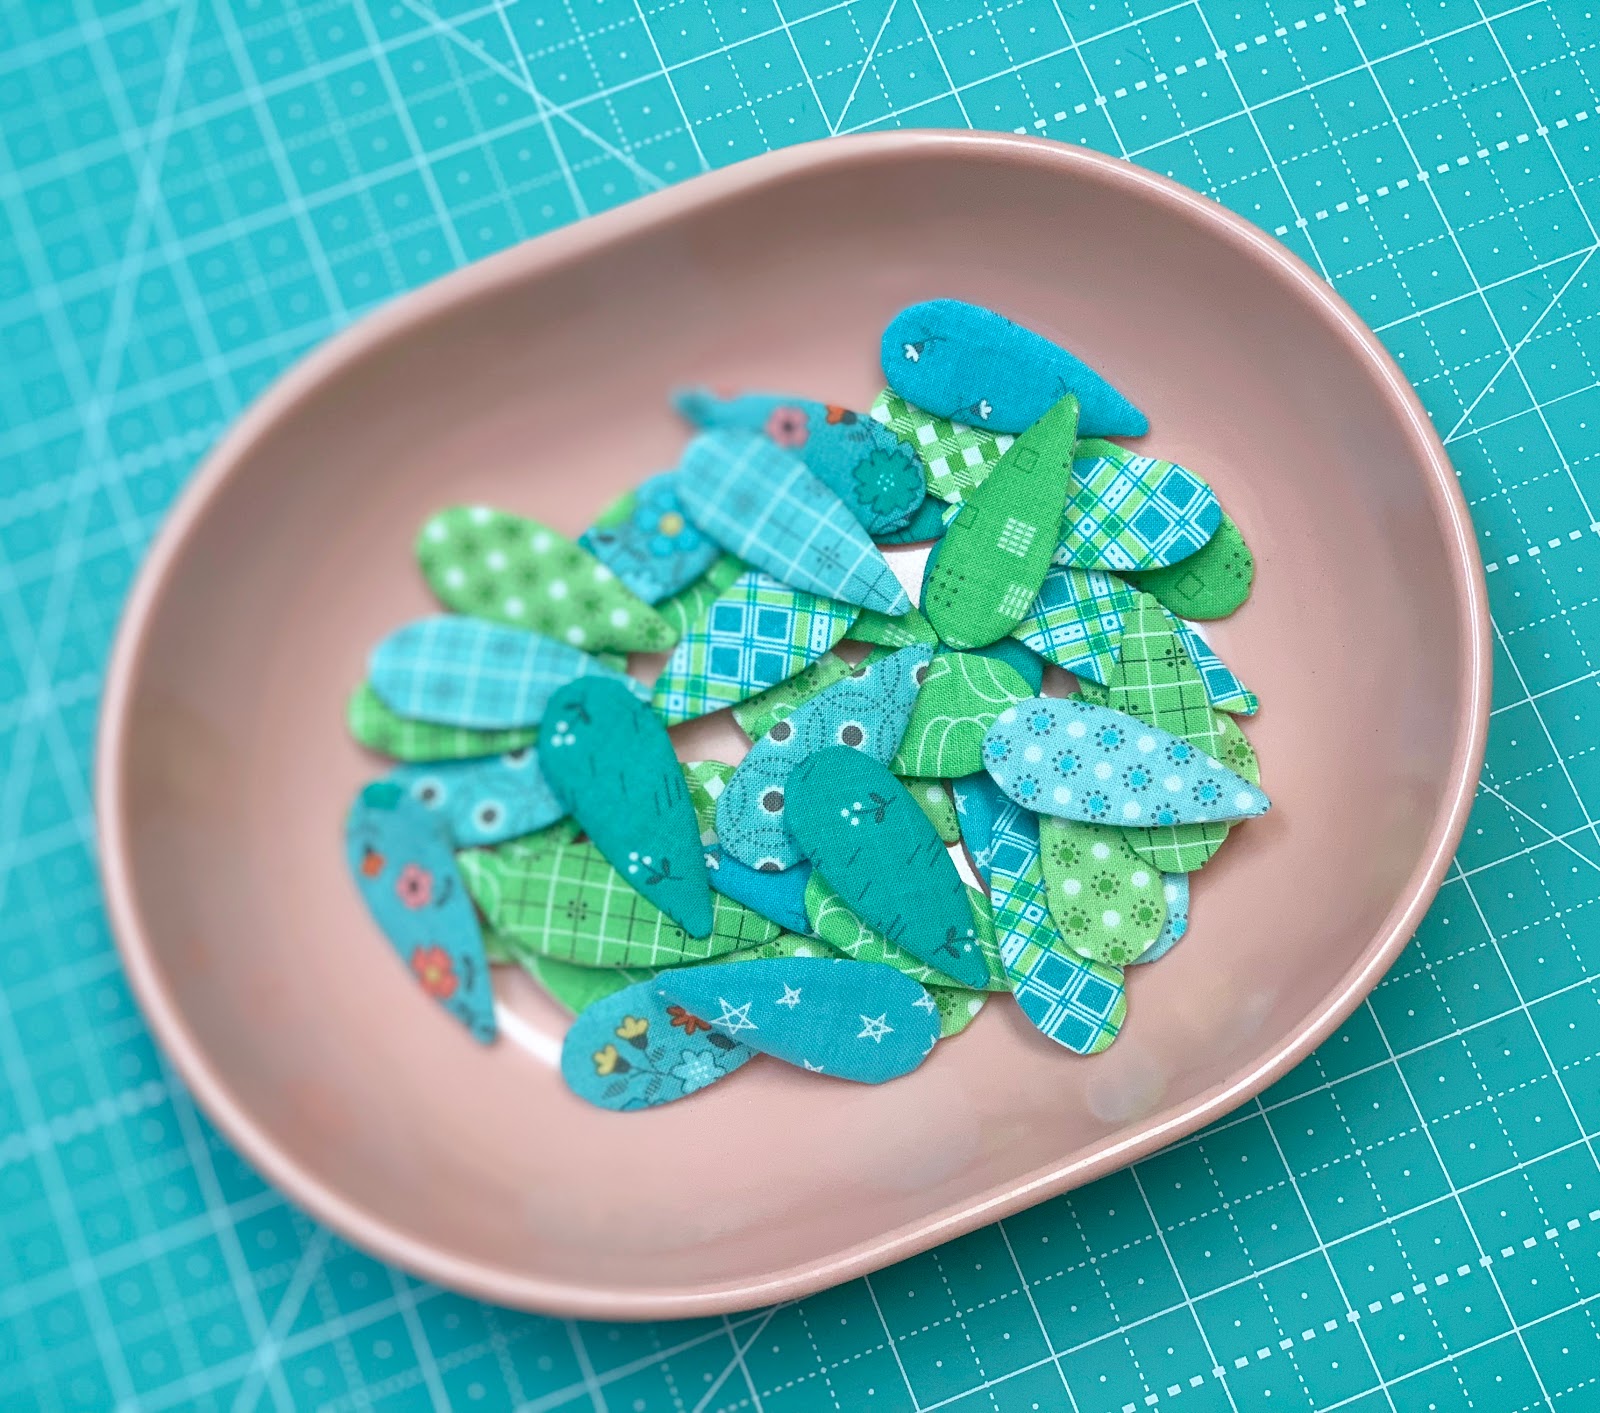
42 - green...teal and aqua leaves:)
That's quite an accomplishment!


As I ran my strips through 
the bias tape maker...
I pressed slight curves 
into them like this...
to make it easy peasy when glue basting!

Remember that I showed you how
 in the video during week one:)
to have a looky again.


My Easy Trace Light Box 
will really come in handy
 when laying out this block!
The block is so wide and has 
a ton of leaves...
and I thought that you 
may need a little 
extra help in placement. 
Sooo...
simply tape together pages
 21...22 and 23 of your guide
 and then tape it to the lightbox.
You can place your background fabric 
right over the top and sew 
exactly where every leaf needs to go!


I always use washi tape for this because
 it doesn't leave a residue on the lightbox or the pattern paper when removing:)


I started with these shapes first...
in the center and then worked outwards...
one side at a time.


The bottom of the crows feet 
and the ends of the flower stems 
tuck under the vine...
so do those first.


One half all glue basted...
now for the other half:)
*PS.You can tape the sew along guide
 pages right side down 
when doing the other half...
when you have the light on 
you can still see the lines great!


I saved the strip for the 
top of the vase and the 2 leaves 
that overlap it until the very end...


So that the vine ends 
would be tucked underneath it:)


Both sides are glue basted...
and ready for applique!
I LOVE THIS BLOCK.
It certainly takes a while to prepare
 but I enjoyed every step!!


I used all 3 jars of my 
Cute Little Buttons 
and rounded up a variety 
of red buttons in sets of three
 to use for the berries:)


Crows and Vines Block
10 1/2" x 34 1/2" BEFORE
 you sew it into the quilt:) 

Again...
after applique...
press from the back 
before trimming it up.

Next week I will have a 
fun surprise tutorial for you! 

And I'll show you my
AUTUMN LOVE QUILT 
all quilted and bound.
YaY!!!
xx
Lori


Friday, October 26, 2018

Vintage Christmas Sew Along


Today I want to tell you about the 

to see me show and tell about some of the projects in the book:)


My latest book is just now 
starting to
 arrive in quilt shops 
 and I'm sew excited!
to watch the video trailer about the book:)


It's spiral bound 
just like my previous books 
and there are a whopping 207 pages of 
Vintage Christmas Fun!

You can see here all of the projects
 that are inside from this photo
 of the index guide.

I've been working on this book 
for a really long time
 and I'm so happy that
 it's finally here:)
to get your copy!


I used my Cozy Christmas 
fabric collection through out the book...
for lots of 
Vintage Christmas Sparkle!!


You can sew the sampler quilt 
shown on the front cover...
it's made with 6" blocks but of course
 you know that there are also
 12" block patterns included as well.


So...
you may want to choose the 
Christmas Eve Quilt 
which is done in 12" block size.


Or maybe whip up a few table runners...


or pillows!


Or the Christmas Row Quilt... 


There are stacks to choose from!


The schedule will go in order
that the 42 Vintage Christmas Blocks
 are in the book
 from beginning to end....
5 at a time.

Of course...
"You are the boss of your own quilt" 
and you can sew one or all 5 
according to your schedule
 and your hearts desire:)
 to view schedule and 
once you have that...
you can visit each guest blogger!

As always...
each post will remain on my blog
 FOR-EV-ER 
and you can visit anytime:)

Like I always say
 during every sew along...
"this is not a race"
 and everyone has a different time 
for sewing time.
 The most important thing is to
 just have fun with it and
 enjoy the spirit of the holidays:)


I hope you enjoy my latest book
 and can see all of the 
Quilty Christmas Love 
that I put inside just for you:)

Have #aVeryVintageChristmas!
xx
Lori


Monday, October 22, 2018

Autumn Love Sew Along - Week Ten - House Block - Part Two!!


Well hello again:)
Welcome to the 
Autumn Love Sew Along


It's Week Ten!...
only two more weeks to go
 until we can put 
all of the blocks together:)
YaY!


Today we are going to finish up
 the house block by adding the
 appliqués at the bottom:)


Step One after last week:
Sew the AUTUMN BLOCK that we made 
in Week Four to the
 bottom of the house:)
Now we can prepare the appliqués!


Autumn Love 
Sew Simple Shapes
 for this week are:
3 - F1
2 - F5
2 - F7
2 - F18
3 - F20
6 - F21
2 - F25
2 - F26

Cut 3 - 1/4" wide bias  1 1/4" long 
for the acorn stems.

Press a slight curve into a 
6 1/2" long piece of 
Nutmeg 1/4" wide bias strip.
No worries! 
Even though it was NOT
 cut on the bias...
you will be able to 
press it slightly curved.


Take note that when you are
 tracing these shapes 
for the squirrel...
you will need to trace a set
 in reverse because they are
 facing opposite directions.


Draw a line down the center of 
the F1 traced circles 
for the acorn tops.
Remember that this is the way
 we did them in Week Six 
for the Oak Leaf Block:)


Sew them like this...


Trim...turn and shape.
This is a good time to remind you 
that this turning tool is
 your best friend when it comes to
 shaping up your shapes!
I would not be able
 to do without it:)


These are the shapes that need
 inner curves and cleavage areas 
clipped before turning:)


All shaped...pressed and 
ready for glue basting!


Before you start...
measure in 1 1/4" from each end
 of the acorn bottoms and trim.


The raw edges will 
tuck under the acorn tops.
You may want to 
save the other ends...
because you never know...
I may have something 
for you to do with them!


Let's start with the pumpkin 
on the right side.
Measure in 3/4" from the edge 
and place the first oval.


Place the other oval 
on the left side and measure 
so that your pumpkin is 
5 3/4" across like this.


You can trim the left side oval off
 a bit to reduce bulk:)


Now you can add the center oval...
the stem and the leaf.


Now for the squirrel:)
Measure 1" from the door and
 place the feet and the 
belly on that line.
Tuck the tail underneath.
Don't glue the arm yet...
just set it there.


Repeat for the left side of the block...
starting with the pumpkin.
Use page 18 of the sew along guide
 to trace the vines for embroidery:)


Add the left side squirrel:)
Just set the arm there...
don't glue baste it yet...


Because you will need to 
glue baste the bias strip first!

Measure 1 3/4" up from the 
bottom of the door and 
place glue dots (slightly curved)
 right above the ruler like this.


Glue the strip down... 
and now you can glue baste the arms:)


Press the acorn stems in half. 
Glue the center acorn bottom first
 and then the ones on each side.
Just set the tops there for placement
 but don't glue them down yet ...


Until you glue the stems first.
Space them about 1 1/2" apart like this.


Now you can glue the acorn tops!


Three cute little acorns 
hanging in a row:)


Now you can do all of 
the applique on the house block!


Just like all of the 
other pumpkin vines in the quilt...
I used all six strands of 
my dark green Aurifloss.


I will sew a 
Cute Little Button 
on for the doorknob:)


HOUSE BLOCK
It should measure 
26 1/2" x 36 1/2" 
BEFORE 
sewing your quilt together:)


Have you finished up
 all of your 4" star blocks?
When you do...
sew them into rows of  seven stars....
and sew the sashing strips 
in-between like this.

The 2 rows on the outside edges 
of this photo are the rows 
that go on the sides 
of the house block.

Sew a sashing strip onto each end 
before adding to the house.


I always press towards my sashing strips:)
The two side strips should measure
 36 1/2" long to fit the sides 
of the house block...
but of course anytime there is
 a lot of piecing involved 
sometimes it may be a little 
too long or a little too short.
If this happens...
it's easy to adjust the length 
of the border strips within the 
sashing strips that are between
 the blocks.


After you have added the side rows...
then you can add the 
two remaining star rows 
to the top and the bottom
 of the house block:)
You can adjust them as needed
 in the same way as well:)

You can do this now if you would like ...
or of course you can save this step
 for when you assemble the entire quilt 
after all of your blocks are completed:)


Here are all four
 Harvest Star blocks completed...
The tutorial for all of the 
pieced blocks are back on Week Four.

Remember that each and every tutorial 
remains here on my blog 
if you need to revisit.
Simply scroll down and look at 
the right side bar of my blog.
When you find the week that you want...
click on it...
 and it will take you right there!


Next week we will be doing the 
Crows and Vines Block...
See you right back here then!
xx
Lori


Related Posts with Thumbnails