

Welcome to week one of the
Granny's Garden Sew Along
YaY!
It's finally here:)

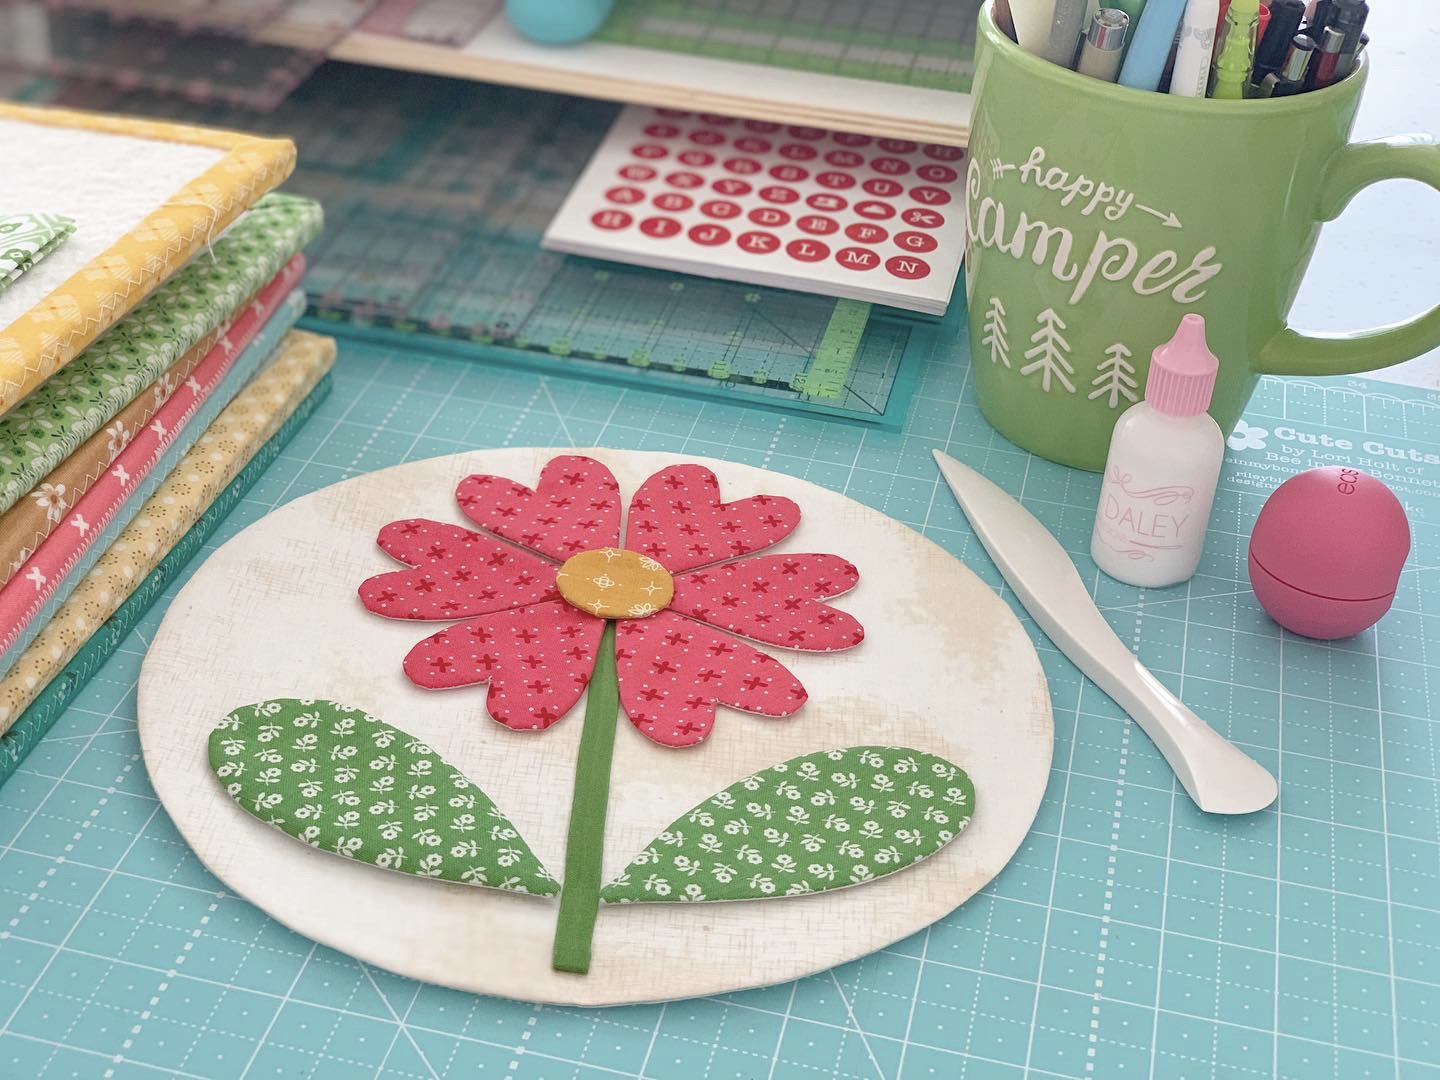
We will be making this quilt:
GRANNY'S GARDEN

Using Granny Chic fabric...

And Granny's Garden
Sew Simple Shapes

And my Shabby fabric
in CLOUD for all of the background circles.
As far as supplies...
they are all listed in the
and I blogged about all of them
a few weeks back in my
"Bee Prepared" post.
if you need to read it again
and see all of the information
and sew along guide updates
before beginning:)
***At the end of this sew along***
I will add a link to each week
of the entire sew along
at the bottom of this post.
All you have to do is scroll down
to the end and click on each one!

Okay...
are you ready to grow a granny garden?
Let's do this!

Of course today we are starting with
Block One.
Grab your kit and ...
to see the video tutorial.
I always kick off each sew along
with a video tutorial of the first block.
The remaining block tutorials
will be here on my blog each week.

We will be doing blocks
2...3 and 4 this week as well.
The tutorial schedule is
in the sew along guide:)
Please go at your own pace
and do not feel pressure
because that's not fun!
The tutorials will remain right here
for your convenience
so that you can do just that!
After you have watched the video
and your Block One
is ready for appliqué...
let's talk about Block Two:)

You will need to use the
4" Circle Ruler for the flower center
and for the petals you will need
shape I-12.

For the petals in this block
you will make 2 petals with one shape
by tracing as usual and then
marking 2 lines 1/2" apart
in the center like this.
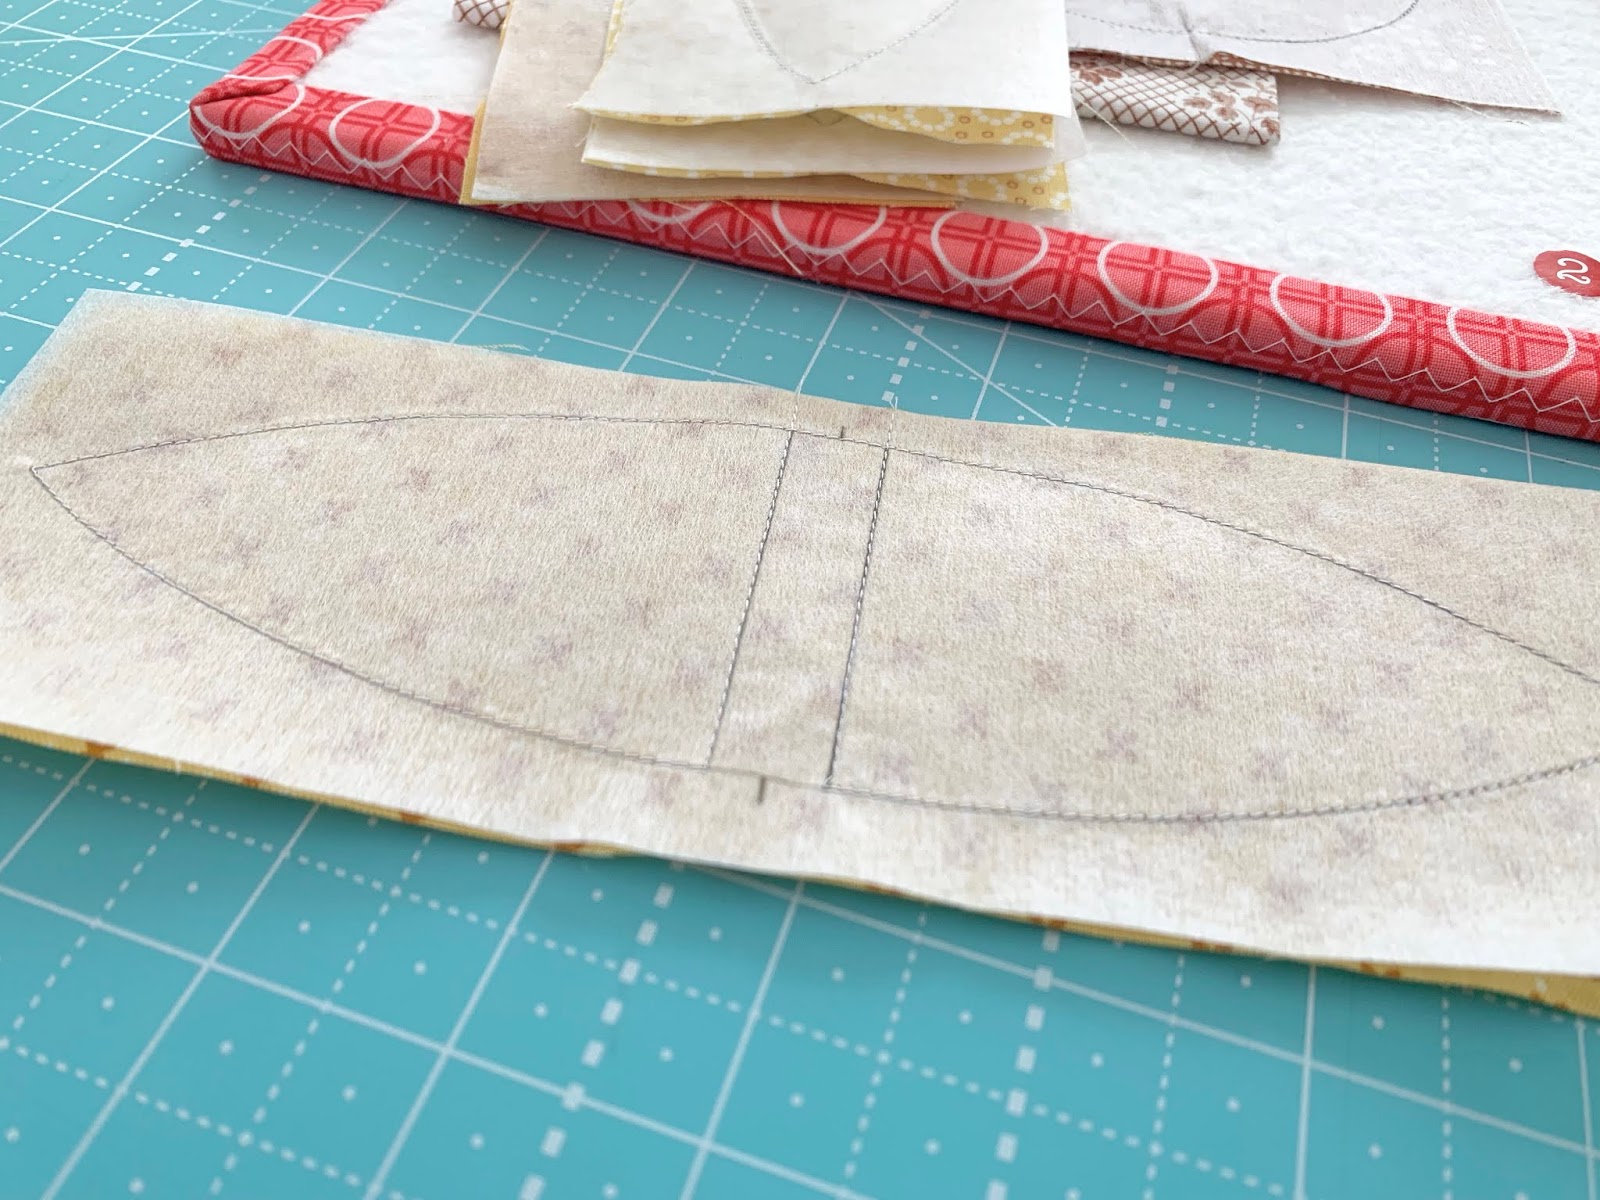
Sew on these two new lines as well...
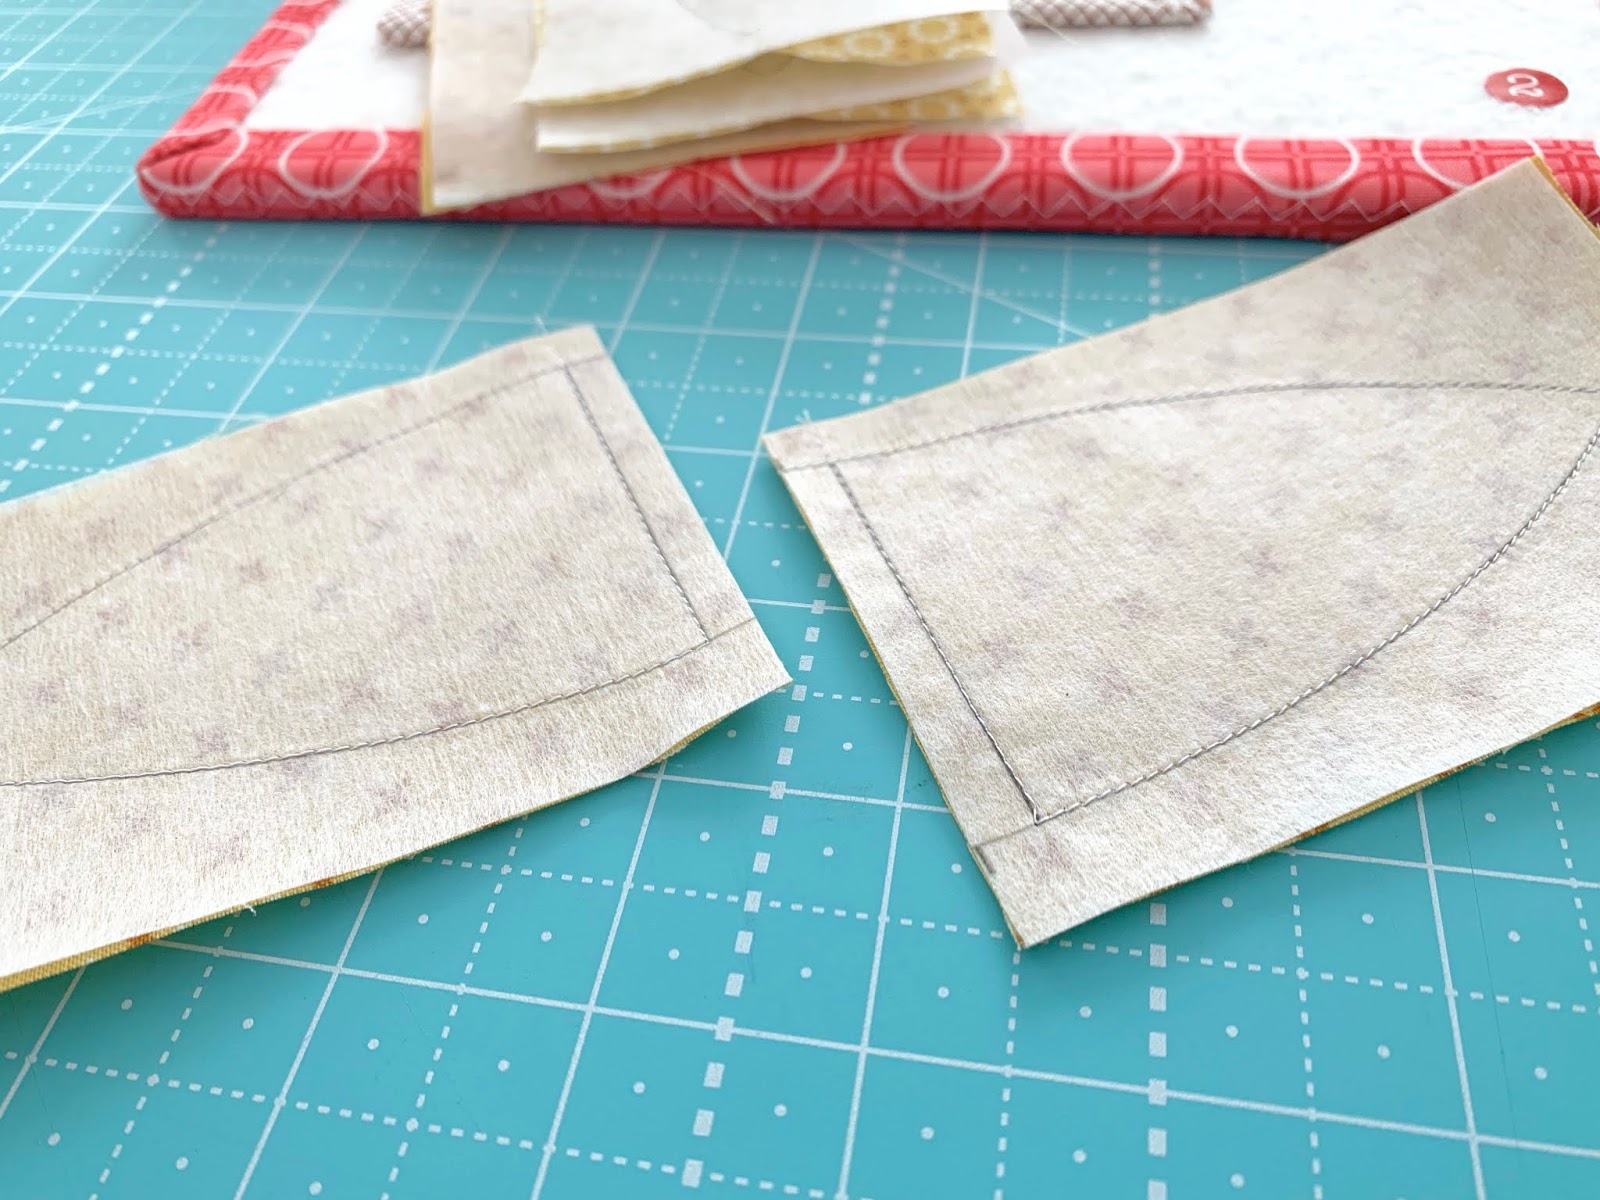
Cut them apart...

and then trim them as usual:)
Now cut the "X" in the back
of the interfacing for turning
just like I showed you in the video.

Turn them right side out...
shape and press.

After making sure that my
flower center circle is
right in the middle
I pin basted my lighter
petals first like this.

Then I added the four darker ones ...
then glued and let it dry.
Now it's all ready to applique.

By the way you could add buttons
from the Granny Chic set in-between
the petals on this block if you would like.
The buttons are packaged by weight
so each package has all of the
same buttons but maybe different
amounts of each size and color...
but no worries because
there is plenty to choose from!

I'm using the
Granny Chic Aurifloss
to sew my buttons on.
I always add my buttons after applique.
You can check with your quilter
to see if you need to wait
until after quilting
is completed to add yours.

I have not appliquéd my block 2 yet
but I wanted to show you this
first week how I add the circle
onto the background after applique.
First...I always press my square
in half both ways like this.

That way it's easy to
center the circle for applique!

After applique is completed
use the 10 1/2" Trim-It Ruler
to trim your blocks down to
10 1/2" square.
Use the lines on circle is centered
correctly in the middle
of the square before trimming:)
This is the way that all 42 blocks
in the quilt are trimmed
before sewing them together.
I'm going to applique
all 42 of my blocks first
and then trim them all at the end:)

Okay now let's talk about Block Three!
Shapes used are I-6 and I-22
Cut longest stem 7" and
press one end under.
Cut the two shorter ones
2 1/2" long
and trim one end on an angle like this.
Those ends will
tuck under the center stem.

After sewing your shapes....
don't forget to clip the cleavage areas
in the flowers before turning.

Turn... shape and press!

Grab your circle and pin baste
before applying the glue.

Let the shapes dry flat by
placing a ruler and
something heavy on top:)

Ready for applique!

I'm thinking about using the
same color of
buttons as the
flowers for the centers:)

Now let's talk all about Block Four:)
Shapes used are I-9 and I-23
Cut two stems 4" long.

Sew your shapes!

While trimming....
clip the cleavage ares between
the flower petals before turning.

Turn...shape and press:)

Pin and glue baste to prepare for applique.

Be sure to take advantage of
the lines on the
10 1/2" Trim-It Ruler.
They are diagonal as well as
vertical and horizontal.
By using the ruler you can
center everything perfectly
onto your circle...
and that's something to be happy about!

I'll probably use yellow buttons
for the center of the flowers in this block but I will also do that at the very end AFTER I have trimmed up my blocks because I want the Trim-It Ruler to lie flat and not on top of buttons LOL

Okay so now we have planted
the first four flowers in our
granny garden and I simply
couldn't be happier about it!

I hope you are looking forward to
making each and every
block along with me.
Have fun with it...
be patient and kind with yourself
as you grow and tend
to your granny garden:)
I'll see you
right back here next week:)
xx
Lori
**************
P.S. I've added this list of links
for your convenience
( after the sew along ended )
Click on each one to go to that week:

13 comments:
❤ Love your QALs.
These flowers are so dainty and cute. I made a template bag out of my hanky fat quarter so I’m ready to rock and roll. Love that the flowers in circles. Another great design Lori
I love this quilt! Thanks for the quilt-a-long. Is there a printed pattern, similar to the one for Bloom?
J'adore 💕
Such a darling quilt. Will get going on my blocks today.
Loved the guide and PDF instructions. Video super clear. TU Lori. Templates arrived today from FQS. Ready to Sew Along after getting my fabric cutting started. Hazel.
This is going to be another amazing sew along. Your blocks are all so cute!
Oh I have never appliqued but I am determined got to order a 10.5 inch ruler and Lori's interfacing.
This will be my fifth appliqué quilt and I've had so much fun making all of them! My Bee Happy quilt won first place in its category at the Virginia State Fair last year. <3 In some of your photos, there's a round Granny Chic item and I was wondering if it's one of the coasters? Could you tell us? It's sew cute!
Este quadro de flores é Maravilhoso . Abençoada mãos que desenhou e pôs em prática , continue sempre inspirada e a maneira como se faz .
Um dia gostava de ver se conseguia fazer um pequeno quadro de flores . Obrigada por mostrarem coisas Maravilhosas
Thank you for keeping these QALs available. I just found this and can’t wait to start it! It will be my first appliqué quilt.
I know it is a couple of years since you did this quilt, but I only came across it a couple months ago. I'm in my late 60's and only starting quilting several years ago. I have never enjoyed making any other quilt as much as this. Lori you really inspired me. Thank you so much I love all of your designs. Barbara from Australua.
I’m had this for almost a year and not tried it yet….well the time has come and time to get started!
Post a Comment