

Rise and Shine because
it's time to make another block!


We are using the


And Farm Girl Vintage fabric...

To make the
Farm Sweet Farm Quilt
if you are just joining us
and need to download
the sew along guide:)

For those of you who have
been here from the beginning...
I'm sure that you have
used the Sew Along Guide
and cut each piece for the
Mr. and Mrs. Farmer Block:)
YaY!
Sew Simple Shapes
that you need for this block:
H2 - 1
H3 - 1
H4 - 2
H7 - 1
H9 - 1
H10 - 4
H13 - 1
H14 - 4
H15 - 9
H30 - 1
H32 - 1
H33 - 2
H34 - 1
H36 - 2
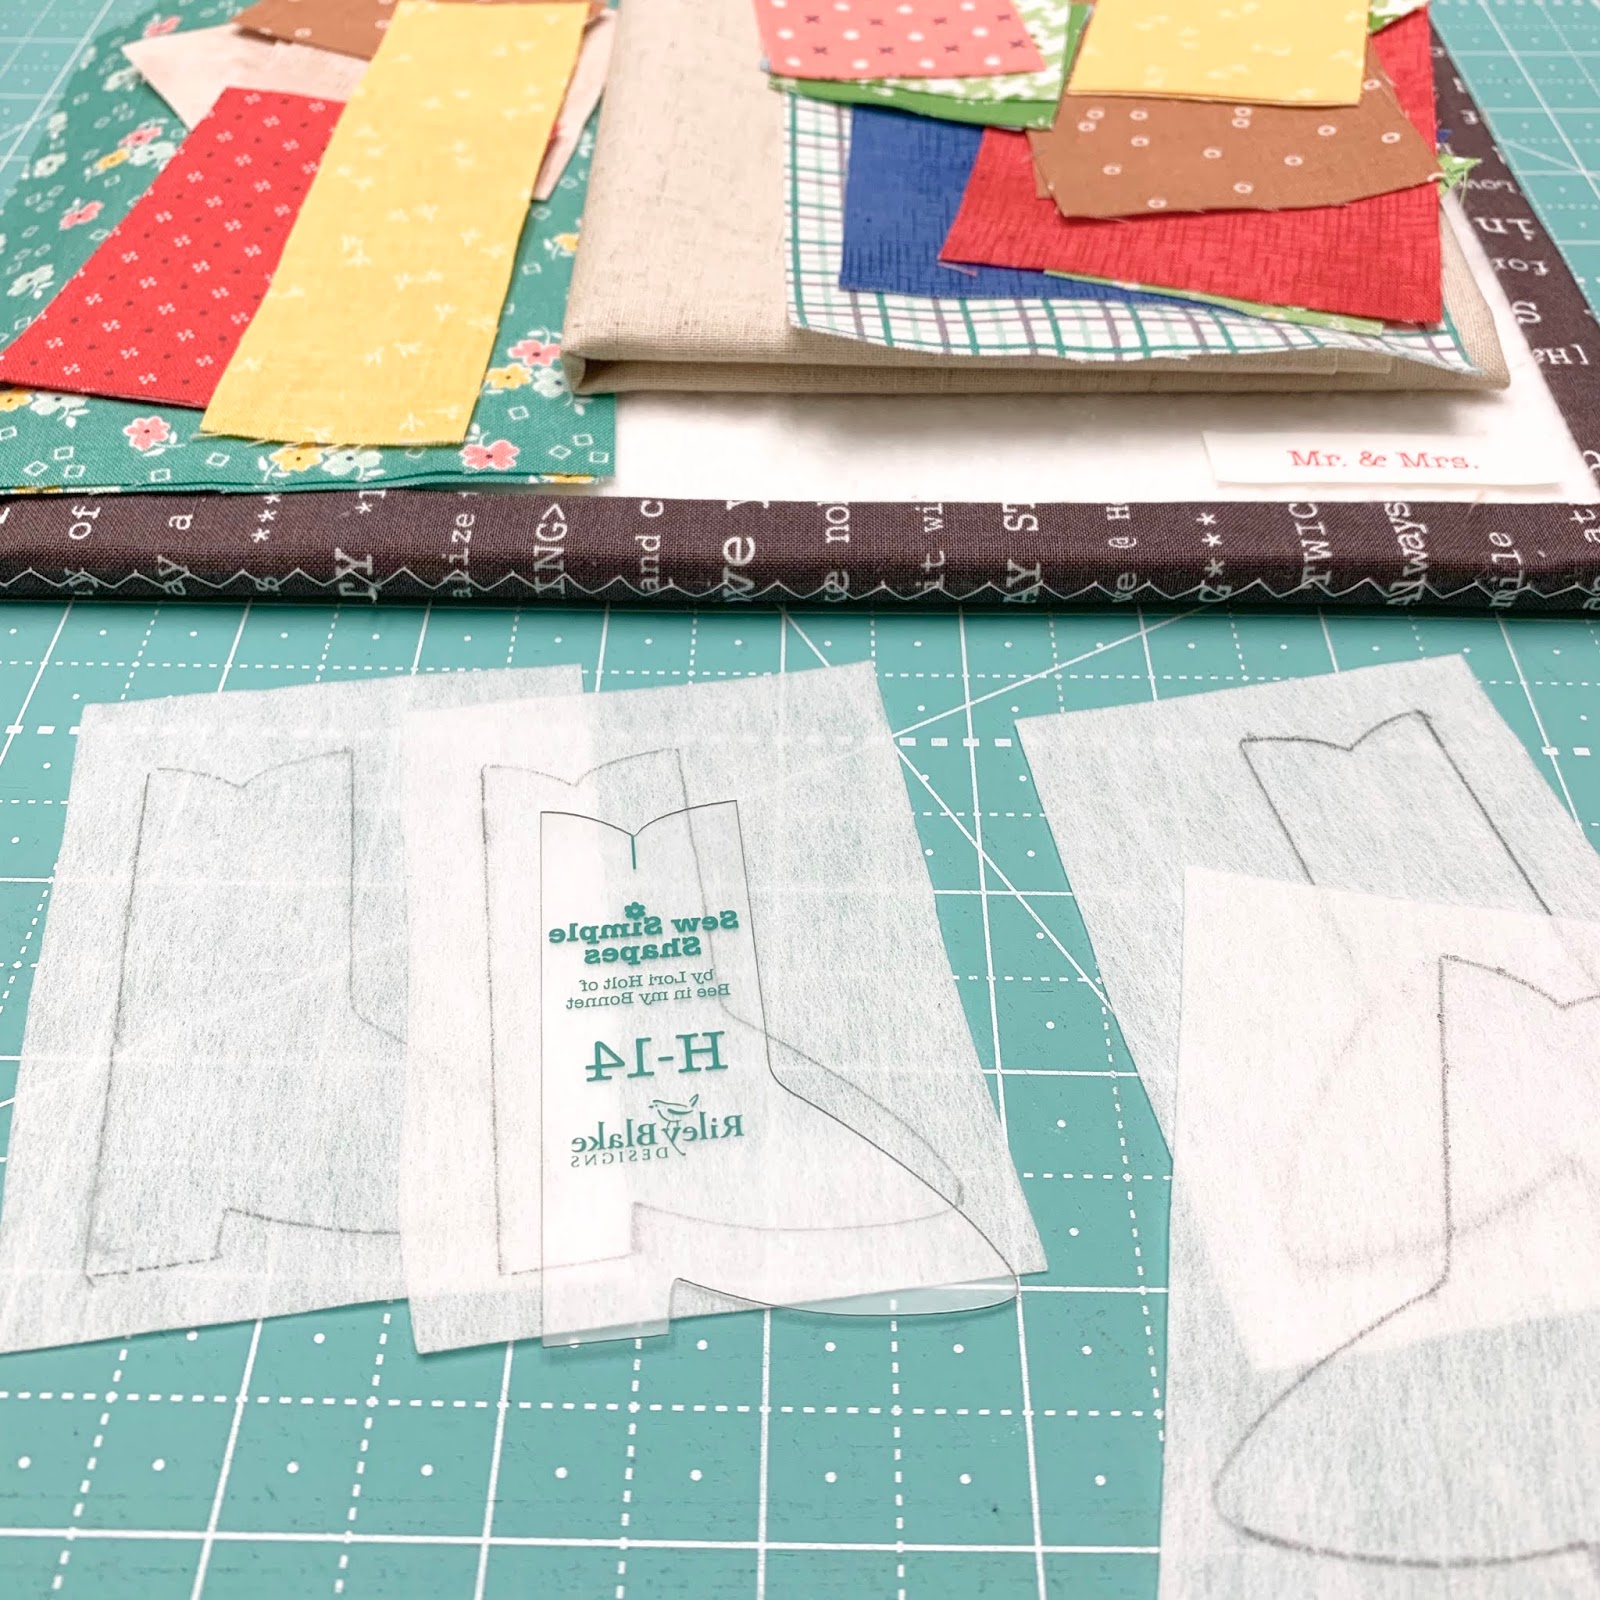
Before you trace all of your
Sew Simple Shapes
that go with each piece...
take note that you will need to
trace 2 of the H-14 (boots)
in reverse so that Mr. and Mrs. Farmer
have both a left and a right boot!

Also...
Mrs.Farmer has a short sleeved dress
so you will need to mark them
as the sewing line when you trace hers.
Use the lines on the
H-33 Sew Simple Shape to mark them.

One more thing before you
sew the H-2 (Mr. Farmer's head) ....
first sew the 1 1/2" x 2 1/2"
brown print that I had you cut
for this block on top of the
2 1/2" x 3" piece and press
the seam open for less bulk.
This is for the top of his hat!

Now you can lay your traced
H-2 Sew Simple Shape
on top like this and sew.
The hat portion is about 1" tall.

After you have prepared your strips
using the bias tape makers...
you will need to cut
the following lengths of each one:
1/4" dk.teal for shovel handle-
cut 6 1/2" long and press one end under.
1/4" coral for his suspenders-
cut them 3" long and press one end under.
1/4" brown for his hat brim-
cut it 2 1/2" long and press each end under.
1/4" red for he apron straps-
cut them 1" long and press one end under.
3/8" ed for her waistband-
cut it 3" long and press both ends under.
3/4" nutmeg shabby for their necks-
cut them 1" long.

Oh! I almost forgot the
1/4" green flower stems!
cut them in the following:
6" - 5" - 4" and 3"

After you have sewn and trimmed...
and before turning...
you will need to clip the
cleavage areas in
the boots...the heart...his hat
and the flowers.

Also clip both of the under arms
and her apron waistband.
Clip the tight inner curve of his jeans.

Don't let these scare you...
just clip and turn them like this
and press one leg at a time.

The back will lie nice and flat...

And the front will too!
Not as hard as you may think:)
You just made a pair of jeans
for Mr. Farmer.
YaY!

Okay...
before you pin your pieces
to the linen laid out
onto your design board...
you will need to embroider their faces.
Trace using the light box
and the pattern in your
Sew Along Guide.
After sewing it...
I cut the end off of
Sew Simple Shape H-10
for the top bun in her hair.
You could choose brown or gray or
dark gray for her hair
if you don't want a blonde Mrs. Farmer.

About the heart...
I chose to embroider 1936 on mine
for the year that my paternal
grandparents Walt and Ida
were married and
started their farm.
Aren't they the cutest!!

I put the milk bucket in Mrs.Farmers hand because of this photo of my Grandma:)
You can choose to embroider
a year or a date that has significance
to you or leave it plain.
If you do this...
just draw it on first or type one
to trace using your computer.

They have faces!
I used 3 strands of brown
for the backstitch and 3 strands
with two twists for french knot eyes:)

This block will finish at
12" tall x 18" wide
and you will trim it down to
12 1/2" x 18 1/2" AFTER
your applique is complete.
This means that when you are
laying out your block...
use a ruler to make sure that
the pieces go no wider that 17 1/2"...

And no taller than 11 1/2".
You don't want to cut off her hair...
or his hat...
or the soles of their boots
when you are trimming up!
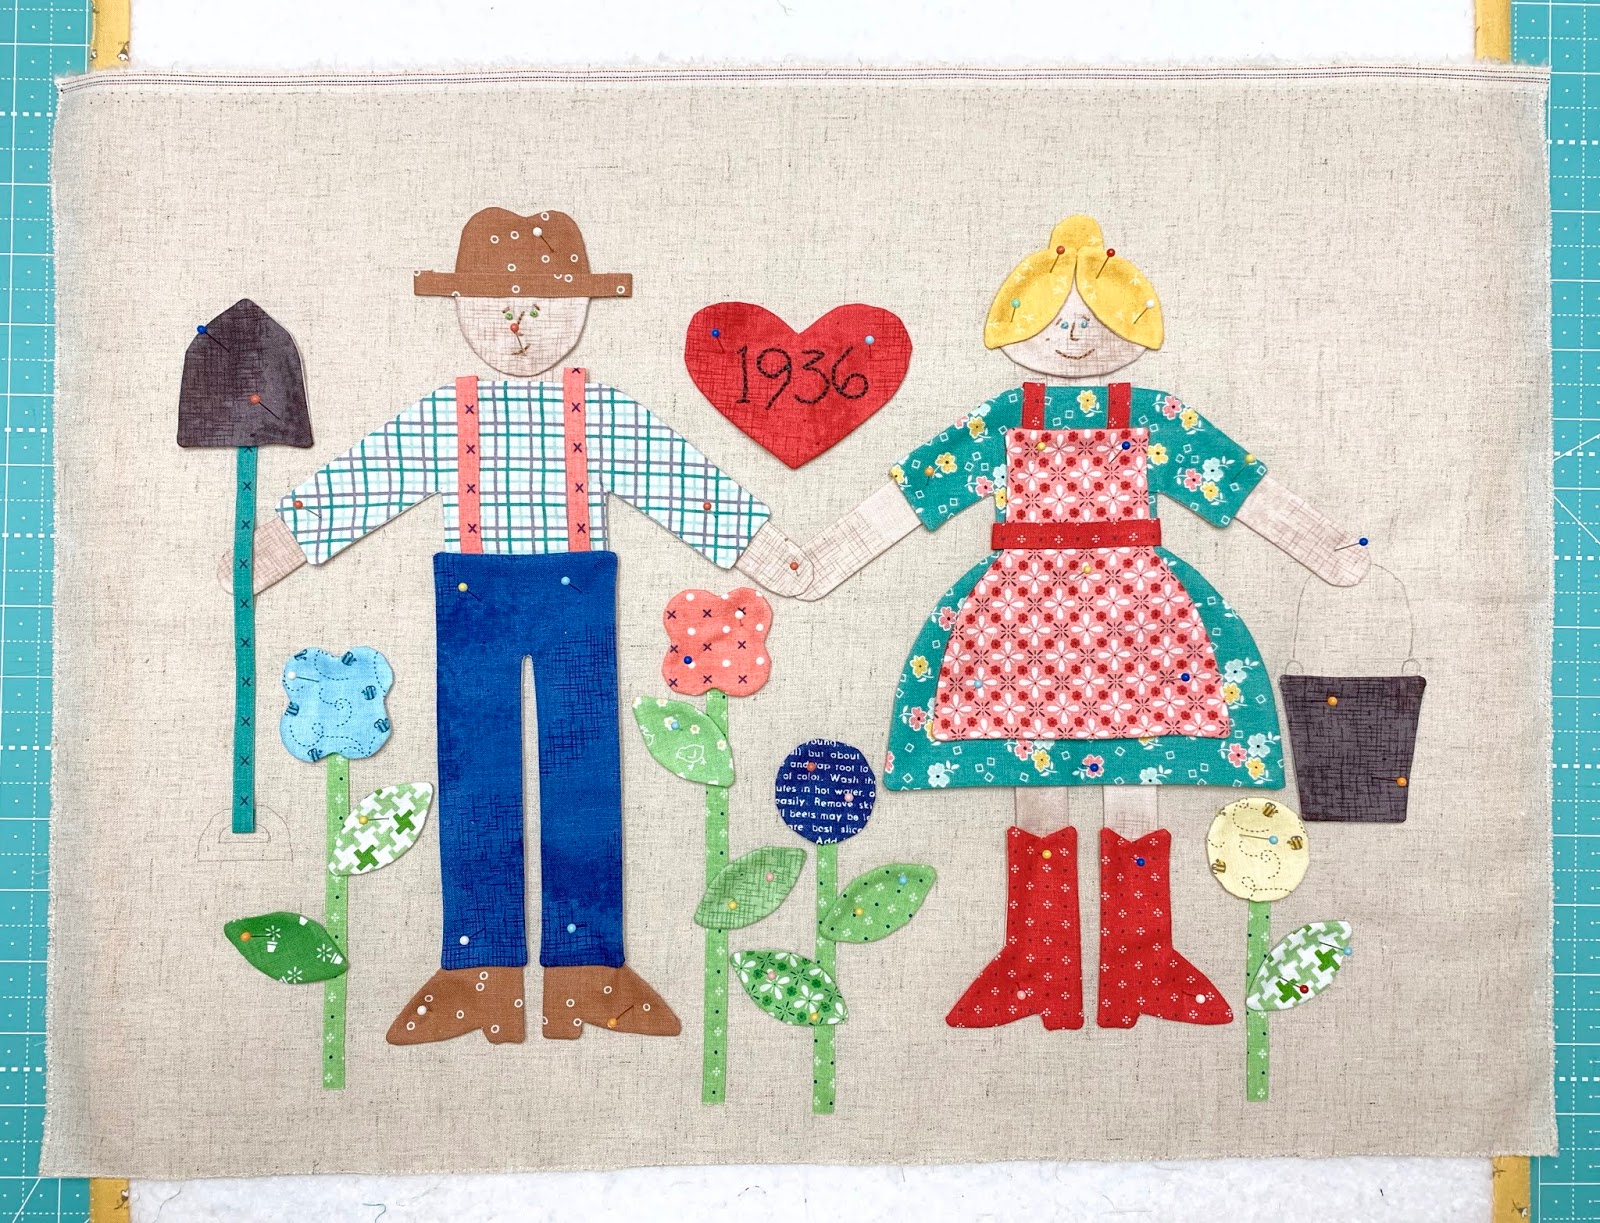
After pinning down each shape...
check your measurements one more time...

And then use your Sue Glue.

Now remove the pins and lay rollers
and something heavy on top while they dry.
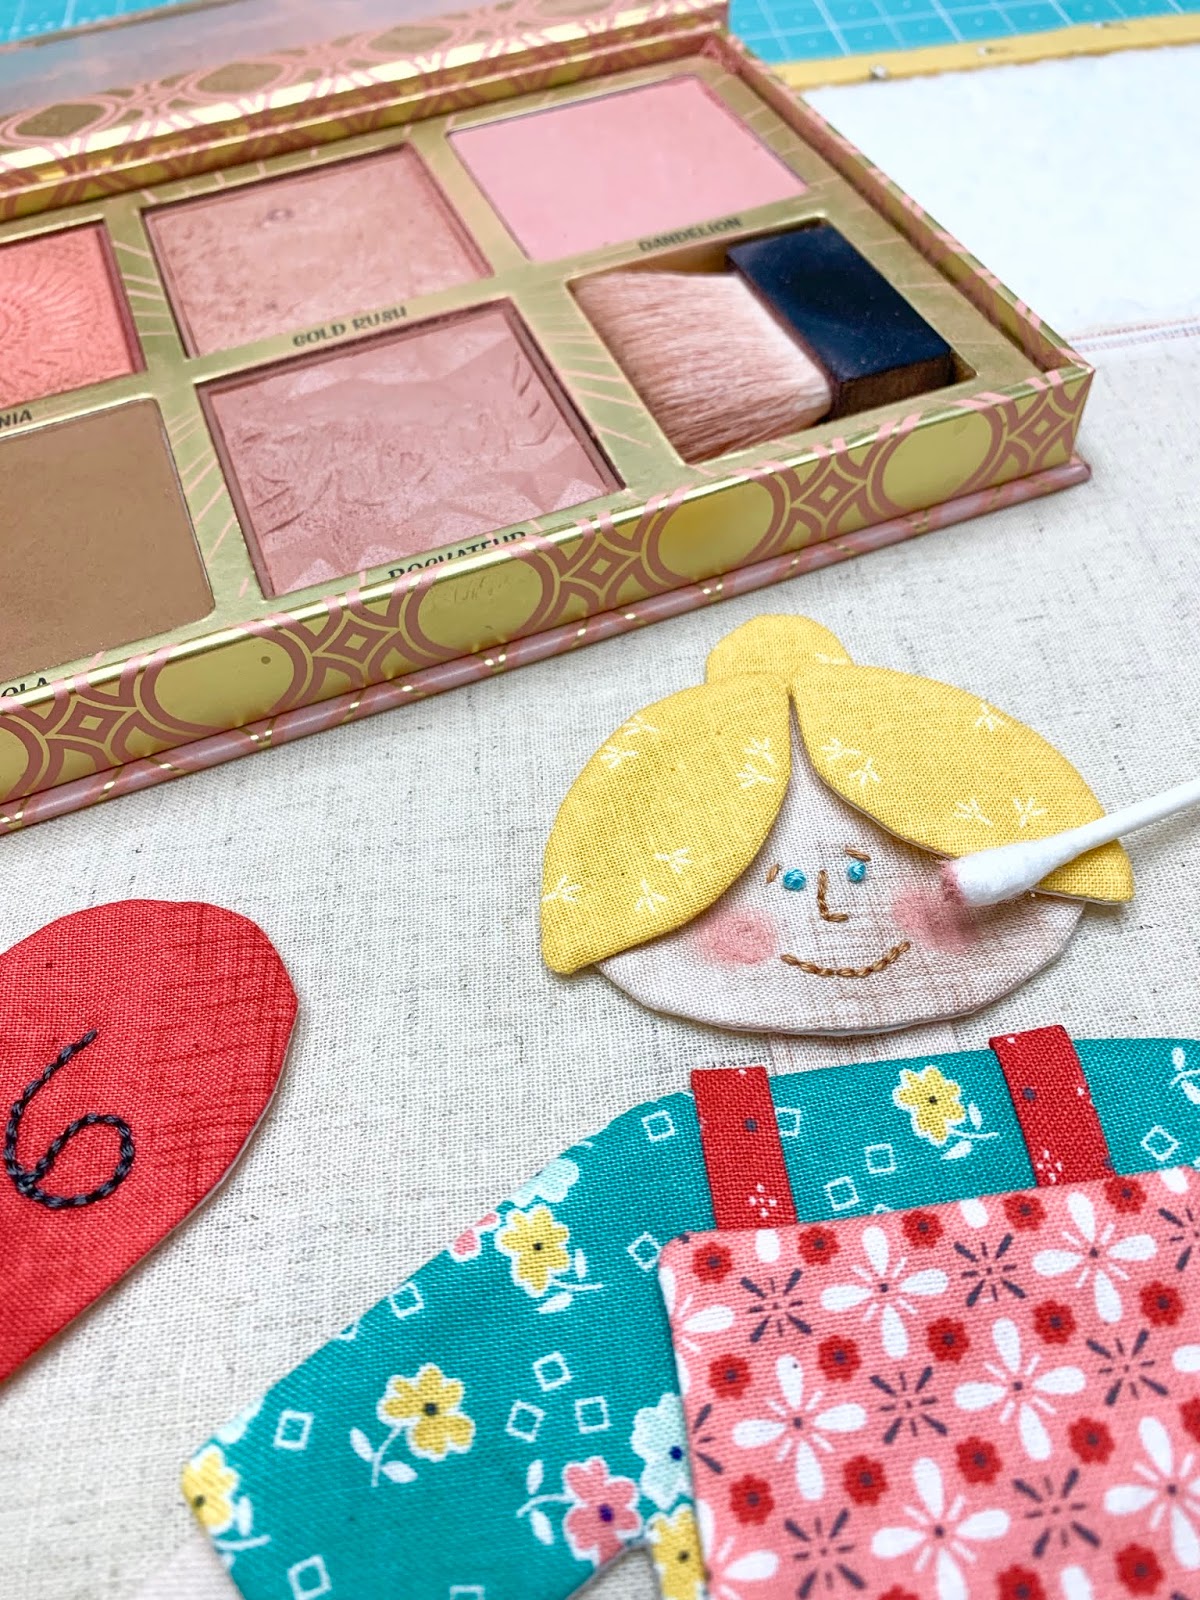
I almost forgot to show you that
I like to put a blush on those cheeks:)
Who ever heard of a farmer without
plenty of sun on their face?
I just use blush and a Q-tip to apply:)

Mr. Farmer says "Aww...shucks"
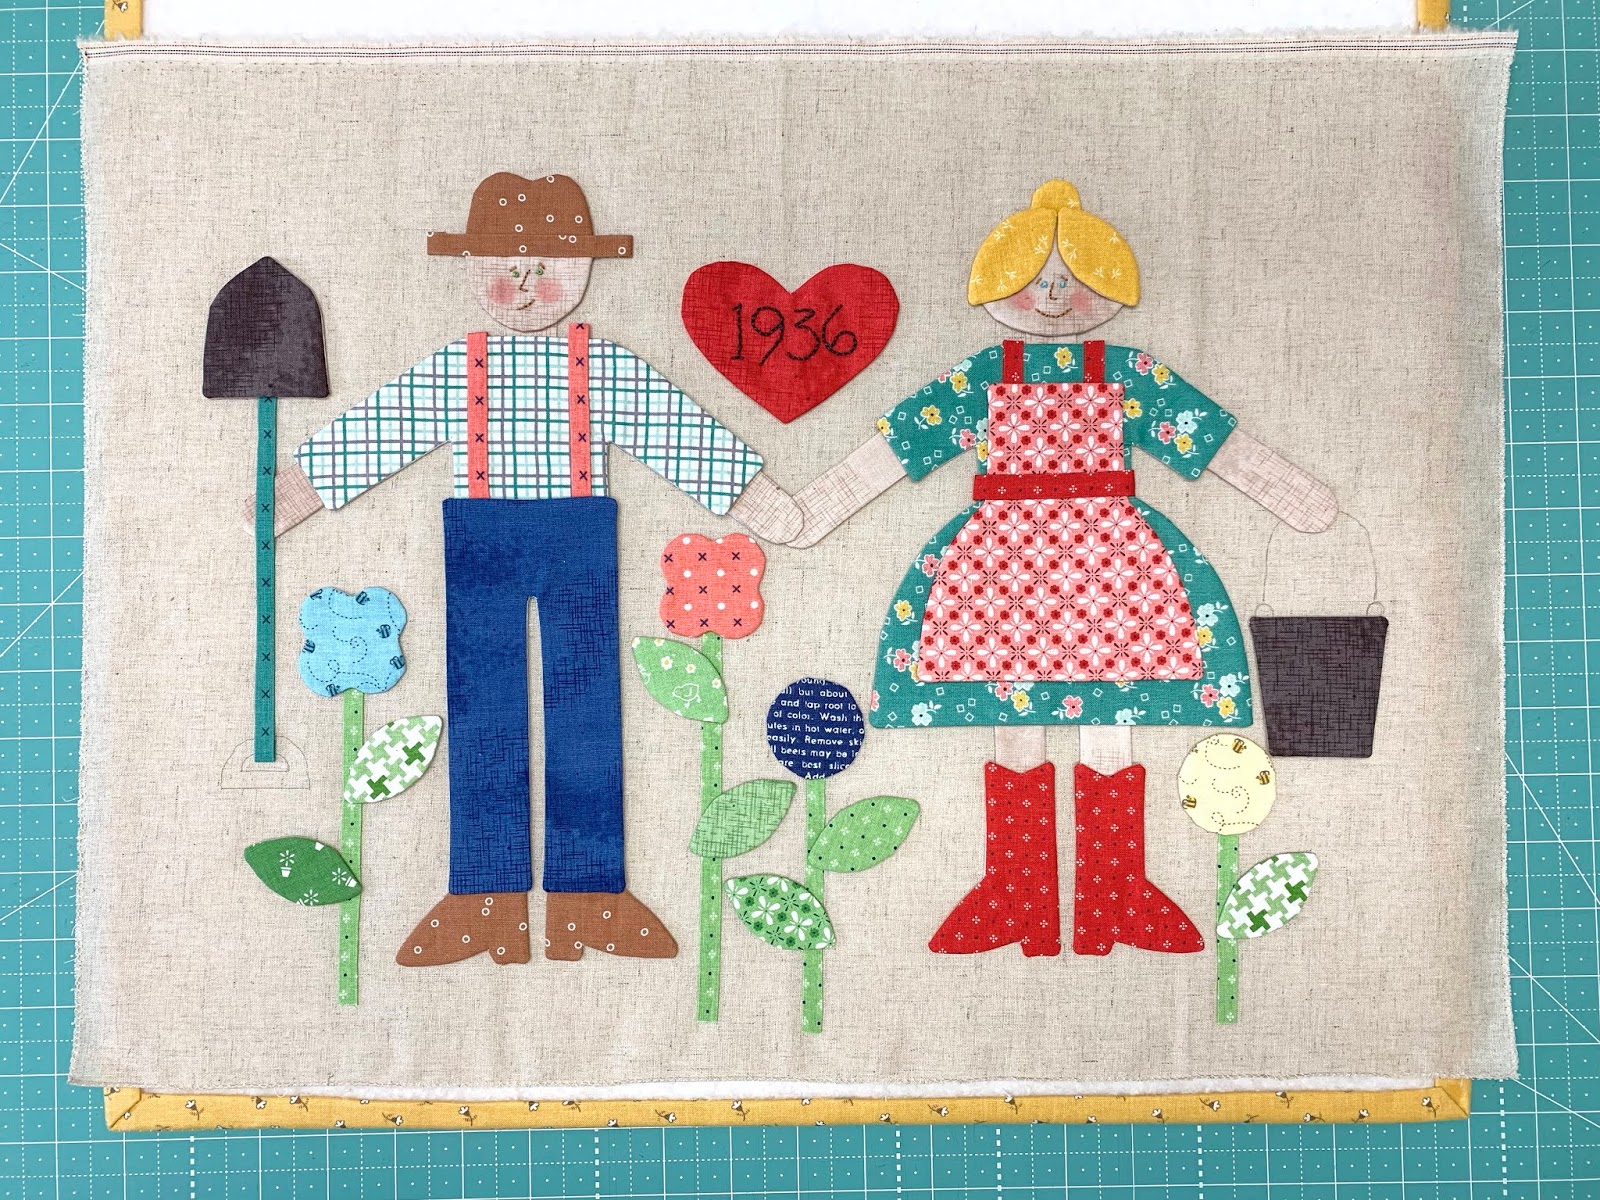
Okay...
now stitch them down in your
preferred applique method and
finish up with the embroidered shovel
and bucket handles...using 3 strands
of dark gray Aurifloss.

The stripes on the bucket are
done with 3 strands of red.

You will need to trim your block
down to 12 1/2" x 18 1/2"
I trimmed mine down exactly like I did
with the tractor block in
last weeks tutorial because they are
both the exact same size.

After trimming it's time for the
Cute Little Buttons!

Sewing buttons on Mr.Farmers shirt:)

Sewing buttons on Mrs.Farmers apron!

Flower centers are sewn on and
Mr. and Mrs. are ready to be sewn into
the quilt right after our last block
is finished next week:)
Tune in then!
xx
Lori

5 comments:
It looks amazing - love Mr & Mrs Farmer!
Of, for cuteness sake. The blush! ❤️
Amazing how women wore dresses (usually with aprons) to do chores. My Grandma never wore shoes so fancy to do chores. Her "good" shoes were reserved for church. Me, give me some blue jeans and a tee shirt! Love this whole quilt.
My nana use to put a clean full apron on after lunch and powder her face.she was always knitting the family socks with the 4 needles.
will these instructions be up for awhile? I'm just getting started on this. I ordered the shapes today. Sure so love this quilt! Thanks!
Post a Comment