

Good morning!
Are you ready to plant more flowers?

It's week two in our

76" x 86"

We are using Granny Chic Fabric...

and Granny's Garden
Sew Simple Shapes
to make our quilt!

This week's tutorials are
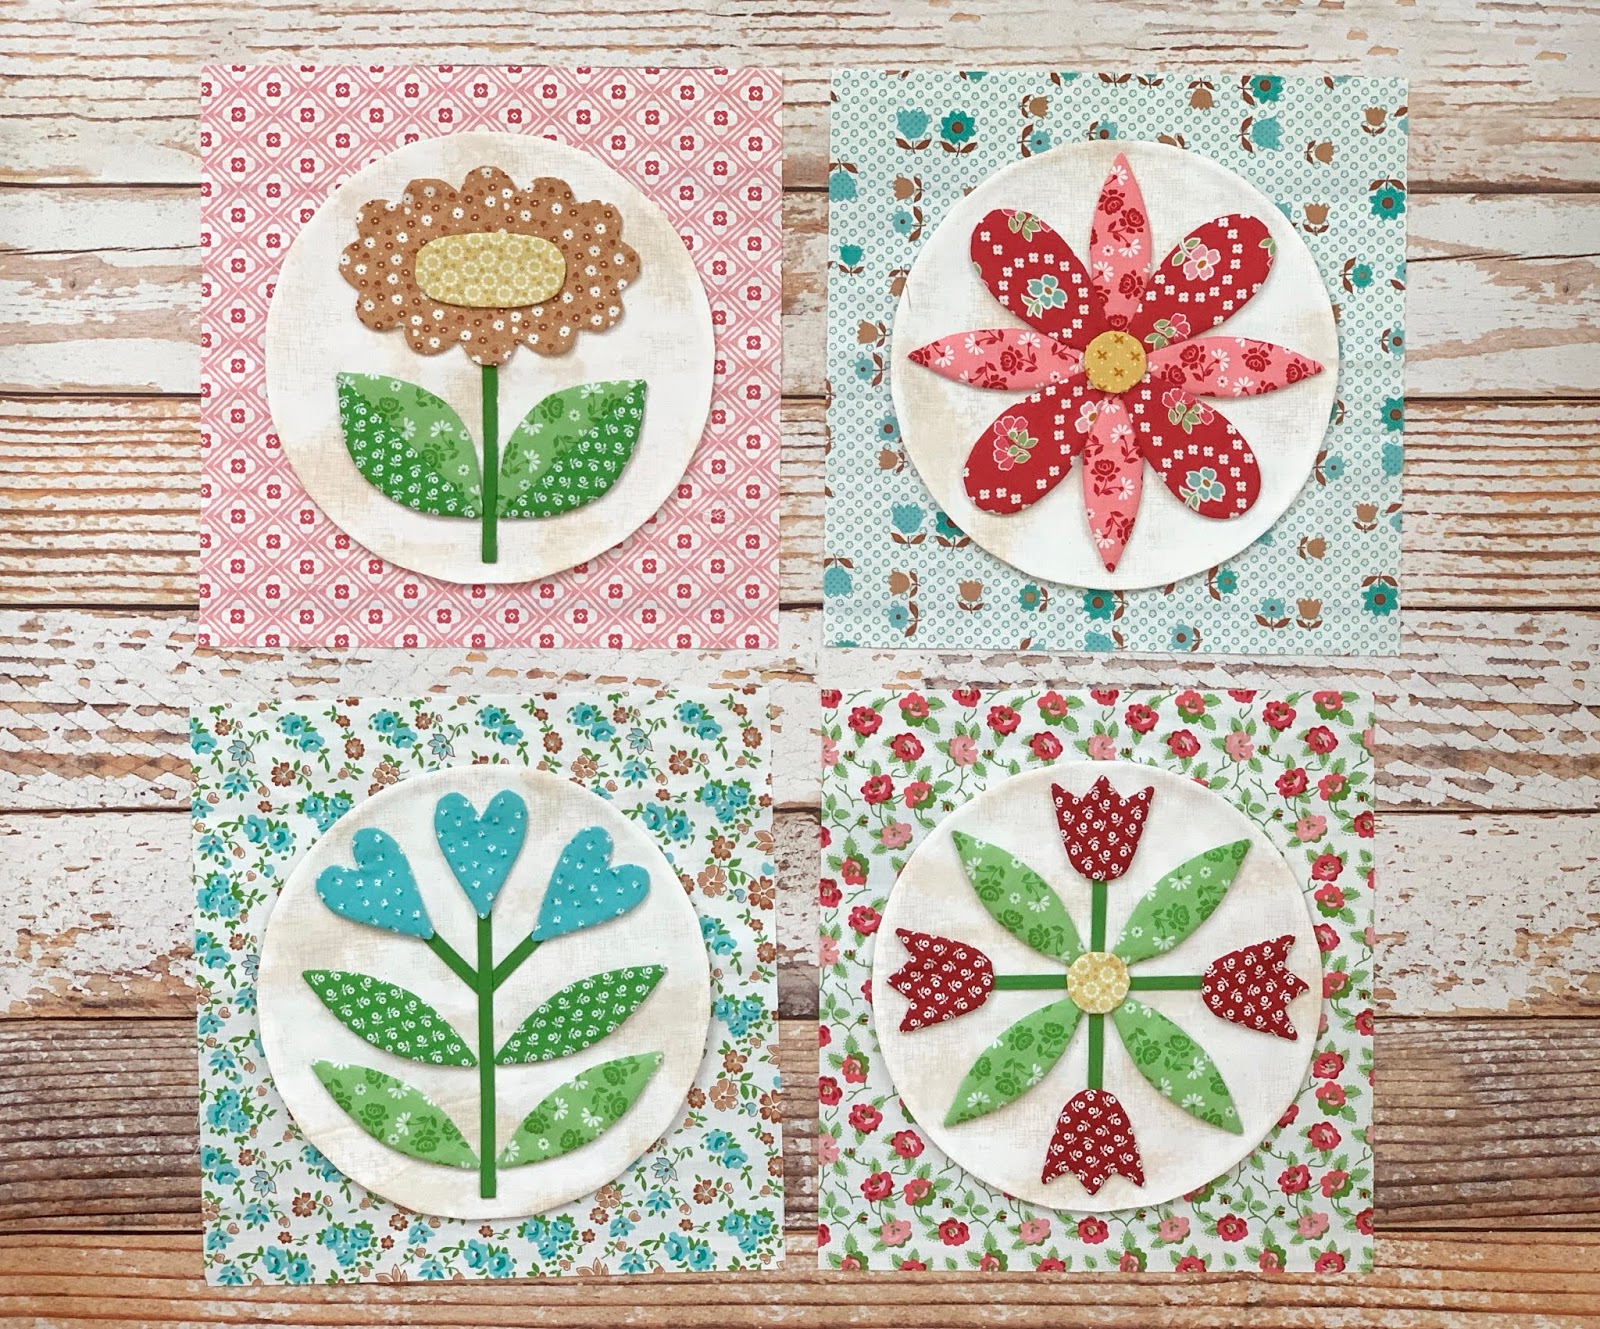
Blocks Five - Six - Seven and Eight
Let's get started!!

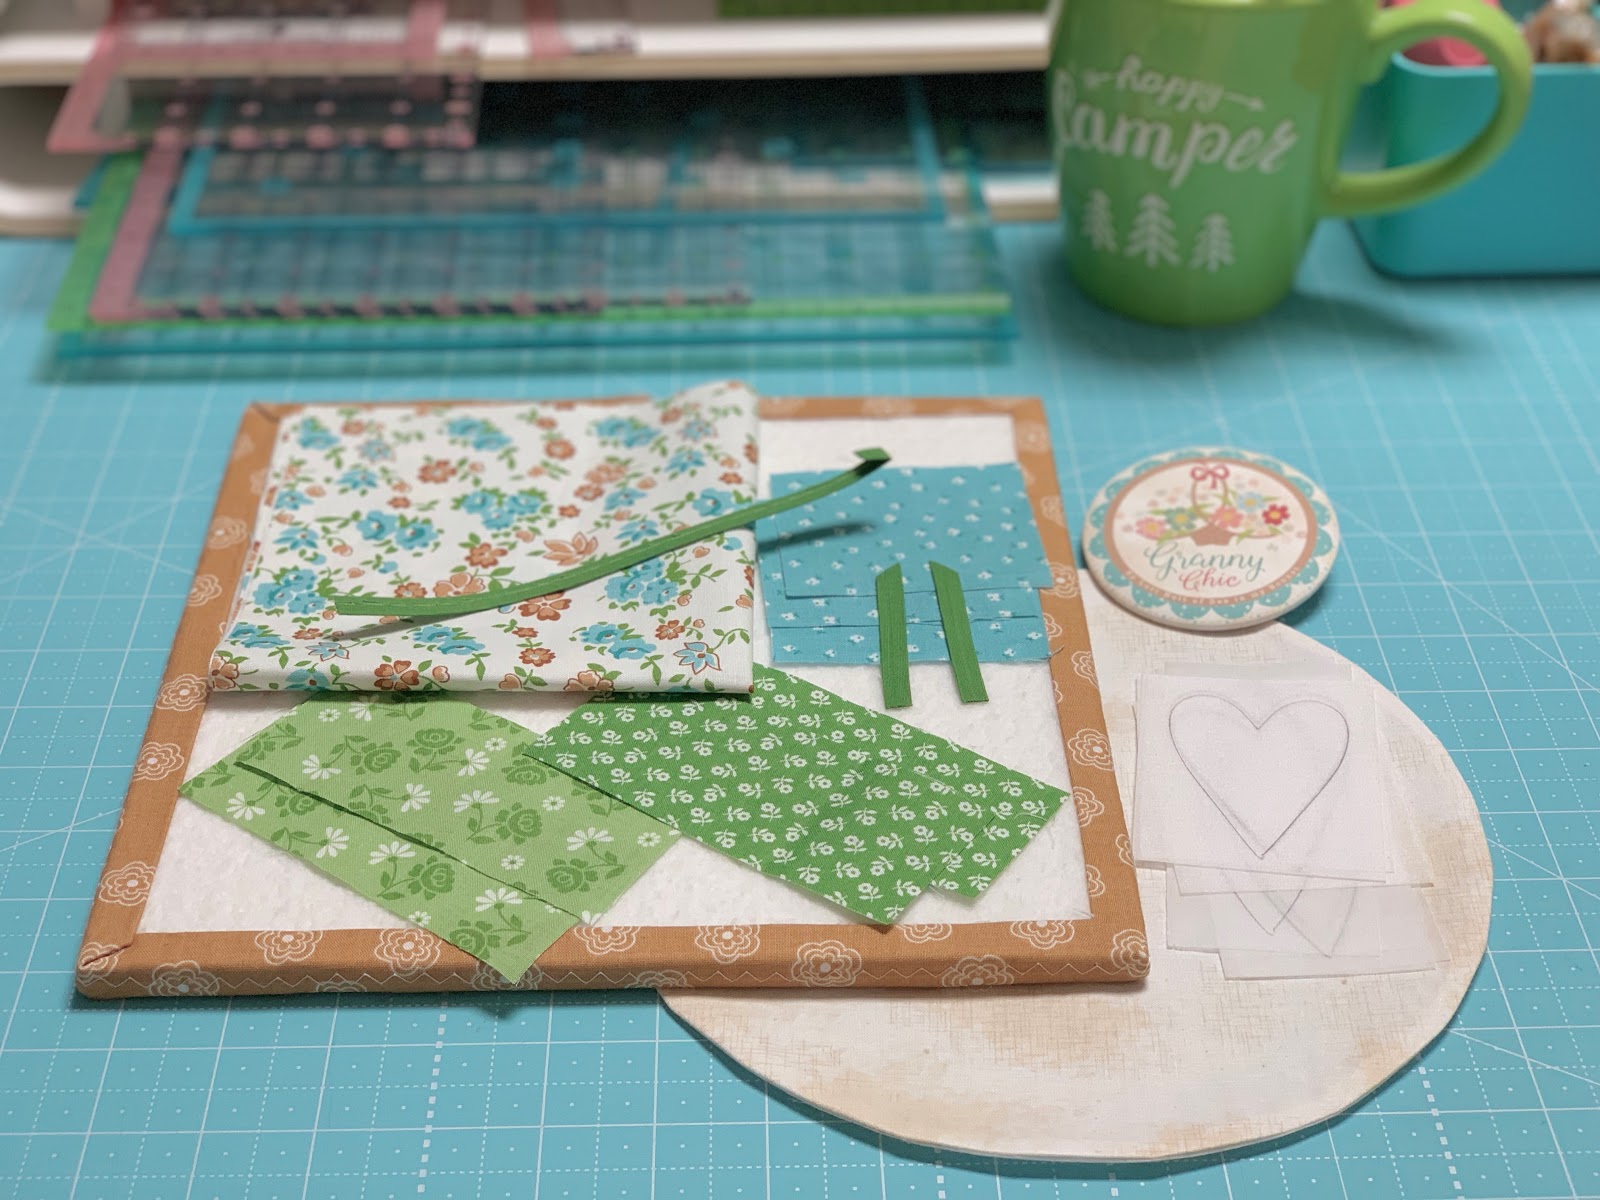
Sew Simple Shapes for
Block Five are:
2 - I 11
1 - I 17
1 - I 19
You will need to cut your stem 5" long
and press one end under.
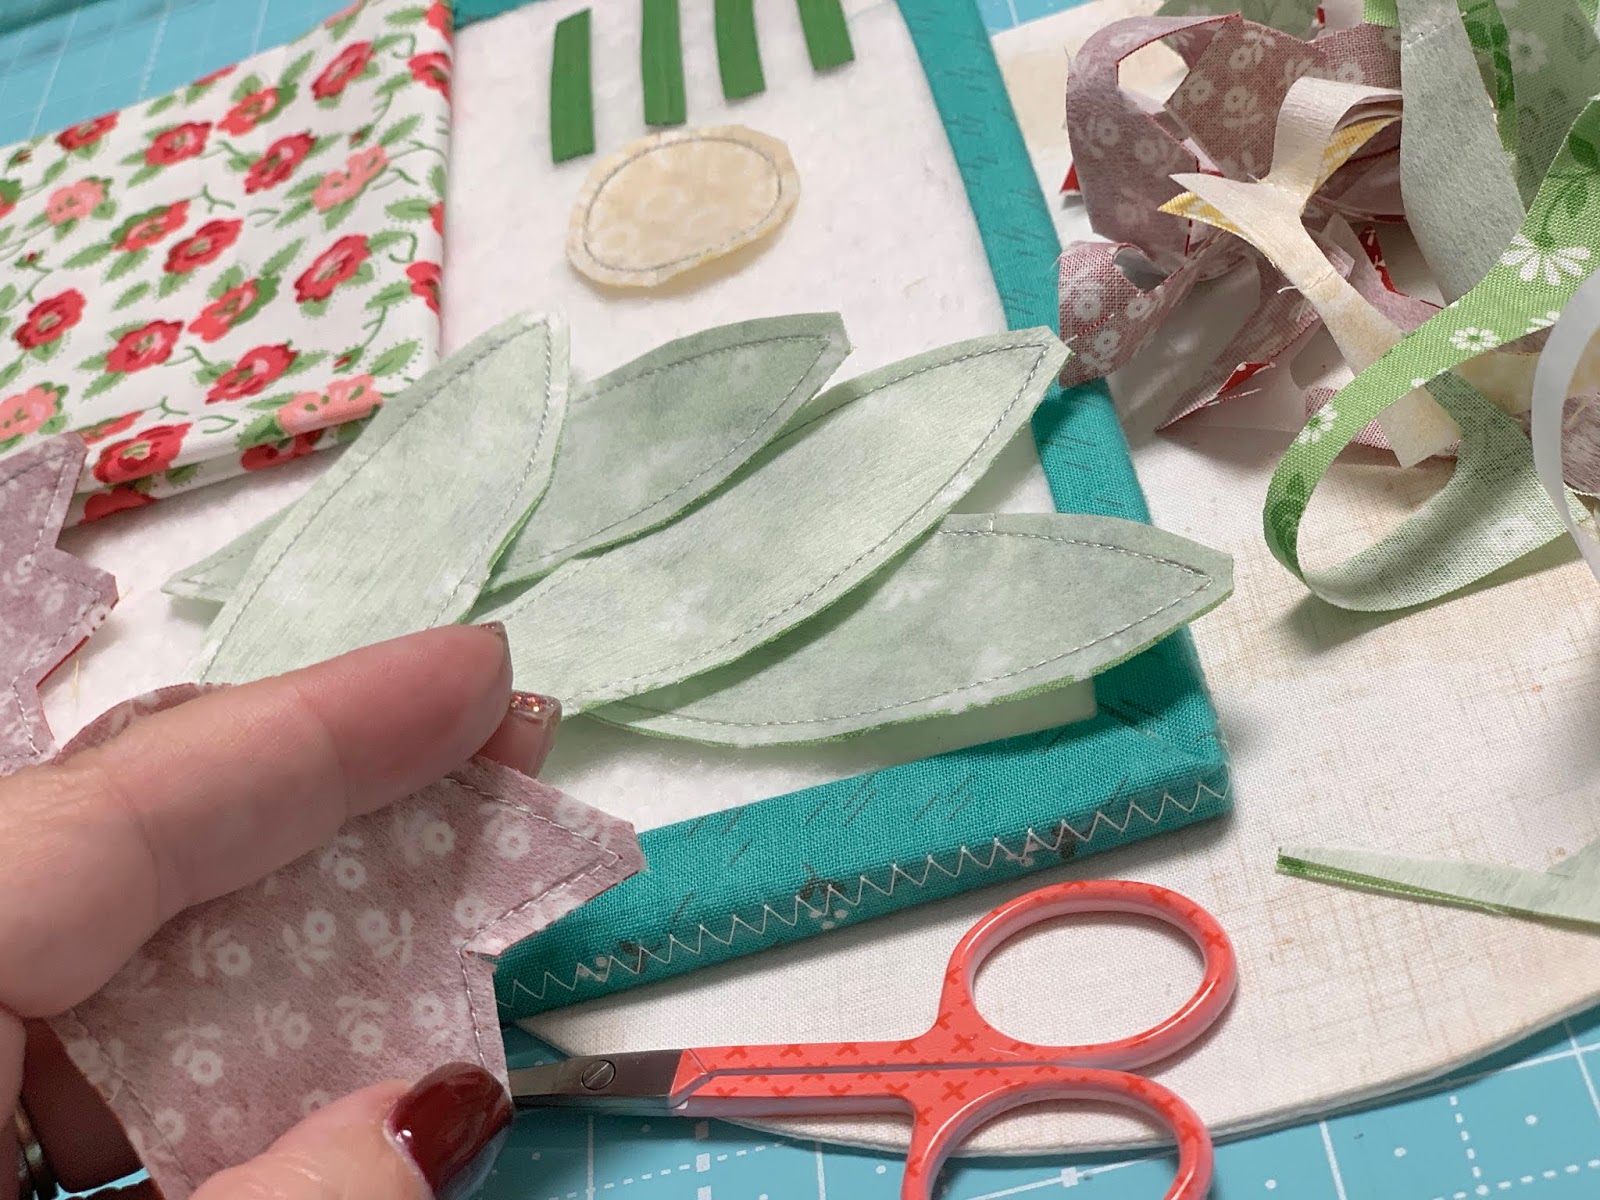
Don't worry about the green fabrics
for shape I 11 being smaller...
it's because we are going to
piece them together to make each
of the leaves from two fabrics:)

Sew them together using a
very scant 1/4" seam allowance
and press the seams open like this
so that they will lie flat when
you sew the shape and appliqué.

Then just sew them
along with the other shapes:)
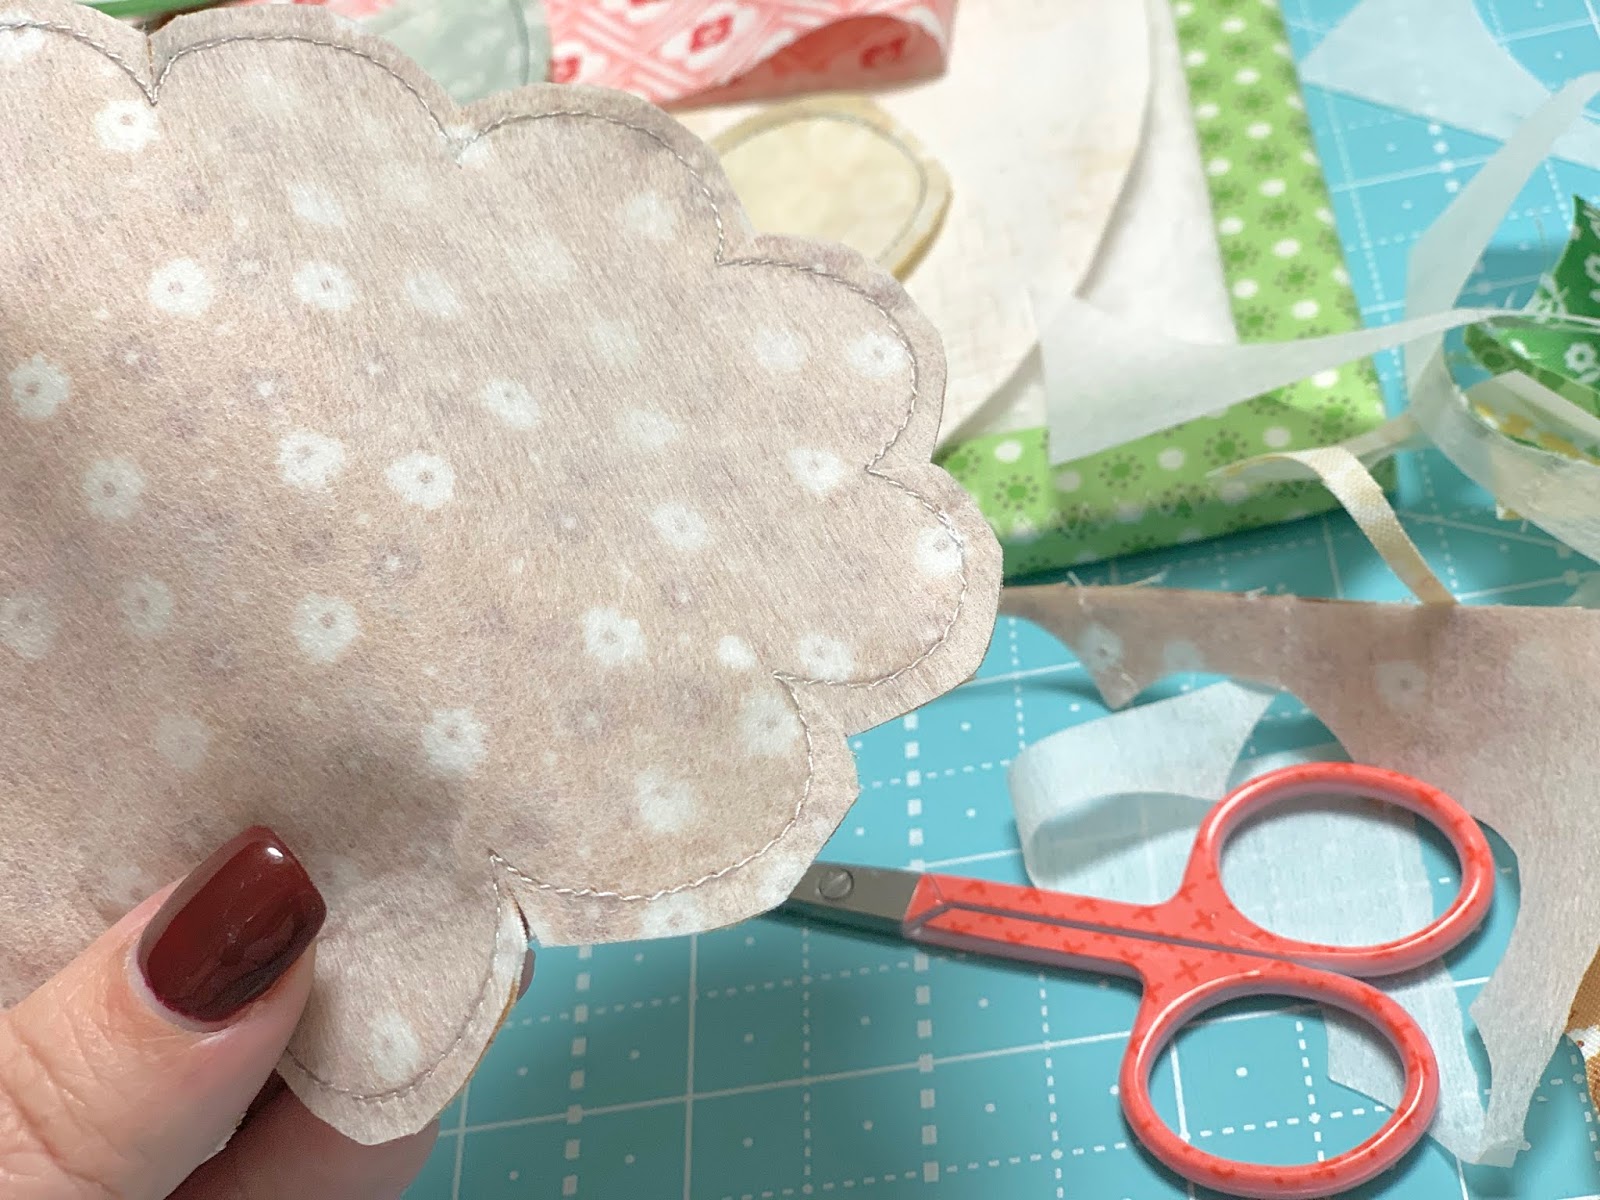
After sewing and trimming
you will need to clip each
cleavage on the flower:)

Use the point to point turner to shape and then give them a quick press!
Keep in mind that the smaller pieces
always take a little longer
to turn and shape...
but stick with it...
Patience and practice has its rewards!
In last weeks video I talked about
when doing the points I turn the
shaping tool sideways when
gently pushing them out.
if you would like to watch the video again:)

Time to glue baste!

Block Five all ready for applique:)
Now let's move on to the next flower!

Sew Simple Shapes for Block Six:
4 - I 6
4 - I 10
1 - I 21
No stems needed for this one...
and after sewing...

No clipping needed either...
just trim...turn...shape and press!

You can press your background circle
in half both ways to help
when glue basting your pieces.
Make sure you press on the
fabric side when you do.
Be sure to take advantage of
all the lines on the
10 1/2" Trim-It Ruler
when laying out your blocks...
it really helps to
get all things centered:)
I always lay my ruler on top of
each block after glue basting...
just to make sure the pieces
are where I want them to be.

Block Six all ready for applique!
Sew Simple Shapes needed for Block Seven:
4 - I 10
3 - I 14
Cut the main stem 7" long
and press one end under
Cut the two short stems 2 1/2" long
and trim each end on opposite diagonal.
The diagonal ends will
tuck under the main stem.

After sewing your shapes...
make one clip in the
cleavage area of each heart.

Turn...shape and press:)

Once again...
use the 10 1/2" Trim-It Ruler
to help line everything up.
I lay it on top of my
pieces after glue basting.
If something looks out of place...
I can easily pull that piece off
and reposition it and then glue it again.

Block Seven all ready for applique:)

Sew Simple Shapes for Block Eight:
4 - I 10
4 - I 15
1 - I 21
Cut 4 stems 2" long
After sewing and before turning...
clip the two cleavage areas
in the top of each tulip shape.

Ready for glue basting:)
Once again...
you can press your background circle
in half both ways to help for placement.

After glue basting check your placement:)

Block Eight is ready for applique...YaY!


After you've appliquéd
the flowers onto the circles...
You can applique them
to their background square.
I don't think that I'm going to
trim mine up until the very end...
but you can if you would like
and you can even sew row one together:)

Thanks for joining me today
for this weeks tutorials:)
Remember to plant your flowers
at your own speed...
because this is your garden:)
Make sure to add your progress photos
onto your social media and use the hashtag
I'll meet you there
and also right back here next week!!
xx
Lori
P.S. If you are just joining us
be sure to click on the links below
for the previous Granny's Garden
posts and tutorials.

No comments:
Post a Comment