

Hi there and welcome to week seven:)
If you are just joining us now...
for all of the information
on this fun sew along:)

Today we are starting on the
right side of the quilt...
YaY!
I'm having sew much fun
playing with Autumn Love
and I hope that you are too:)

Let's make the Milk Can Block today!
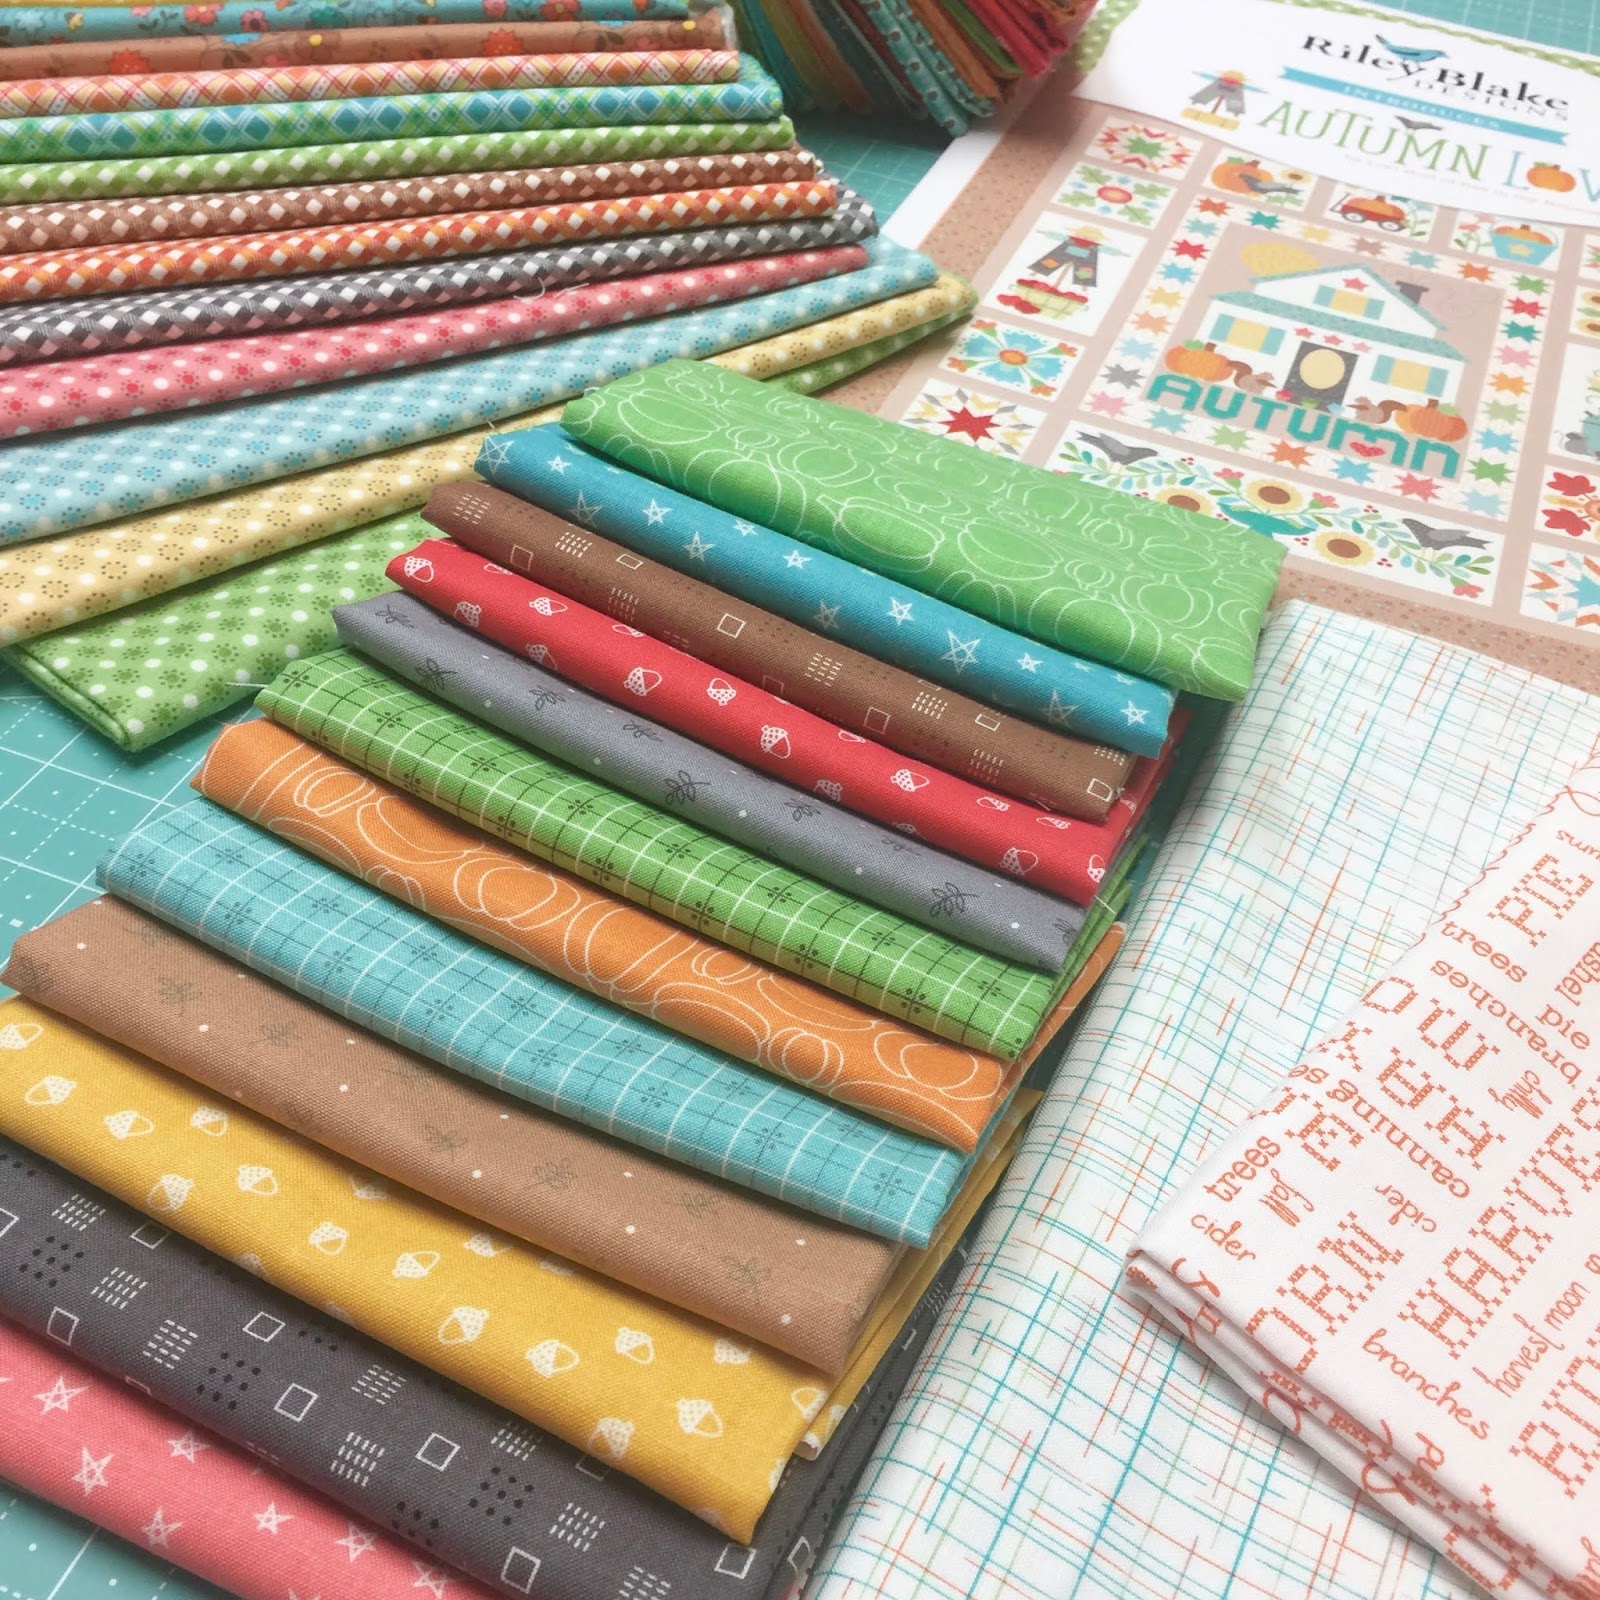
These are the Autumn Love prints
used in this week's block.

Autumn Love
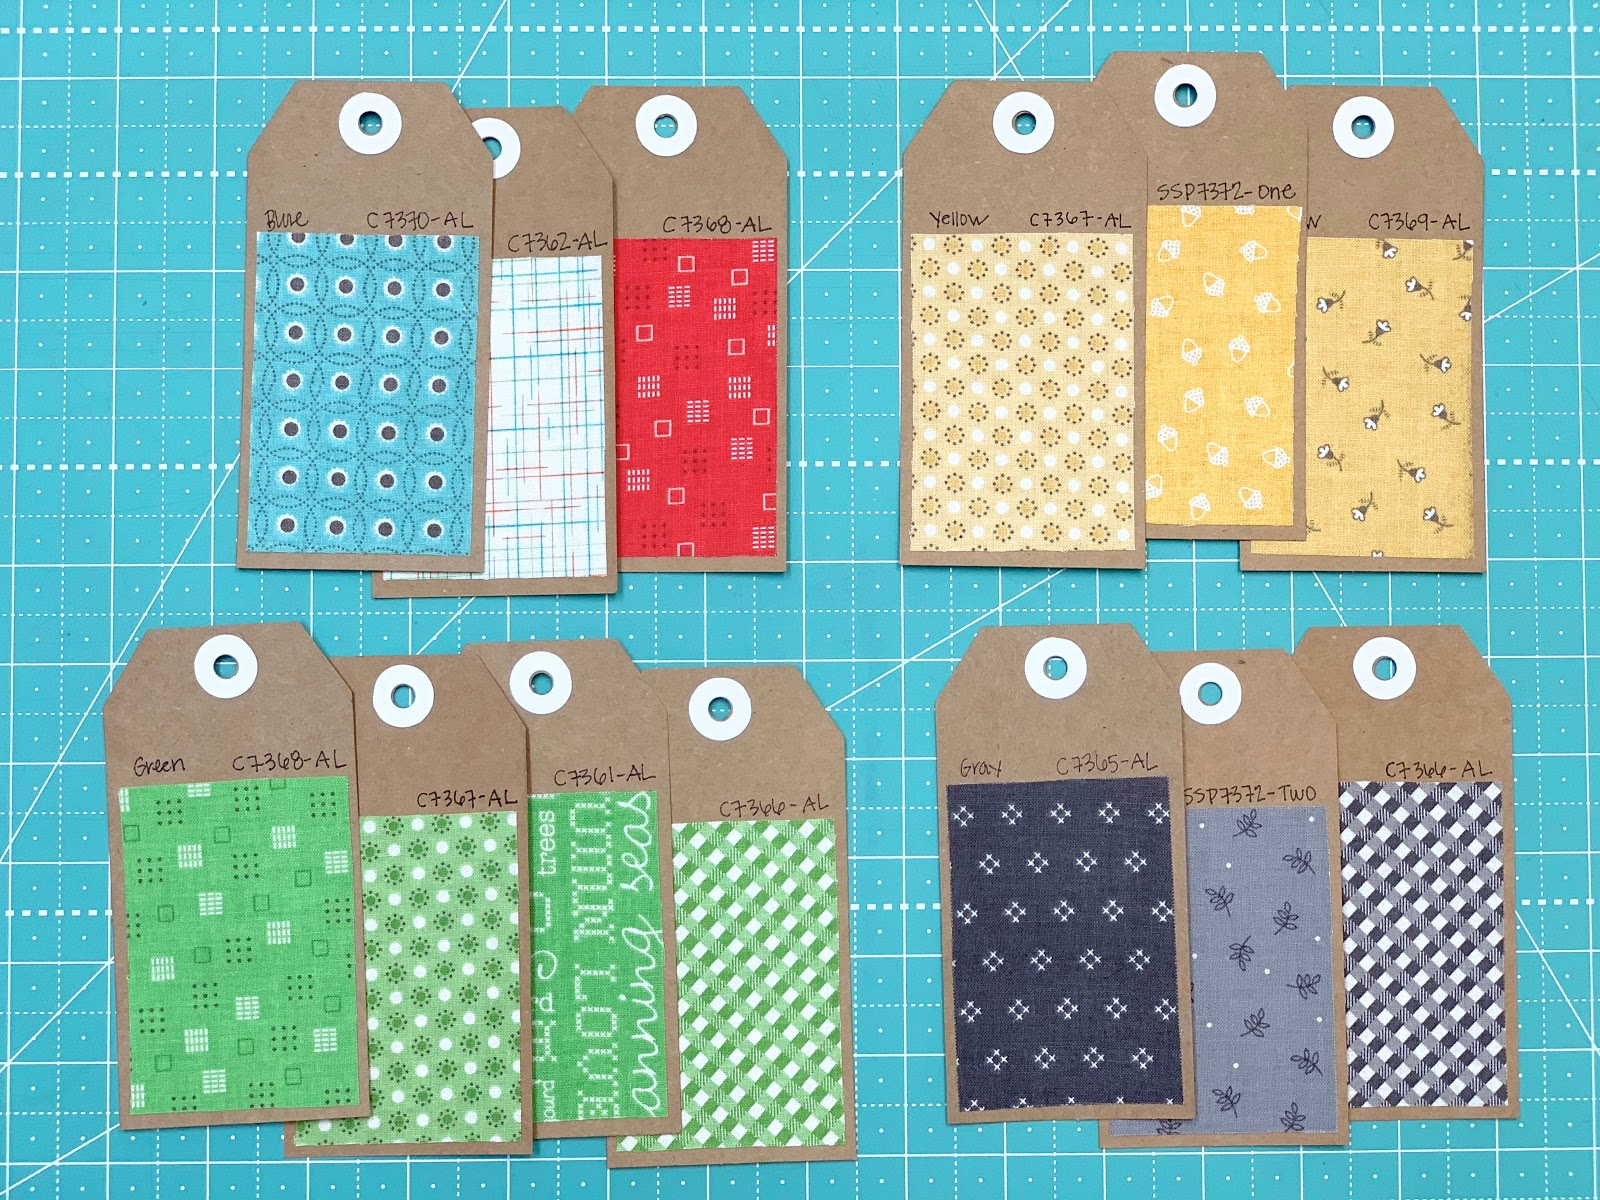
Sew Simple Shapes needed:
4 - F4
2 - F9
1 - F15
3 - F16
3 - F20
1 - F34
Cut your background block 12" x 22"
You will trim it down to 10 1/2" x 20 1/2"
AFTER the applique is completed.
You already know how to do this...
because it's exactly the same size
as the Scarecrow Block
that we did in Week 5:)

Use the 12" long 1/2" wide bias strip from the green text for the cornstalk.
I ended up using about 8 1/2" of it.
I pressed under the top end.
Cut three strips about
6" long from the
5/8" wide strips that
I had you cut on the BIAS
and make them super curvy
when you run them through the
1/4" bias tape maker.
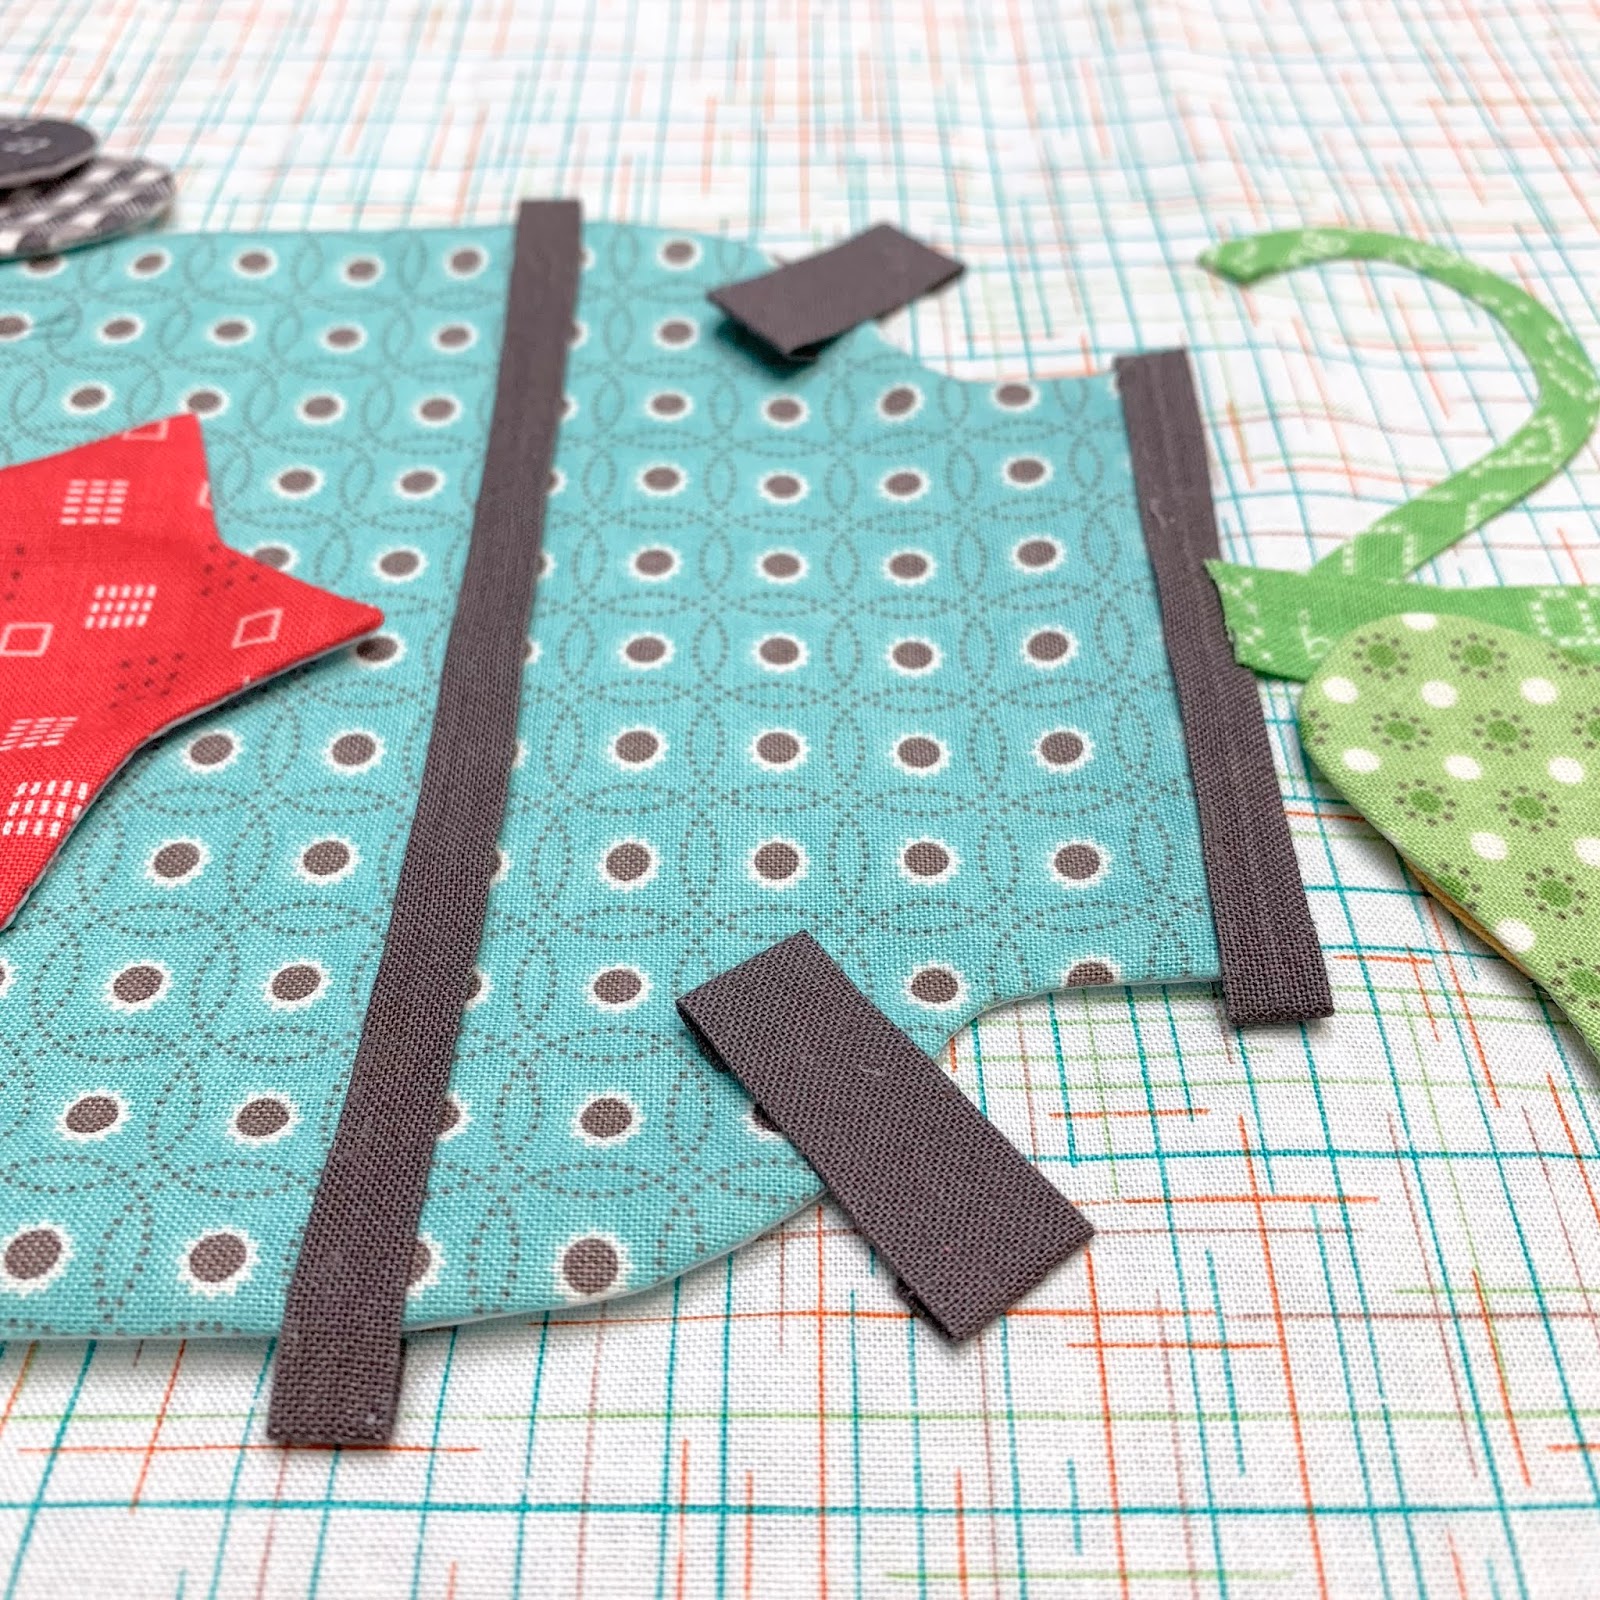
Subcut 2 - of the 1/2" wide
Steel Solid bias strips 1 3/4" long.
I pressed each end under 1/4"
Cut 2 - 1/4" wide Steel bias strips
6 1/2" long.
I pressed both ends under
on one of them and
one end under on the remaining.
Also cut a 4" long strip and
press each end under by 1/4".
(I didn't do that yet in this photo lol)

Another thing to remember when
tracing your mice...
trace one in reverse because
they are facing each other:)

After sewing and trimming
all of your shapes...
clip the inner curves and/or
cleavage areas on these shapes:
milk can...
corn husk...
the mice and the star.

All shapes are turned...
pressed and ready for glue basting!

Press your background in half
long ways so that you can place
the cornstalk in the center.
My finished cornstalk
measures 8 1/4" long.
Tuck the raw edges of the
curly ones under the center cornstalk.

Then I added the corn like this:)
Don't forget to add pins
that measure 10" X 20"
onto your background
just like I showed you for the
Scarecrow Block in week 5.
They will help you to
keep your cornstalk from
"growing" too tall!!

Now comes the milk can ...
the bias strips and the star:)
It's 4 3/4" between the
two widest bias strips
on the milk can.

Then layer the mice on top
of the milk can.
I traced the tails on using the
pattern on page 18 of the guide.
You can just make two long stitches
for whiskers...
no pattern needed to trace.
I drew them on to show you:)
I'll do this embroidery after
applique instead of
before like usual...
because it extends onto
the background fabric.
You can also do a french knot
for the eyes...
unless you want two blind mice lol:)

Use the pattern on page 17
to trace the embroidery
on top of the cornstalk.

I pinned all of my shapes
onto the design board...
then glue basted
just as I always do.
I used my
8 1/2" x 24 1/2" Cute Cuts Ruler
and my Queen Bee Rock
to help my block to dry nice and flat.

All ready for applique!
I noticed in these photos that the raw edge on the bottom of my cornstalk came untucked...but I assure you that I will tuck it under before applique:)


After I applique...
I will sew 2 Cute Little Buttons
onto the handles of the
milk can like this:)

Here is a close up of the embroidery.
I used all 6 strands of my dark gray Aurifloss for the mice tails and whiskers...and french knots for the eyes!

I used all 6 strands of my dark green Aurifloss for the top of the cornstalk:)

I haven't been able to
applique my pieces down yet...
but I will have time before next week!
We will be doing the
Sunflower Block and
the Maple Leaf Block...
See you then!!
xx
Lori

No comments:
Post a Comment