

Hello and welcome to the
Granny's Garden Bee Prepared blog post!
Today I'm going to talk to you
about prepping for the sew along:)
If you are new to my applique sew alongs...
You can read all of my
previous ones because they
remain right here on my blog.
I would strongly suggest that you do
and you will become familiar
with how this sew along will work!
You can find each sew along
by scrolling down and looking at
the right sidebar of this blog:)

Want to know how to join us???
Here's the sew along image
for you to use...
post it on your
Instagram and/or Facebook
to show that you have
joined our sew along!
Use the hashtag
#GrannysGardenSewAlong
when you post and then everyone
on that hashtag page can see your post
and we know you are doing the sew along:)
By doing so you have
joined our sew along...
YaY!!

The sew along will take place
right here on my blog every
Monday starting August 26th.
Each Monday we work on the quilt
and I will give you directions
through step by step tutorials.

Page 2 of the Sew Along Guide
has the schedule of what tutorials
I will be doing on what week.
The guide is free...
and is ready for you to download!
to download and print.
I like to put mine in a binder
with sheet protectors for
easy access during the sew along.

There are corrections on page 3 which have been updated on the guide:
1. Border cutting on
the Pink Granny Aprons print
should be 8 1/2" x 10 1/2"
2. Cut the 4 1/2" square for
block 14 from the Red Medallion
print instead of the Pink Diamonds.
3. Cut a 2 1/2" square from the
Pink Granny Needlepoint print for Block 31.
You can see here where I have
written what it should be.
It has been fixed on the guide
so if you haven't copied yours yet you are good!

On the last page of the guide
there is some cute
Granny's Garden Sew Along clip art
that I designed for you so that
you can use with your binder
or to make cute tags or
use with your planner etc..
I'll be using it to make some fun things
and I'll show you
as soon as it's ready!

On the second page of the guide
it lists all of the
supplies needed for the sew along.
In the Bee Prepared post
I like to show you a photo
of each supply just in case
you are new to my sew alongs
so that you can see what they are.
I'm a visual person and
that helps me so I'm hoping
it will help you!

We will be using my
newest fabric collection called
Granny Chic
and I designed the Granny's Garden quilt
especially for this fabric.
It has been arriving in quilt shops everywhere for the last 4 weeks.
If you have pre-ordered your fabric kit
and sew along supplies from your
fave quilt shop you should be
getting them anytime now...
if not already!
If you still need the supplies
and a kit and don't know
where to find them...
simply do a quick google search of
"Granny's Garden Quilt Kit"
so that you will be able to:)

Here are a few images from when
the Granny's Garden Quilt was
being made to display in the
Riley Blake booth during
spring quilt market in May...


That quilt belongs to Riley Blake
and I'm going to be making
my quilt right along with you:)
The following are the supplies listed
in the sew along guide
and are what I will
be using to make mine!

First off...
is the set of
Sew Simple Shapes
called Granny's Garden:)

Here is my newest set of
Aurifil threads called Granny Chic...
especially made to go with the
new colors in this collection:)
These threads are for hand applique
as well as machine applique.
You will want to match your applique pieces.

I love these colors and it's no secret
how much I love Aurifil threads.

This is what the Circle Rulers look like.
I have two different sets of circle rulers.
This is the one that has four rulers
in the set.
The product number is on the guide
so that you are sure to
purchase the correct set.

Here is what the
10 1/2" Trim It Ruler looks like...
we will use this to
perfectly center and then
trim up the blocks after appliqué:)

For this quilt we will only need
one size of the Clover bias tape makers.
It's 1/4" and is used for all
of the flower stems in the quilt.

I'm going to prepare all of my stems
(fabric required is on page 4 of the guide)
before I start the quilt
and wind them onto this empty spool
from my Large Vintage Trim.

This is the Point to Point Turner by Clover.
I will be using it to shape
all of my applique pieces
after sewing and turning!

You will need 2 packages of the
Sew In Interfacing
for all of the smaller appliqués
and 2-3 more packages for the larger circles and border pieces.
I developed this thickness
especially to use for the shapes because
it's still thin but stronger...
so that you don't poke holes
while shaping and it also helps
to keep your shapes from distorting.

Granny Chic buttons...
aren't they cute??
There is no embroidery at all
in this quilt...
just a little embellishment of the
buttons on some of the blocks:)

My fave go to for applique glue
is this little white bottle
with the pink lid.
It's by the amazing Sue Daley
and I affectionally call it
Sue Glue!

I have several different packages of
Pretty Pins for different things
and these are the ones
that I use for laying out my
applique during the glue basting process.

They are the right height and strength
and work perfectly and I love them!
Okay that's it for special supplies...
all of the others are normal sewing supplies
and of course you will need
design boards for laying out and
glue basting your blocks.
On the top of page 7 in the guide...
You will see that it has a
picture of the Cloud Shabby print
and what you cut from it
and which block each cut piece belongs to.
The same goes for every piece
of fabric in your kit....
they are all detailed in the guide
for your convenience and preparation.
Besides getting all of your fabrics
and interfacing cut BEFORE
the sew along begins...
there is one other thing
that you can do in preparation...

After cutting the 42 - 10" squares...
(one for each of the 42 blocks)

You can go ahead and cut all of the interfacing
for these circles as well!
(the guide tells you what size to cut
all of your interfacing for each shape
and how many of each shape we will be using)

I decided to go one step further
and sew all 42 of these circles.
If you want to do the same ...
I'll quickly walk you through it.
Place a traced interfacing right side up
onto a fabric square that is
right side up as well.
Your traced line is your stitching line
and I like to use a
.05 mechanical pencil for a nice this line.

I sew directly onto the line ...
no backstitching ...
just over sewing by about an inch.
I use a regular or maybe
slightly smaller stitch length.

You can see the "over sewn"
part on this circle.

I trim off the excess
leaving an approximate 1/4" seam allowance.

I pull the interfacing away
from the fabric in the center...

so that I only cut into the
interfacing for turning.
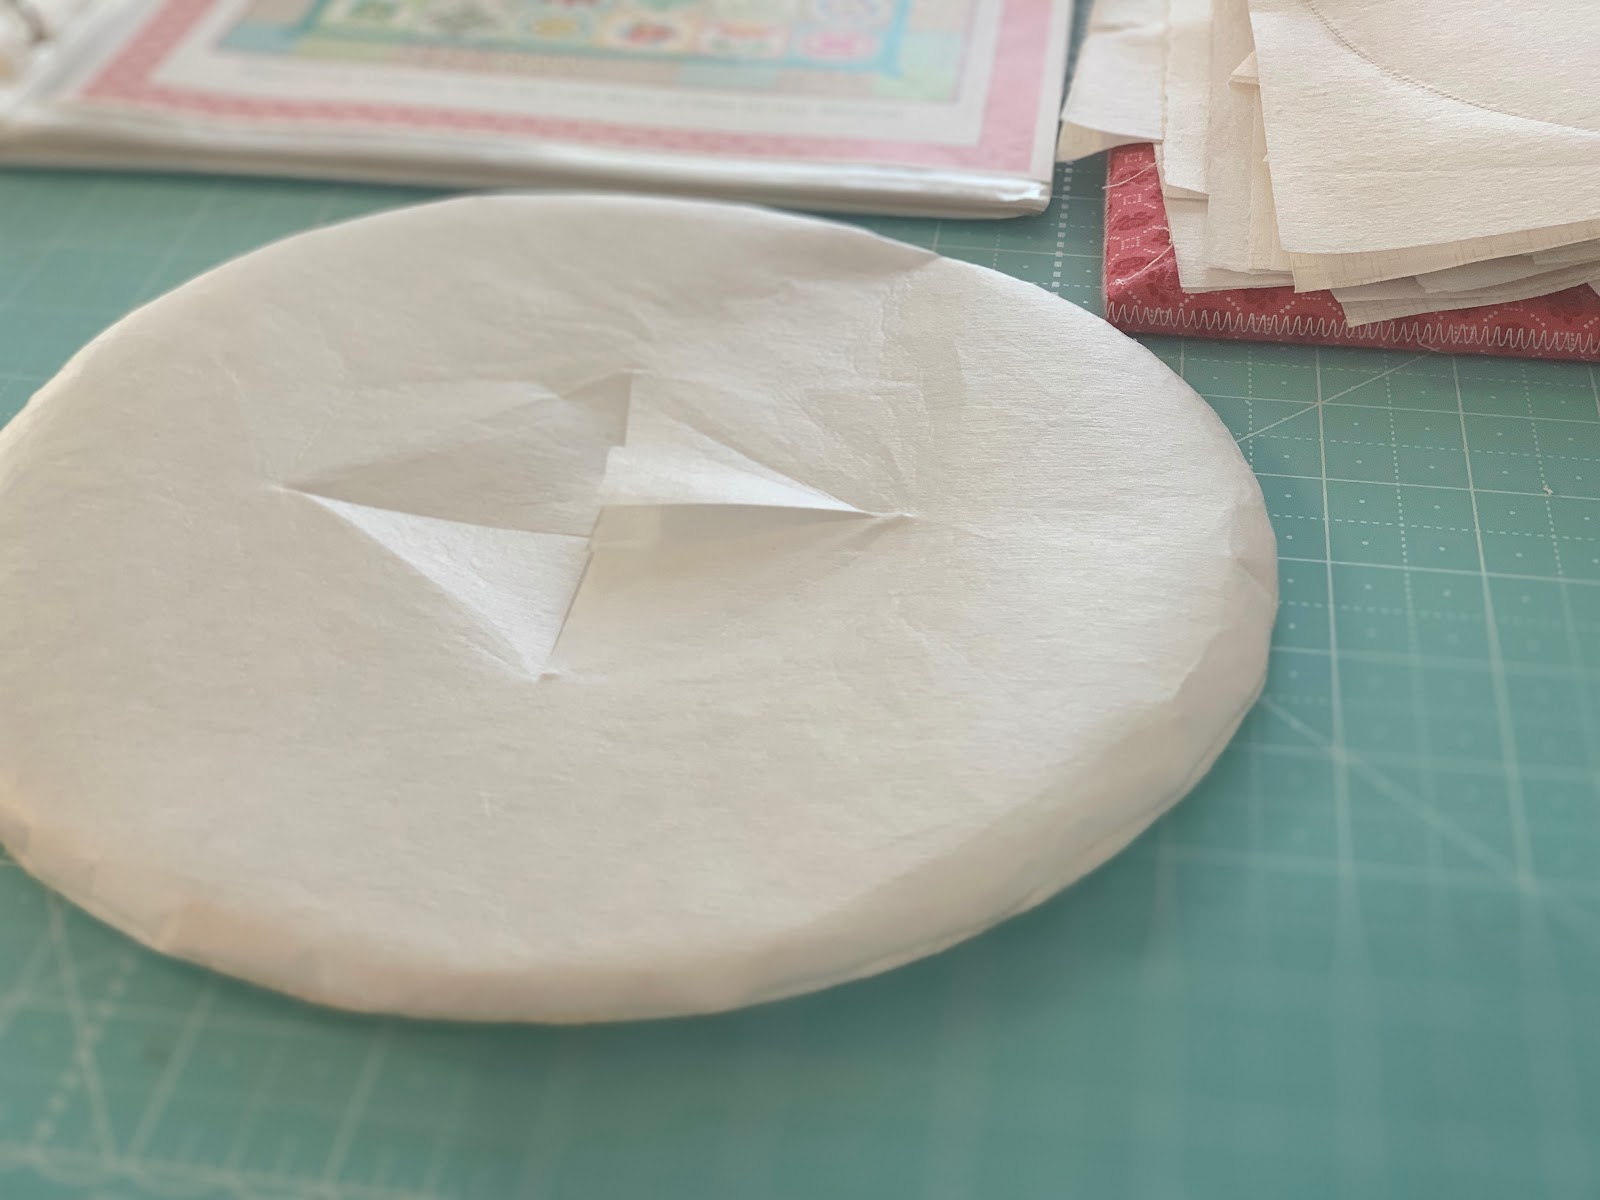
Turn right side out through
the X that you just cut.

Shape using the point to point tool
and give your circle a quick press
on the fabric side only.

Repeat 41 times LOL!
Just look at this
cute stack of circles.
All ready to have
flowers "grow" on them:)

While I was sewing the large circles
I decided to just go ahead and
sew up the rest of the Cloud Shabby pieces.


Now they are all ready
and I'll just keep them together
and use them as needed
when I work on the blocks:)

All of the cutting
in the guide is there
for you
so that beforehand you can do so
if you are so inclined:)
Some people like to
cut as they go or do all at once...
YOU decide:)
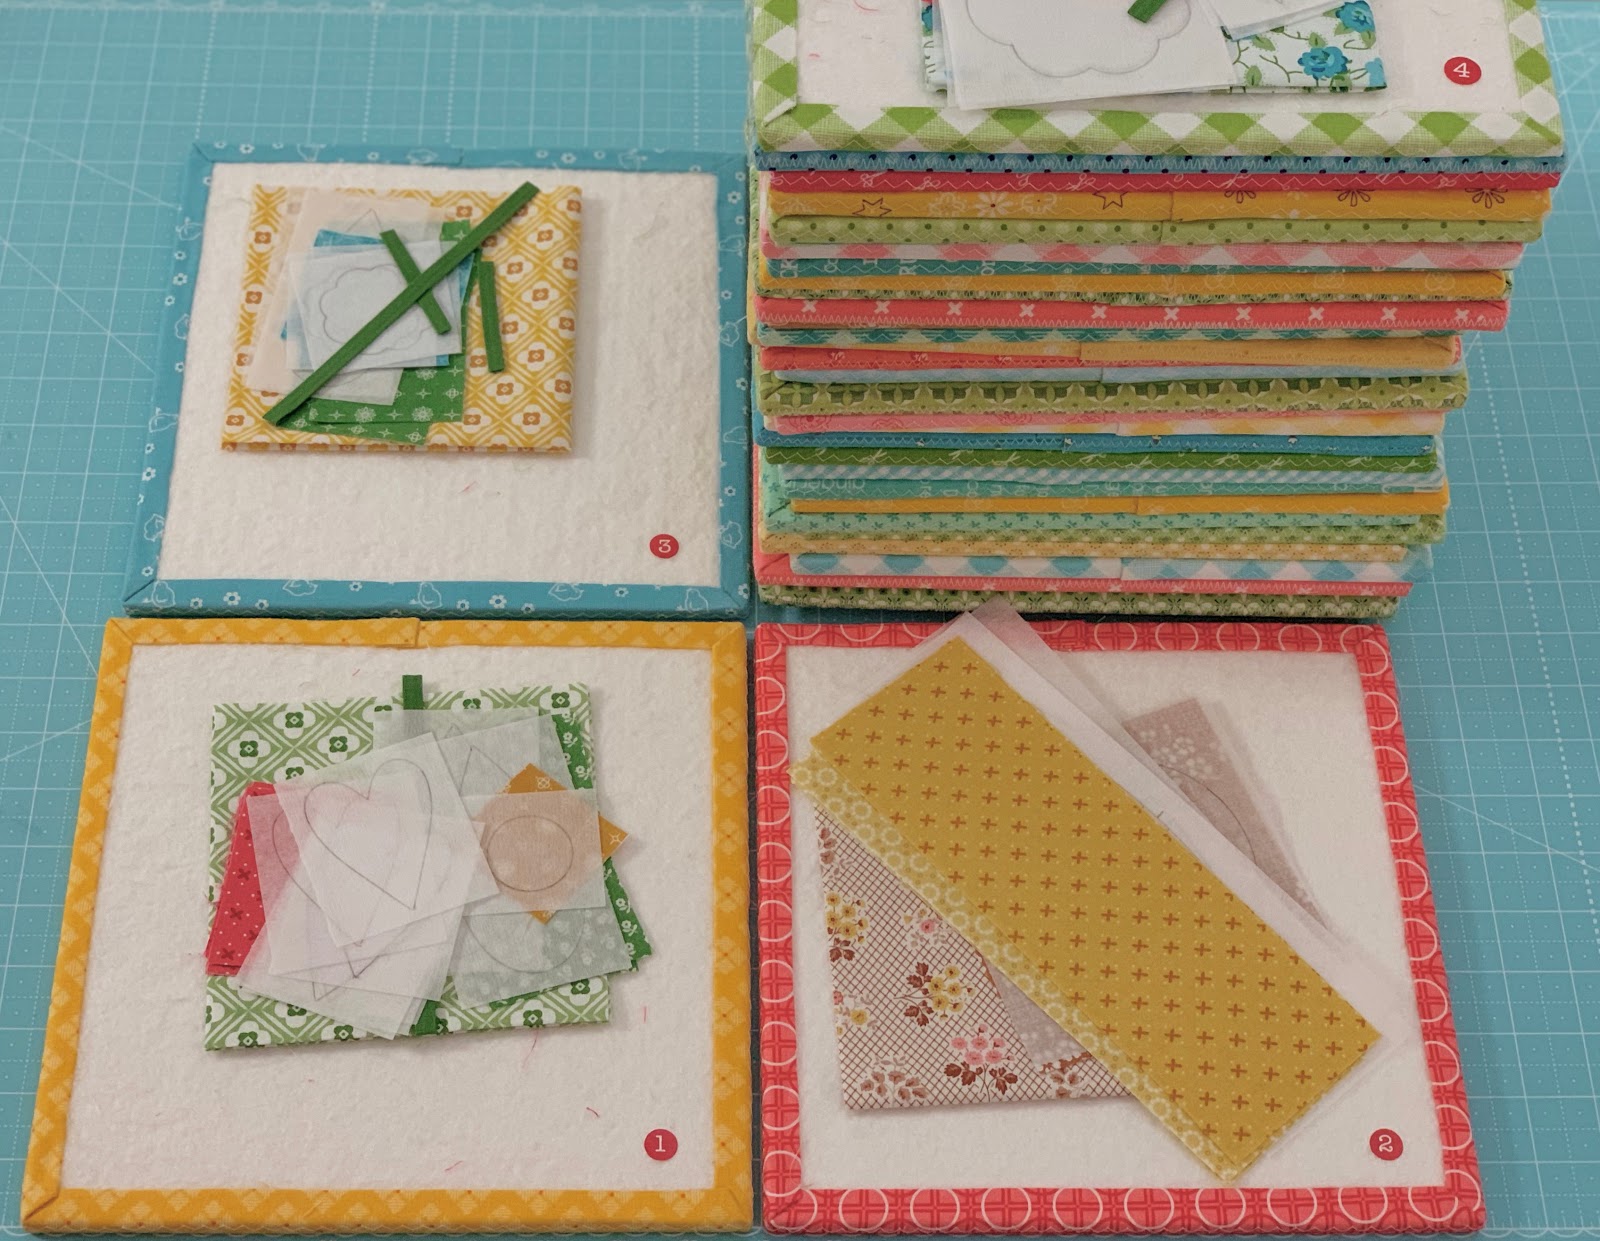
I have made individual kits for
each block simply by cutting out
all of the pieces from each print
in the kit
and putting them on a
numbered design board
(the block number)
I cut and traced each piece
of interfacing for each block as well.
I'll keep my design boards
all stacked up from 1- 42
and each week the stack will get
smaller and smaller
as each block is completed!
If you just don't happen to have
42 small design boards LOL...
you can use ziplock bags
and label each bag with a Sharpie:)
FYI...when I cut the square print
that each large circle will go on
after the flowers are appliquéd...
I pressed them in half and then
in half again and placed them
onto their block numbered design board.

I used my new Sew Handy Stickers
to number the boards.

Each package contains
several sheets of letters
in each color
(for labeling blocks when
cutting from my book patterns)
But there are also
several sheets of numbers as well:)
Sew Handy!!

I'm so very excited to grow
my Granny's Garden Quilt with you.
I am thrilled with how my
Granny Chic fabric turned out...
here is my inspiration
for this collection
that is written on the back
of the Granny Chic Fabric storyboard:
Granny Chic is the latest fabric collection designed by Lori Holt of Bee in my Bonnet.
She has created Granny Chic with her typical vintage flair!
The variety of prints were inspired by the sweet little homes of her grandma’s and great aunts.
She was lucky enough to have lived closely to each of them in the small town of Herriman, Utah where she grew up.
She remembers each of their homes being comfortable and quaint…. and always filled with love.
All of the decor contained lovingly created handmade items such as curtains, pillows, tablecloths, aprons, and of course quilts!
Lori especially loved the old fashioned wallpapers, floral sheets and pretty china patterns.
She remembers admiring each of their carefully tended gardens…and the happy flowers as she walked down the path to their front doors.
Whenever she visited… she was given a warm welcome …often accompanied by a hug and a kiss and sometimes a cookie!
Lori has created this wide variety of prints with the sincere hope that you will use them to create projects for your home… in true Granny Chic style!!
I'll see y'all right back here
on Monday the 26th
with a video tutorial!!
xx
Lori

10 comments:
Soo, soo, excited! I still need to make my design boards. What size do you recommend for this project?
I love how detailed and organized you are. Looking forward to this sew-a-long. =)
I am so excited. I have the same memories, especially under the quilting frame hanging from the ceiling. I spent all my summers with both of my grannies. This is my first sew along!
I love this quilt!
Oh geez, I went to order the kit and it looks sold out!!! Does anyone know if FQS will be getting more? I really want to make this quilt
I am so excited about the sew-along. Just love the design and fabric.
got my kit today: yay!!! Don't know how you do it, coming up with one lovely kit after another, but you knock it out of the park!!!
Cannot wait for mytemplates to arrive and to get started on this lovely project. Love the fabric and design.
Oh my gosh, I love this quilt. My pile of 9 inches circles looks like a stack of tortillas. LOL
I just started to work on my Granny Garden Quilt.
Thanks for sharing your pattern and ideas with us.
Post a Comment