Monday, April 26, 2021

Red Sampler Quilt Along - Week Three!!


Hello peeps and happy Monday!

It's already time 
for week three in the 


And I'm having sew much fun!!


Are you ready to add 
three more blocks this week?

This week I worked 
from two of my books...


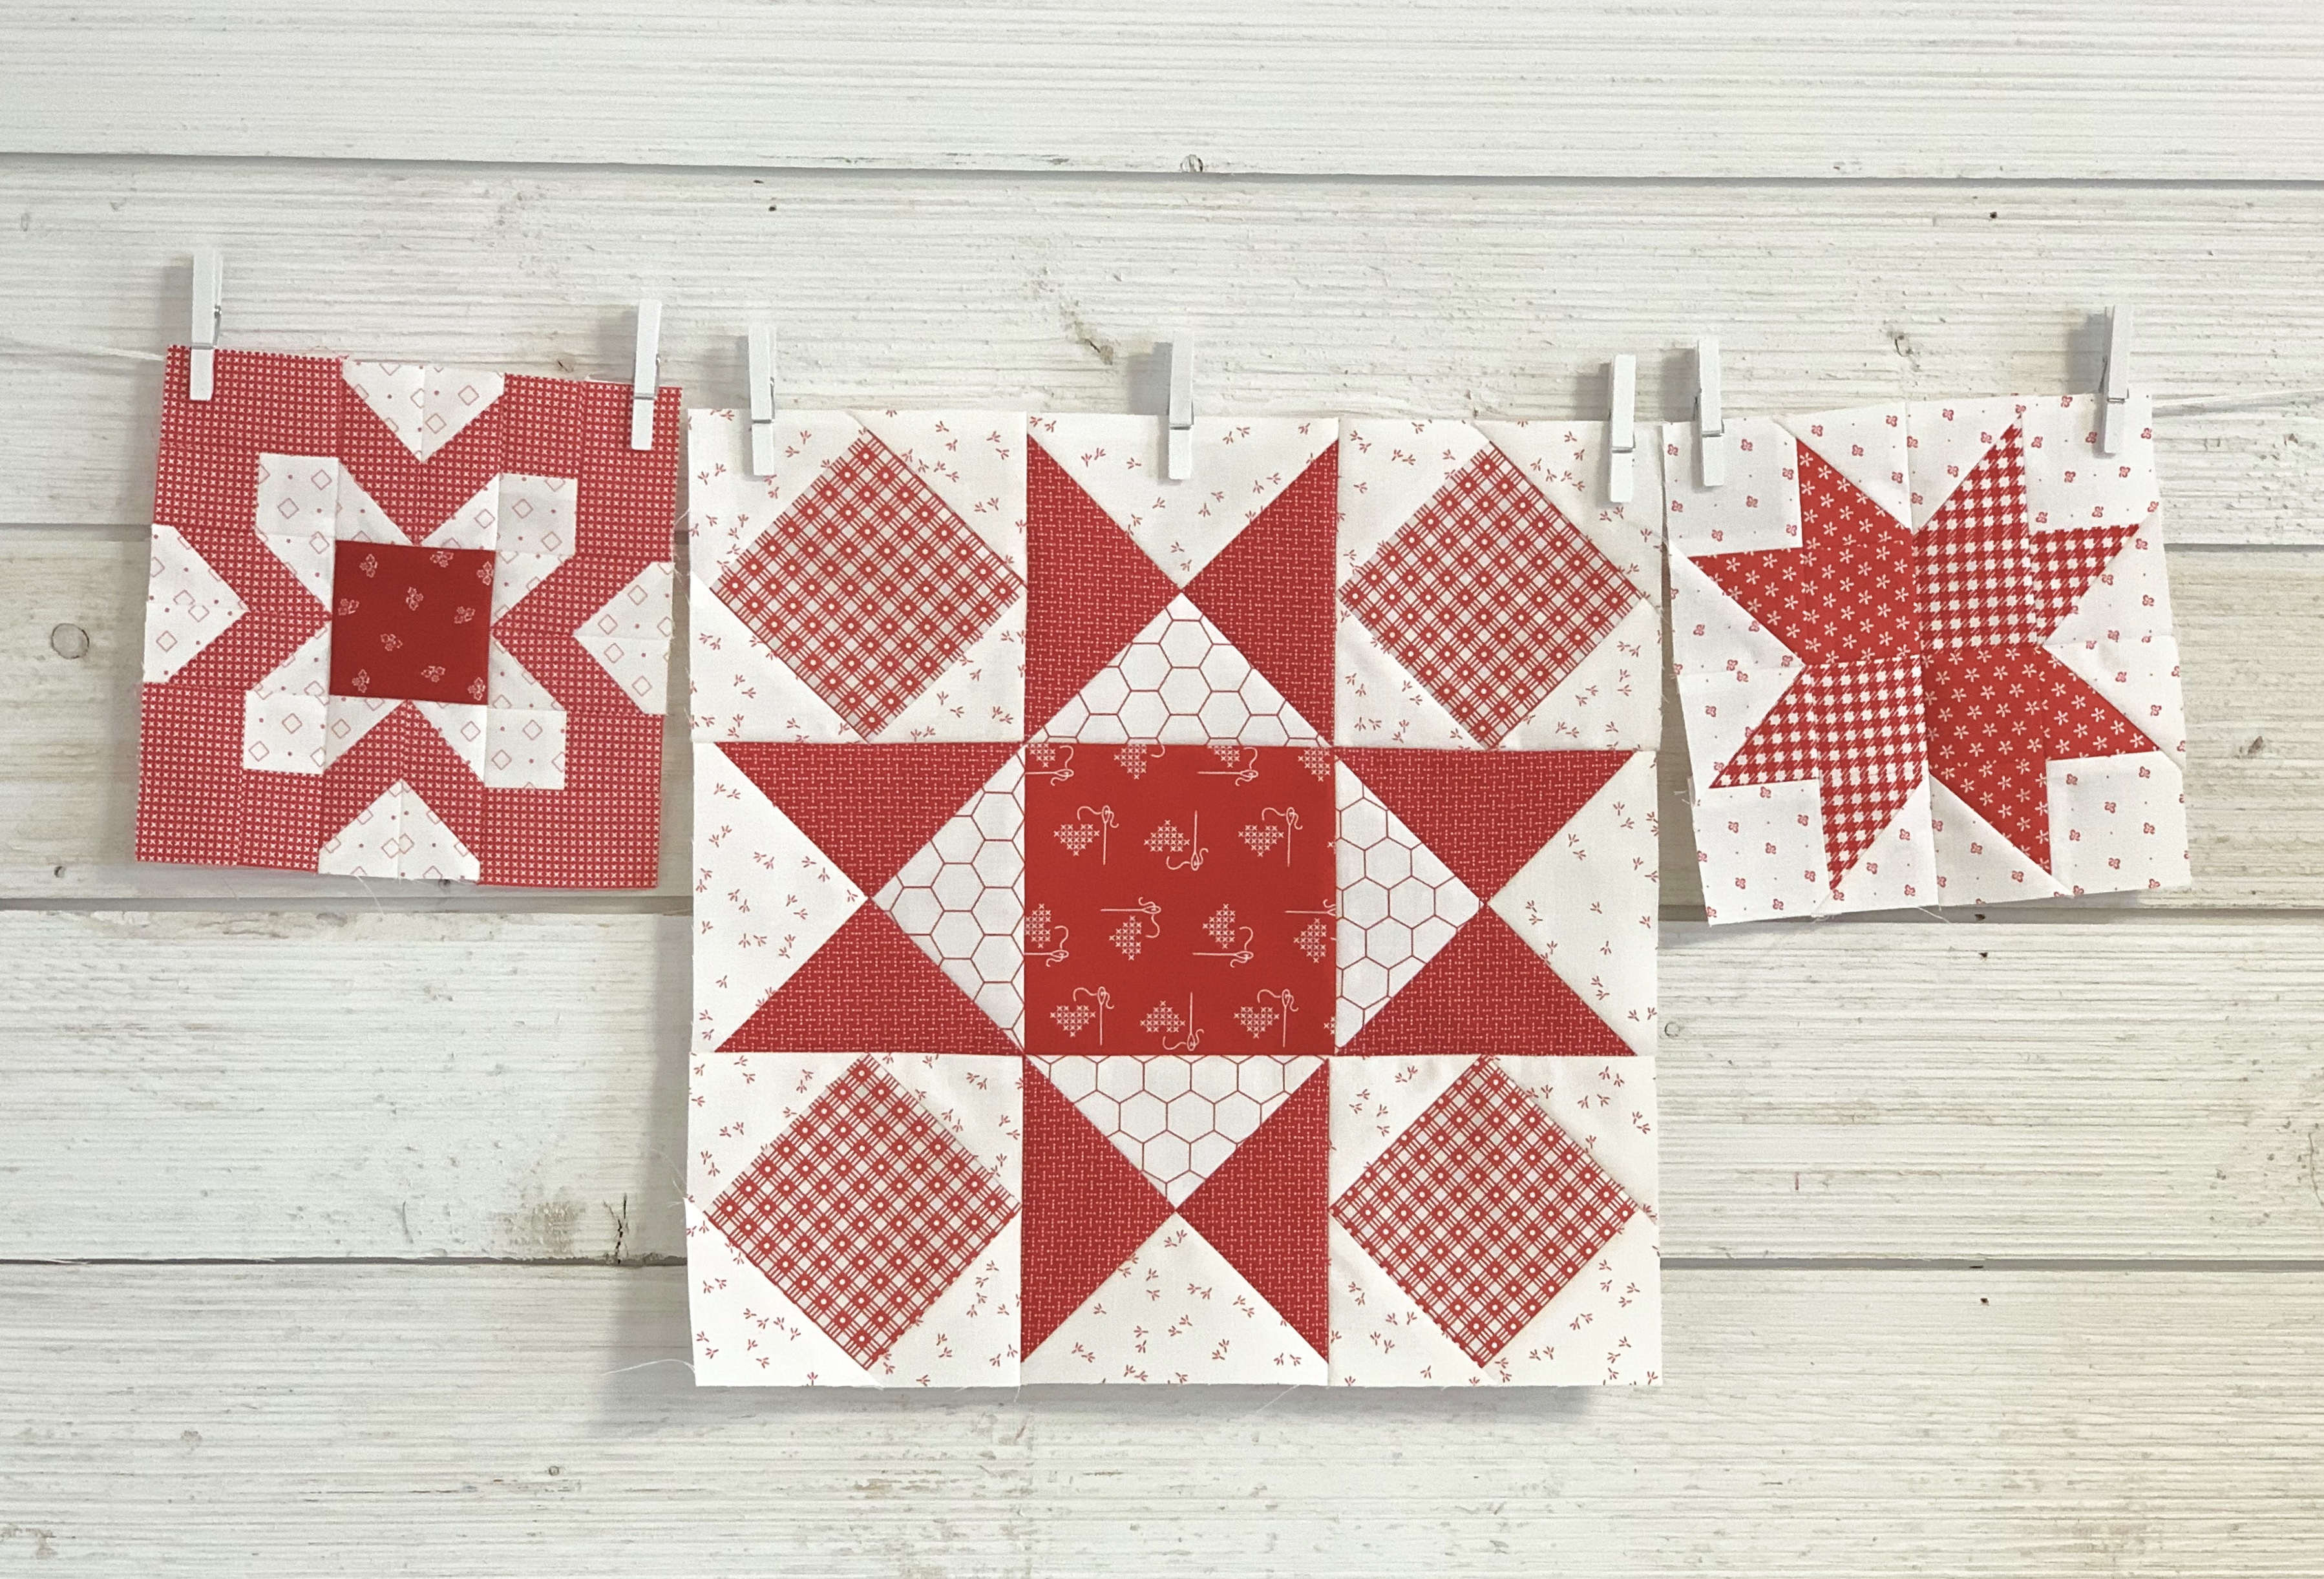
For the 12" Block I made my 
Cozy Star Block on page 24 
of my book Vintage Christmas.

I added my Bee Backgrounds Penmanship 
print into this block and 
used my Farm Girl Vintage gingham:)
As usual I'll be using it 
a lot because it works so well!


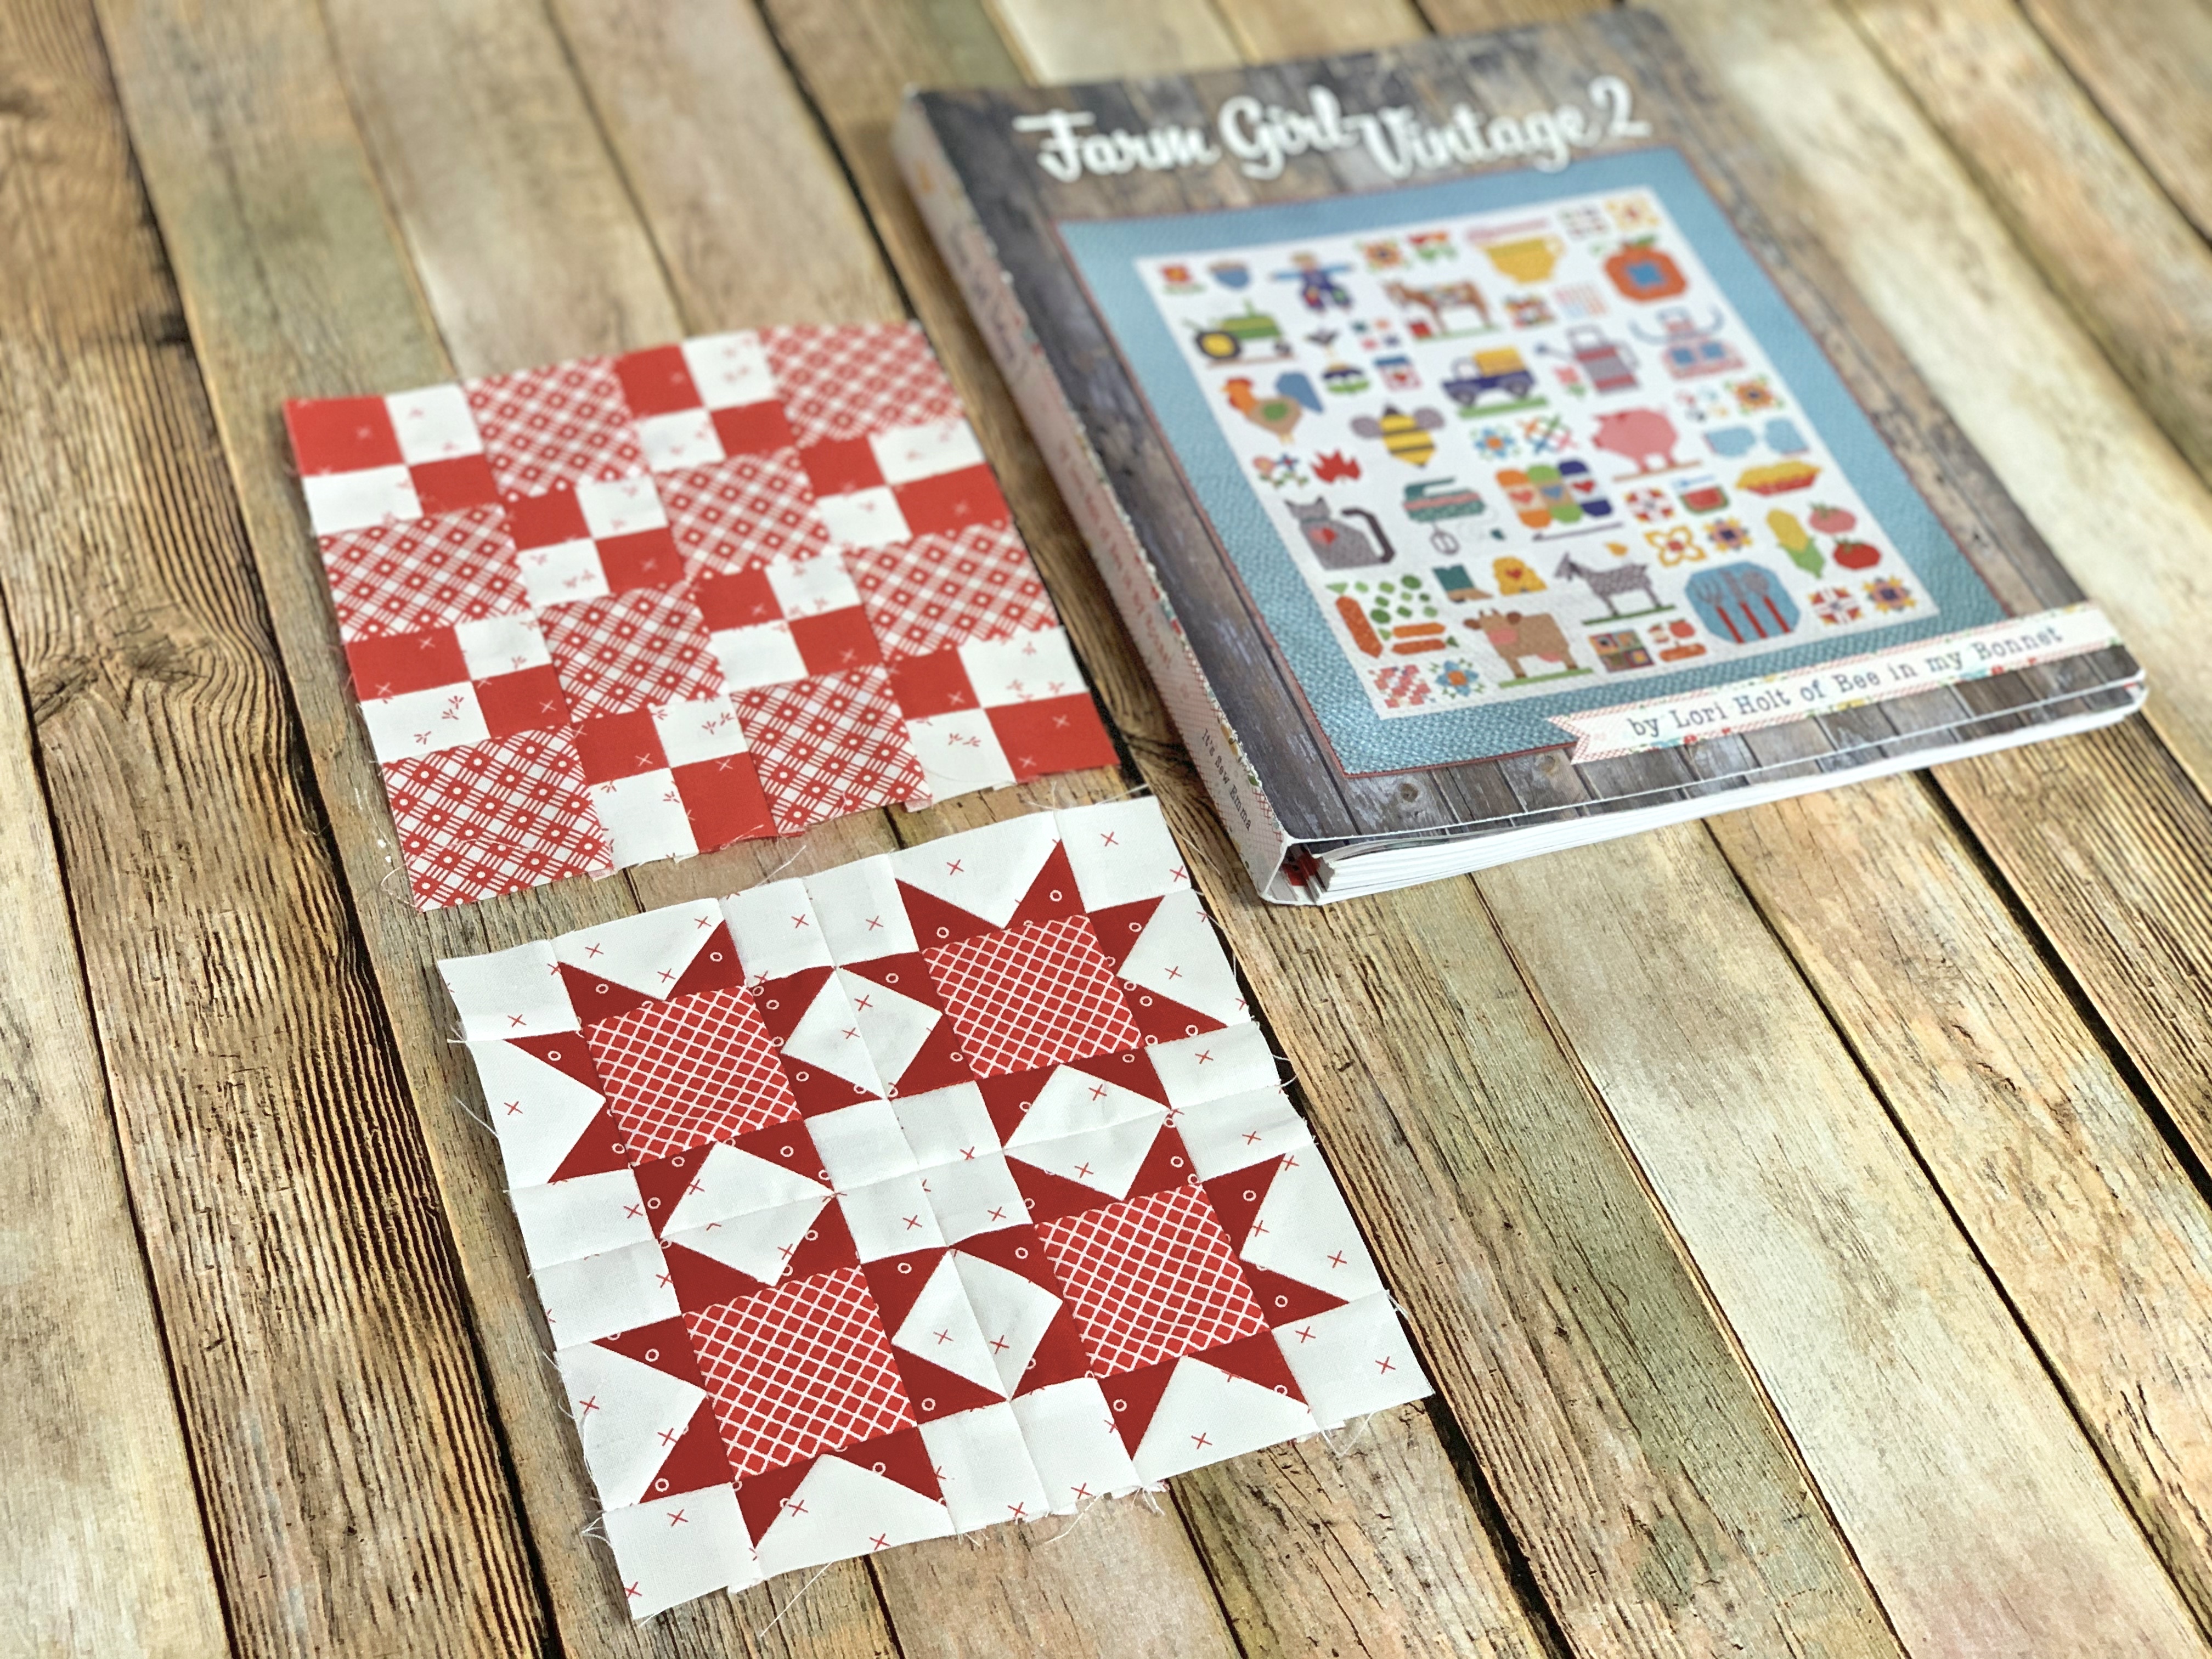
I made two 6" blocks from my 
Farm Girl Vintage 2 Book.

New Baby Quilt Block is on page 103
and
Starry Nights Block is on page 126.

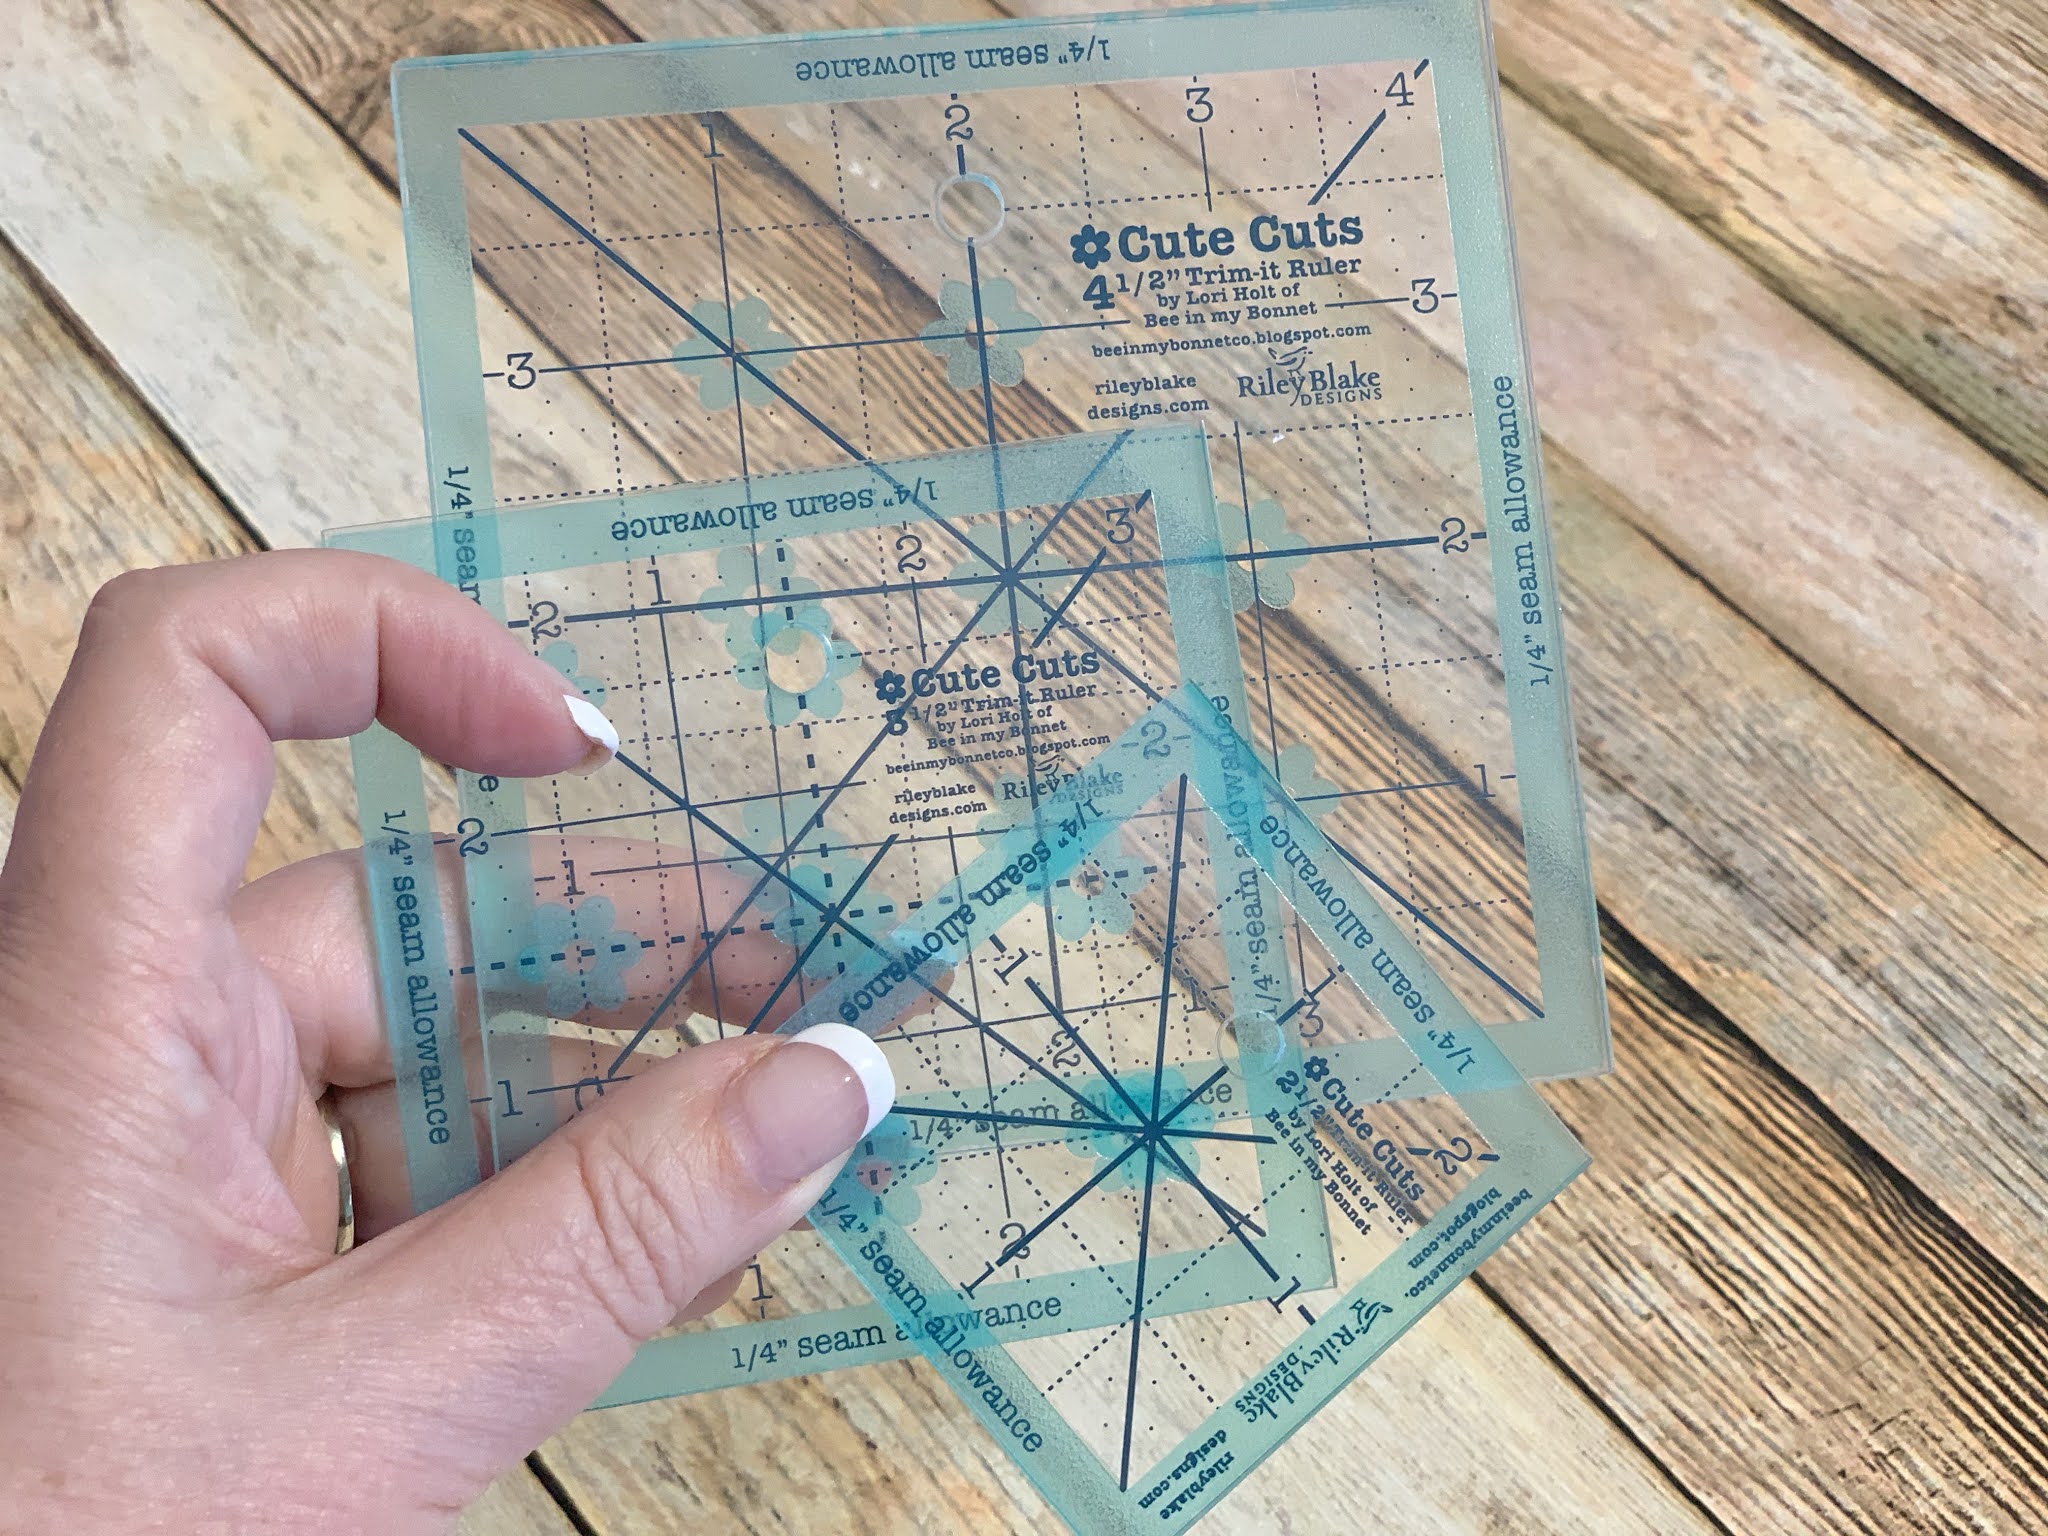
I'm not sure if you have been
 watching my Sew Your Stash Series
 tutorials on my YouTube Channel...
 but you may find them very helpful 
as I show my tips and tricks 
on making my blocks accurately
 when small pieces are involved.


I seriously love how my 
Red Sampler Blocks 
are looking together:)

By the time I'm finished 
I will have made 
20 - 12" Blocks and 
30 - 6" blocks 
for the Farm Girl Vintage 2 Sampler 
quilt setting that I am using.


But just remember...
like I told you
 in my week one blog post:
 If you are not comfortable with 
making both 6" and 12" blocks 
you can always make all of 
your blocks in my 12"size and
 then use any of the settings
 in my books for 12" blocks only:)

"You're the BOSS of your own quilt!"


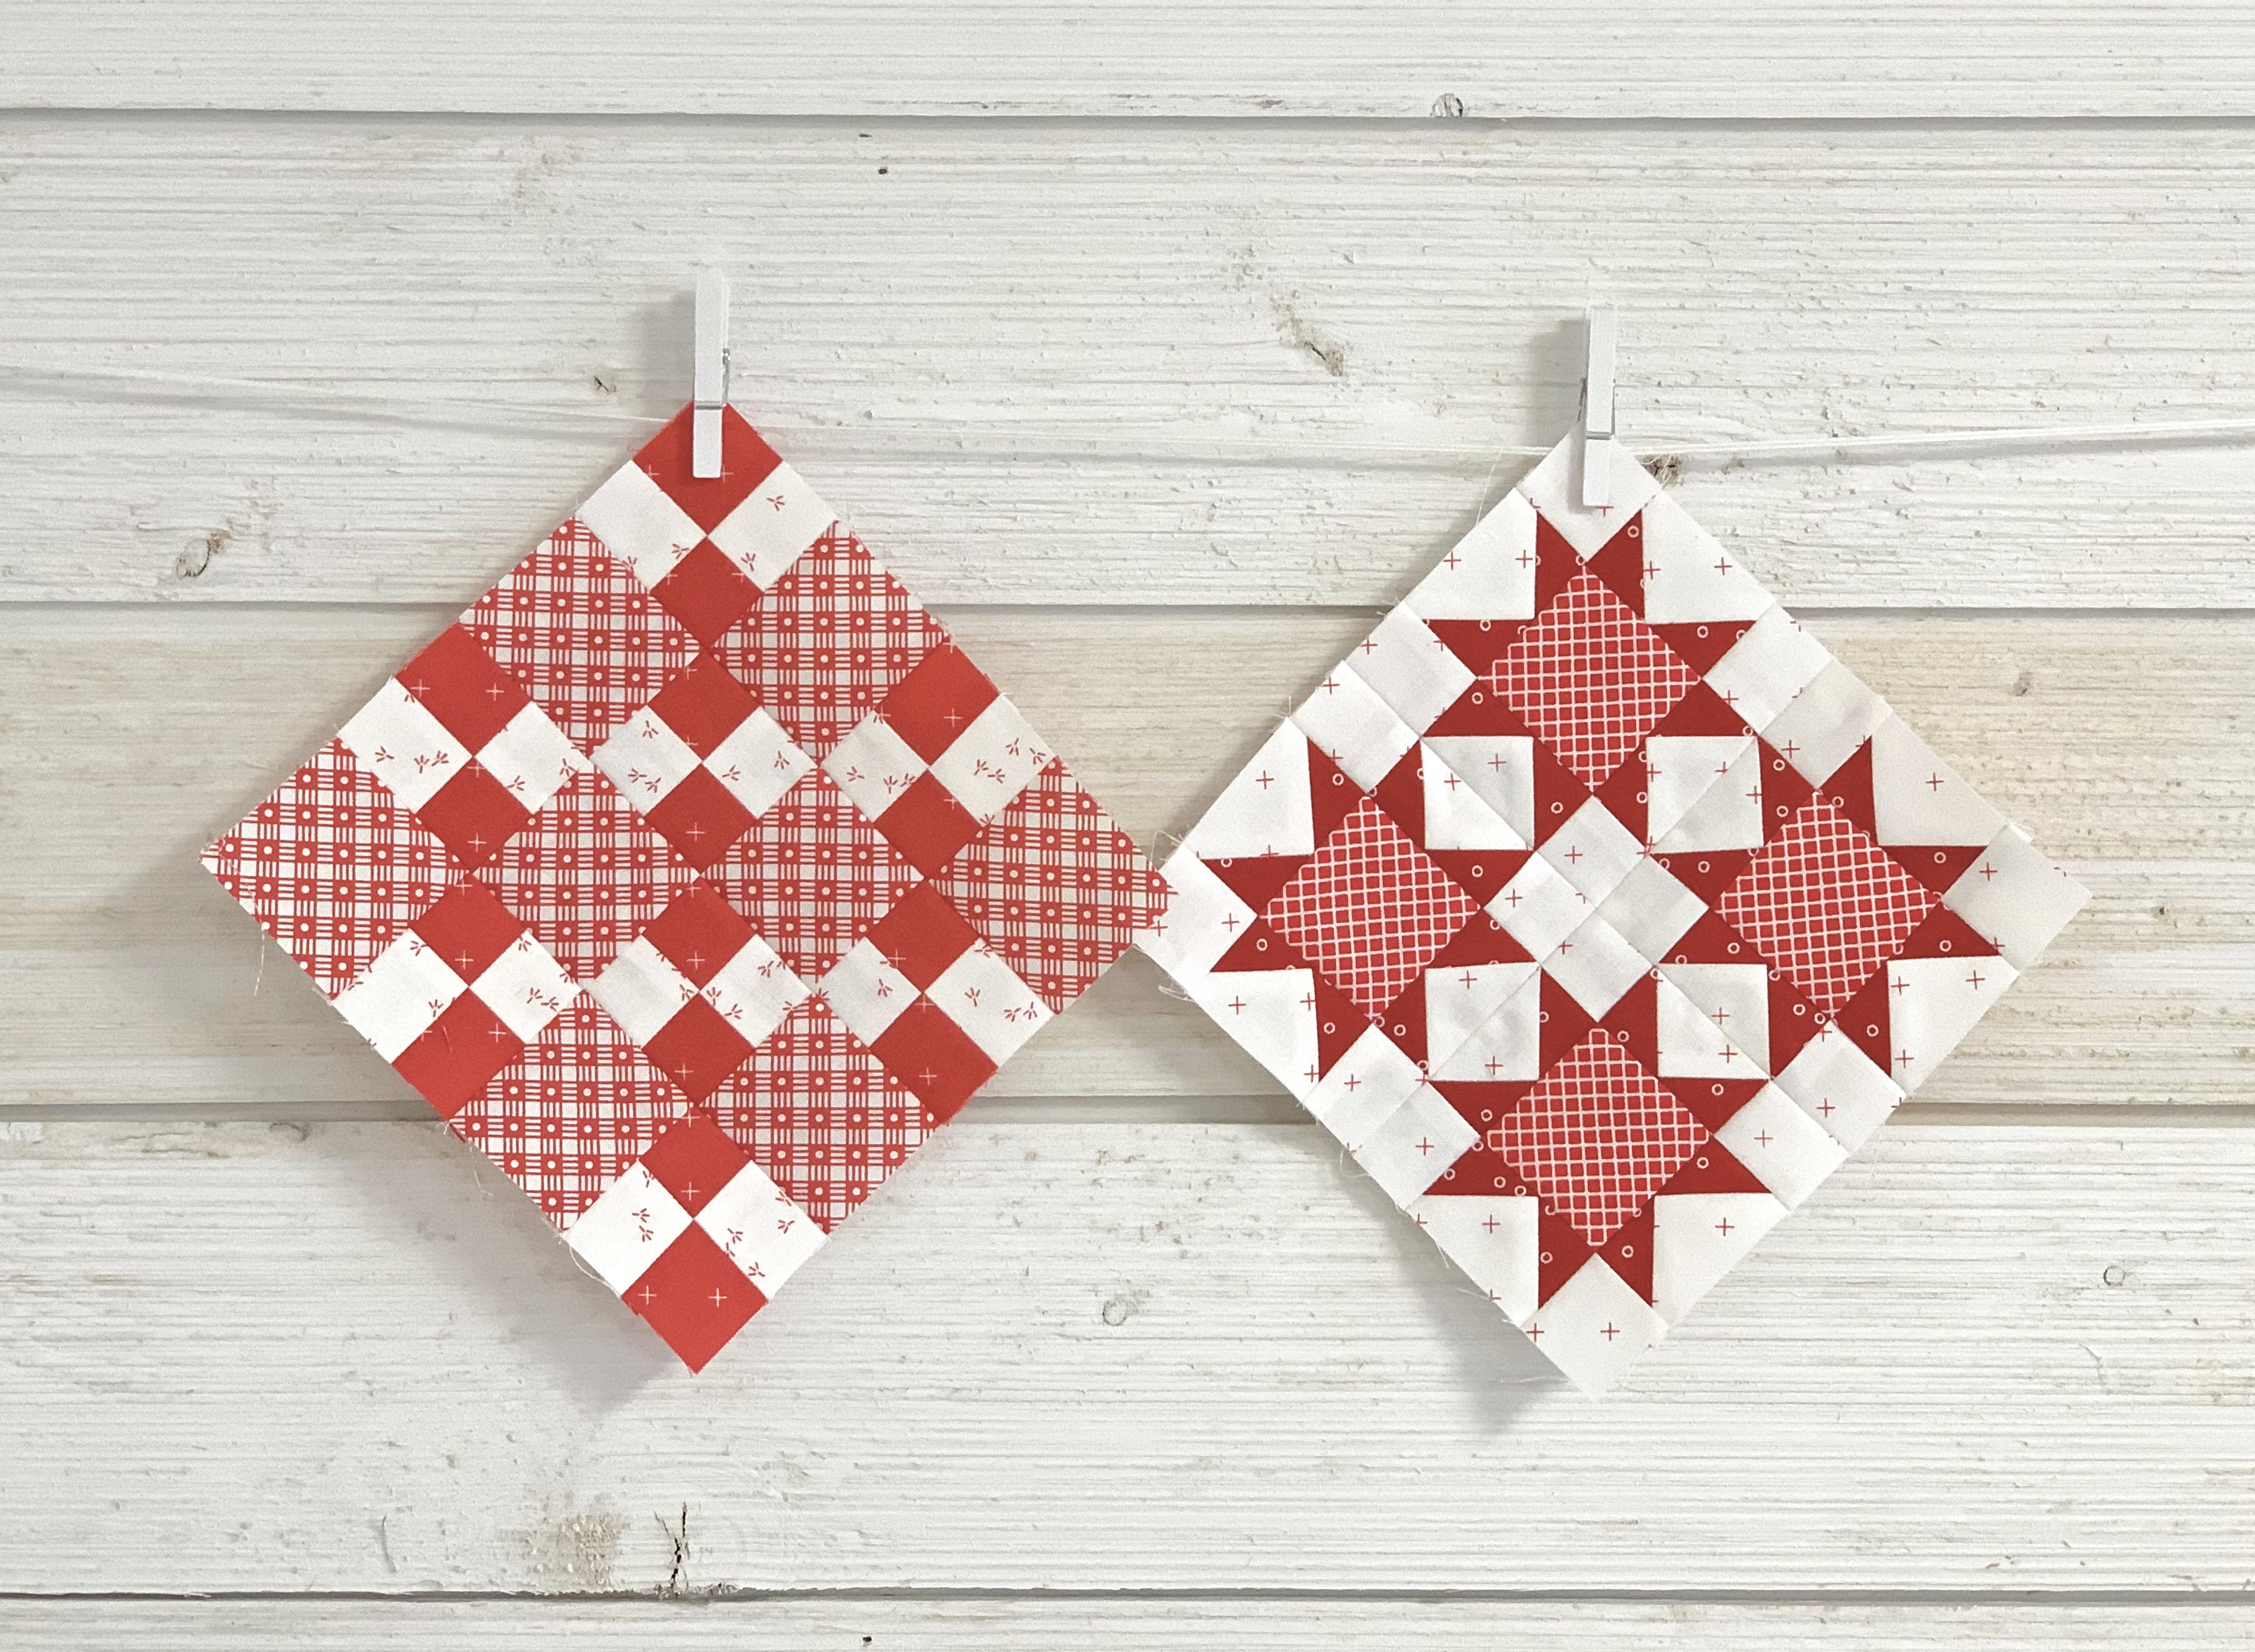
I really enjoy the process of 
choosing red fabrics for each block.

Most of the fabrics are my designs 
but I throw in others here and there
 because I have those in my stash too!

 I sure do love using the
 fabrics in my scrappy stash baskets...
and because of this sew along
I've taken the opportunity
to add a few more
 red prints to my baskets:)


I had an idea to show you 
a picture or two from the
 different photo shoots from my books.

All of the photography 
takes place here in my home.
Kimberly and the crew from 
It's Sew Emma come here to 
Salt Lake for a week 
and take as many pictures as they can
 while I style the photos:)

This one above is from my 
first Farm Girl Vintage Book
 and I loved it so much 
that I chose it for the back cover:)


I'm sure that you can 
figure out all on your own 
that this one is from my 
Vintage Christmas Book.

It's my Christmas Eve Quilt
 on page 168 and it's one 
that I put on my bed 
each year for Christmas.
It's made from 
25 - of my 12" Blocks.

This is just one of many 
12" Block setting options in my books
 and I hope all of these settings 
provide you with inspiration
for a very long time:)

Well that's it for today folks!
I've shown you my blocks...
now it's time for you to show me yours!

Go ahead and use the hashtag
when posting on your social media:)

I'll meet you right back here 
next week with 3 more blocks!
xx
Lori


P.S. Here is a list of 
each week's blog post 
for this sew along so far:
Click on the week 
that you would like to visit!


Monday, April 19, 2021

Red Sampler Quilt Along - Week Two!!


Good morning all and Happy Monday!
This is week two of the 


This week I made one 
12" block and two 6" blocks
 just like I did last week:)


For the 12" Block...
I used my first 
Farm Girl Vintage Book 
and chose my 
Summer Star Block on page 63.


Did you notice that I 
got a little bit fancy by 
using 2 different backgrounds?
LOL
I thought that it would be fun
 to have my honeycomb print 
surrounding the center square.

I do often use two backgrounds
 in a block or a quilt.
I think it adds texture 
and even more interest
 in this star block!


I added a one yard cut of my
 Red Honeycomb Bee Background 
to my other Bee Backgrounds
 to use for my Red Sampler Quilt.

Because the setting that I am using 
requires each block to have a 
background border...
 I'll be using all of these
 for that as well.

I'll talk about adding those borders
 in a few weeks just in case you are
 doing the same setting that I am:)


The first 6" block that I chose
 for this week is my 
Reindeer Hooves Block on page 80
 of my book Vintage Christmas.

In the book...each "hoof" is a 
different fabric but for my Red Sampler 
I used 2 contrasting fabrics 
and placed them opposite of each other.

I think this block 
turned out really cute.
Gingham always goes well with
 another print that reads almost solid.
It's a classic combo!


I made my 6" Lazy Daisy Block
 from my book Farm Girl Vintage 2.
The directions are on page 81:)

*Take note that in the book 
2 different prints are used to make
 the flower petals 
but I chose to use 
just one print from my stash
for all four of the petals.

I liked how it contrasted
 with the barn red center square
 from my PRIM fabric collection.

This block would also be 
really nice with a light center
 such as the gingham 
and then darker petals:)


*My Trim-It Rulers are my 
best little buddies when 
I'm piecing my blocks.

I used these three sizes 
when sewing this weeks blocks:
2 1/2" - 3 1/2" - 4 1/2"

If you have been following my 
"Sew Your Stash Series"
 that I am doing on my 
then you already know 
all about my Trim -It Rulers.
If not...
I thought I would quickly 
explain why I use them.


Here we go!...
So in the book during the 
step by step instructions...
when you have finished piecing a segment
 I tell you what it should measure
 so that if needed...
you can check it and trim it up 
to the correct size 
before sewing your segments 
together to form the block.

When making the 12" Summer Star Block
 each of the 9 segments should measure
 4 1/2" square and so that is the
 size ruler that I use for that step.

Notice that on my Trim-It Rulers
 They have diagonal lines 
going both ways as well as center lines.

These lines are to make it easy peasy
 to center your blocks by lining up
 your seam lines onto 
the lines of the rulers.

The aqua outside of the ruler 
represents the 1/4" seam allowance 
and inside that window you will sew
 exactly what your block will look like 
after it is sewn into your quilt.
WHEW!
That was kind of a long explanation!


I used my 3 1/2" Trim-It Ruler
 when sewing the Reindeer Hooves Block
 because each hoof should measure
 3 1/2" square before you 
sew the block together:)


For the Lazy Daisy Block
 I used my 2 1/2" size because...
you guessed it!
 The 9 segments in this block 
should measure 2 1/2" each 
before sewing the block together.

I hope this info helps you out!


And just like that...
 I have 3 more super cute 
Red Sampler Blocks for my quilt.

These blocks were really fun to make 
and I just know that I'm going to 
love each and every step 
of making blocks for this quilt along:)


Here's how all six of my blocks 
that I've made so far look together.

They make me happy and I hope 
that they make you happy too!

Thank's so much for all of the
enthusiasm about my 
Red Sampler Quilt Along.

I have seen so many of you jump right in
 and start sewing and 
posting your blocks onto 
YaY!...they are sew fun to see!
Keep them coming and I'll be 
right back here next week:) 
xx
Lori


Click below to visit week one:


Saturday, April 17, 2021

FlossTube No.9 - Show Notes!


Hello!
I have something fun and 
what I hope will be helpful 
for you that I will be posting
 monthly here on my blog.

As you know I have a new 
YouTube Channel 
and each month I film 
a new episode of FlossTube.

Within each of those episodes
 I show my cross stitching 
that I have been doing that
 month and tell all about it.

I have a lot of color changes 
that I do so that my stitches
 match my decor style and many of you
 have been asking if I would 
share those color conversions.

So each month I'll be doing
 "show notes" 
and sharing my colors on
 each "finished" piece that I 
have shown in that particular episode.

Last night I filmed FlossTube No. 9 
and here are my show notes.


The Milk & Cream Company
Vintage Cloth used:
 25 Count FARMHOUSE Luagana
Stitched with 2 threads over two.


Chart is by Plum Street Samplers


My Color Conversion:
Called for is listed first-
 following is what I used:)
Classic Colorworks Black Coffee - same
Gentle Arts Tin Bucket - WDW Galvanized
CC Frosted Sage - same
DMC 632 - CC Deep Fennel
DMC 640 - CC Cherry Tomato
CC Prairie Grass - same
CC Eggshell - WDW Parchment
DMC 950 - CC Country Lane
CC Pine Needles - GA Chives
CC Joshua Tree - GA Green Apple
WDW Bark - same
DMC 3371 - CC Blackbird
DMC 3779 - CC Blushing Beauty
DMC 3857 - GA Ruby Slipper
WDW Baked Apple - CC Cherry Tomato 
DMC 3865 - WDW Whitewash
Note that these are the colors
 that I used but placed them 
differently within the 
milkmaids clothing:) 


Bushel and a Peck
Linen used: 36 count Beach Brew
Stitched with 1 strand of floss over 2.


Chart is by Notforgotten Farm


My color conversion:
Called for is DMC followed by my choice:
782 - Weeks Dye Works Chickpea
3021 - WDW Flatfish
3828 - didn't use
3852 - didn't use
732 - WDW Oscar
400 - Gentle Arts Pomegranate
733 - GA Chives
830 - WDW Teal Frost
975 - GA Mountain Mist
3829 - GA Harvest Basket
433 GA Apple Cider


Friendship Sampler
Linen used: 
36 count Tycho by Picture this Plus
Stitched with one strand floss over two


Chart is by Moira Blackburn


My color conversion:
(called for is DMC and is listed first 
and following is what I used)
839 - I didn't use this because 
I didn't stitch the border
642 - 3813
3012 - 3012
926 - 3816
730 - 730
407 - 347 
and 
3779 for the robins breast
3022 - 07
613 - 3813
829 - 08


I also finished my Prim and Proper!
I show and tell many more projects
 and talk about my Red Samplers.
to watch my FlossTube No.9

You are welcome to use my 
color conversions and in exchange 
I would
 really appreciate that you 
give me credit when doing so.
xx
Lori


Monday, April 12, 2021

Red Sampler Quilt Along - Week One - You're Invited!!


Hello again and welcome to my blog:)
Today is the day to 
announce my new quilt along...
RED SAMPLER QUILT ALONG
And yes!...
of course you are invited to join me!


As you know by now ...
I love to make all kinds of samplers.

I have made many over the years 
and most of them I've made scrappy 
using my scrappy stash baskets.

I'm talking about the 
same baskets that I have been 
doing block tutorials about on my 


I've also made samplers 
using only one color...
however I still consider them scrappy 
because 
I use several different prints
 from my stash baskets in one color...


 and sometimes just one print
 for the background or sometimes more!

This sew along is all about
 using scrappy red prints 
and several different backgrounds...
probably five or maybe six.

 
And the blocks that we will be making
 for the red sampler are from my books:

Farm Girl Vintage
Farm Girl Vintage 2
Vintage Christmas 
Great Granny Squared

All of these books have instructions
 to make either the 6" or 12" sized blocks 
and several settings that you can
 choose from to make your red sampler.


I'm going to be making 
6" and 12" blocks for my sampler 
because I'll be using the setting 
from the sampler quilt in my book
 Farm Girl Vintage 2
That quilt setting requires 
20 - 12" blocks 
and 
30 - 6" blocks
for a total of 50.

I'll be choosing and sewing 
some of the 
more traditional sampler looking blocks
 from each of these books 
and sewing 3 blocks each week 
until I have 50 for my quilt.


Of course you are welcome 
to make 50 of my blocks and choose 
the same setting that I am doing 
or you can choose any of my other 
settings that I have in my books.

You can see here on the 
Table of Contents 
of my Farm Girl Vintage 2
 that the sampler setting 
that I am using is on page 138.


In my first Farm Girl Vintage Book
 there are so many 
setting choices to choose from.
Some only use 6" blocks 
(like the cover quilt) 
or some only use 12" blocks 
and some use both sizes together!

And remember that I am 
always telling you that 
"You are the BOSS 
of your own Quilt"
and so you can choose a setting
 that needs fewer blocks 
if that's what your time allows!


In my book Vintage Christmas 
there are many more setting choices 
for 6" and/or 12" blocks:)


The main quilt in my 
Great Granny Squared Book 
uses 20 - 12" Blocks 
and would make a fabulous sampler!


Now let's chat a little 
about my three block choices 
for this week.
I made one 12" and two 6"


This is my block called 
SUNNY SUNFLOWER
and it's on page 66 of my first
 Farm Girl Vintage Book.


This block is  
"QUILTING DAY"
and it's on page 112 of 
Farm Girl Vintage 2


And last but not least 
is my block called 
"TAFFY"
and it's on page 90 of my book
 Vintage Christmas


I already love love and love 
how these three blocks look together
 and I can't wait to add more each week!
*SCHEDULE*
The sew along starts now!
I'll be posting my three 
Red Sampler Blocks 
here on my blog every Monday 
and I'm sure I'll show and tell
 them several times 
on my YouTube Channel as well.

The sew along will last for 16 weeks
 and will end the last week in July.

If I sew 3 blocks for 16 weeks 
that adds up to 48 and so I'll be 
sewing 1 or 2 more blocks extra 
during those weeks to make 50 total:)

I have something fun planned 
for the label of our Red Samplers
 and as a hint...
 I'll be using blocks from my 
Spelling Bee Book


Here I have 5 - one yard cuts 
of my Bee Backgrounds fabrics
 in my vintage red and white enamel bowl 
just waiting to be cut and sewn
 into cute Red Sampler Blocks!
 (the Chicken Tracks print 
is from my Farm Girl Vintage collection)


I may add one or two more backgrounds
 or just stick with these 5:)


As for the reds...
I'm using all shades from light to dark.
This is important when you are 
using only one color 
so that your block design isn't lost.

 This sew along will be a great exercise 
in color value placement 
and how it can make or break a block:)


Notice that within each block 
I have used prints that 
have contrast from each other...
either by a different shade of red 
or by using a print that has 
quite a bit of white in it 
such as the gingham.
Keep this in mind as you are 
gathering reds for your sampler.


I gathered some reds from my stash and 
placed them in another one of my 
vintage enamelware pans
 to choose from for this weeks blocks.

Because I'd like to use 
even more variety of reds 
than these... I know I'll need
 a bigger container!


I always keep a few extra 
scrappy baskets on hand 
just for projects such as this 
and this week I'll be going 
through my stash baskets in my closet 
and filling one of these up 
with even more reds.
I'm sure one of these 
baskets full will be plenty!


Okay...
with all of this being said...
I sure hope that you are excited 
as much as I am about my 
Red Sampler Quilt Along 
and that you will be
 sewing right along with me.
READY - SET - SEW!!!

Besides posting here 
weekly on my blog
 I'll also be posting 
my blocks weekly on 
And I would love it if you 
would too... and use the hashtag
 
#RedSamplerQuiltAlong
 
so that we can all see your blocks:)
And as I've said earlier...
I plan on showing and telling
 my Red Sampler Blocks 
two or three times on my 


I can't wait!!
xx
Lori


Related Posts with Thumbnails