

YeeHaw!
I cannot even tell you
how excited that I am:)
It's week one in the
Farm Sweet Farm Sew Along!!


We will be sewing with my brand new
Farm Girl Vintage Collection...

And using the

To make the
Farm Sweet Farm Quilt
75" x 87"

A few weeks ago I posted all about
how you can "Bee Prepared"
for this sew along.
I told you all about the free
Sew Along Guide
and showed you how I
put mine in a binder.
to download the guide
if you haven't yet:)
if you have not read the
"Bee Prepared" post
or if you need any reminders
about supplies before we get started:)

First up is this cute PIG BLOCK!

After going through the guide
and following the cutting directions...
you should have all of the pieces
for the pig block all ready to go!
I'll list the Sew Simple Shapes
needed for each block...
even though they are listed in the guide
just for clarification:)
PIG BLOCK:
1-H23
4-H11
10-H15
1-H29
2-H36
2-H4

As always for the first week
only and first block...
I did a video tutorial with Cindy at
Riley Blake Designs Studio.
to watch and get the instructions
on making the PIG BLOCK:)

I'll also tell you how long to cut
the flower stems for each block.
For the PIG BLOCK you will need to cut:
2 - 8 1/2"
1 - 4 1/2"
1 - 2 1/2"

In the guide I asked you to cut
6 - 5/8" wide x Width of Fabric strips
for all of the flower stems in the quilt.
Run all of them through the
1/4" wide bias tape maker
just like I showed you in the video.

Wrap the prepared stems around
an old spool or you can use
an empty Vintage Trim spool like I did:)
Now when it's time to make each block...
all you will need to do is
cut the lengths required
from your prepared stems.
Easy Peasy!!

When preparing your block for appliqué
you need to stay within the guidelines
of the finished block size
so that when you trim up after applique...
you will not cut off tips of leaves
on the sides or any pig feet on the bottom!
The finished size of the
PIG BLOCK is 11" tall x 12" wide.
So when laying out your block
you do NOT want the design
to go any wider than 11 1/2".
That means after sewing it
into the quilt there will be
1/4"space on each side of
the width which is your goal:)

The measurement from the bottom
of my pigs feet and the tip of the
goose wing is 9 1/2"
That leaves plenty of room
when trimming up the height.
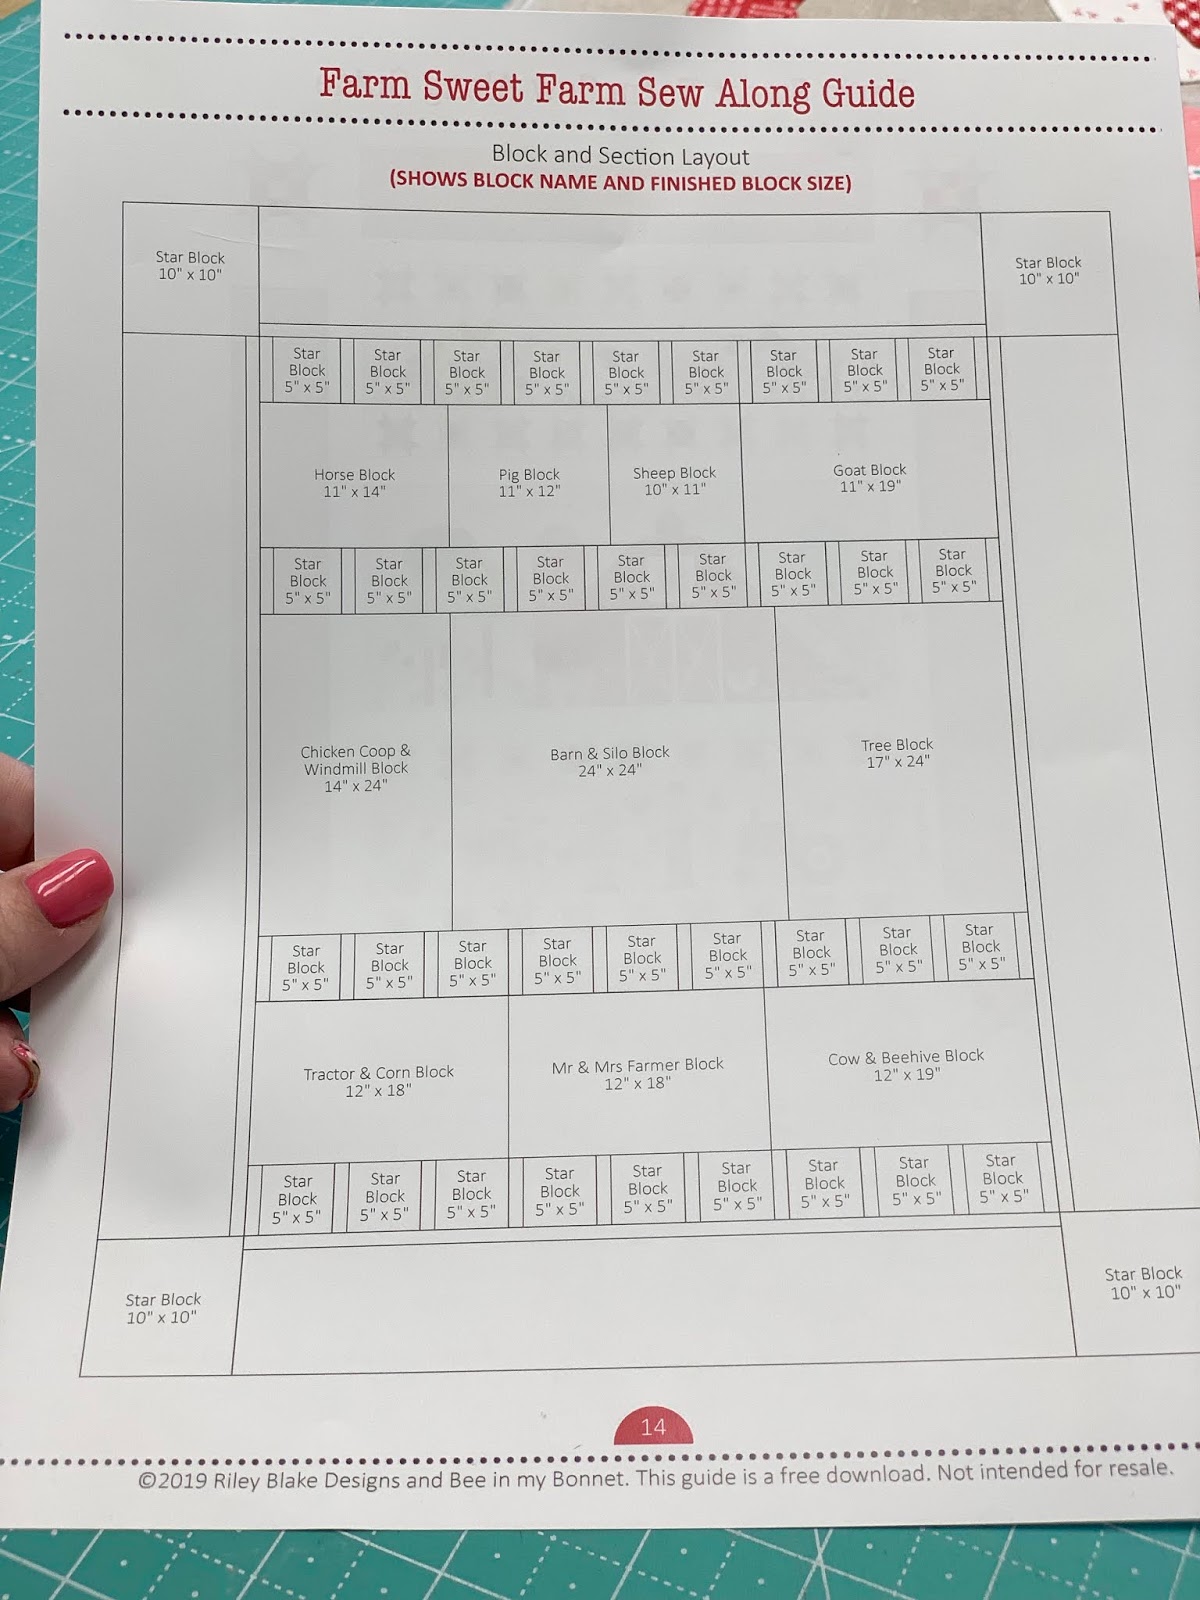
On page 14 of the guide you will
see the FINISHED measurement of each block.
This is so that you will know
how tall and wide your appliqués need to stay within when laying out
each block for applique.
Take note that this is
NOT THE TRIM UP MEASUREMENT.
The measurement for
trimming up your block after applique
is always 1/2" than the finished size.
This is the standard rule
when making any quilt.
I did not trim my block in the video
because I want to walk you
through how I do it.

I like to do the side first.
I need to trim it 12 1/2" wide
so I grabbed my 12 1/2" Trim-It Ruler
for this.
Of course you can use any ruler
that you want:)

I just find these handy because I can
see inside the "window" of the aqua
what my finished block will look like.
You can see here that there is 1/4"
to the leaf and I'm happy with that.

Also 1/4" on the left side as well
so I go ahead and trim the sides.

There is plenty of room from
top to bottom and I usually
measure 1/2" from the bottom
of the feet and trim.
P.S. I did not zig-zag the edges
of the linen on this first pig block
because I forgot.
Linen frays easily so be sure to
zig-zag or serge your edges.

And now I only need to trim the top.
I measure 11 1/2" from the bottom line
that I just trimmed and cut:)
I'm always VERY CAREFUL
when I trim up my blocks.
After all...
I've just appliquéd an embroidered
and I don't want to make a mistake!
My advice is as always...
measure twice and cut once.
I've also learned from experience
that during my trim up time
I turn off my phone...laptop... TV...Radio...pop out my ear buds...
shoo the kids and pets
out of the room ...
because I'm easily distracted LOL

Now that my little piggy is all trimmed
up it's time for the buttons!
But you already know all about
this step because I talked
about it in the video:)

PIG BLOCK
should be completely adorable
and should also measure
12 1/2" wide x 11 1/2" tall
BEFORE sewing it into your quilt:)

OINK OINK!!!

HONK HONK!!

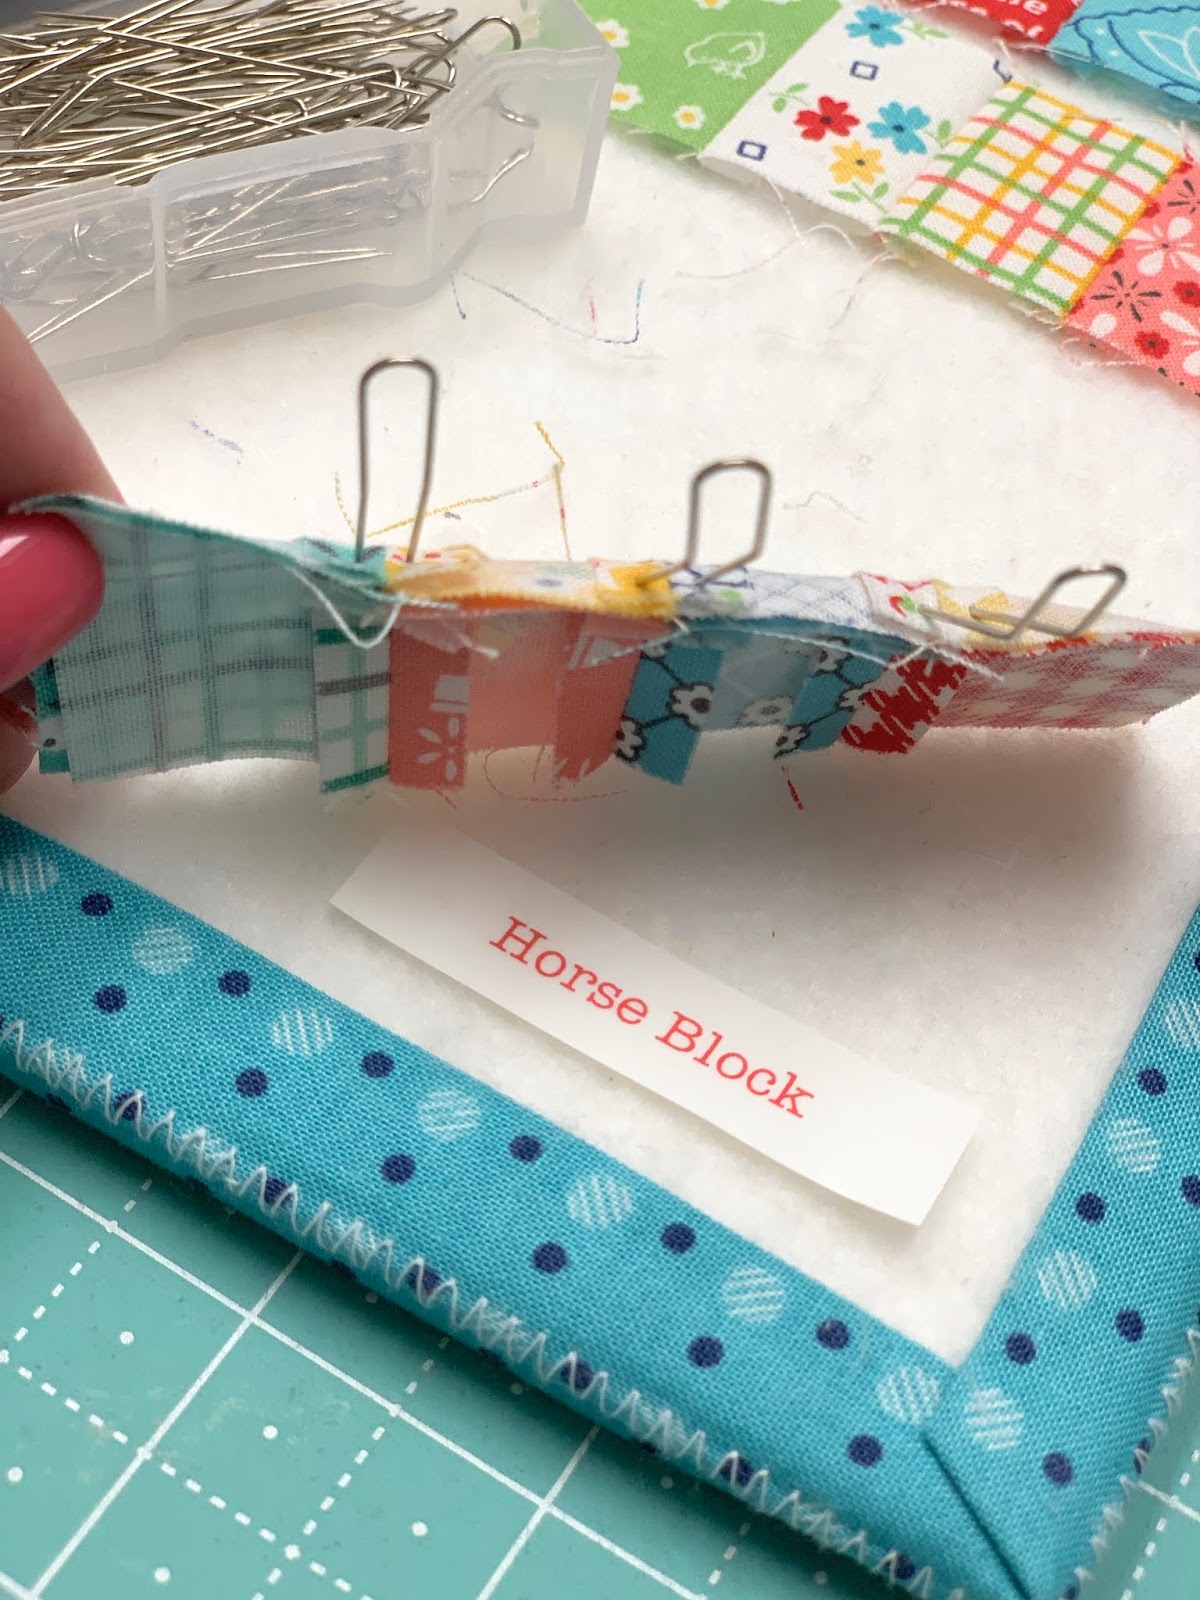
Okie dokie...let's make a horse!

Grab your horse block pieces
and traced shapes.
The shapes used in this block are:
1-H28
4-H11
9-H15
2-H4
2-H36
1-H16

Cut your flower stems:
2 - 5 1/2"
2 - 2 1/2"

Sew and trim.
Before turning remember to clip the
cleavage and inner curves on the horse...
flowers and baby chick.

Turn and shape them and give
each piece a quick little press.
P.S. If you like my little
vintage red tractor pincushion...
to read where I tell how I made it.

It's time to make a
cute little quilt for the horse:)

Lay your squares out like this...

And sew into 4 rows of 4.

This is my handy little double pin
that I use when doing small patchwork.
These type of pins have been around
forever and are normally used when
making clothing but I have always
used them for piecing fussy patchwork!
(if you have attended my workshops
you already know this lol)
I'm excited to now have some
Bee in my Bonnet ones
and I call them Double Pins:)
This is why my double pins are nifty:
While using only one pin...
you are pinning on both sides
of the seams
that need to line up with each other.

Now there is no room for that seam
to shift when they are pinned this way.
I love the results!!

if you need some
DOUBLE Pretty Pins:)

You can sew over them if needed...
I just go slowly while watching
to make sure that the
needle doesn't come down on one.
They are thin and they work like a charm!

See how each and every seam
lines up perfectly!?
Normally that is hard to do
with little patchwork pieces.

They sure save me from spending
time with the seam ripper:)

The cute little
horse quilt is all pieced...

And all the seams are pressed open
so as not to distort it...
and to reduce bulk...
and to help it lie flat.

Your little quilt should measure
3 1/2" square at this point and
you can trim it up if you want to:)

But it's not really necessary because
we will be using the interfacing and
turning it into an appliqué shape!

This is the "Ruler Work" that I gave
you instructions on tracing in the guide:)

Center it onto the quilt and
pin into place for sewing.

Trim the seam allowance and
clip off a little of each corner:)

Turn and press.
Use the turning tool to
gently shape the corners.

So cute and tiny!!
I just love little patchwork:)

One more thing before you prepare
your block for applique...
trace the mane onto the horse
and embroider it first.
You could do it after but it's
bulky through all of those layers.

I like to use washi tape to place
the pattern onto my Easy Trace Light Box.
It's easy to remove and leaves no residue!
I have a set of
Farm Girl Vintage washi tape
to be released soon:)

I use a backstitch and all 6 strands
of my steel gray Aurifloss.
I do not make perfect tiny stitches...
I like them kinda chunky because
it adds texture and free style to the block:)

Again...when laying out each block...
use a ruler so that your shapes
do not "grow" past the finished size.
The finished size of the
horse block is 14" wide...
so your pieces should not be
wider than 13 1/2"

It finishes at 11" tall.
From the bottom of the hooves
and the tip of the ears
it should measure 10"

Use the applique pins and pin your
shapes onto the background and
straight into the design board
while you are placing them...
just like I showed you
in the video for the pig.

When you are happy with the placement
grab your Sue Glue and
glue baste them down.
I used a stapler and my Queen Bee rock
and a couple rulers to
cover this block when drying
LOL...whatever works!!

All ready for applique and the
rest of the embroidery:)

I used 3 strands of the
Steel Gray for the baby chick:)

You will need to trim up your block
in the same way that I showed you
with the pig....but take note that
this block will instead
be trimmed 14 1/2" wide.
It will be trimmed 11 1/2" tall
just like the pig.
There is 1/2" measured in down at the bottom
of the feet in the exact same way.

Take note that all four of the
applique blocks on the top row
are 11" tall finished.
That's how they all fit together:)

After trimming...
sew on the Cute Little Buttons:)
I absolutely love my horse block
and I hope that you do too!
At this point he should be
nice and warm wearing his quilt...
and measure 14 1/2" wide and
11 1/2 inches tall
(I meant 11 1/2 hands tall lol)

NEIGH!!!

WHINNY!!!

YeeHaw!!!
Two super cute blocks completed:)
Whew!
That was a lot for the
first week but it's okay.
This post will stay here FOREVER
and we will only do one applique block
per week with the exception
of week four when we will only do
the pieced blocks.
The word" schedule" simply means
those are the days that I will
be posting that block tutorial
but that does not mean that
you have to have that block completed
by the end of the week.

We all work at different speeds and
some do not even have their fabric yet.
It's all good y'all!!!...
there is time to enjoy the process.
We have plenty to bee happy about...
and we are going to have
sew much fun with this sew along!!

Thanks so much for
"plowing through"
with me today and we will
do more farmin' next Monday!
xx
Lori

11 comments:
Too sinkin' CUTE! Your directions are so on point giving the beginner the attitude of, "this is doable". Love your style of teaching and your thoroughness. I might make my tractor orange...we have a Kubota:)
Great tutorial! I can see where those pins would hold much better than a straight pin.
I like your idea of using double pins to match seams. I bought a bunch to block crochet projects, but love anything that has multiple use potential.
Love it, love it! Thank you for hosting this Sew Along. Egg-celent directions:)
Thank you..will start qorking on it tomorrow waiting for my interfacing to arrive.
Can't wait to get started
Yehaw to you Lori
Your newest quilt is just beautiful. Gosh I adore your creativity and seeing your work.
This is my first sew along and I am SO impressed with how organized you are Lori!! I was feeling a little overwhelmed with all the little appliqué pieces, but after watching your video I have the confidence to do it. Thank you for all the pictures and little details included on your blog. Can’t wait for my fabric to get here!!
every day i see things that look nice and are added to my "maybe someday" list, but i adore this quilt so much, i just ordered everything to make it! now to wait (impatiently!) for it to arrive so i can join in the fun! thank you for this sweet design and sew-along!
Adorable! I am planning mine even as I am working on another quilt.
Lori, thank you for sharing your talents and wisdom with us. Truly, gifts from God.
Lori I have loved your designs since you were tole or decorative painting. I guess I have been a fan for probably 30 years. I am working on Bee Happy and have the hexes left to do, I have purchased bloom, and of course farm sweet farm. I like to Applique by hand,I’m 65 years old so I hope god will let me live long enough to finish all your quilts. I love your blogs, I just have trouble finding the one I’m looking for. we are all blessed to have you in our life, keep up with your beautiful work.
Just finishing up my Farm Sweet Farm quilt, my first of your quilts. Love them all! Working on Farm Girl Vintage blocks also...would love to make all of your quilts! I grew up on the farm. :)
Post a Comment