

Well hello again:)
Welcome to the
Autumn Love Sew Along

It's Week Ten!...
only two more weeks to go
until we can put
all of the blocks together:)
YaY!

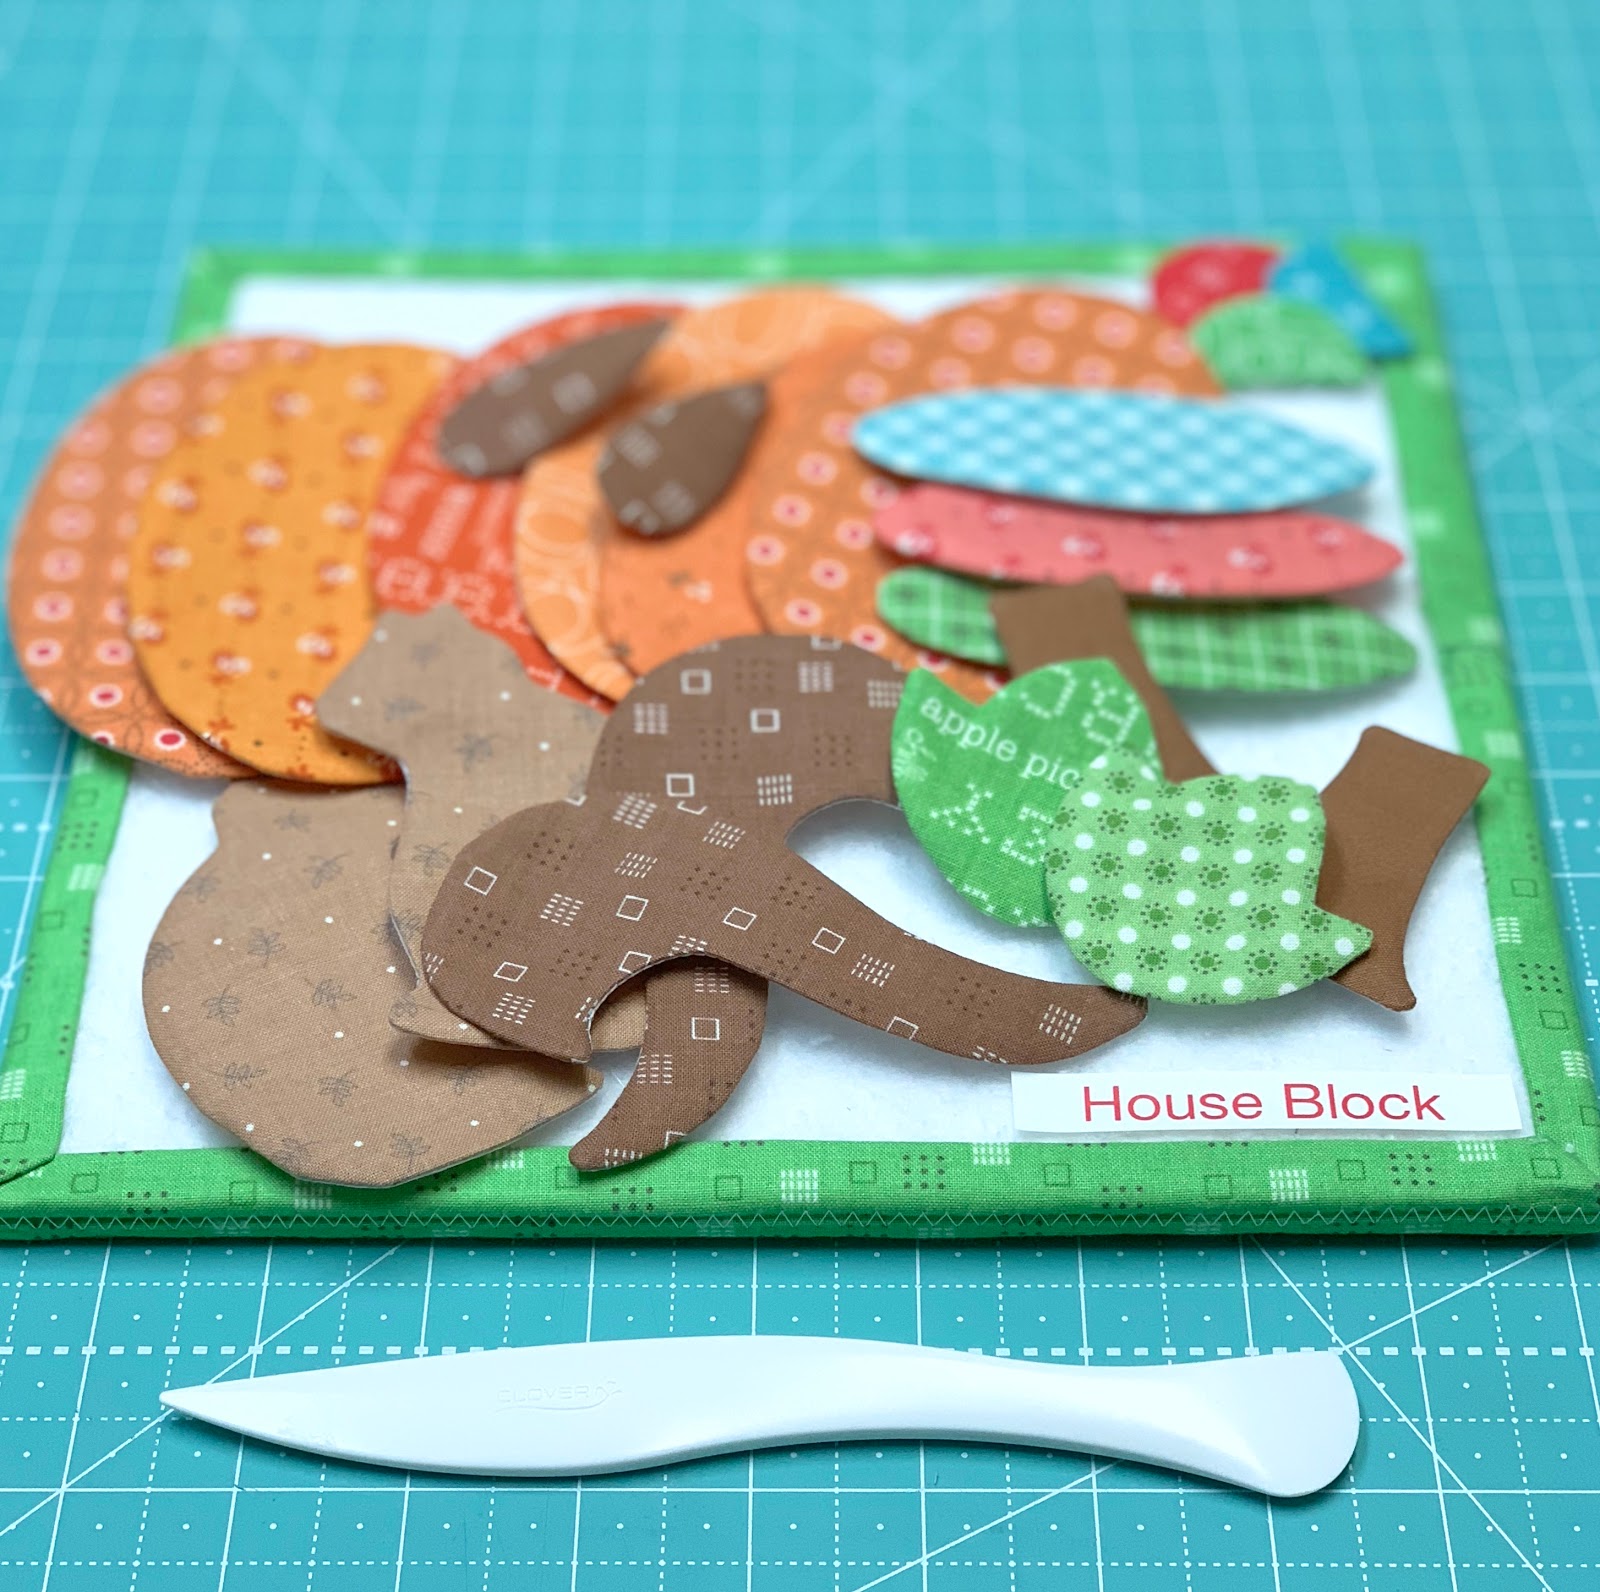
Today we are going to finish up
the house block by adding the
appliqués at the bottom:)

Step One after last week:
Sew the AUTUMN BLOCK that we made
in Week Four to the
bottom of the house:)
Now we can prepare the appliqués!

Autumn Love
Sew Simple Shapes
for this week are:
3 - F1
2 - F5
2 - F7
2 - F18
3 - F20
6 - F21
2 - F25
2 - F26
Cut 3 - 1/4" wide bias 1 1/4" long
for the acorn stems.
Press a slight curve into a
6 1/2" long piece of
Nutmeg 1/4" wide bias strip.
No worries!
Even though it was NOT
cut on the bias...
you will be able to
press it slightly curved.

Take note that when you are
tracing these shapes
for the squirrel...
you will need to trace a set
in reverse because they are
facing opposite directions.

Draw a line down the center of
the F1 traced circles
for the acorn tops.
Remember that this is the way
we did them in Week Six
for the Oak Leaf Block:)

Sew them like this...

Trim...turn and shape.
This is a good time to remind you
that this turning tool is
your best friend when it comes to
shaping up your shapes!
I would not be able
to do without it:)

These are the shapes that need
inner curves and cleavage areas
clipped before turning:)
All shaped...pressed and
ready for glue basting!

Before you start...
measure in 1 1/4" from each end
of the acorn bottoms and trim.

The raw edges will
tuck under the acorn tops.
You may want to
save the other ends...
because you never know...
I may have something
for you to do with them!

Let's start with the pumpkin
on the right side.
Measure in 3/4" from the edge
and place the first oval.

Place the other oval
on the left side and measure
so that your pumpkin is
5 3/4" across like this.

You can trim the left side oval off
a bit to reduce bulk:)

Now you can add the center oval...
the stem and the leaf.

Now for the squirrel:)
Measure 1" from the door and
place the feet and the
belly on that line.
Tuck the tail underneath.
Don't glue the arm yet...
just set it there.

Repeat for the left side of the block...
starting with the pumpkin.
Use page 18 of the sew along guide
to trace the vines for embroidery:)

Add the left side squirrel:)
Just set the arm there...
don't glue baste it yet...

Because you will need to
glue baste the bias strip first!
Measure 1 3/4" up from the
bottom of the door and
place glue dots (slightly curved)
right above the ruler like this.

Glue the strip down...
and now you can glue baste the arms:)

Press the acorn stems in half.
Glue the center acorn bottom first
and then the ones on each side.
Just set the tops there for placement
but don't glue them down yet ...

Until you glue the stems first.
Space them about 1 1/2" apart like this.

Now you can glue the acorn tops!

Three cute little acorns
hanging in a row:)

Now you can do all of
the applique on the house block!


Just like all of the
other pumpkin vines in the quilt...
I used all six strands of
my dark green Aurifloss.

I will sew a
Cute Little Button
on for the doorknob:)

HOUSE BLOCK
It should measure
26 1/2" x 36 1/2"
BEFORE
sewing your quilt together:)

Have you finished up
all of your 4" star blocks?
When you do...
sew them into rows of seven stars....
and sew the sashing strips
in-between like this.
The 2 rows on the outside edges
of this photo are the rows
that go on the sides
of the house block.
Sew a sashing strip onto each end
before adding to the house.

I always press towards my sashing strips:)
The two side strips should measure
36 1/2" long to fit the sides
of the house block...
but of course anytime there is
a lot of piecing involved
sometimes it may be a little
too long or a little too short.
If this happens...
it's easy to adjust the length
of the border strips within the
sashing strips that are between
the blocks.

After you have added the side rows...
then you can add the
two remaining star rows
to the top and the bottom
of the house block:)
You can adjust them as needed
in the same way as well:)
You can do this now if you would like ...
or of course you can save this step
for when you assemble the entire quilt
after all of your blocks are completed:)

Here are all four
Harvest Star blocks completed...
The tutorial for all of the
pieced blocks are back on Week Four.
Remember that each and every tutorial
remains here on my blog
if you need to revisit.
Simply scroll down and look at
the right side bar of my blog.
When you find the week that you want...
click on it...
and it will take you right there!
Next week we will be doing the
Crows and Vines Block...
See you right back here then!
xx
Lori

2 comments:
This looks so great!! I am hoping to catch up so that I can finish along with you all!! thanks for posting this quilt along--even though I am behind, I have enjoyed every bit of it!! I admire your talent and organization!
Keep up the great--and fun work! :)
This house block is just SO stinkin' cute!! I'm working on my 28 stars today (I skipped it because I got behind and I went for the Scarecrow which just needs to be glued down) so it's stars today, then I've already turned my Milk Can pieces, then it's back to the rest of the stars and the 'autumn' wording. Lori, I am loving your QuiltAlong and I just wanted to say thank you - I'm really enjoying it immensely!!!
Post a Comment