

Welcome!!
Today is the day for the
"Bee Prepared"
post that I do in preparation for my
appliqué sew alongs using my
Sew Simple Shapes
and my latest fabric collection.
This is the point to start gathering
your supplies and order
your quilt kits for the sew along.
This one is the
Calico Garden SEW ALONG
and I'm so excited for it to start!

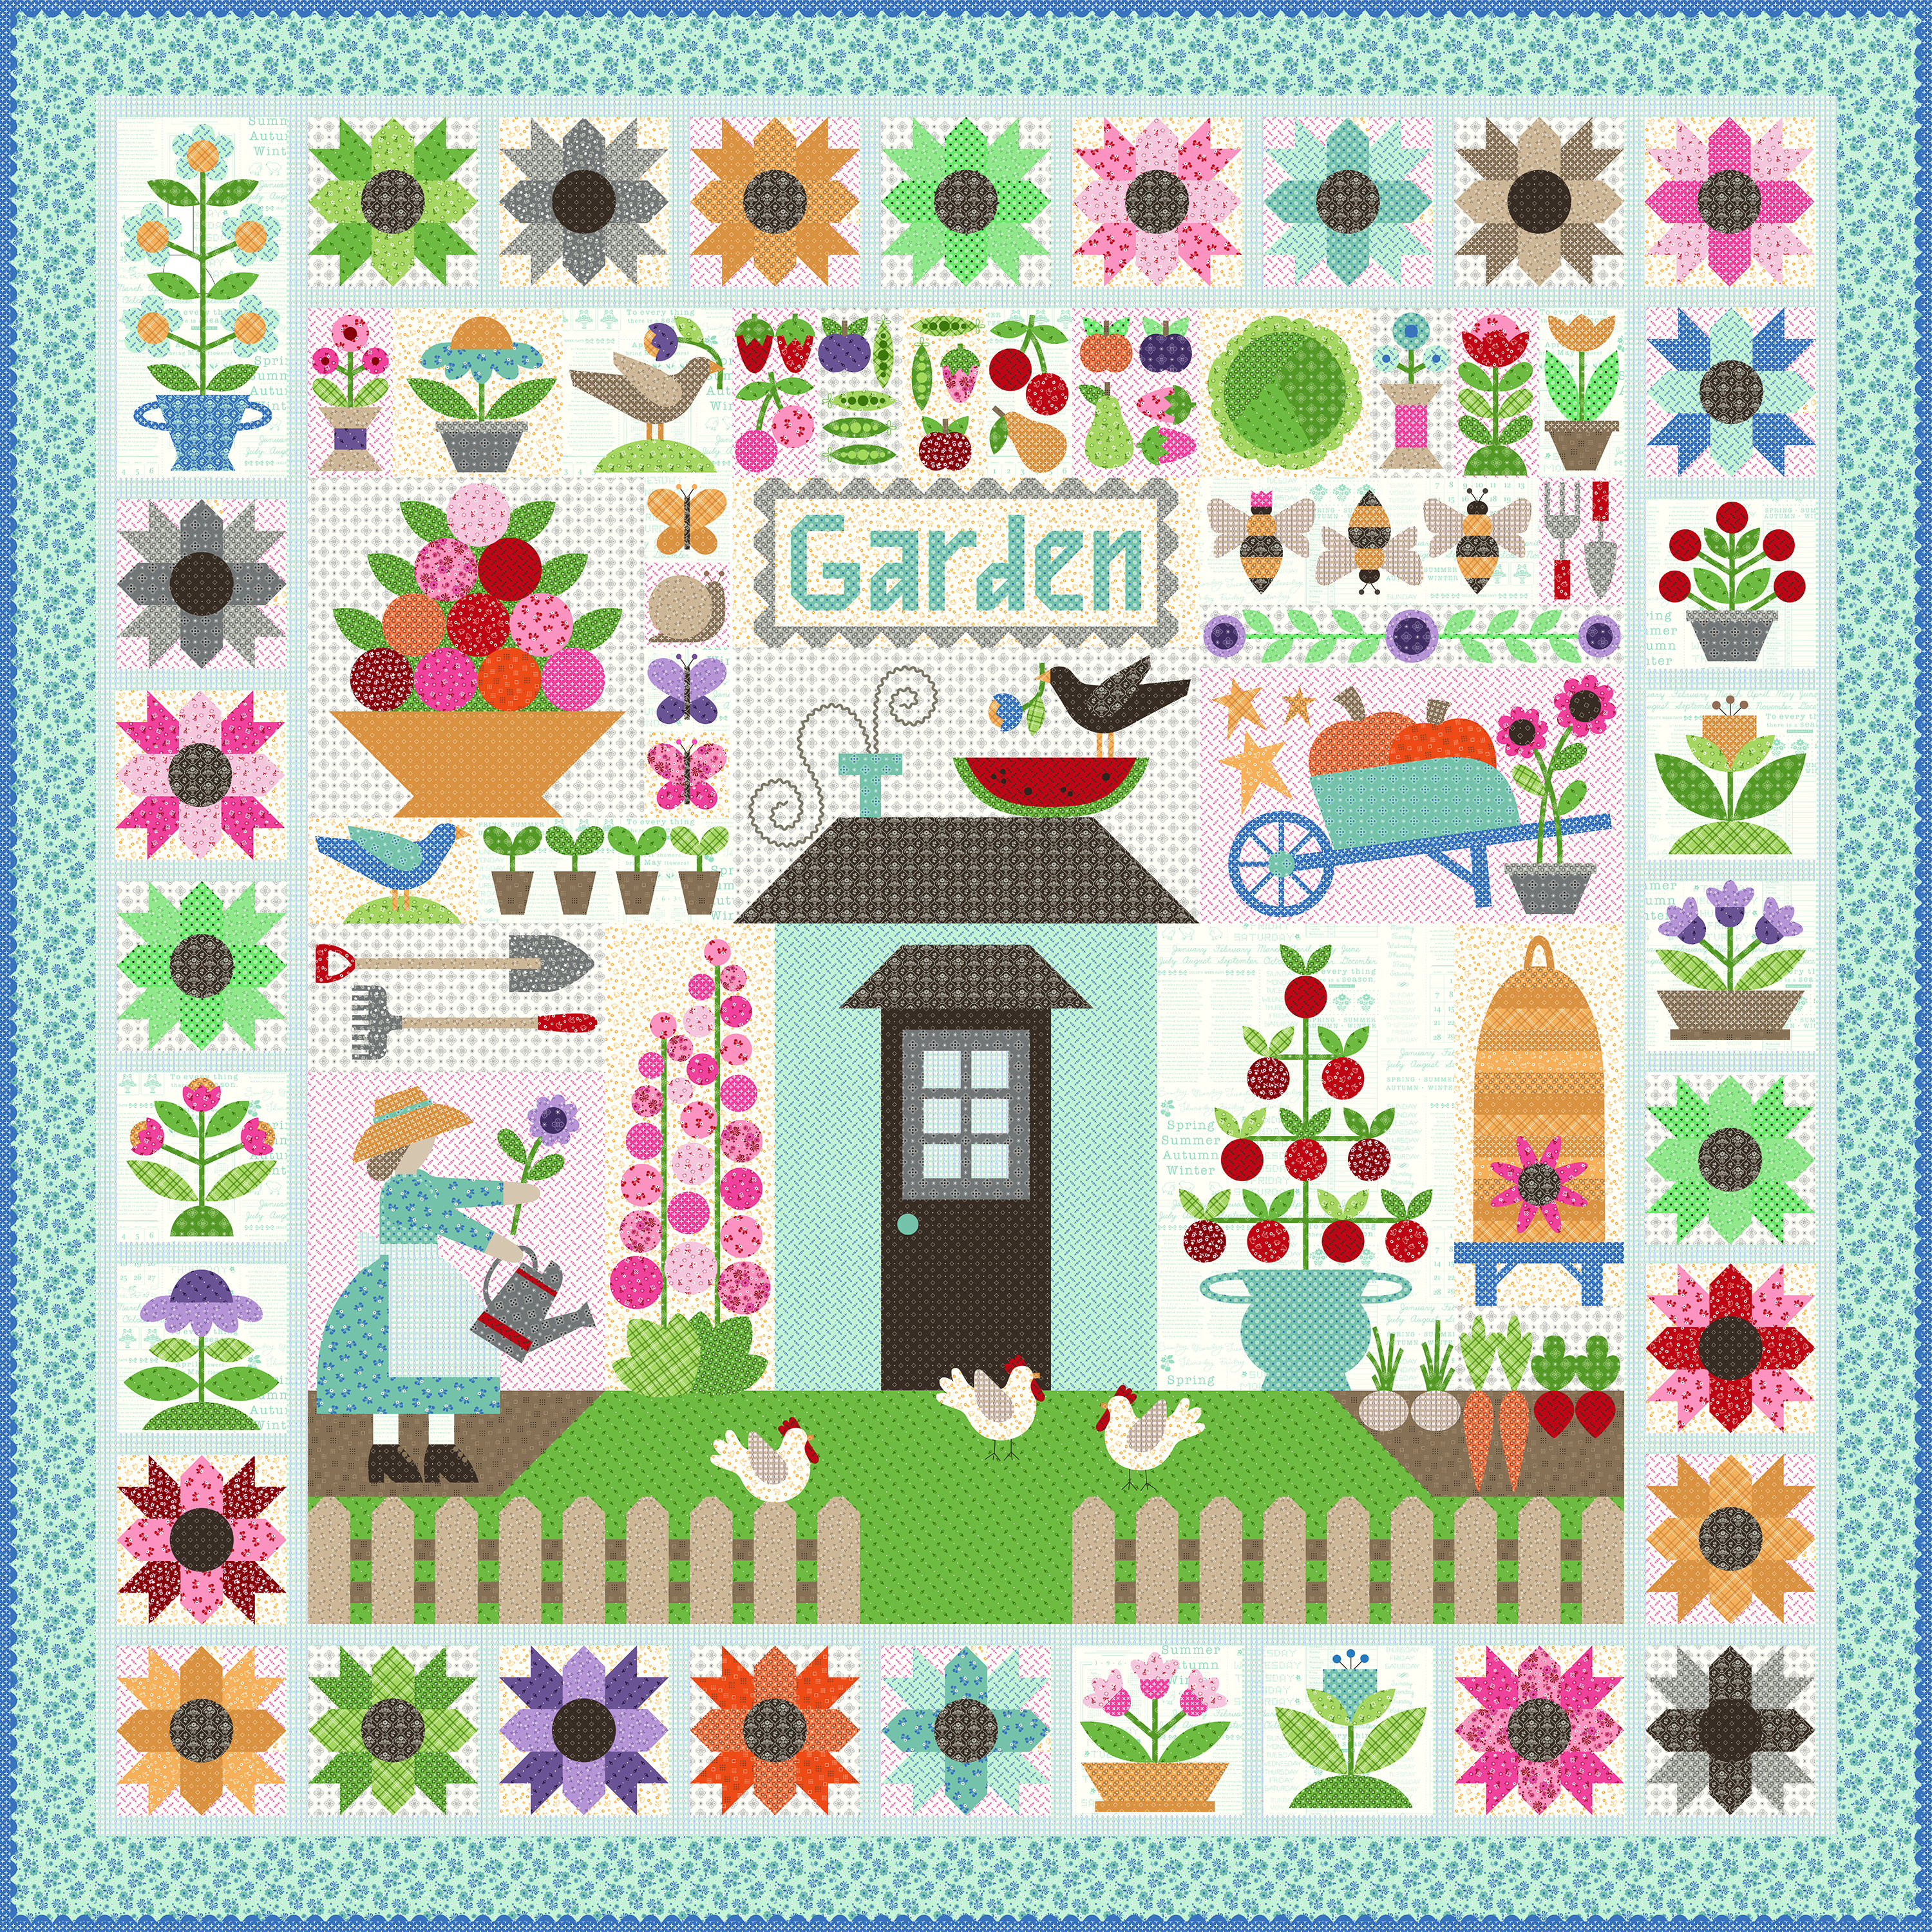
We will be making the
Calico Garden Quilt
which finishes at
90" x 90"
It consists of several machine pieced blocks
in the border and in the quilt center
and appliquéd blocks the border
and quilt center as well.
For the applique we will be using my
Sew Simple Shapes called of course...
Calico Garden:)
We will start with the applique blocks
in the border and then move on to the
pieced border blocks
and then start in on the center blocks!

My Sew Simple Shapes Sew Alongs
always take place here on my blog
and they are on Monday's.
This one starts January 30th!
How do you join the sew along?
1.You simply grab yourself a
Calico Garden Quilt Fabric Kit
2. You will need the
Calico Garden Sew Simple Shapes and
the Sew Along Guide
3. Gather up supplies needed
to make the quilt
4. Come HERE to my BLOG every Monday
during the sew along
(starting January 30th)
where I will give you the
free step by step tutorial
for that weeks block or blocks.
*for week one block I'll be doing a
video tutorial on my YouTube channel
and I will also be doing a
week one blog post here as well.
Please read ALL of the information
within this post telling you all that
you need to know about this sew along.
Once the sew along has begun...
each of my weekly posts will be
tutorials about actually
making the blocks and so I am
telling you here all about the supplies
and other things necessary to get started
gathering what you will need.

There is no pattern to purchase...
because basically the
Calico Garden
Sew Simple Shapes
are the pattern and the instructions on
how to use them for each block
are shown weekly here
on my blog or YouTube channel
for week one
during the sew along.

After purchasing the shapes you will
need to download the handy dandy
Calico Garden
Sew Along Guide
for the free download.
The guide is not a pattern...
remember that the shapes are the pattern
and the guide is simply a guide.
Why do I create a guide?
It has all kinds of info such as:

the schedule of what blocks
we will be doing each week
during the sew along.
This sew will go for 19 weeks!

Also in the guide you will find
fabric requirements for the quilt...
and notion requirements for the quilt
as well as suggested notions
that I use when making mine.

You will also find instructions
for cutting each and every
piece of fabric in your kit!
It will tell you what that piece is for...
which Sew Simple Shape it is used with
and what block it belongs to.
This way you can cut ahead of time
and make individual block kits for
your quilt and have them all
ready to go each week!
As with any sew along...
organization is really the key.
I like to have this information
ready for you ahead of time
so that you can have each block cut
and ready to go ahead of time...
So that each week you can
simply make the block or blocks!!

You will also find the cutting
measurements of the Sew-In Interfacing
that goes with each Sew Simple Shape
so that you can have that all cut
and ready to go as well:)

block sections and quilt borders
for when it is time to finish the quilt
and sew it all together.

And as always there is a page
for "Calico Notes"
so that you can
jot anything down from my blog posts
or video tutorials
during the sew along.
I recommend using these pages to
write down the piecing tips
that I will be giving you during
the tutorials for each of the
pieced blocks in the quilt:)
You can print as many
note pages as you would like
to take as many notes as you want
so you could print a page for each.
So now you know what the guide includes.
The instructions to make each block
is NOT in the guide.
The instructions are a detailed
step by step tutorial
for EACH applique block
and
EACH pieced block
and I show you those here each week
during the sew along:)

As per usual I used my
Bee Keeper Binder Pocket Inserts
to hold my set of
Sew Simple Shapes....
for easy access during the sew along!
This time I used two of them
and separated the large pieces
from the smaller pieces.
This is a set with many shapes:)

I even went one step further
and placed the circles and ovals
in a baggie
and all the leaf shapes in a baggie
and placed those in the one
with the smaller shapes...
for even faster sorting time!
I also added one of my
Calico Enamel Charms
to each zipper pull for the
cuteness factor:)

I am using my new
CALICO Crafting Paper Pad
to create and decorate a binder
for this sew along...

On the back of the pad it
shows all of the papers included
(papers are 8 1/2" x 11"
very nice quality scrapbook paper)
and the 2 pages of clip art that
I designed for binder decorating:)
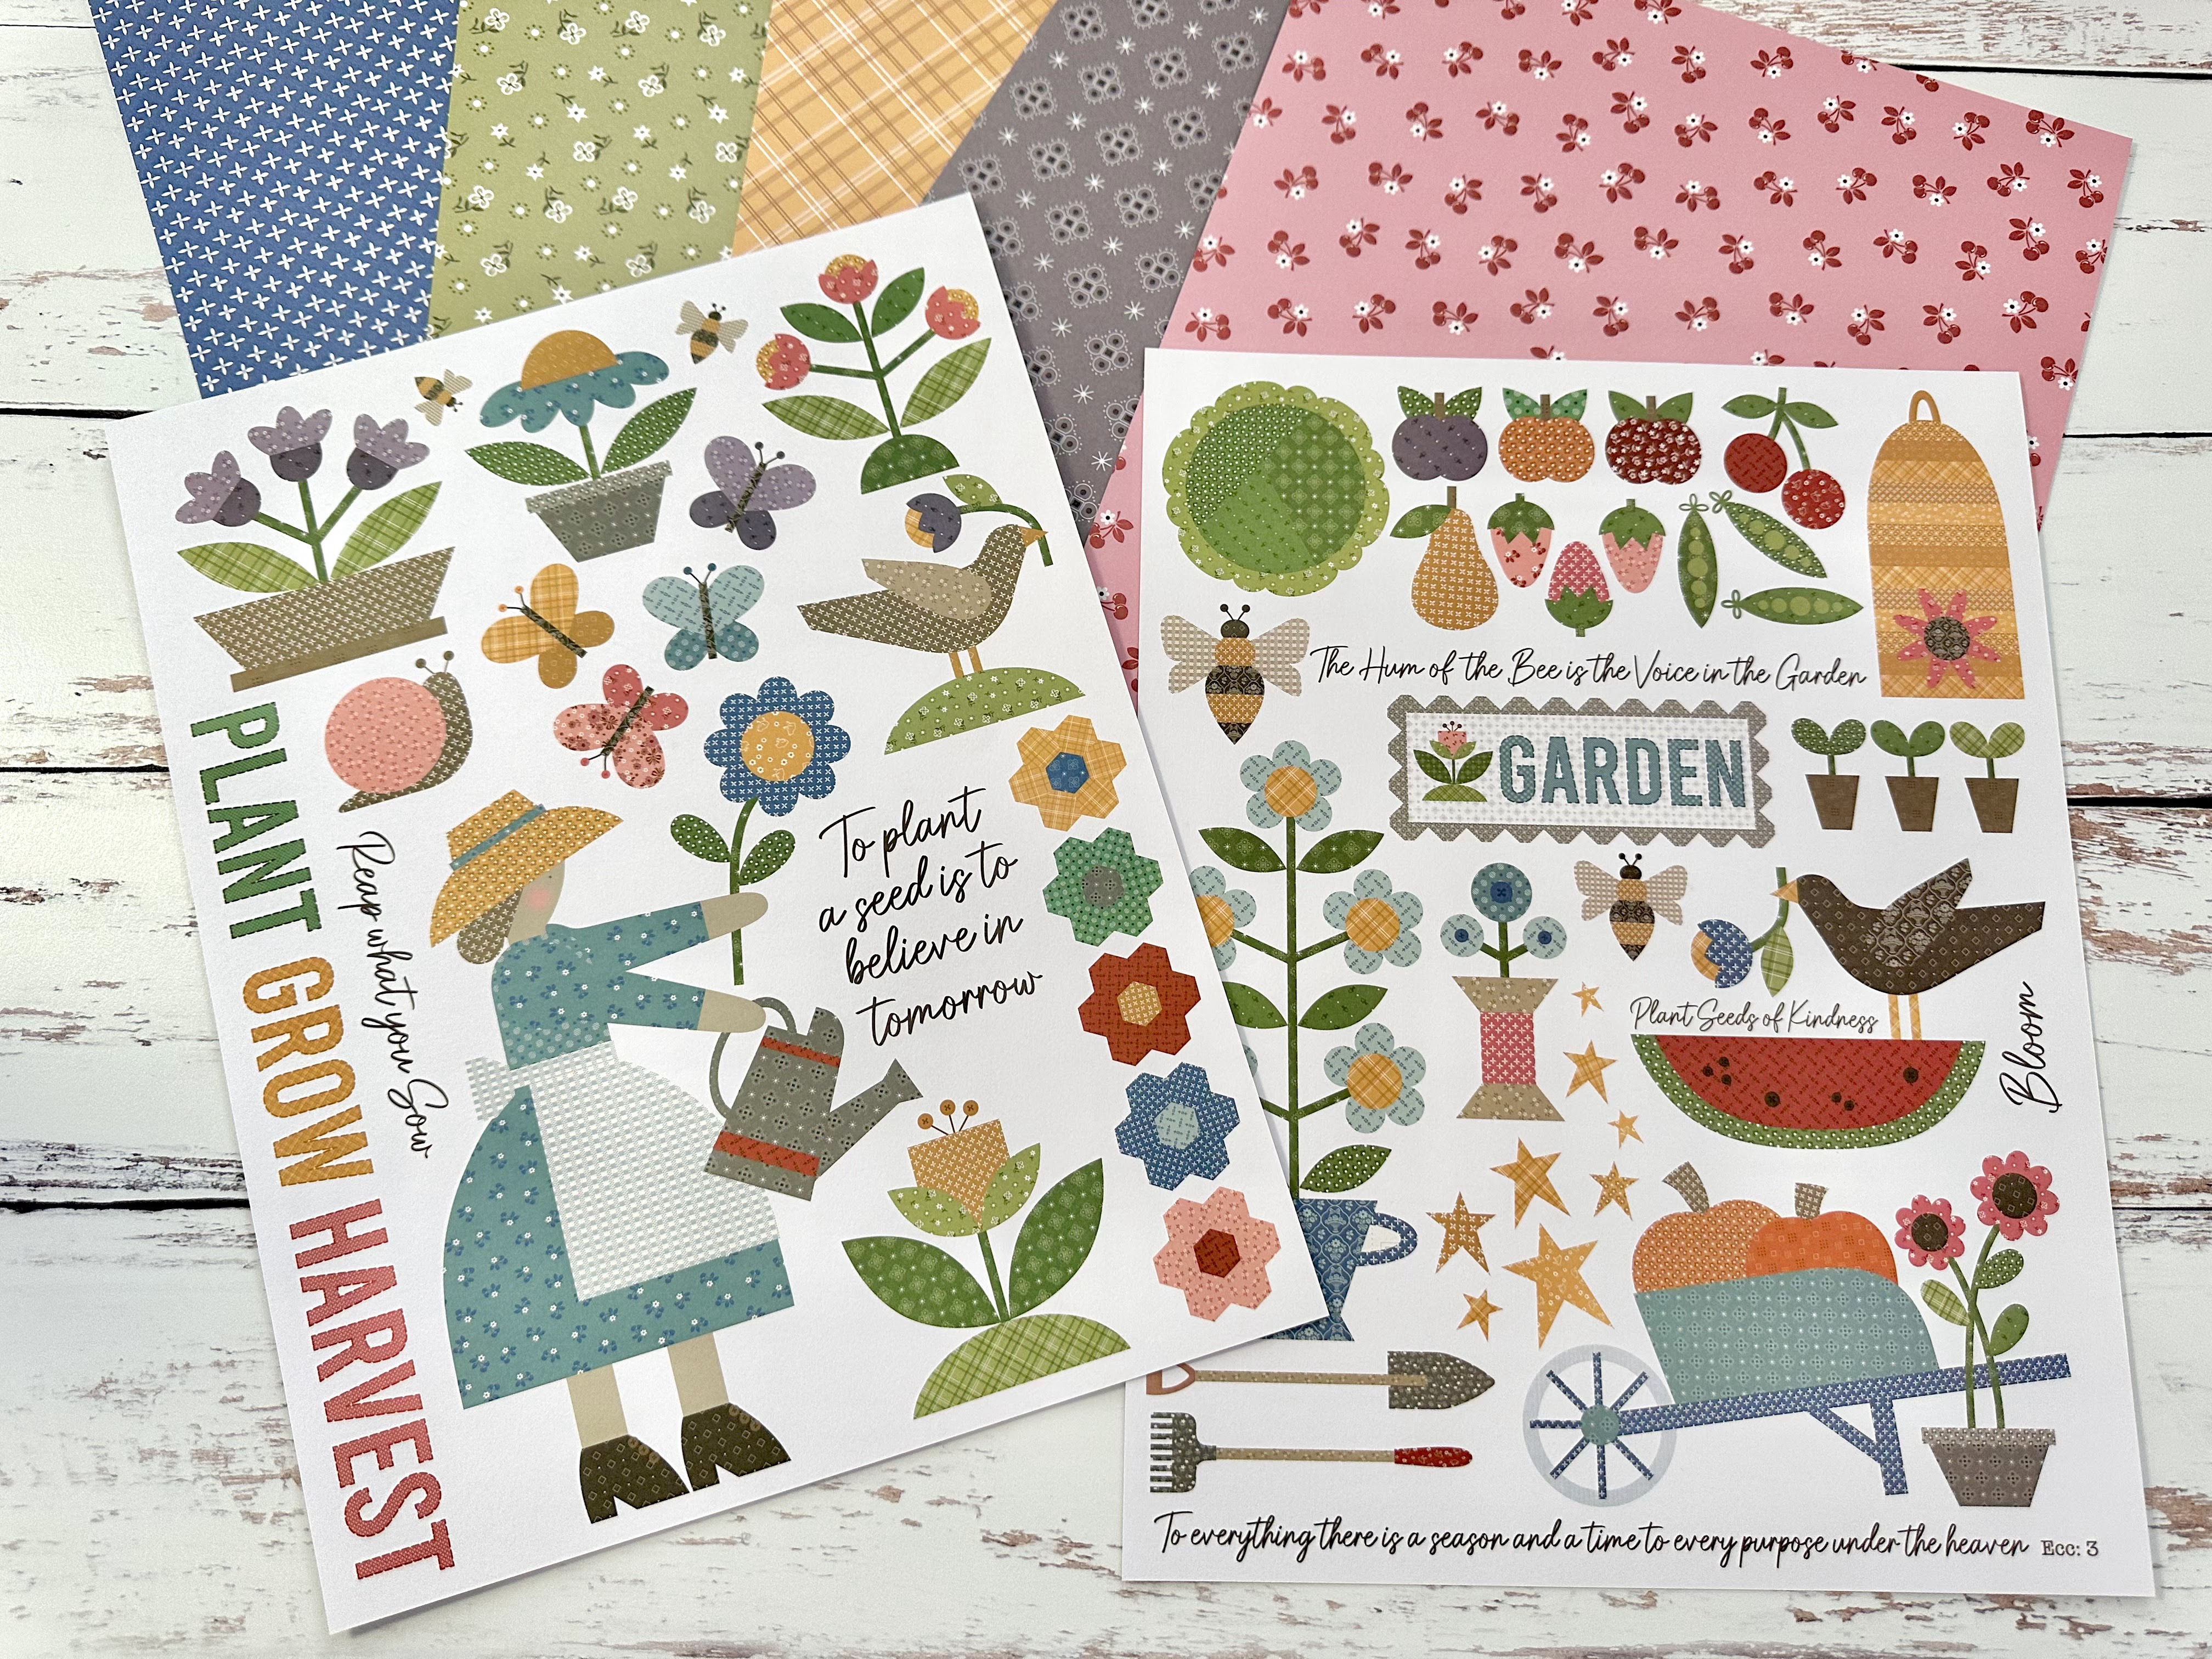
Here are 5 of the papers
and the two pages of clip art so that
you can see what they look like.
If you are not familiar with the term
"clip art"
It simply means you cut the art out
with scissors and use a
glue stick to apply:)
I'm going to have so much fun decorating
and creating my binder and
I'll show it to you
in my week one video:)
I'll probably use a 2" binder
or even my binder from Prairie
I'll decide which one when I do it
and of course will let you know!
I'll put my guide pages into individual
sheet protectors as per usual.
I will have my Sew Along Guide and my shapes all in one place
and I'll bee ready to go!

Okay...
enough about the guide and
that I'm going to decorate the binder...
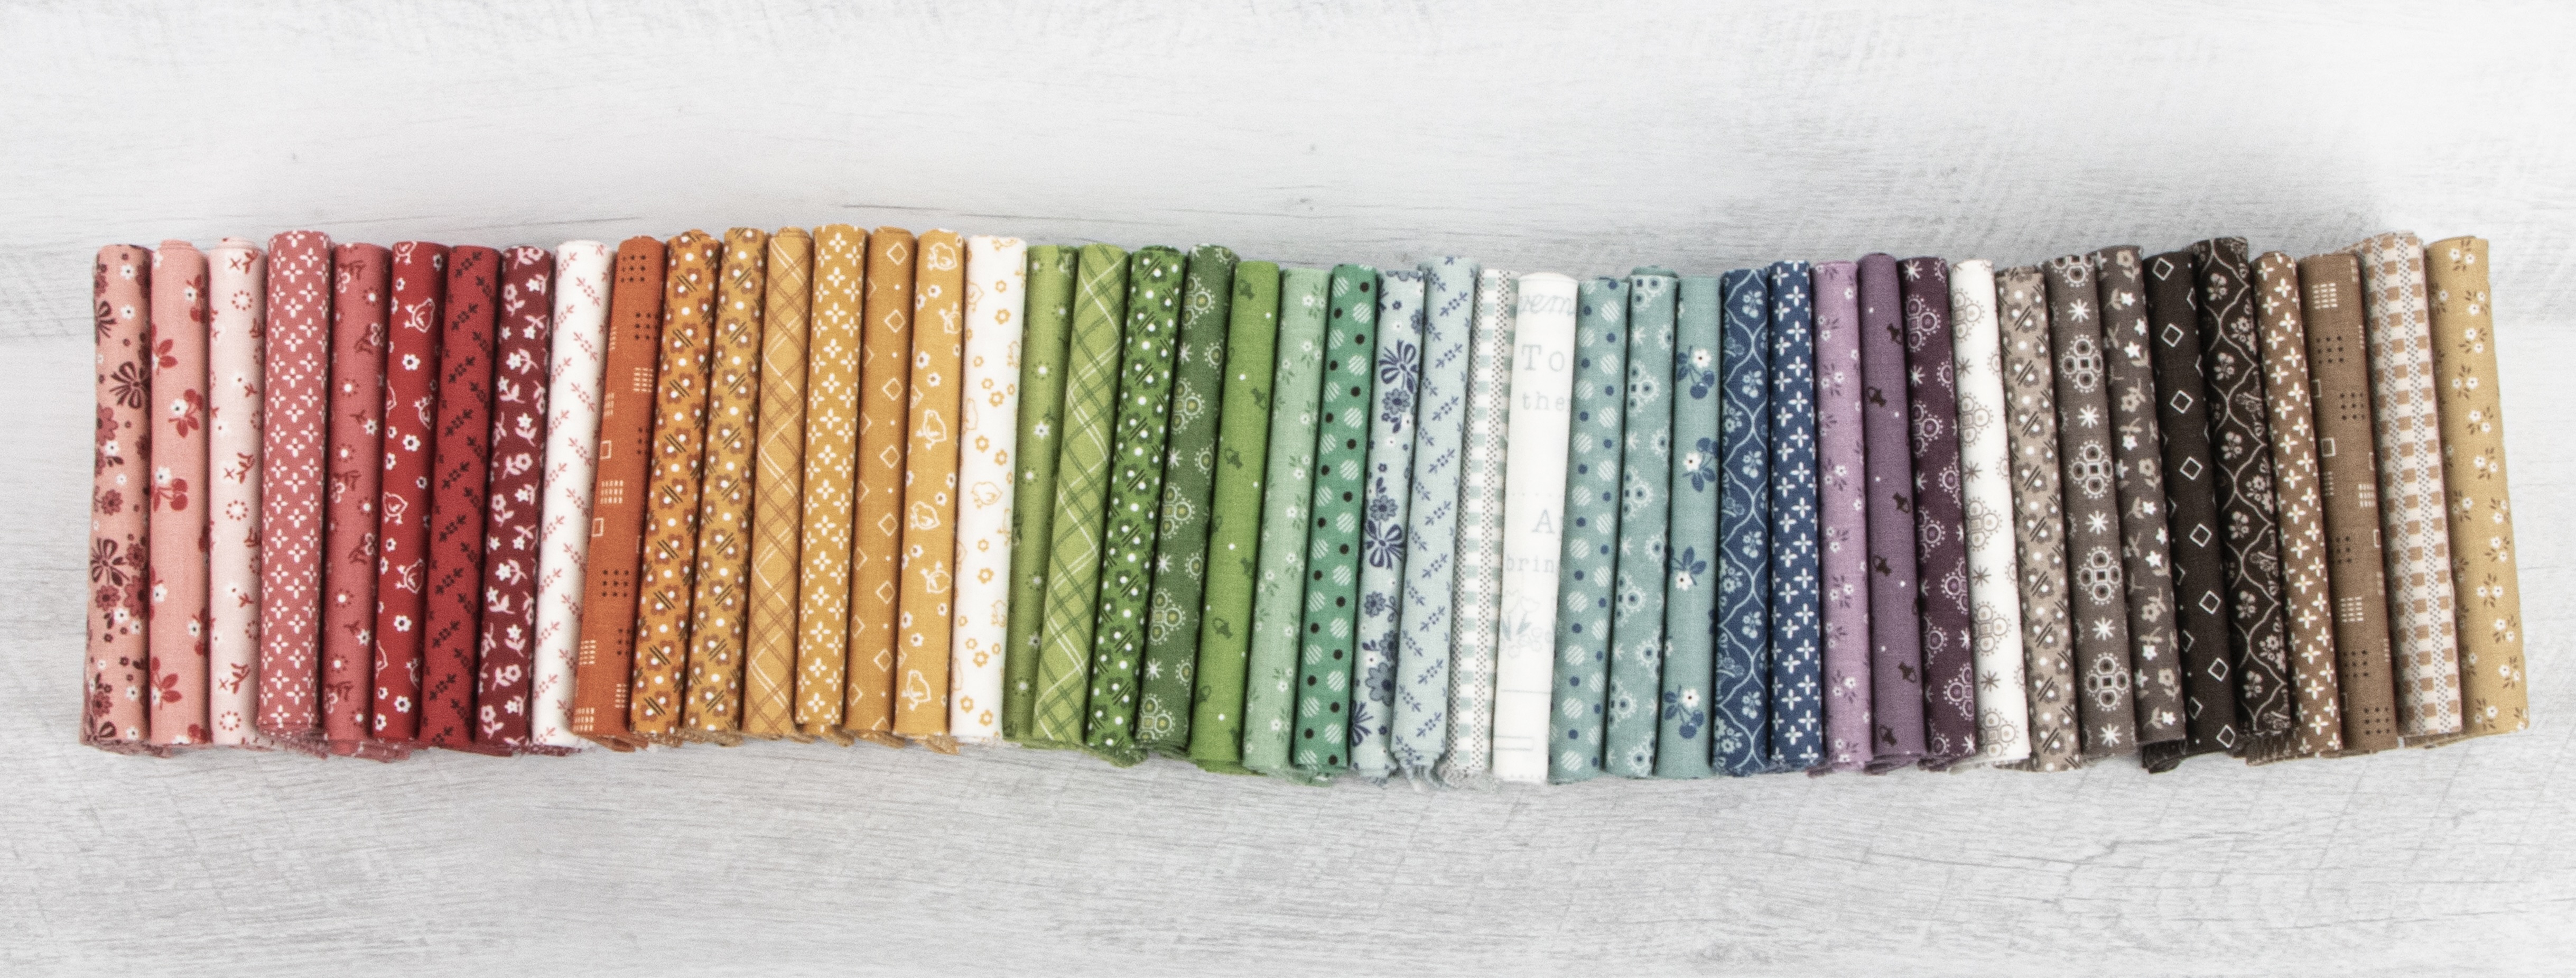
let's talk about the fabric!
The collection that we are using
for the Calico Garden Quilt is of course...
CALICO!!
Designed happily by me...
and produced and distributed
to quilt shops everywhere
by the amazing Riley Blake Designs:)


I'm really excited to be working and
playing with the Calico collection:)
There are 42 prints in the collection...
and 4 backgrounds that I designed
to coordinate with the prints:)
I hope my Calico collection speaks
to you and finds a place
in your gardening heart
like it has in mine:)
So let's talk about the
Calico Garden Quilt Kit.
Several shops are stocking the kit...
both brick and mortar shops
as well as online quilt shops.
The Calico notions as well as the
fabric have begun shipping
to quilt shops everywhere
and will continue to ship as
each item arrives at the warehouse!
So of course if you have not
already pre-ordered
your fabric kit and need one...
it is not too late at all!
The sew along does not begin
until the end of this month...
and when I say "BEGIN"
that just means it's when I begin
to do the weekly tutorials.
As always...
everyone sews at their own speed,
at their own time and so it simply
does not matter when you start.
Do what makes you happy
and do what works for you...
because I always keep
each and every tutorial right here
on my blog and it never goes away.
The schedule is NOT to keep
YOU
on a deadline or stress you out ...
it is simply the schedule for
ME
to do my tutorials.
If you will look at my sew alongs that way
hopefully that relieves any stress.
Sewing is FUN!
So again...
if your kit has not arrived
just know that it's coming.
And if you are just deciding to join in
Just do a quick google search of
"Calico Garden Quilt Kit"
to find one...
google is your best friend lol...
easy peasy!!


With each collection that I design...
I also design wide back prints
(108" wide)
to use for the backings on any and all
of your Calico projects...
it's so nice when you don't have to
piece the back!
It comes in 3 colors...
Alpine... Coral and Milk Can

I also designed this
"Grandmas Calico Garden"
print for the collection.
It's not used in the quilt
but I just had to show it to you
because I love it so much!
If you would like to see
all things CALICO
to view the story board!

If you would like to watch my
Virtual Spring Market Video
where I show you everything
that is coming this year...(so far)

We will be using the small Vintage Trim
in the color Pebble for the
smoke in the Potting Shed Chimney
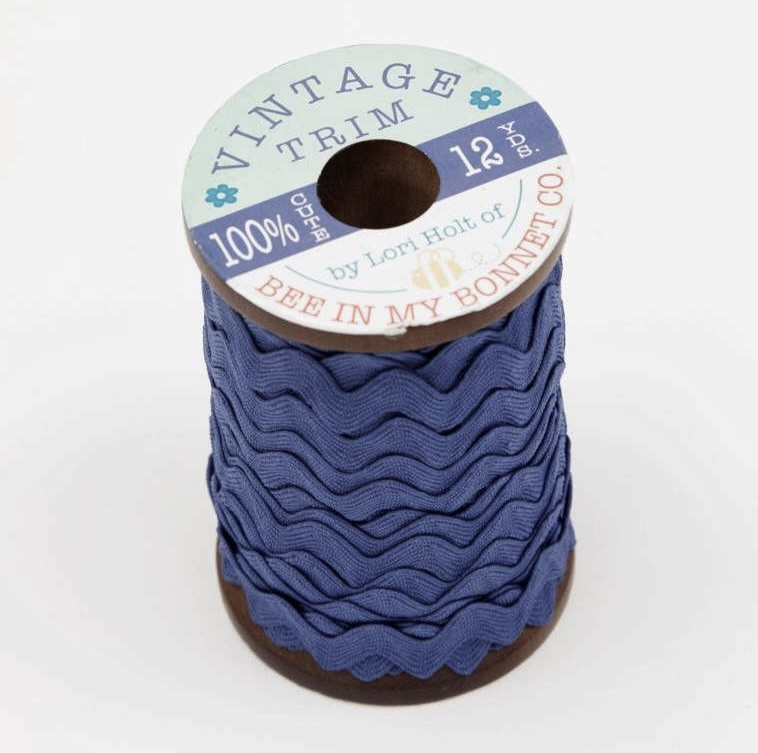
And large Vintage Trim in Denim
to use in the binding:)

Okay!!
Because I am a visual person...
I thought you might like to see
a photo of each of the supplies
and notions that are listed in the guide.
***The following photos are some
of my notions and other of my
favorite notions that I am using
to make my Calico Garden Quilt.
Some are listed in the guide
and some are not ...
but I will explain each one!
You will see me using them in the
tutorials during the sew along...
so I thought I would tell you about
each of them here...
to answer any questions that
you may have about them.
You can of course use what
you would like...
these happen to be my favorites:

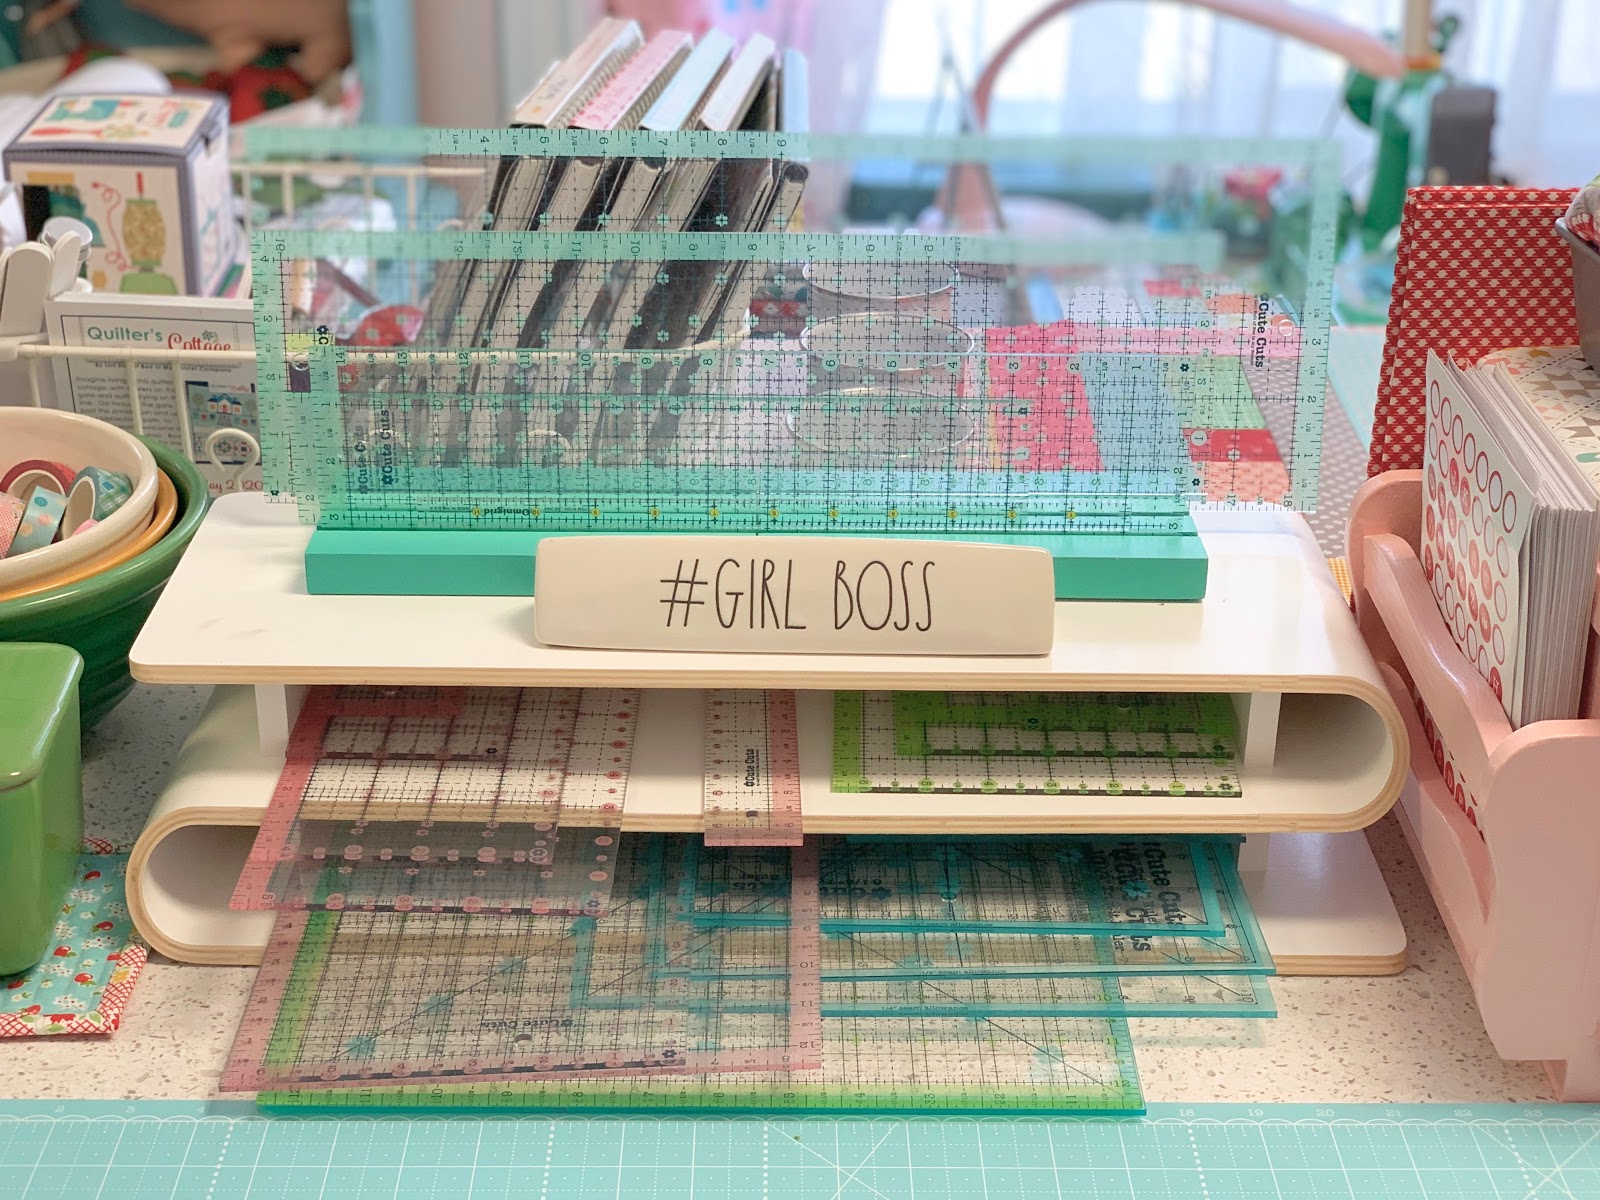
You will need several sizes of the
Cute Cuts Trim - It Rulers
to trim up the Blocks
after they are appliquéd
and during the piecing process.
I have several sizes
of my Trim-It Rulers
that come in handy for every
applique and pieced blocks that I make.
The sizes that I will be using
for this sew along are
3 1/2", 4 1/2", 5 1/2", 6 1/2",
7 1/2", 8 1/2", 12 1/2", 14 1/2"
16 1/2" (shown in photo)
and the 20 1/2"
***NOTE***
(Background fabrics are cut larger
to allow for working the block and
then trimmed up later using these rulers)

You will need my Sew-In Interfacing
for the appliqués.
Since starting my sew alongs that use
my easy applique method...
I have developed what I think is the
perfect strength and thickness of
interfacing for shaping the appliqués.
I also use the
Point to Point Turner by Clover
to shape each of my pieces...
I could not do without this handy tool!

I pin and then glue baste
each block for applique prep.
I love love love this glue
by Sue Daley
and affectionately nick named it
"Sue Glue"
It is water soluble...
dries clear...
keeps my pieces in place for
applique but can be
pulled off if I need to reposition
...its a win win!
I will use my other Cute Cut Rulers
and my readers and these are all
pink so I had to take a picture
of them together for you lol

that you will need for this quilt.
Some fabrics are cut on the bias
and most are not.
I always like to keep my cut
and prepared bias rolled up
on one of the empty spools
from my large Vintage Trim.
It's very handy!
You can watch any of my week one in any
of my sew along videos if you have not
seen how I prepare my bias strips for applique.
If you have never cut strips on the bias
you can watch how from this weeks tutorial
from my Sew Simple Shapes ReMix Series.

Here is a photo of my NIFTY NEEDLES...
they come in a card with several
of each different kind...
and also come in
individual needle tubes as well.
There are 6 different kinds
for all stitching tasks...
shown in the tubes are
Embroidery...applique and binding.
You can also use the sewing needles
in one of the smaller sizes
if the applique needles are
too small for you.
It's really a personal preference...
they both work just as well and
there are several sizes
to choose from within each tube.


Now let's talk thread.
I have a Aurifil thread set
called Bee Happy
and it will work for most of the colors
in my fabric collections including
CALICO.
The thread is 50 wt. and 80 wt.
and is used for
APPLIQUE and NOT embroidery.


Since then I have introduced several
new colors in
PRAIRIE and PRIM
that will also match
other prints in CALICO as well:)
You can decide if you would like to
machine applique or hand applique...
either way you will need to
have matching thread for each applique.
These thread sets work for both
machine and hand applique!
If you are machine appliquéing
you would use it for the top thread
but you would not need to change
your bobbin color as it would
not show on the top.
to watch my tutorial on both
machine or hand applique.
Then you can decide
which you would like to do!


I use my washi tape to tape my
Seams Sew Easy Guide
onto my sewing machine.
For those of you who may not know
what washi tape is...
it was developed for paper crafting
and packaging but I also use it
for sewing and quilting!
You can bet I'll be using it for
decorating my sew along guide binder!
Just think of it as cute
miniature painters tape.
It has a low adhesive so that it
can hold temporarily and can be
easily peeled off without leaving
a residue on fabric or your sewing machine.
I do a set of washi tape designs
with each fabric collection
and these are from my Calico set:)
I use my Seams Sew Easy Guide
to piece all of the blocks in the quilt.
It's used as an accurate
1/4" seam allowance and also when
piecing all of the easy corner triangles
in my quilt blocks.

I have several different sets of
Pretty Pins and these are the two
that I use when making this quilt.
The Double Pins are used when
piecing blocks to match up seams.
The Applique Pins are used for
pin basting into the design boards
and are essential to me!
These are just the right length
for this task...
which is why I call them appliqué.
I also have "mini applique" Pretty Pins
that are short and tiny and are
used for hand applique
when I don't glue baste.

use my brand new
Flower Power Magnetic Pin Holder
to make my Calico Garden Quilt:)

I use the Bee in my Bonnet Design Boards
when cutting and for pinning and
glue basting each applique block.
The new Calico ones will come in
four sizes...7" - 10" - 14" and 18"
There are 2 prints for each size.
Besides my Trim-It Rulers
for laying out and trimming blocks...
You will need all sizes of
cutting rulers and of course a cutting mat...
I have a variety of Cute Cuts Rulers
in 4 different colors and shapes and sizes
and the same goes for my cutting mats.
I have a big variety for cutting and of course
to make your sewing room look cute!!
These rulers are the ones that I use
to cut all of my fabrics for everything...
including all of my pieced quilt blocks.

When I am cutting I use my
Sew Handy Stickers for labeling
my cut pieces and blocks etc.
They come in 5 different colors
and are letters and a few
number pages as well:)
These stickers adhere well...
can be ironed over...sewn over too...
but then they easily peel off
without leaving any residue.
You can use them to help label your
appliqués or blocks as you cut them.
LOVELY and SEW HANDY!!

And speaking of sewing...
you do not need a
fancy shmancy sewing machine
to make the applique pieces from the
Sew Simple Shapes
or to piece the quilt blocks.
Just a good straight stitching
machine is all you need...
at just a bit shorter than
regular stitch length.
It really is a matter of
personal preference and what works
best for you but I would suggest
doing a smaller stitch
rather than larger.
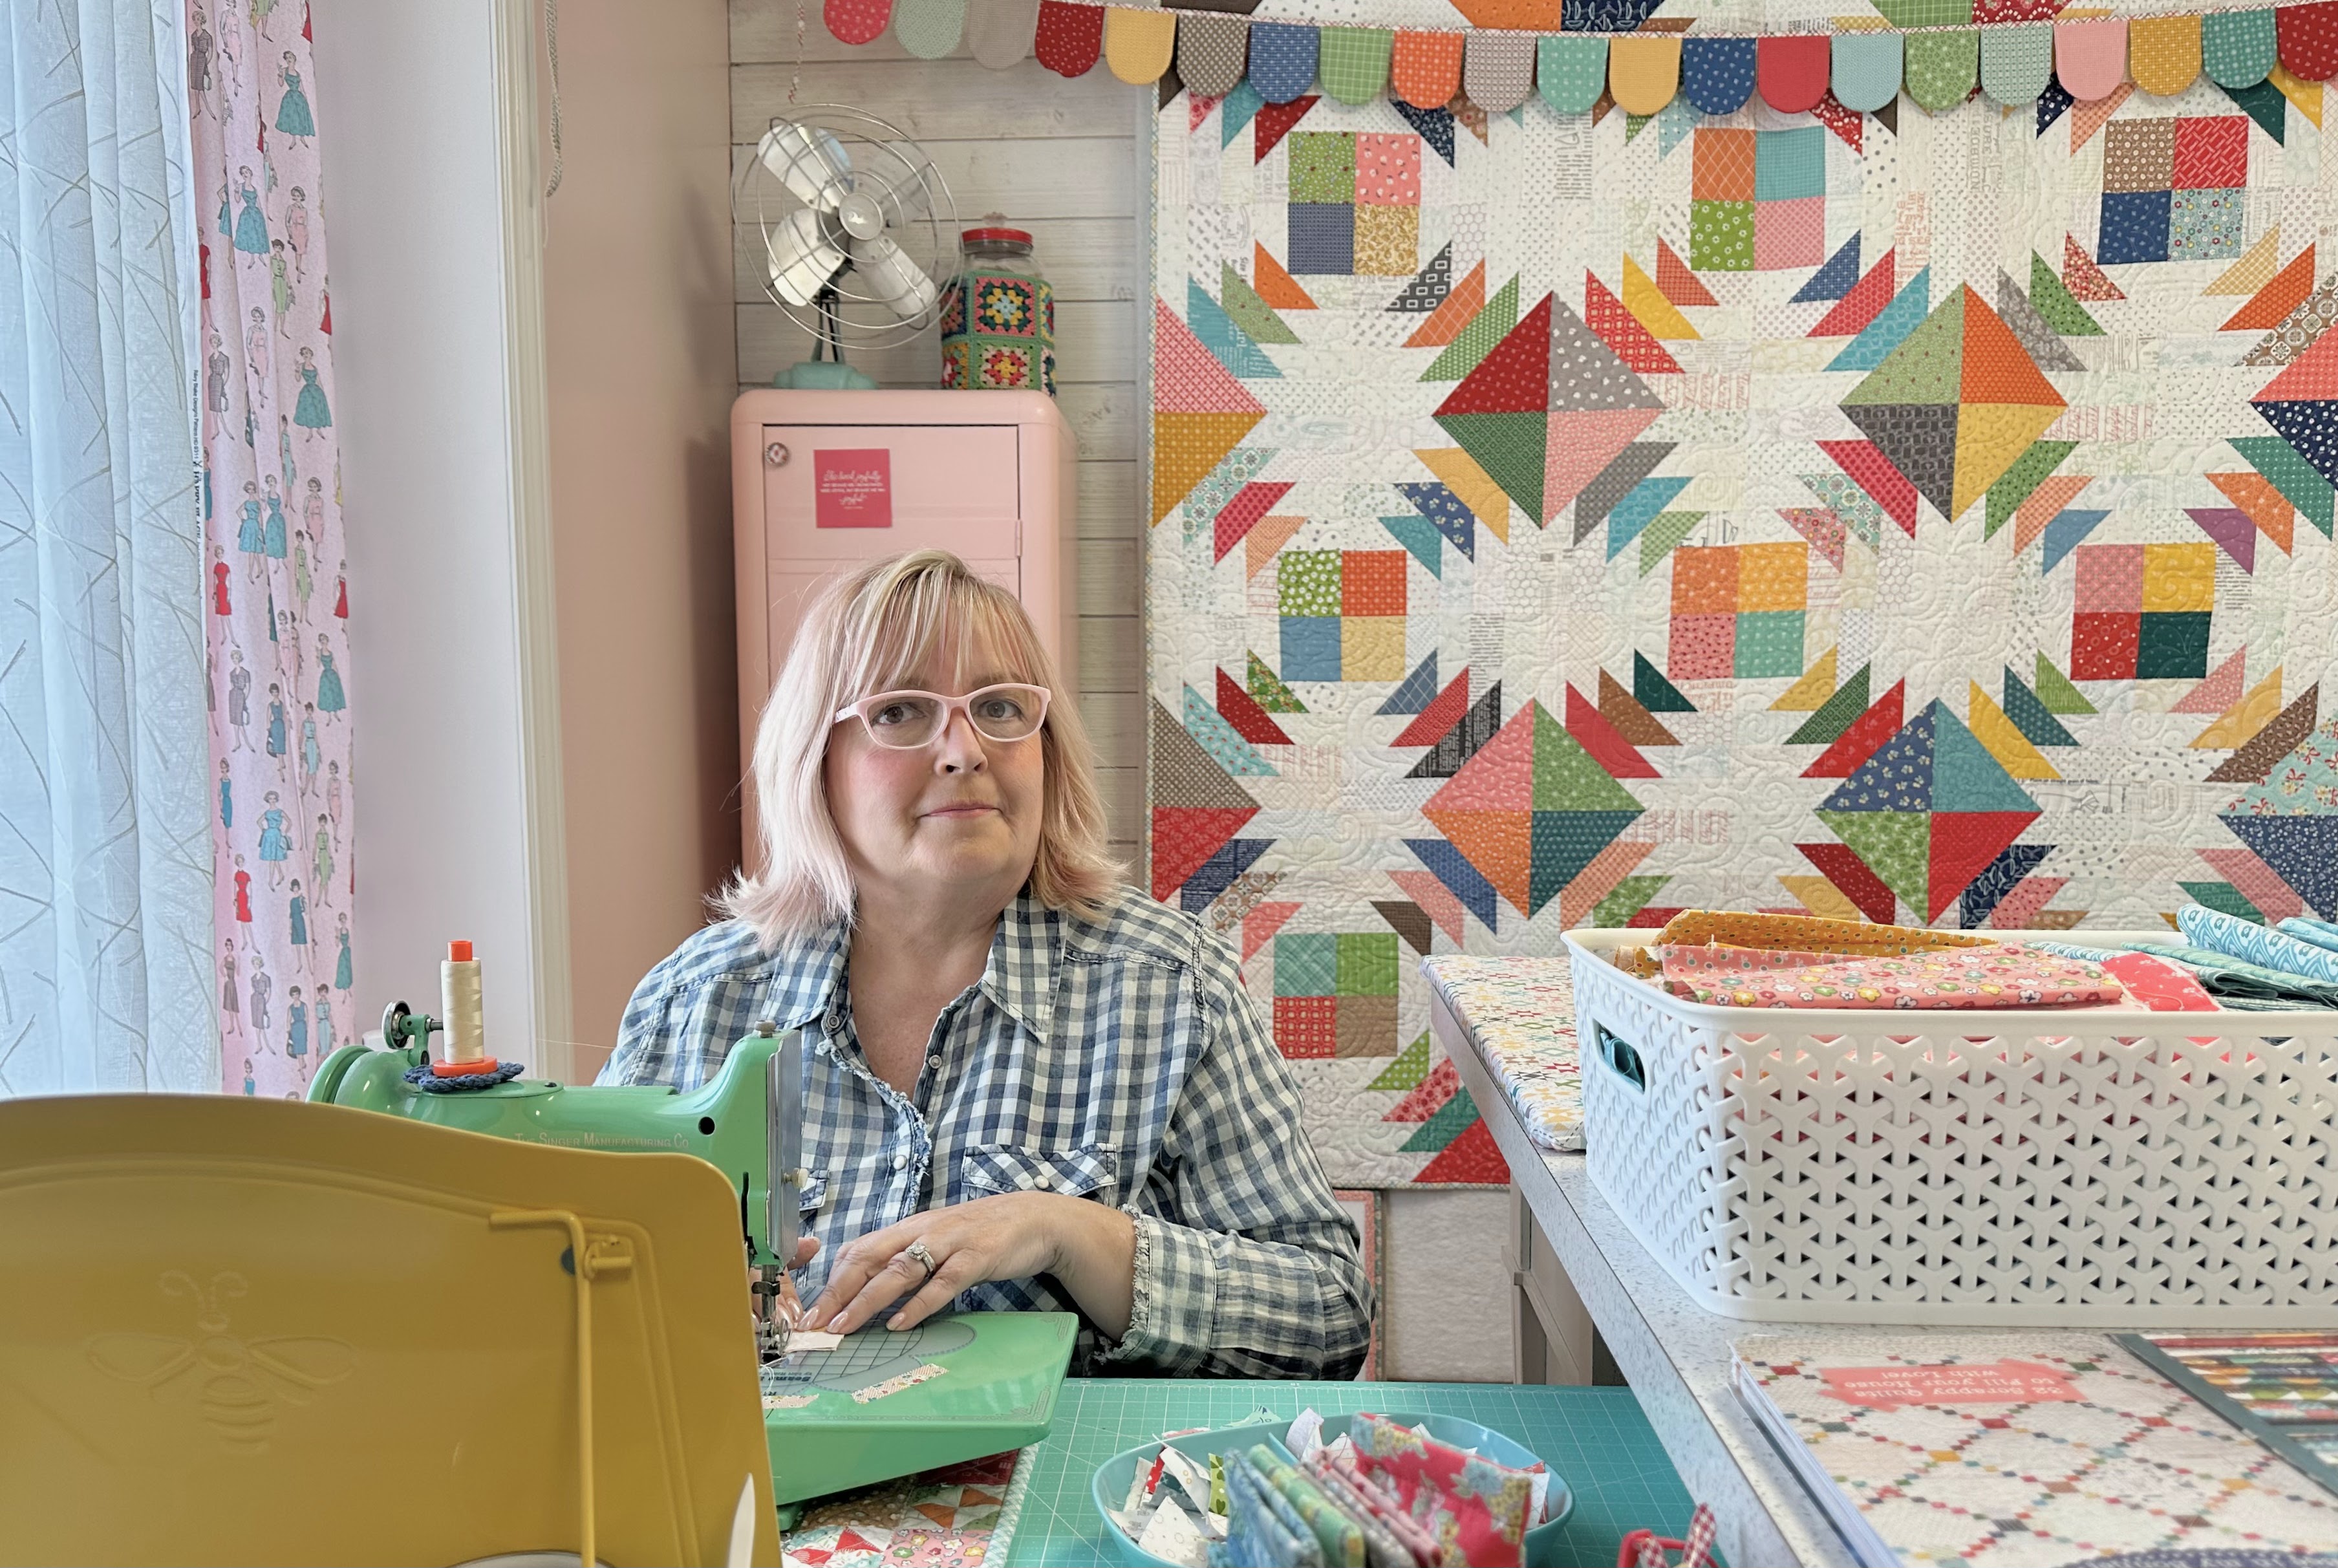
As usual...
I am using one of my vintage
Singer Featherweight machines
for making this quilt.
You can see my
Seams Sew Easy Guide
washi taped to my machine...

Also...a note about washing and ironing.
I do NOT prewash my fabrics.
I used to years ago
but now we have such nice
quality fabric available to us
I do not find it necessary.
I do not use steam in my iron
and you want to make sure not to
after you have sewn your shapes
and are pressing them.
Just a good and dry hot iron works well
and I have found that a
seam roller works fabulous for
pressing my shapes after shaping as well.
Use a seam roller that is flat and not rounded
so that it will not distort the shape.
I don't like to "smoosh" my shapes down
and iron them too flat.
I like a little poof in my shapes
because it gives my applique
a nice handmade finish.
to watch my video about why and how
I use vintage irons and where to
find them and what to look for!


So here is a sneak peek
of what is to come!
A few Calico Blocks...
both pieced and applique:)
Again...during the first week I always
do a video tutorial.
The first block is the Coneflower
and I'll be doing that tutorial on my
YouTube Channel
and the Starflower Pieced Block
here on my blog.

I'll of course also be posting
all about week one here on my blog
and will have a link to my
YouTube video here for you
on my week one blog post.
A while ago blogger changed their format
and since then I have not been able
to put a button on my blog
for you to get email notifications
or to follow me here.
But remember that google is your
best friend and all you have to do
is type in the name of my blog
or the name of my sew along
and it will bring you right here!
I have been using my blog exclusively
for my sew alongs for several years now
except for the week one video.
I like to be able to write everything
down here for you such as the pieced
block measurements and applique shape needed
but I also like the visual of
actually showing you how I do my
Sew Simple Shapes method of applique.
That's why I do the first week
on my YouTube Channel.
Using both my blog and my channel
for these sew alongs is a perfect pair!

I do many other tutorials
on my channel as well.
So...If you would like to know
what I am up to on a weekly basis...
check out my weekly videos on my
YouTube channel.
There I talk about what I've been doing
and new things happening:)
If you are new to my
Sew Simple Shapes Sew Alongs...
I suggest that you watch a few
of my previous week one video tutorials
because I know that
they will help a you a lot!!
to watch week one tutorial for
Chicken Salad Sew Along
to watch my week one tutorial for
My Happy Place Sew Along
to watch my week one tutorial for my
PRIM Sew Along and
to watch week one tutorial for my
Flea Market Flowers Sew Along
to watch my week one tutorial for my
Prairie Meadow Sew Along
to watch my entire playlist
of each and every one of my
Sew Simple Shape tutorials:)

OH MY GOODNESS!!
That is a lot of information
but it's all very important and meant
to be informative and answer all questions
so that you can Bee Prepared
as much as possible.
As for me...
I will be doing what I always do
while preparing for a
sew along which is...
Cut my fabric and make kits for each block
so that every week I am ready to go!
I am SEW excited to make the
Calico Garden Quilt with you:)
I will meet you right back here
on Monday January 30th for the
Week One kick off!!
Sew with you soon...
xx
Lori

7 comments:
This will be am ambitious project for me but I'm looking forward to it, just waiting on the finalized guide and my kit to arrive. Thank you especially for the pretty printable notes pages you have been doing, they're a treat to use.
Can’t wait to get started on this one! Gardening is a new to me (since the 2020 pandemic) passion & as soon as I saw this quilt, I knew I had to make it.
I ordered the Galico bundle and will be picking it up when I visit Utah next month.
Will be traveling to Utah with 7 quilter friends and I am sure we are going to enjoy a lot of your beautiful patterns, notions and fabrics in stores!
So excited to start this!!! Thanks Lori. Am using my scrap collection. I did Chicken Salad and loved it!!
Can’t wait to get started! I think I needed to start a week ago. I just love all your patterns. This is a big challenge for me but I’m excited and thrilled to start it. Thank you, Lori for all the work you put into this and all your quilts.
I’m late to the challenge or as my grandma would say as I dashed in to most things a little late… with a smile she would say your late ( a day late and a dollar short ) and we would both laugh …lol so incredibly happy to discovered Lori Holt I of course knew of her and have bought many of her fabrics but since I have retired I have really been able to enjoy her content and the fabulous stories behind many of her products… everything she creates sparked joy thank you thank you
I just finished cutting everything out. I'll be starting to put my packs together soon.
Post a Comment