Okay cute people...
here are the last 3 blocks
for this fun quilt!
These are the blocks that started it all:)

I made them with my new
Now that they are here and available...
and you are pro's by making
the first 17 blocks...
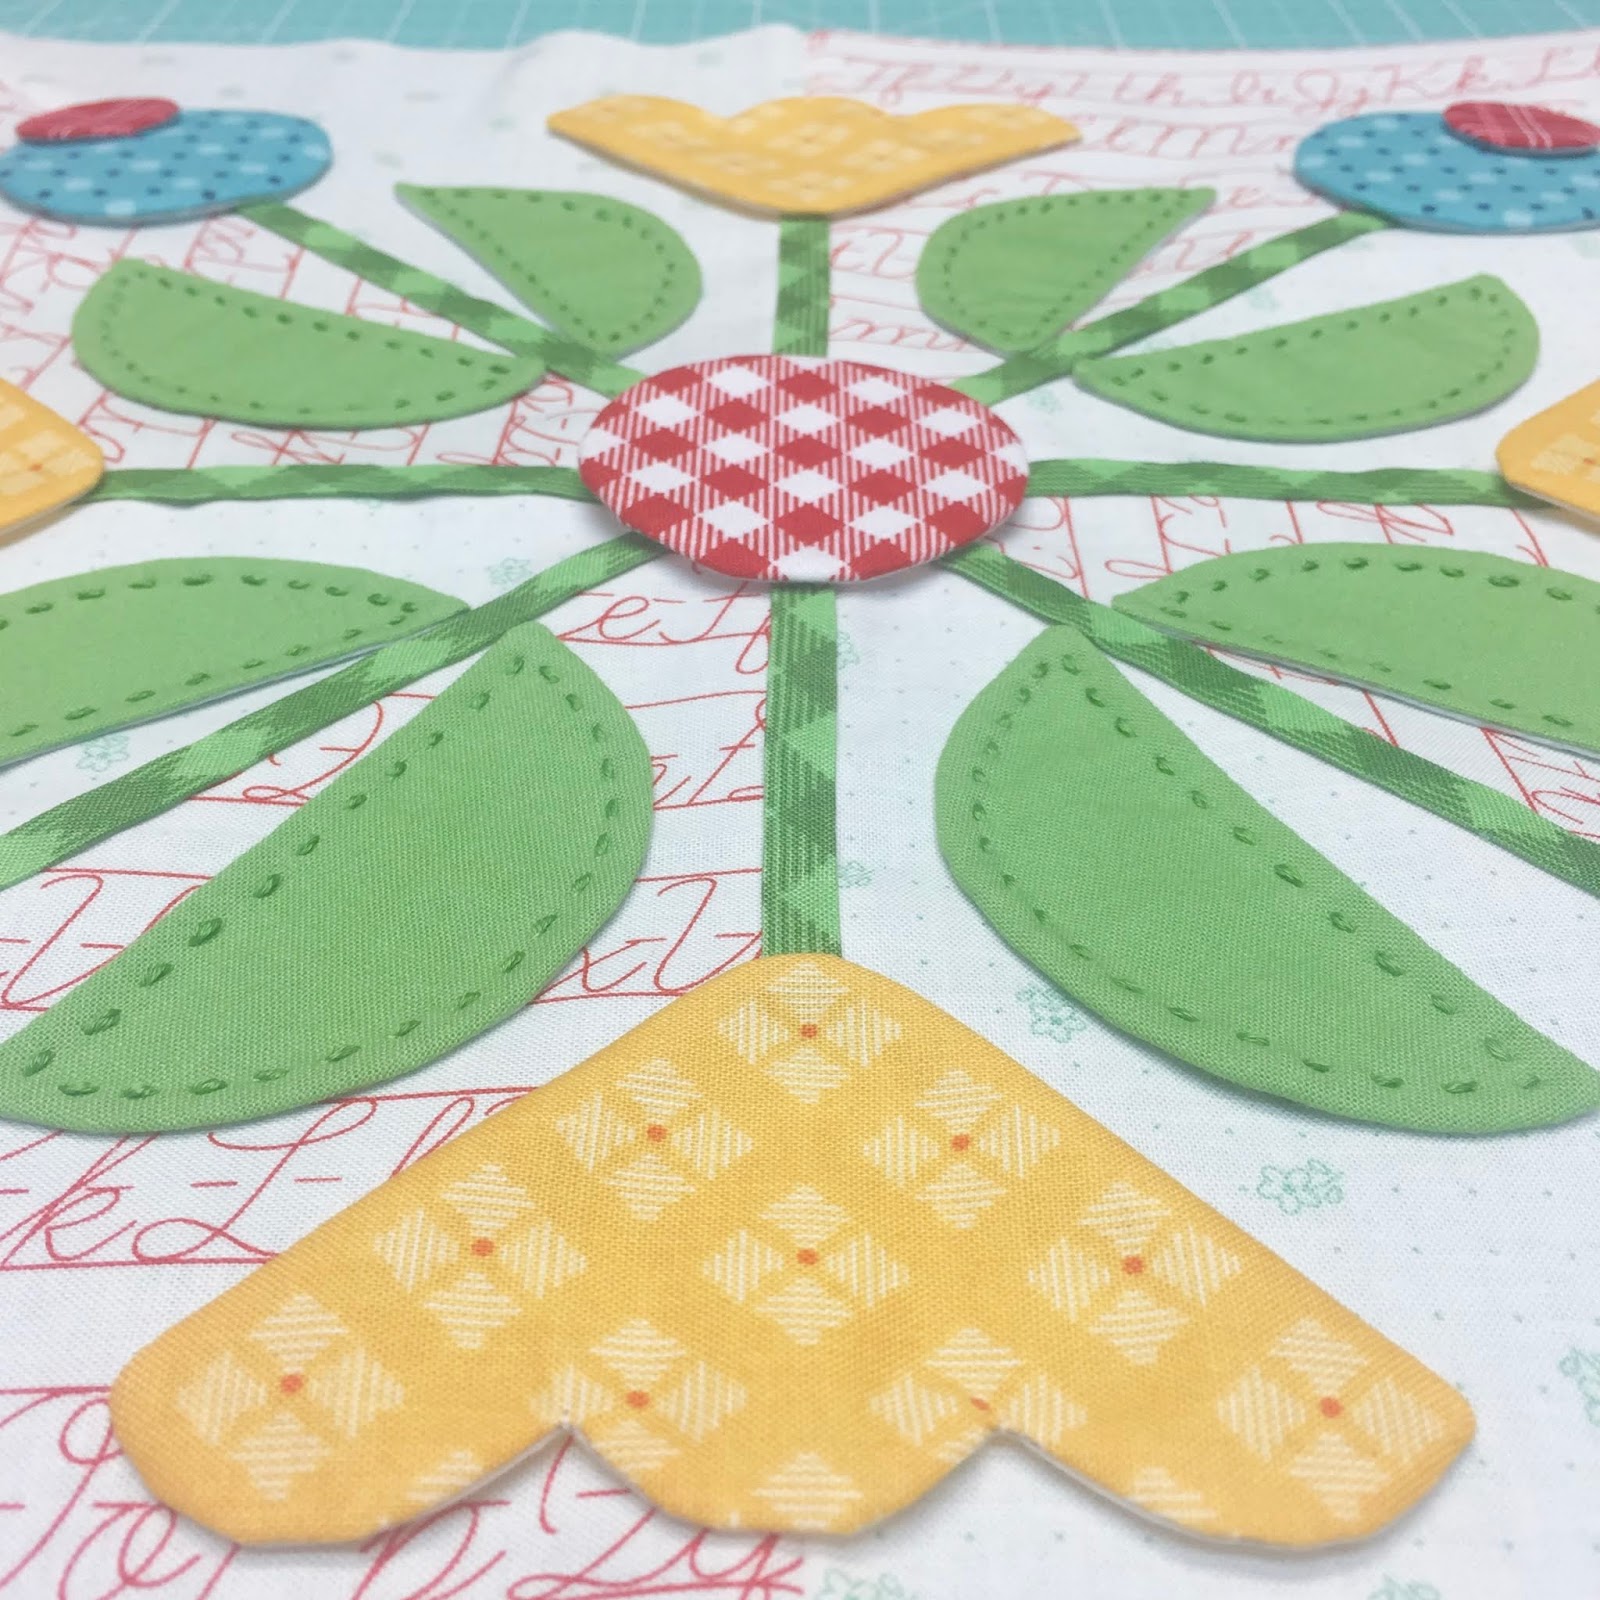
Here are the shapes you need to
trace and sew for Block 18:
4 - F-1
1 - F-3
8 - F-5
4 - F-19
1 - F-24
4 - F27
Cut 4 - 2 1/4" long 1/4" wide
stems from your spool.
Sew your pinwheel background square:)
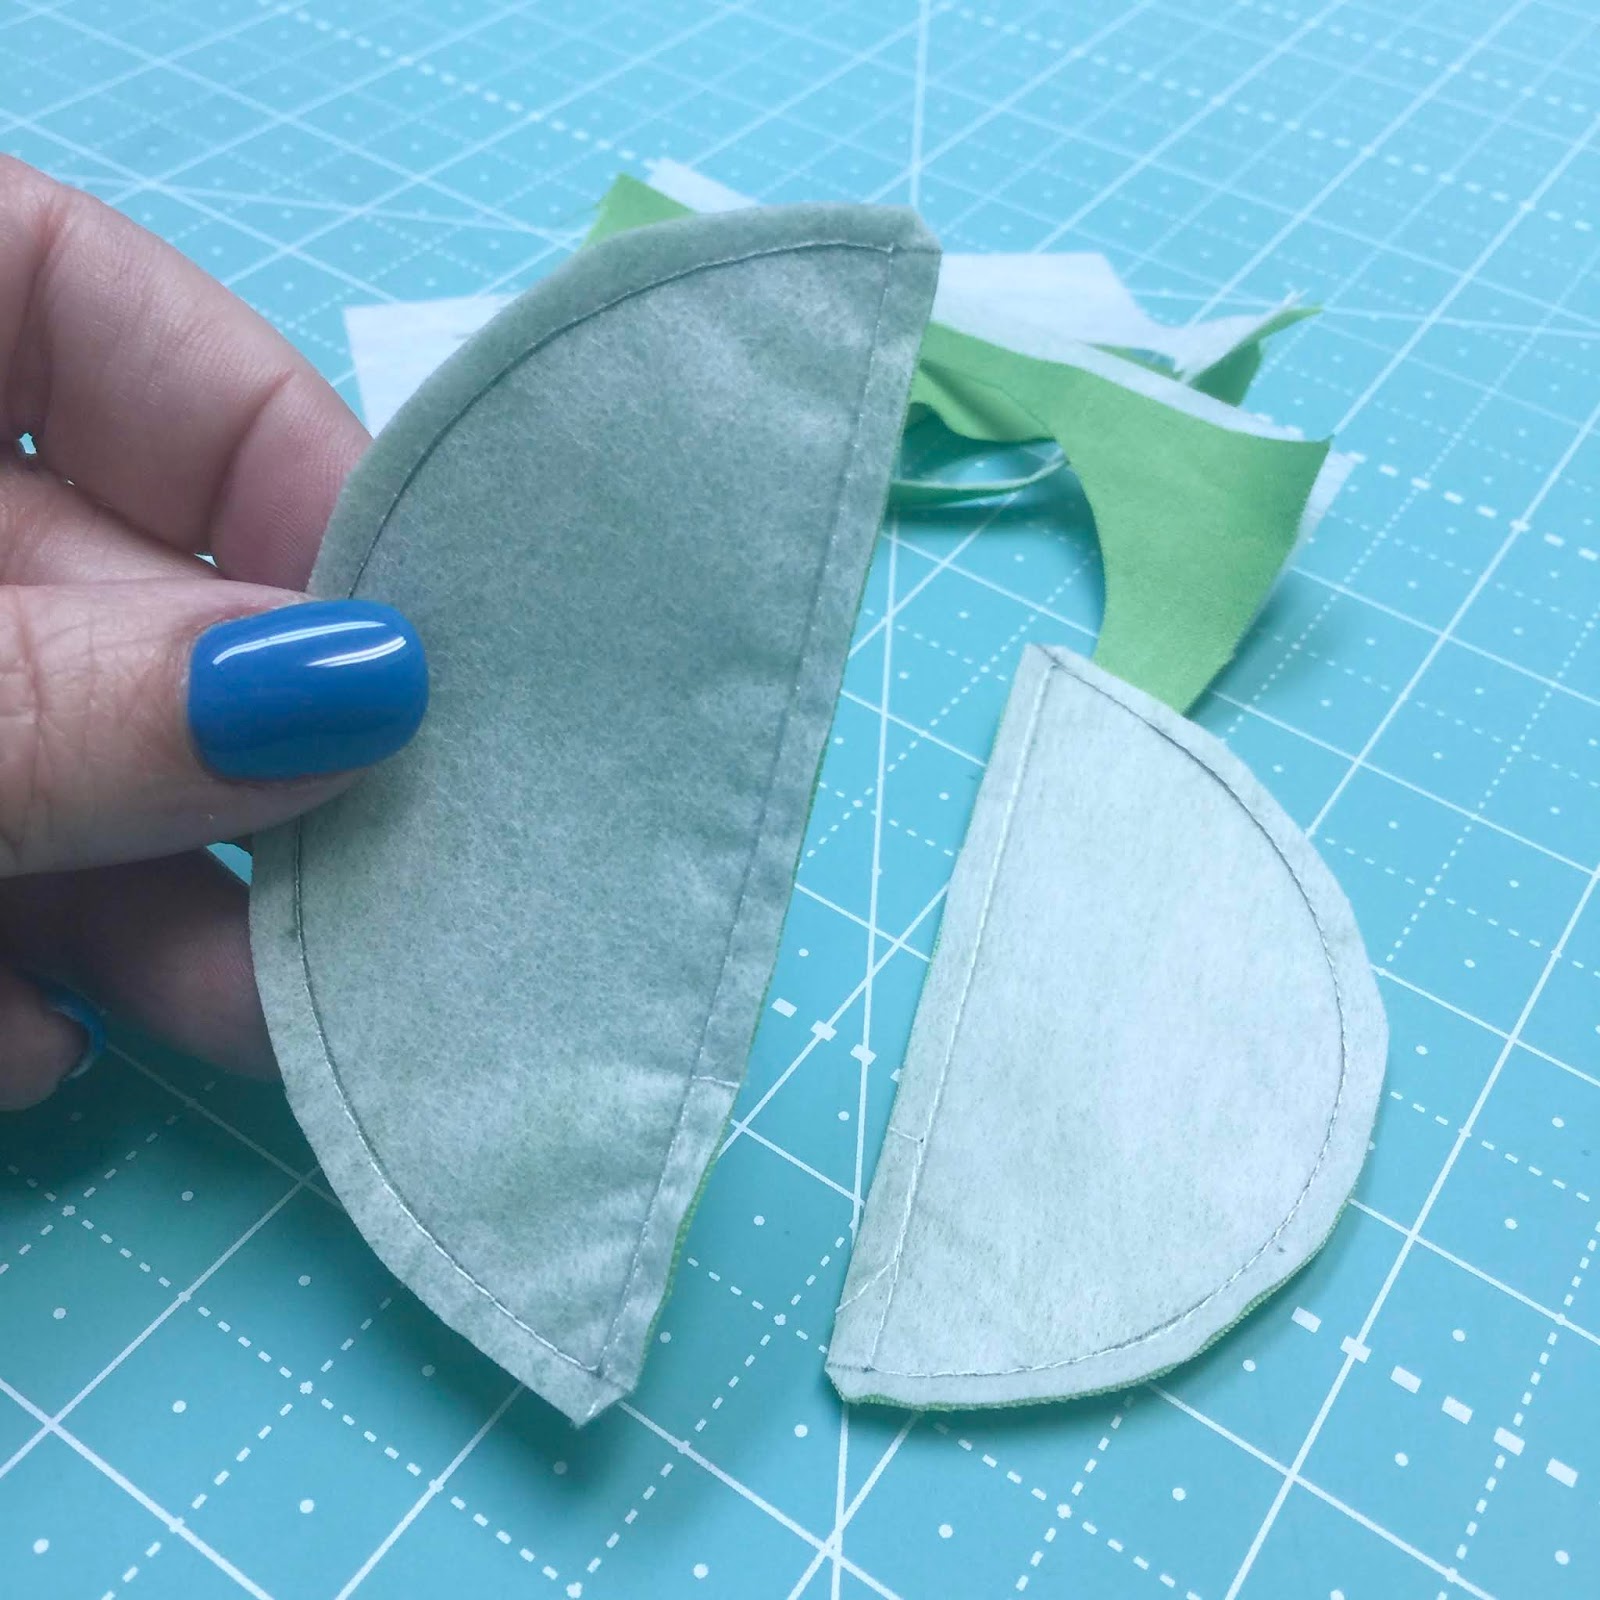
***You will need to clip the cleavage in the flower pot and sunflower shapes***

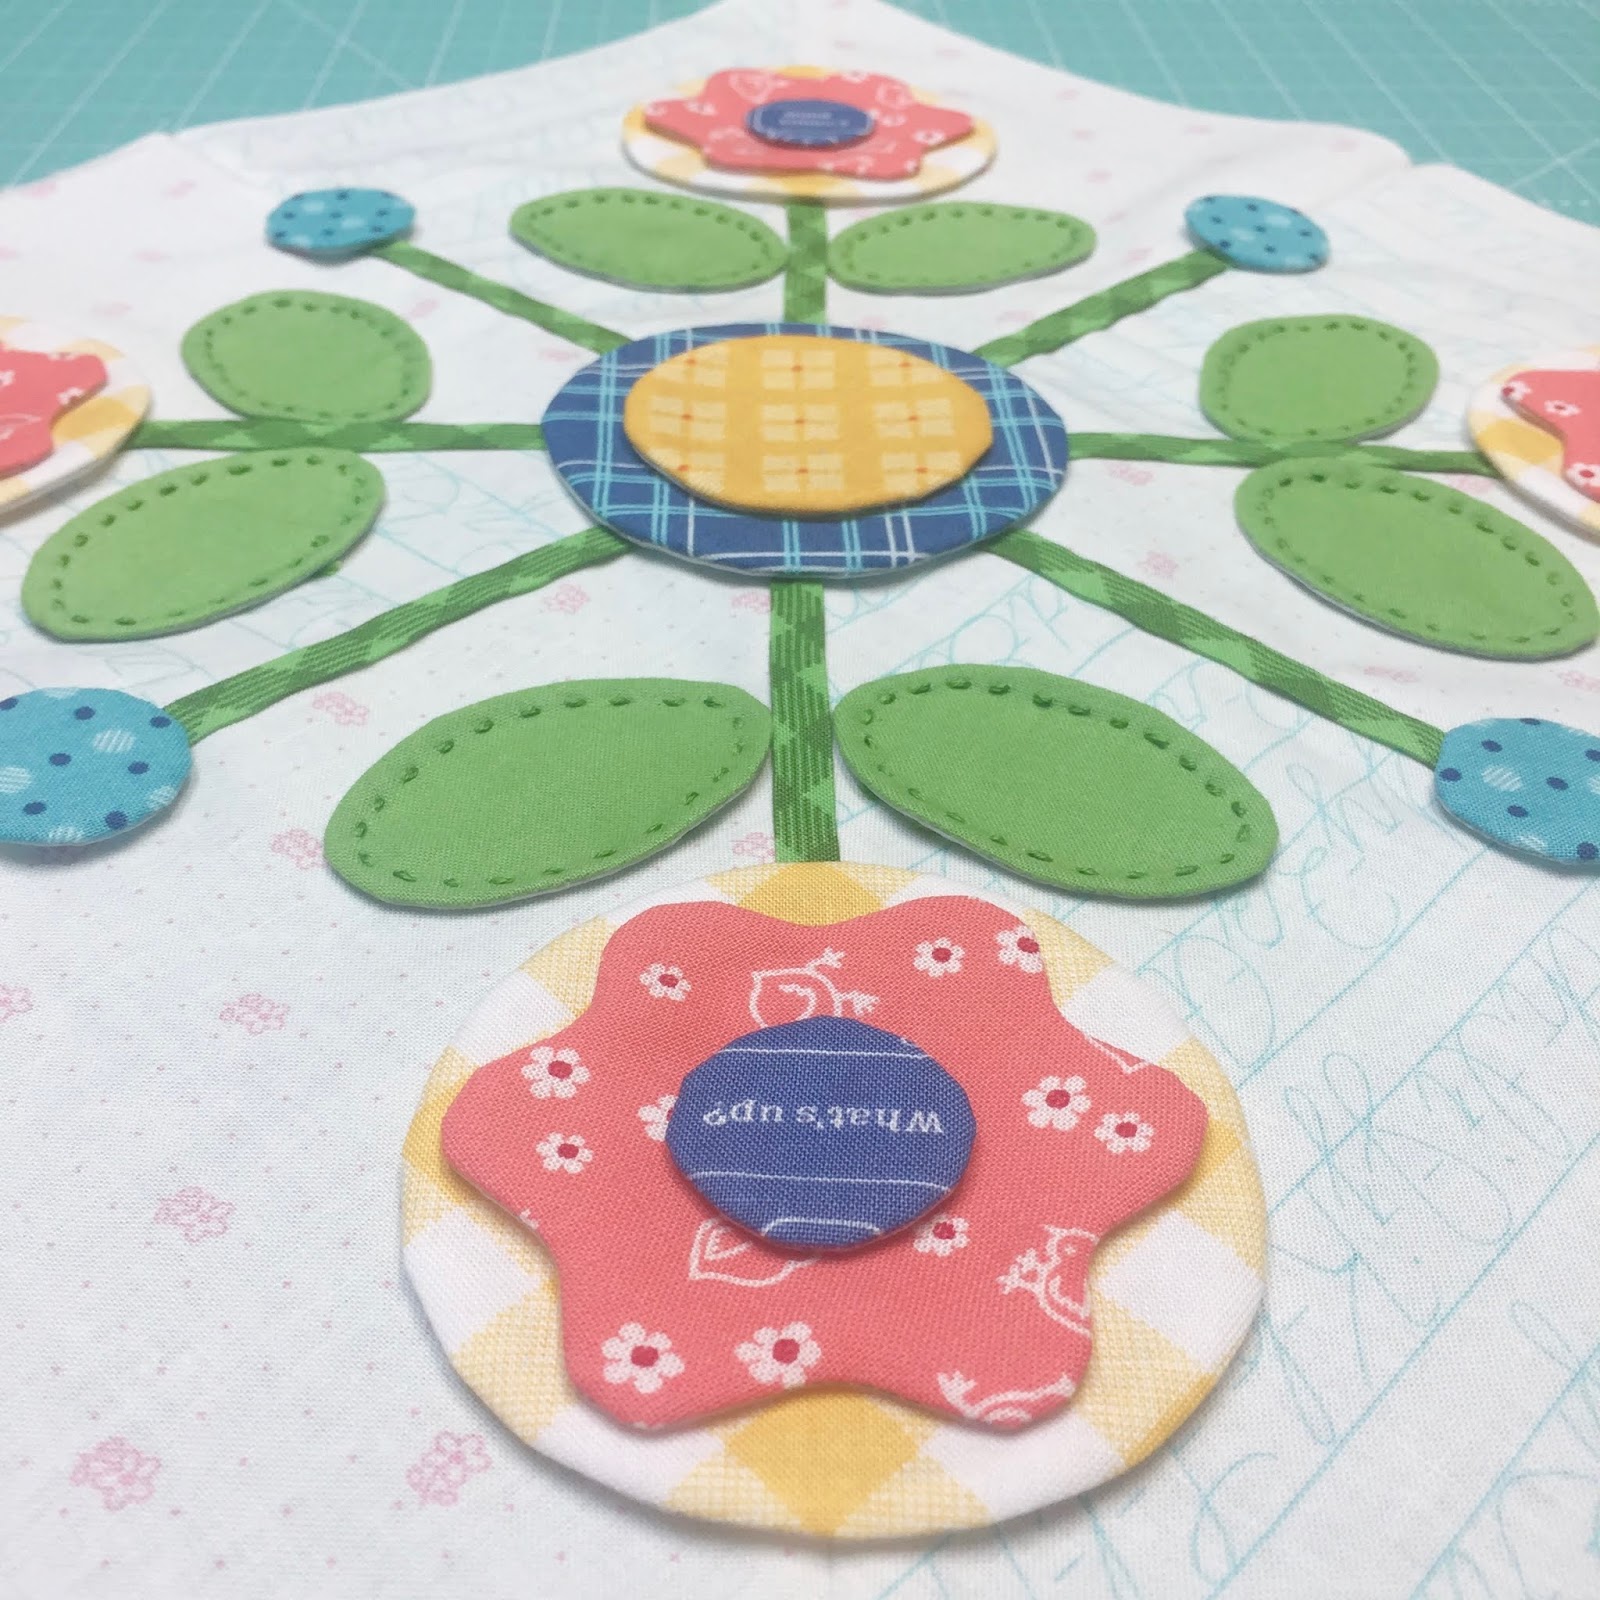
Pin and glue baste the center flower first.
Measure in 2 1/2" from the corner
and place the yellow flowers.
The top of the flower pot is
5 1/2" in from the corner:)
The red hearts are 3" in from the side edge.

There is 1/2" between the
leaves and the flowers.

Ready for applique!

I fussy cut my flowers so that the
white daisy would be in the center:)

I super love the sunflower
with the red gingham center!

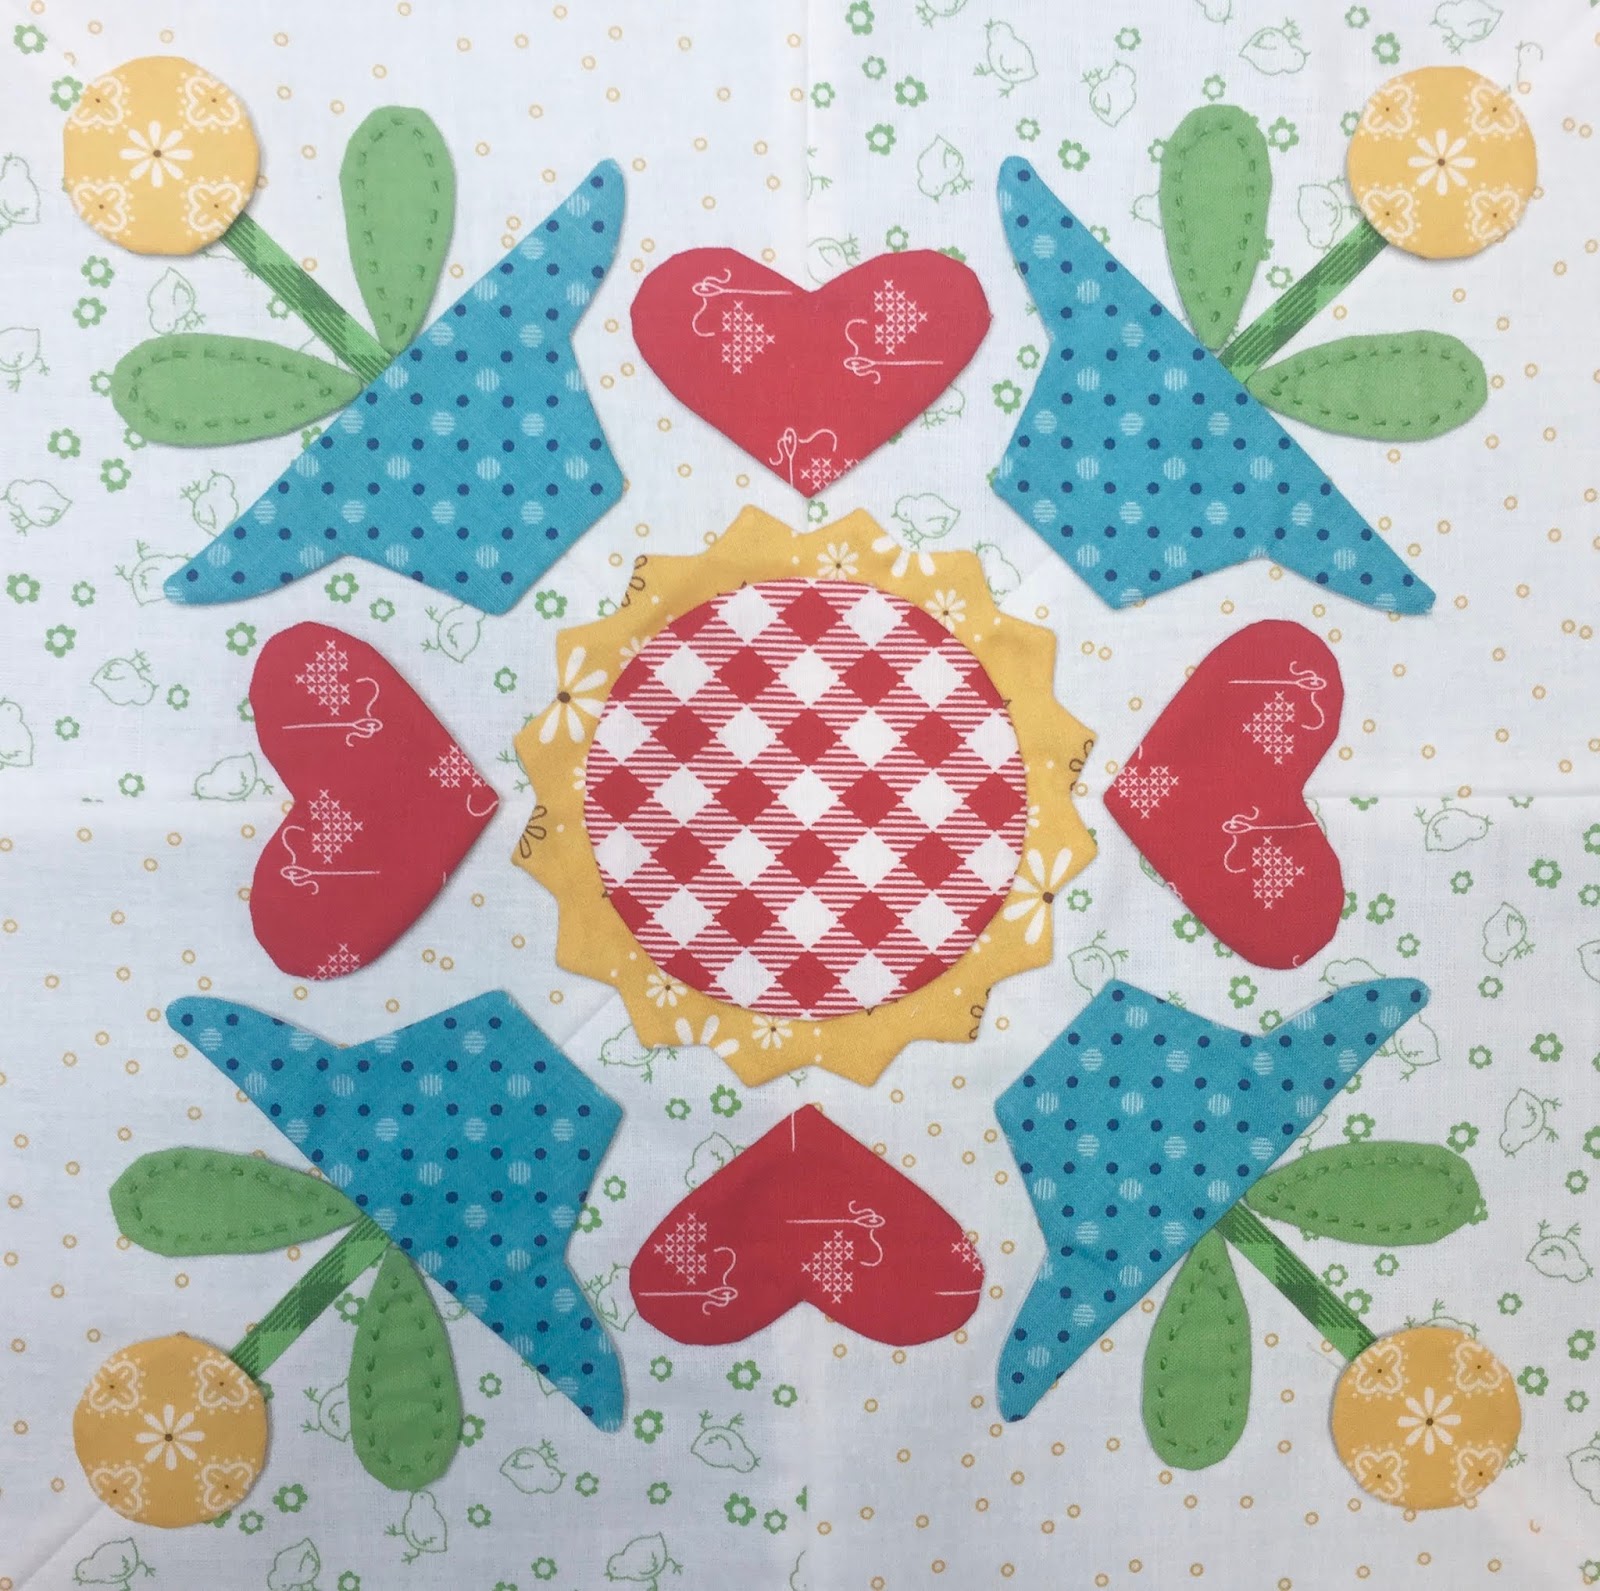
BLOCK 18
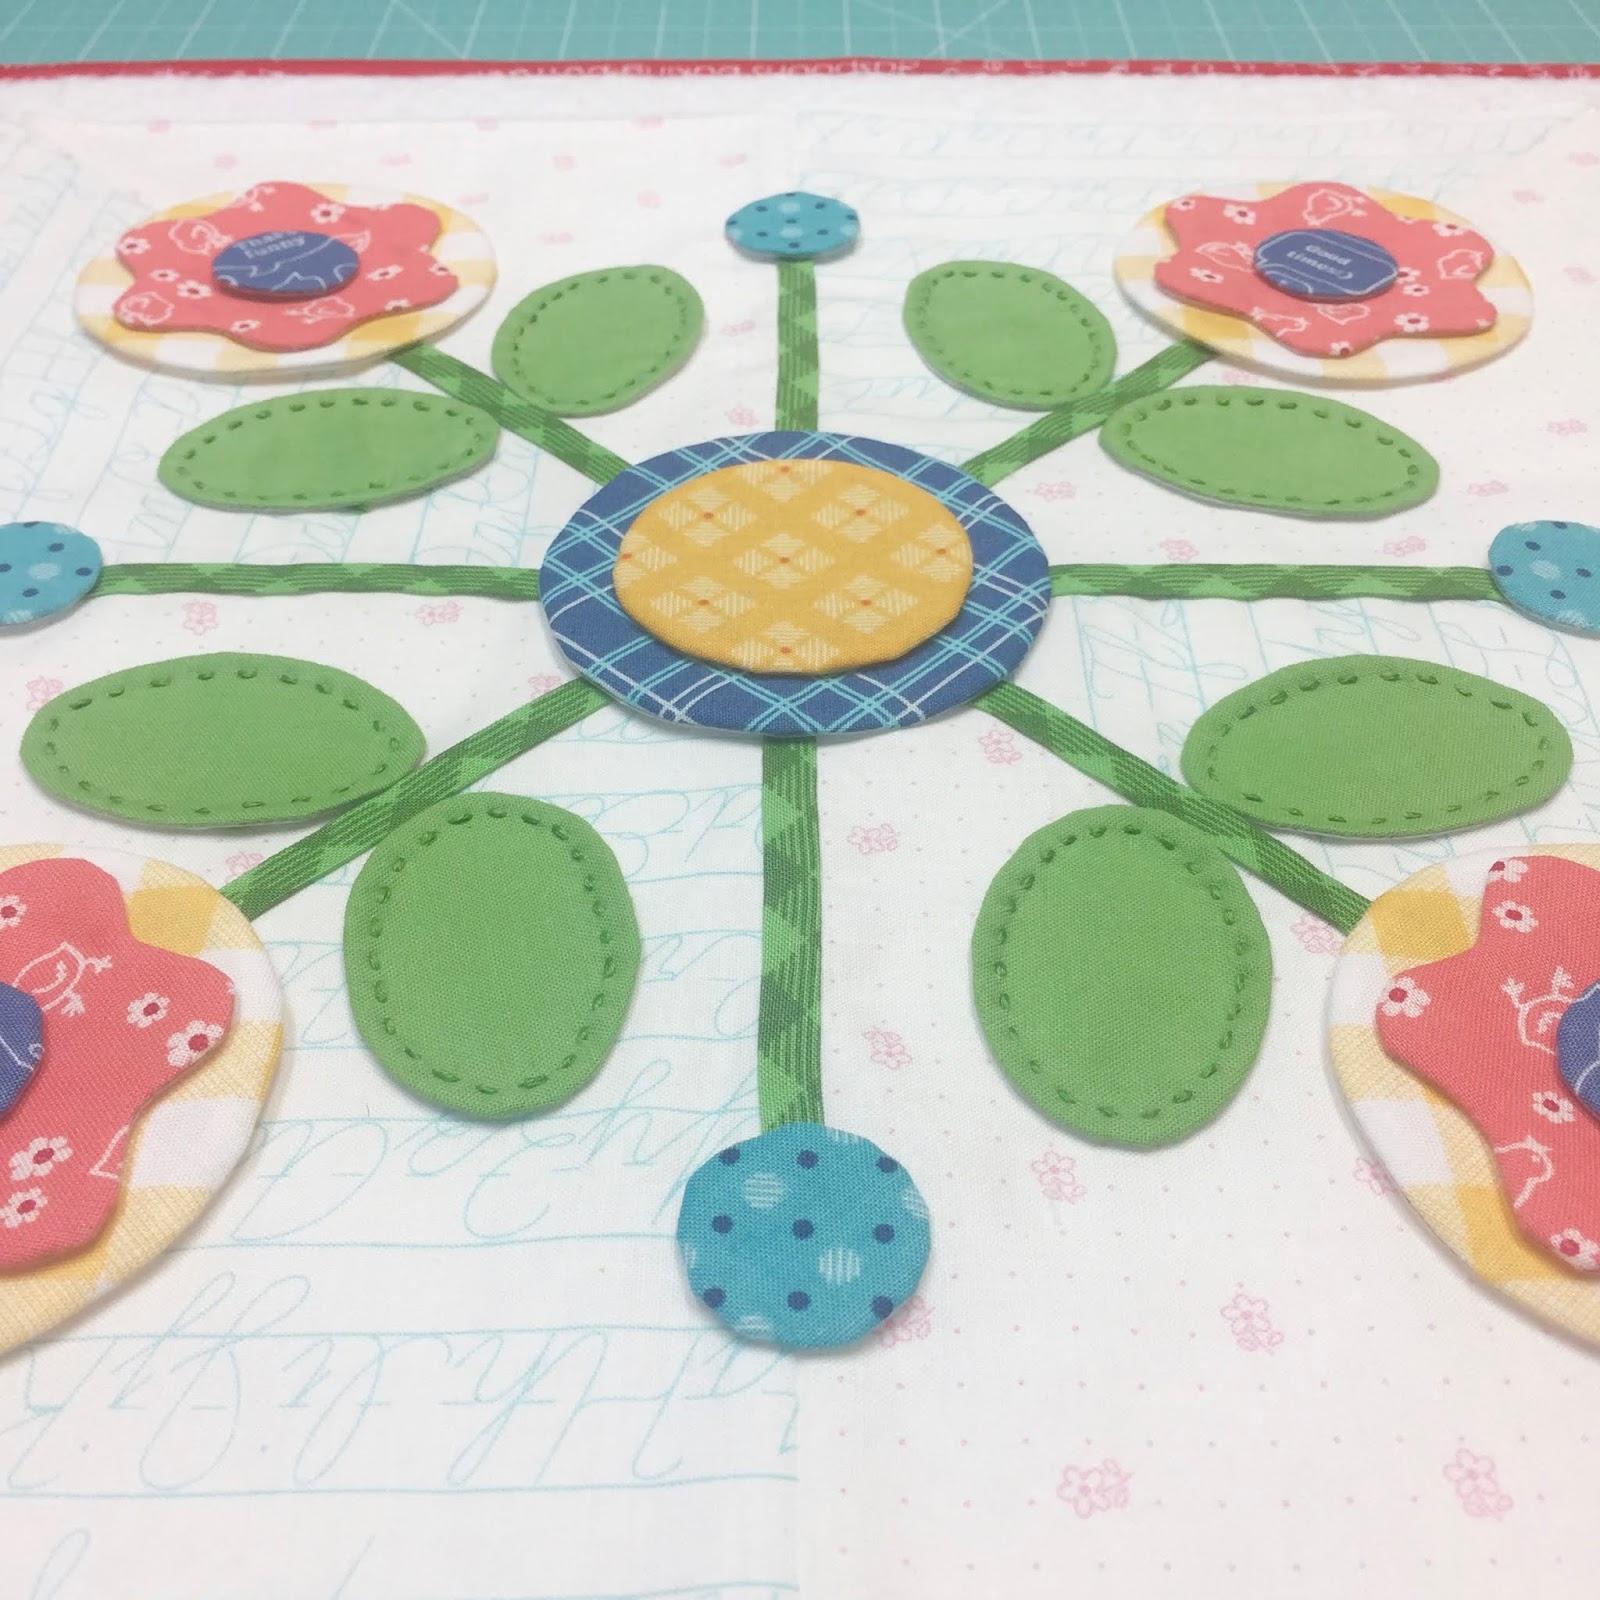
Here are the shapes that you will
need to trace and sew for Block 19:
5 - F-1
4 - F-3
4 - F-8
4 - F-15
4 - F-24
No Stems!
Make your pinwheel background square:)
***Cleavages to clip are the
sunflowers-stars and leaves***

Pin and glue baste the center circle
and leaves first.

Measure in 3" from the corner
and place your red sunflower shapes.
Layer with the circles first
and then the stars.
The blue circles in between are
1 3/4"in from the side edge.

Ready for applique!
I love the patriotic feel of this block:)

BLOCK 19

Here are the shapes that you will need
to trace and sew for block 20:
4 - F-1
1 - F-2
1 - F-3
8 - F-10
4 - F-16
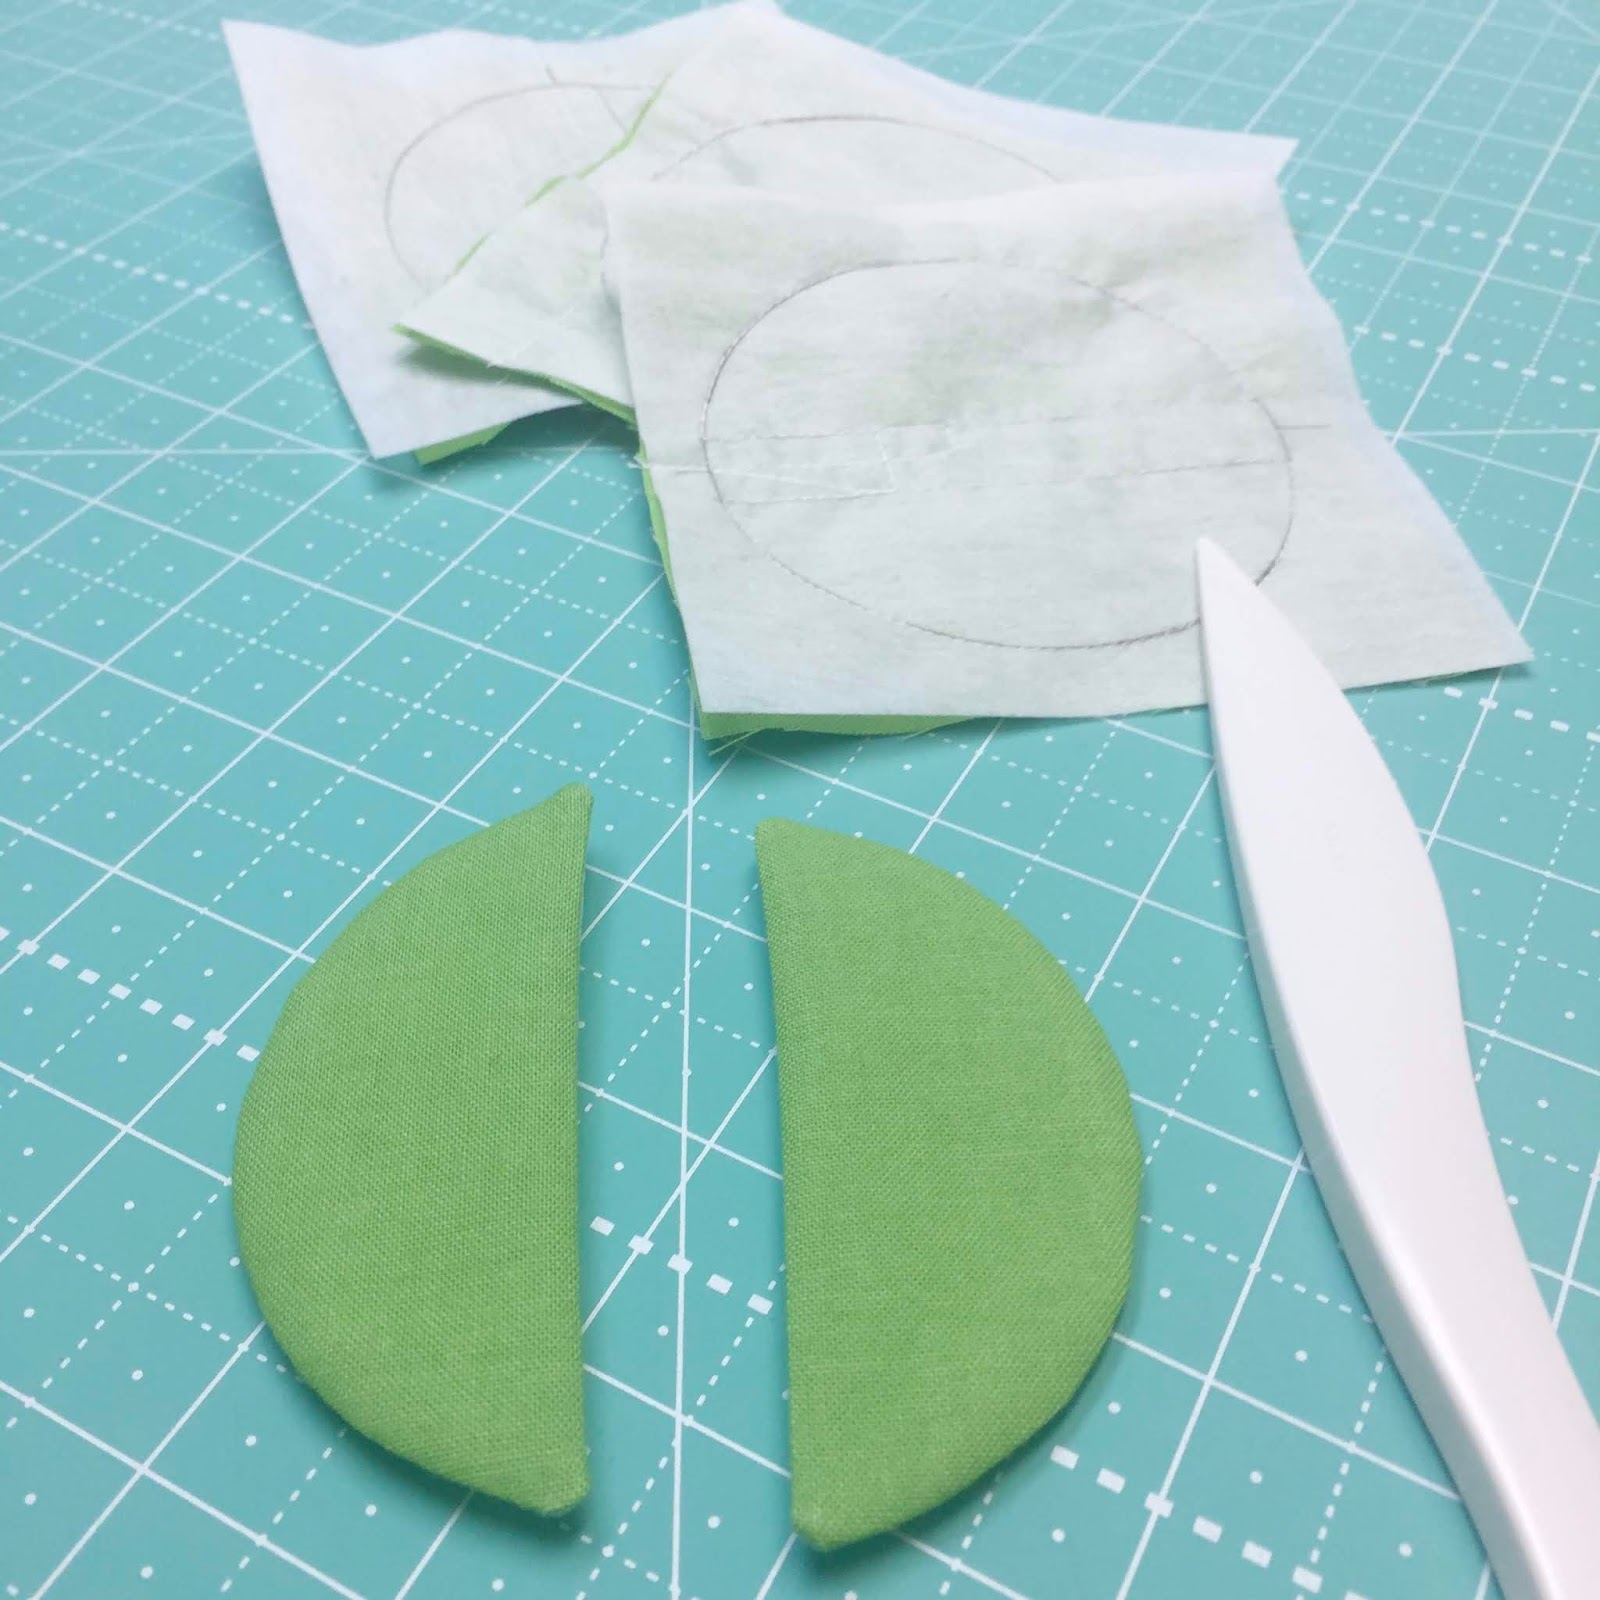
2 - F-20
(cut the 2 - F-20 in half after
sewing to make the 4 tulip centers)
Cut 4 - 2 1/2" long 1/4" wide stems
for the tulips
and Cut 4 - 3" long 1/4" wide stems
for the little blue flowers
***You will need to clip the
cleavage in each tulip***

Pin and glue baste the center circles first.

Measure in 3 1/2"in from the corner
and place the tulip center.
Place the tulip on top:)
The blue flowers are about
1 3/4" in from the side edge.
The tip-off the leaves are 2" in.

Ready for applique!

Because of the tulips...
this block reminds me of spring:)

Block 20
When all 20 of your blocks are completed...
you will need to use your
12 1/2" Trim-It Ruler
to trim them down to 12 1/2" square.
I'll show you what my quilt top
looks like as soon as I decide
how I'm doing it and
get it sewn together:)
Of course I will give you
all of those measurements!!
I'm not sure what the date will be
but I do know that it will be
BEFORE August 20th which is when my
Autumn Love Sew Along starts.
I have really loved making these blocks
with all of my
Sew Simple Shapes sets together.
I hope this series has helped you to
see how versatile they are and to think outside of the box when
looking at each shape...
and seeing new possibilities:)
Talk to you soon!
xx
Lori