
YaY!
It's time for episode four in the
Sew Simple Shapes Series
If you are just joining us now
click on these links
to the first three weeks

Okie Dokie...
Let's get started on Block Nine!

We are using the
for the next 6
blocks in this series:)

Trace and sew the following
shapes from the set:
5 - C-1
4 - C-4
4 - C-7
4 - C-8
4 - C-12
Sew your pinwheel block
for the background:)

For this block you will need to
prepare brown 1/4" bias for the stems.
I cut about 5/8" x 42" for mine.
After running it through the maker
I wrapped it around one of my cute little wooden empty Aurifloss spools:)
*FYI* - I used this brown 1/4" bias
for 3 blocks in the series.

For each Pear stem...
Cut 4 - 2" long pieces and press
one end under by about 1/4" like this.

After sewing and trimming
each C-12 pear shape
you will need to clip the
inner curves before turning.
Remember to clip right to your
sewing line but not into it.

You will also need to
clip the cleavage
each time you sew the
C-8 heart shape.
We will be using this shape
in the next 5 blocks:)
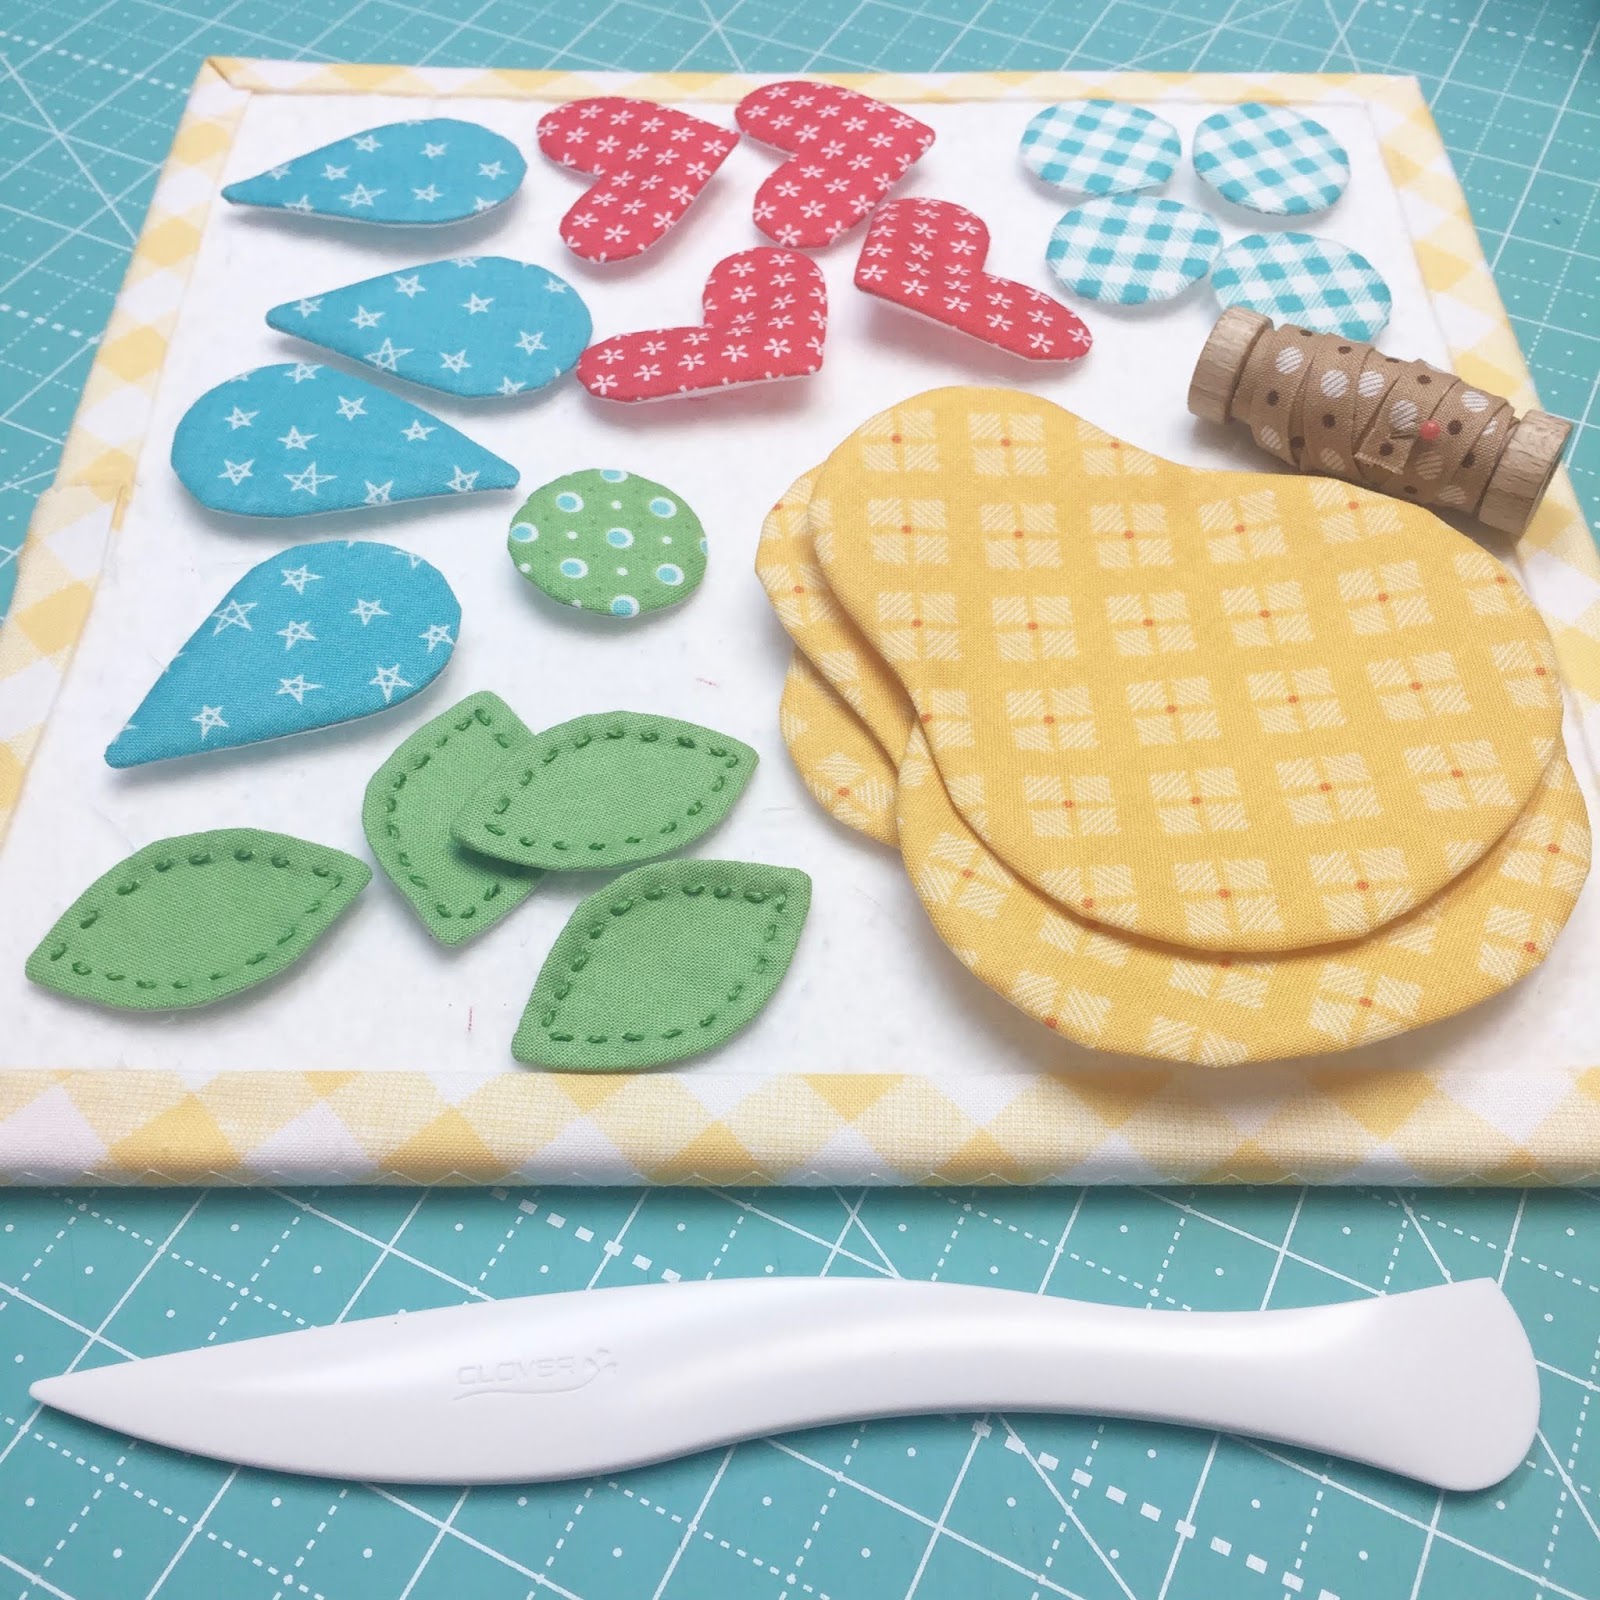
Prepare all of your
cute shapes for this cute block!!

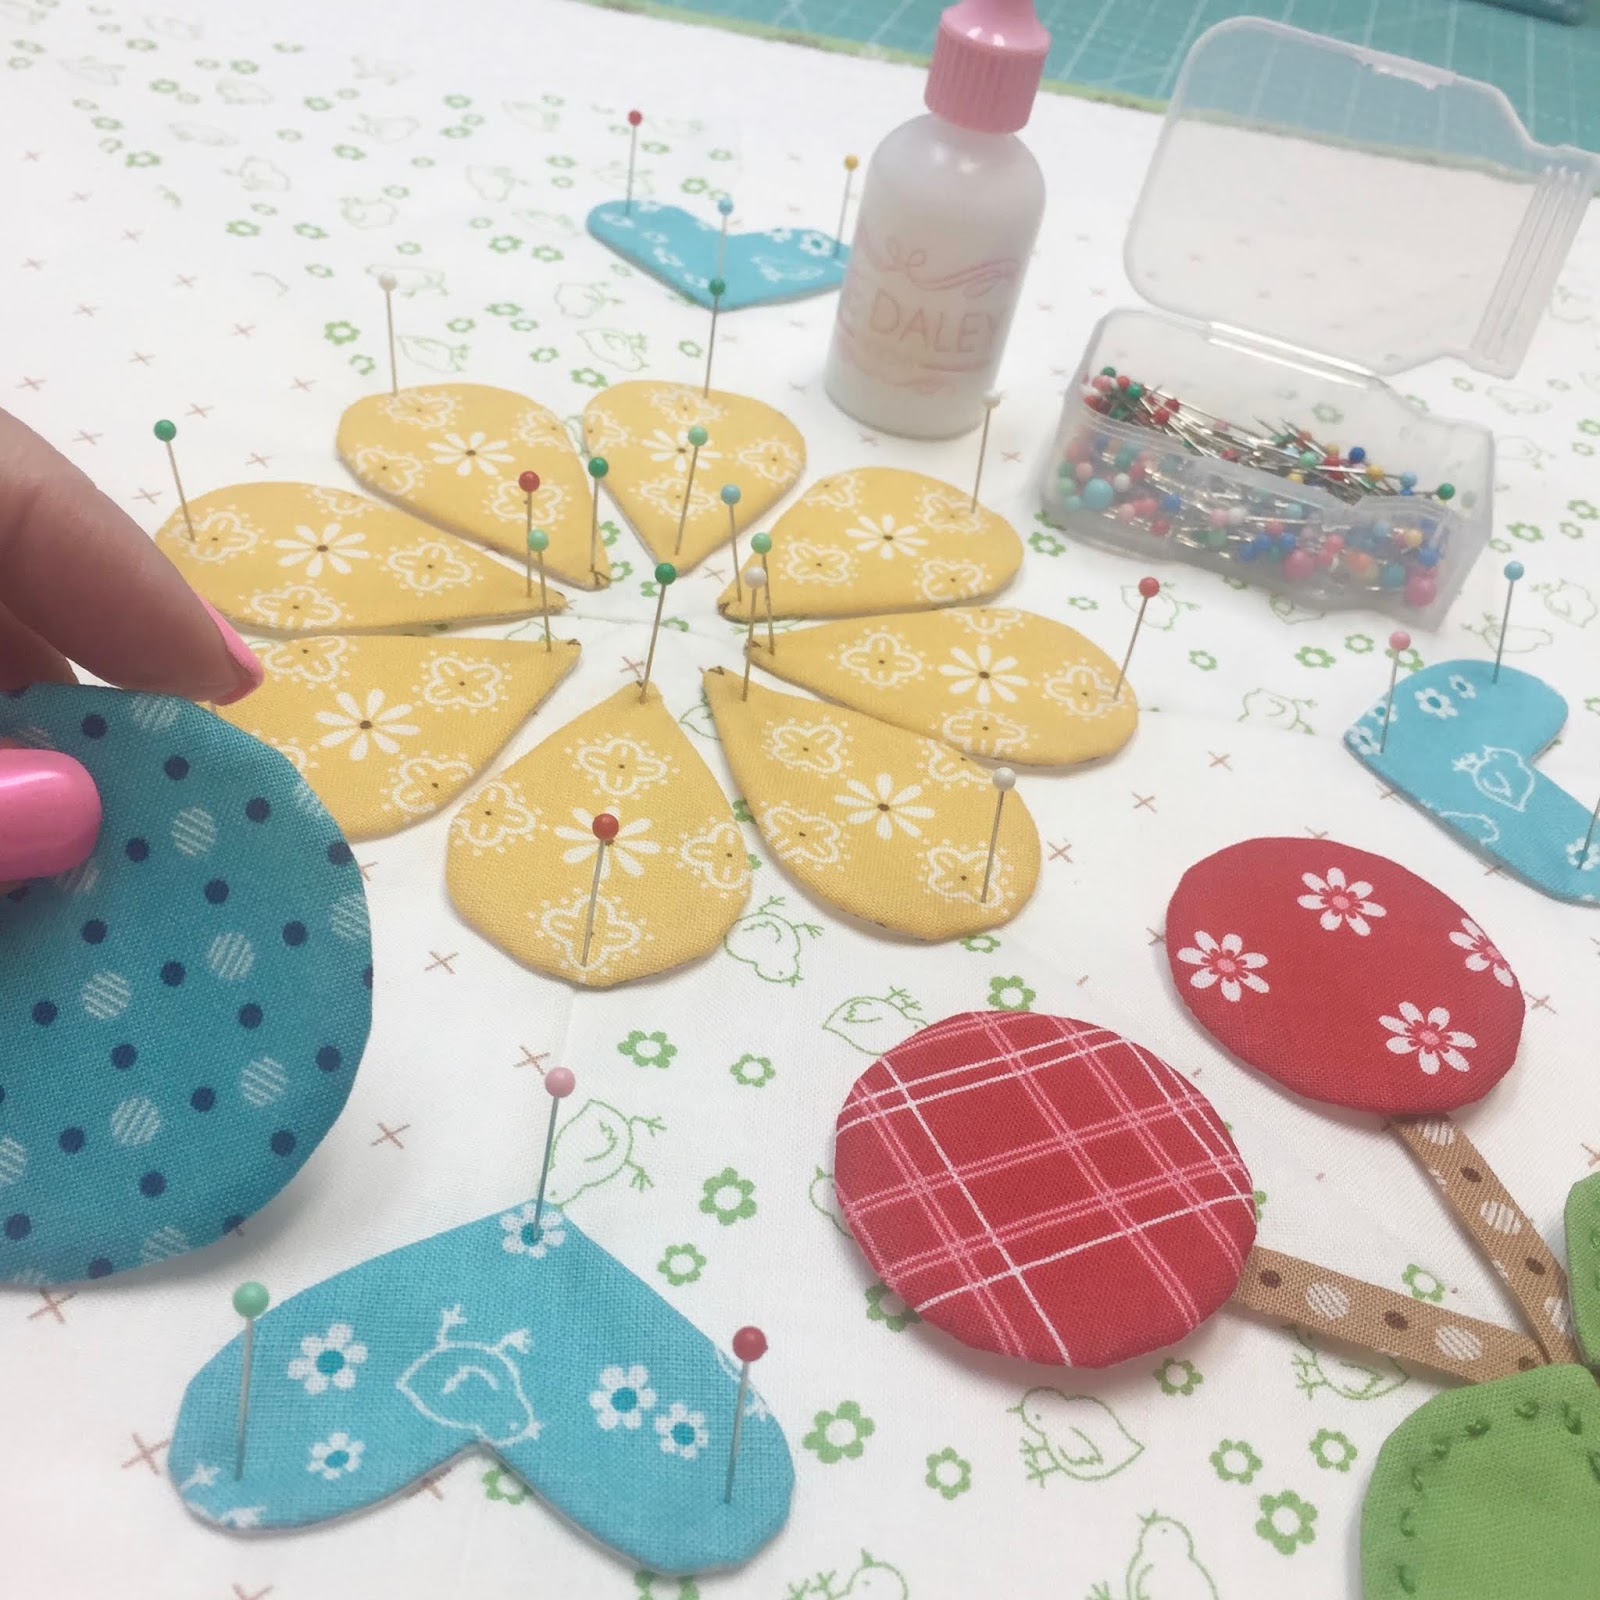
The first thing that I glue basted
were the petals for the center flower.
All four points meet in the middle.
Glue baste the flower center next.
Always use your
12 1/2" Trim -It Ruler
to check if it is
correctly in the center.
I always think that
I can "just eyeball it"
but I never can!

I measured 4" in from the corner
of my background block and
pinned the top of my pear.
The top of the stem is placed
2 1/2" in from the corner
and the raw edge is
tucked under the pear.
The leaf is placed straight across
one side of the pear with
the point in the center of the stem.
I measured in 1 3/4" from the edge
and placed my aqua gingham circles:)

I removed the pins after
my Sue Glue was dry...
about 15 minutes.

I used the aqua penmanship
and
red honeycomb prints from
Bee Backgrounds Collection
for the background block:)
I used Bee Basics fabric for the rest
with the exception of the
green polka dot is Bake Sale 2
and the aqua stars print
for the flower petals are my
upcoming Autumn Love
that will be here any day!

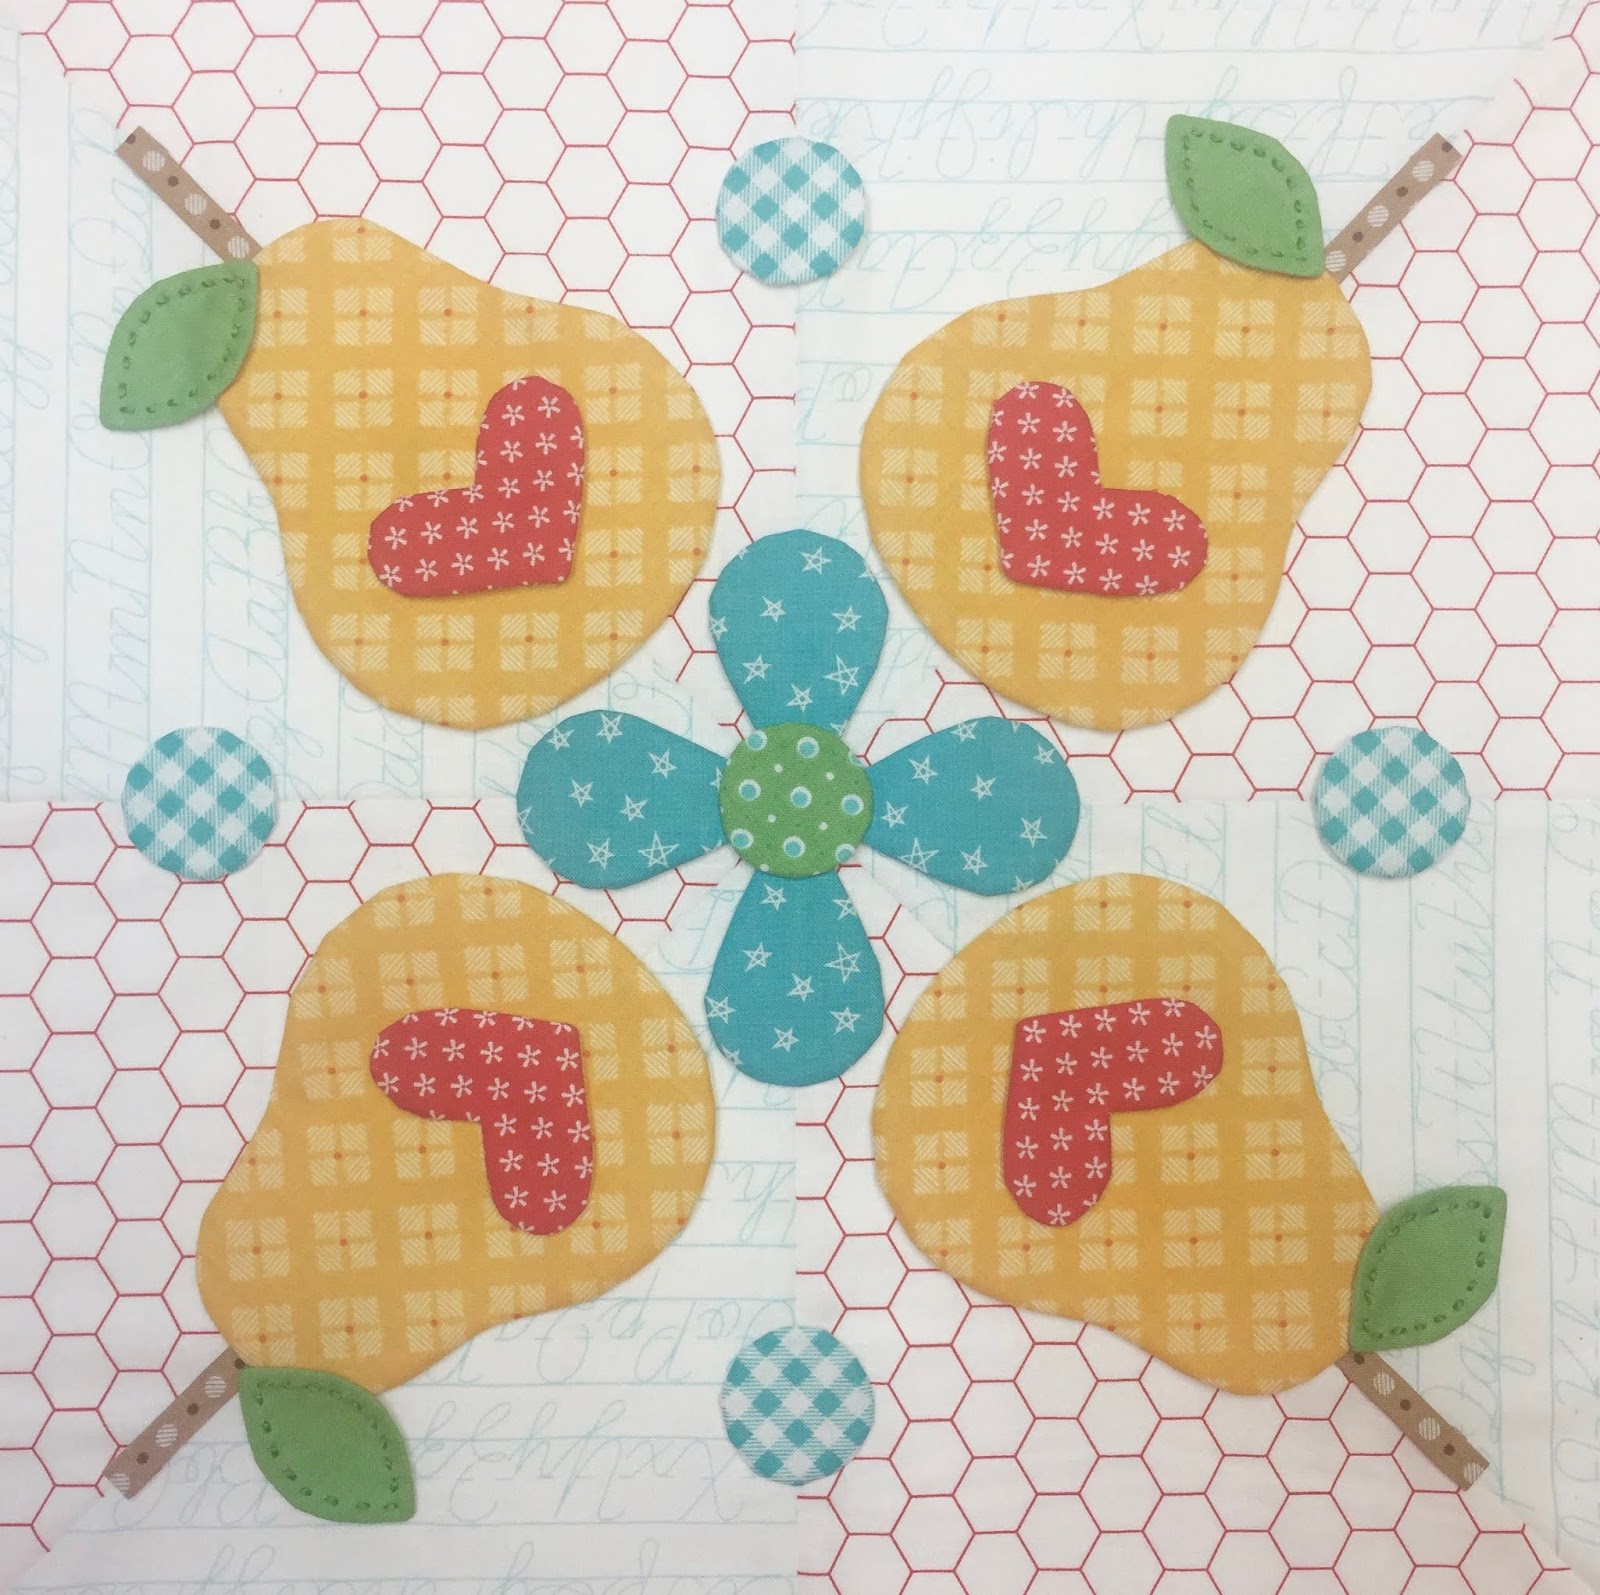
All ready for applique:)
I love this block!
I think the making of
4 fruit blocks will be a
sweet addition to our quilt:)

BLOCK NINE

Now let's make some cherries!

Trace and sew the following shapes
from the FRUIT SALAD set:
8 - C-2
1 - C-3
8 - C-4
8 - C-7
4 - C-8
Cut 8 - 3 1/2" long brown stems
and press one one end 1/4"
Sew your pinwheel background block:)

All ready for pinning and glue basting!

Place your flower petal points
1/2" from the center and 1" apart.

Use your 12 1/2" Trim-It Ruler
to center and check for accuracy.
At this point...
I can see that I need to move
the petal on the top
diagonal right out just a bit.
The flower center is up next
after the petal dry.
As a reminder...
I always use my
and pin directly into my
design boards to hold my pieces
into place after measuring...
and then I glue baste.

I measured 3 1/2" down from the
corner and place my leaves like this.

The stems are place 3" down.

The cherries are 2 3/4" from
the side edge and the hearts
are 1 3/4" in from the side edge.

The inside corner of stems are
1/2" from the
center(diagonal)seam
making them 1" apart
and the cherries are about
1/4"-3/8" apart.

For the background block I used the
Nutmeg "X" print from
Bee Backgrounds and the
Green baby chicks print from
Bee Backings and Borders.
The cherries are plaid from
Calico Days and daisies
from Sew Cherry 2.
The hearts and the flower petals
are from Bee Backings and Borders
and the flower center
is from Bee Basics:)

All ready for applique!

What could be cuter than
cherries with flowers and hearts?

BLOCK TEN
Tune in next week for blocks 11 and 12:)
But in the meantime...
show us your progress on
and be sure to use the hashtags
and
so that your post will go
onto the page that we can all see!
xx
Lori

No comments:
Post a Comment