

Good morning cute people!
Today I'm going to show you how to make this block in the
This is one of the first blocks that I designed with the BLOOM set ...
and because it's also a 12" block I thought it would be fun to add to the quilt.

Grab you BLOOM set and let's get started!
You will need:
1 - A23
9 - A1
1 - A2
8 - A10
4 - A18
And cut 4 -
3" prepared stems from your spool
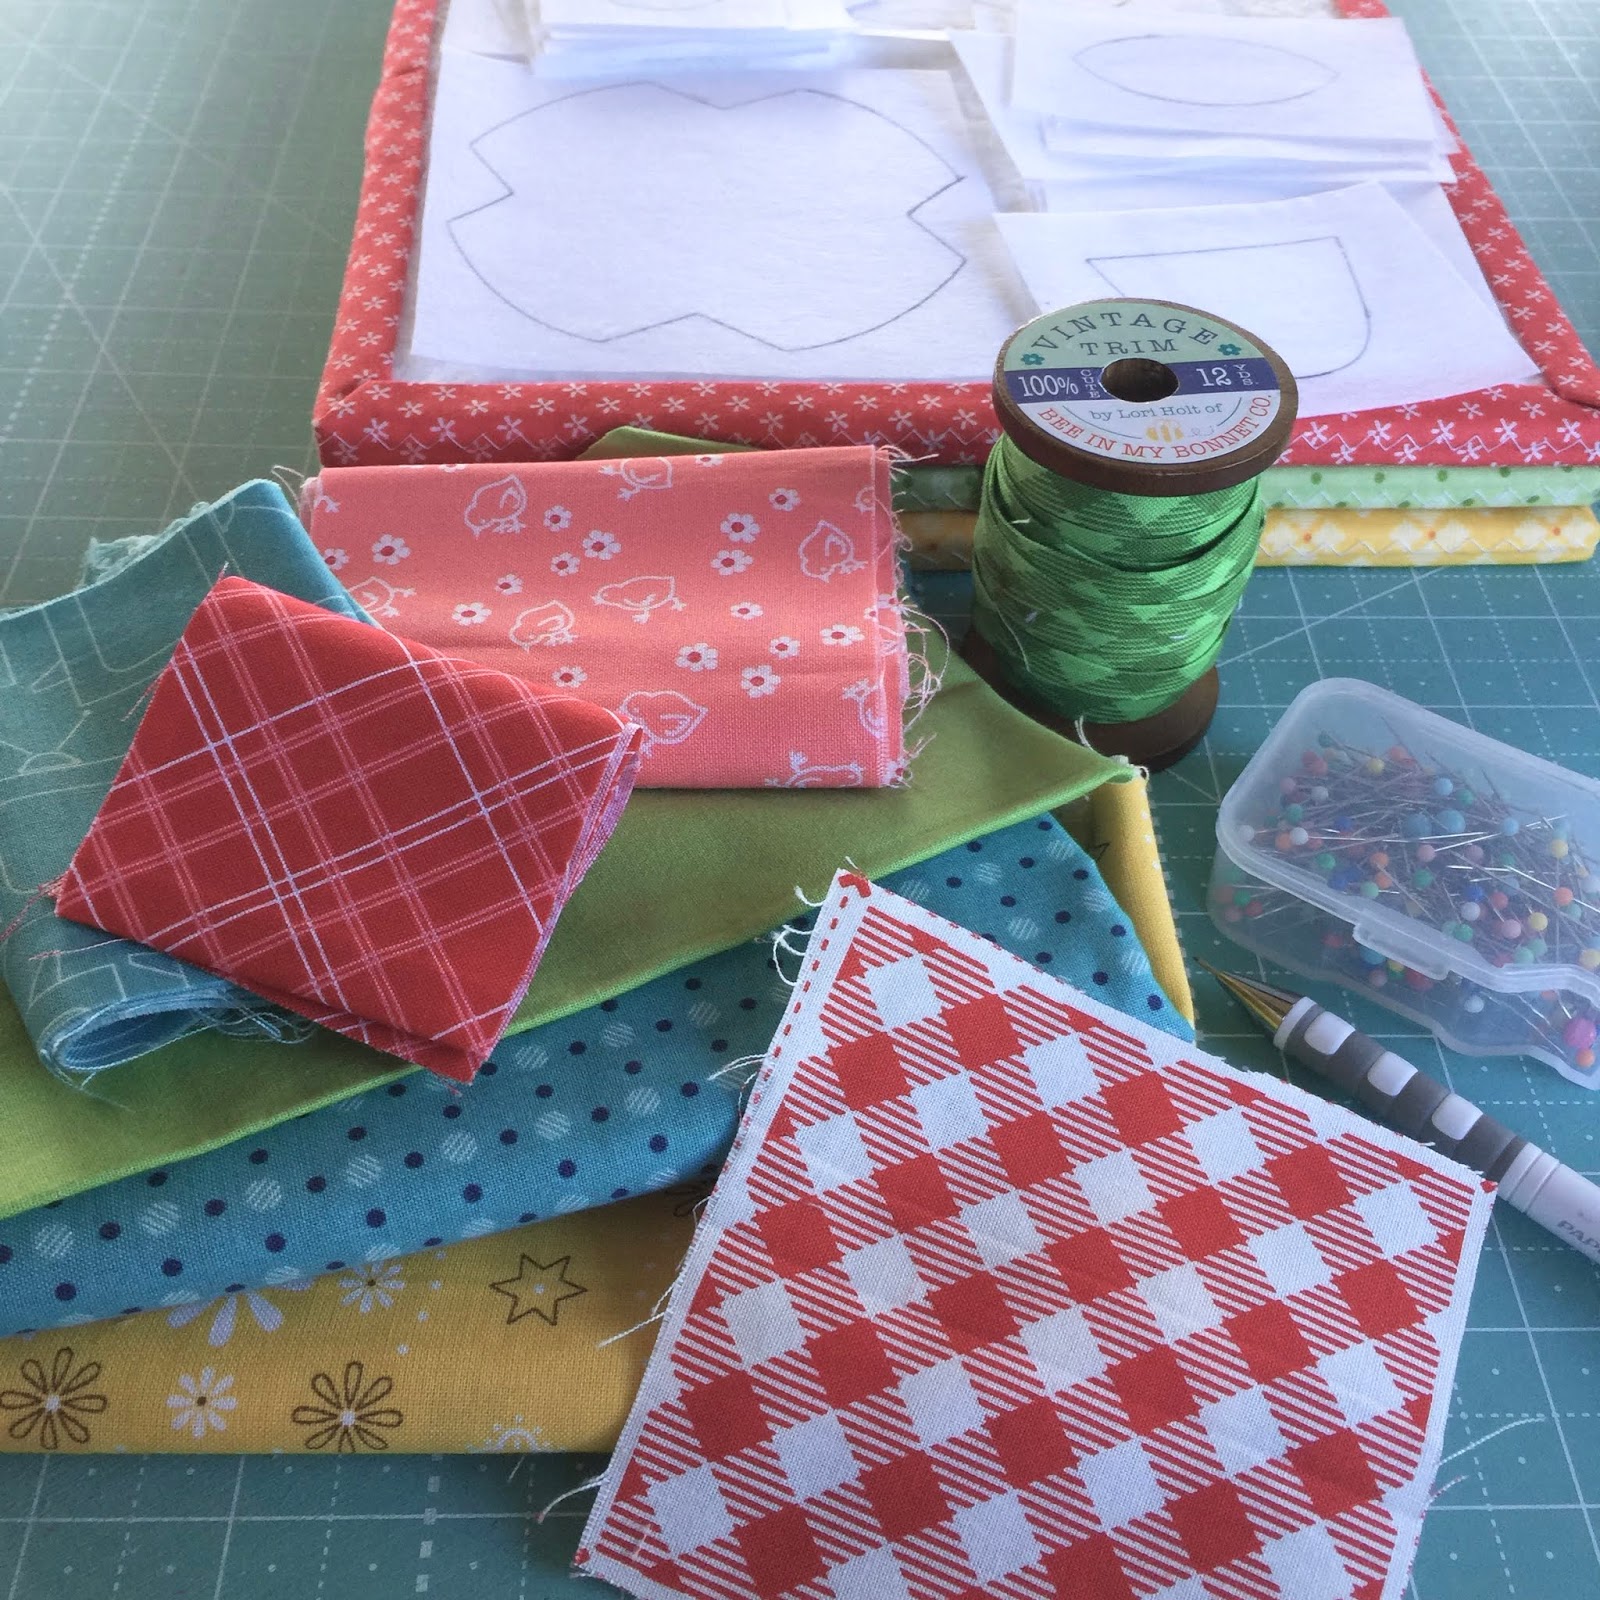
Choose your fabrics and sew your shapes...

And your block background.
If you are just joining us...
you will need to
for week one tutorial
where I detail all of these steps:)

*FYI*
On the A-23 shape you will need to
make a clip in all 4 cleavage areas.
Clip right to your sewing line...
but not into it or past it.
This is so your shape will lie flat.

Prepare all of your applique shapes
using the turning tool.
This step is important so
don't underestimate how useful
this tool is:)

I stitched my leaves just like
I did in last weeks block.
Now we can lay them all out
onto the background:)

Start with the center flower...
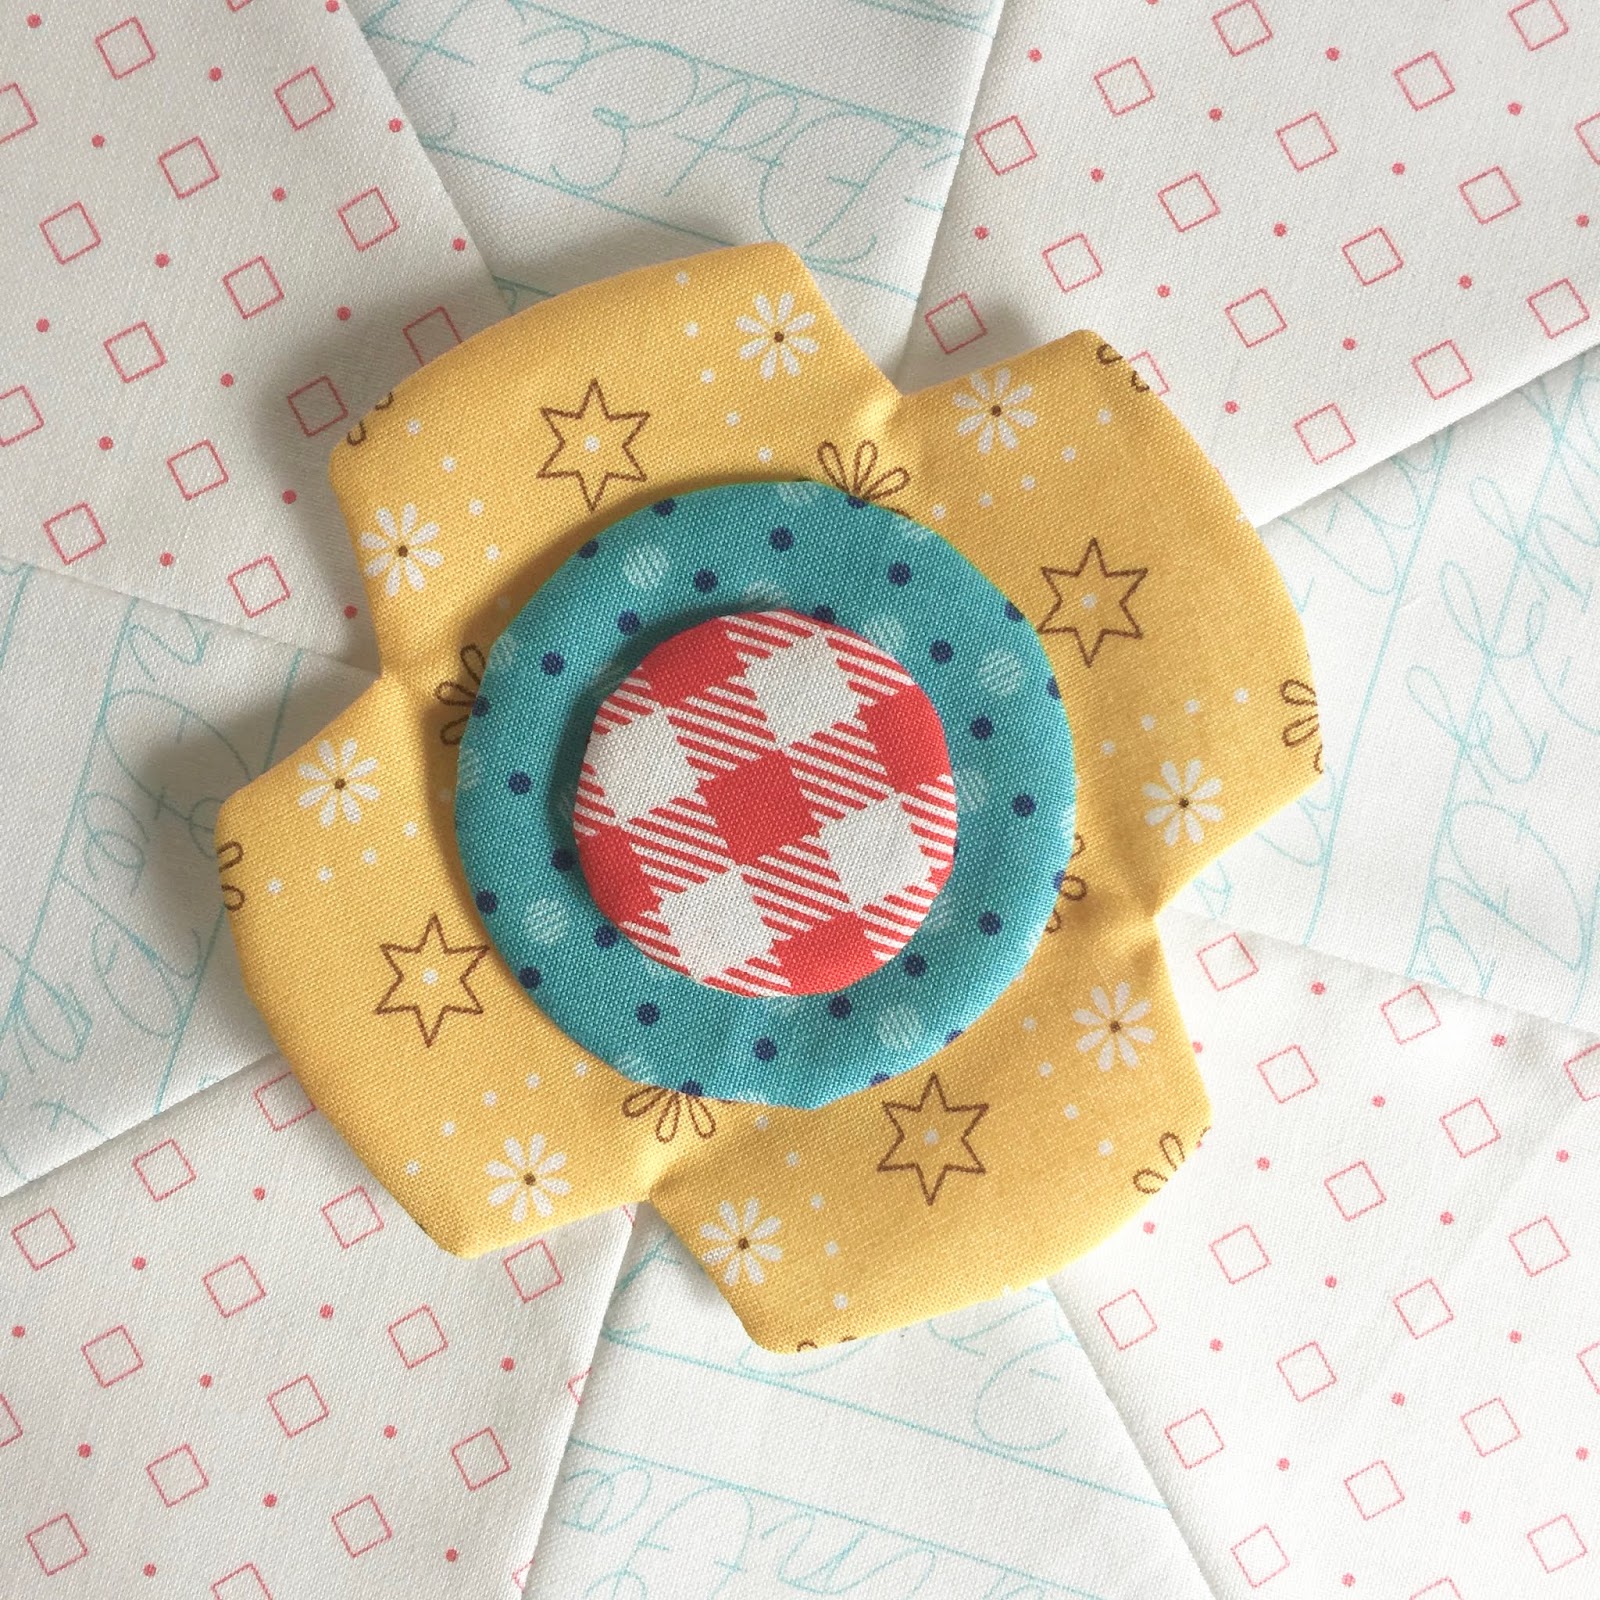
And add the two circles:)
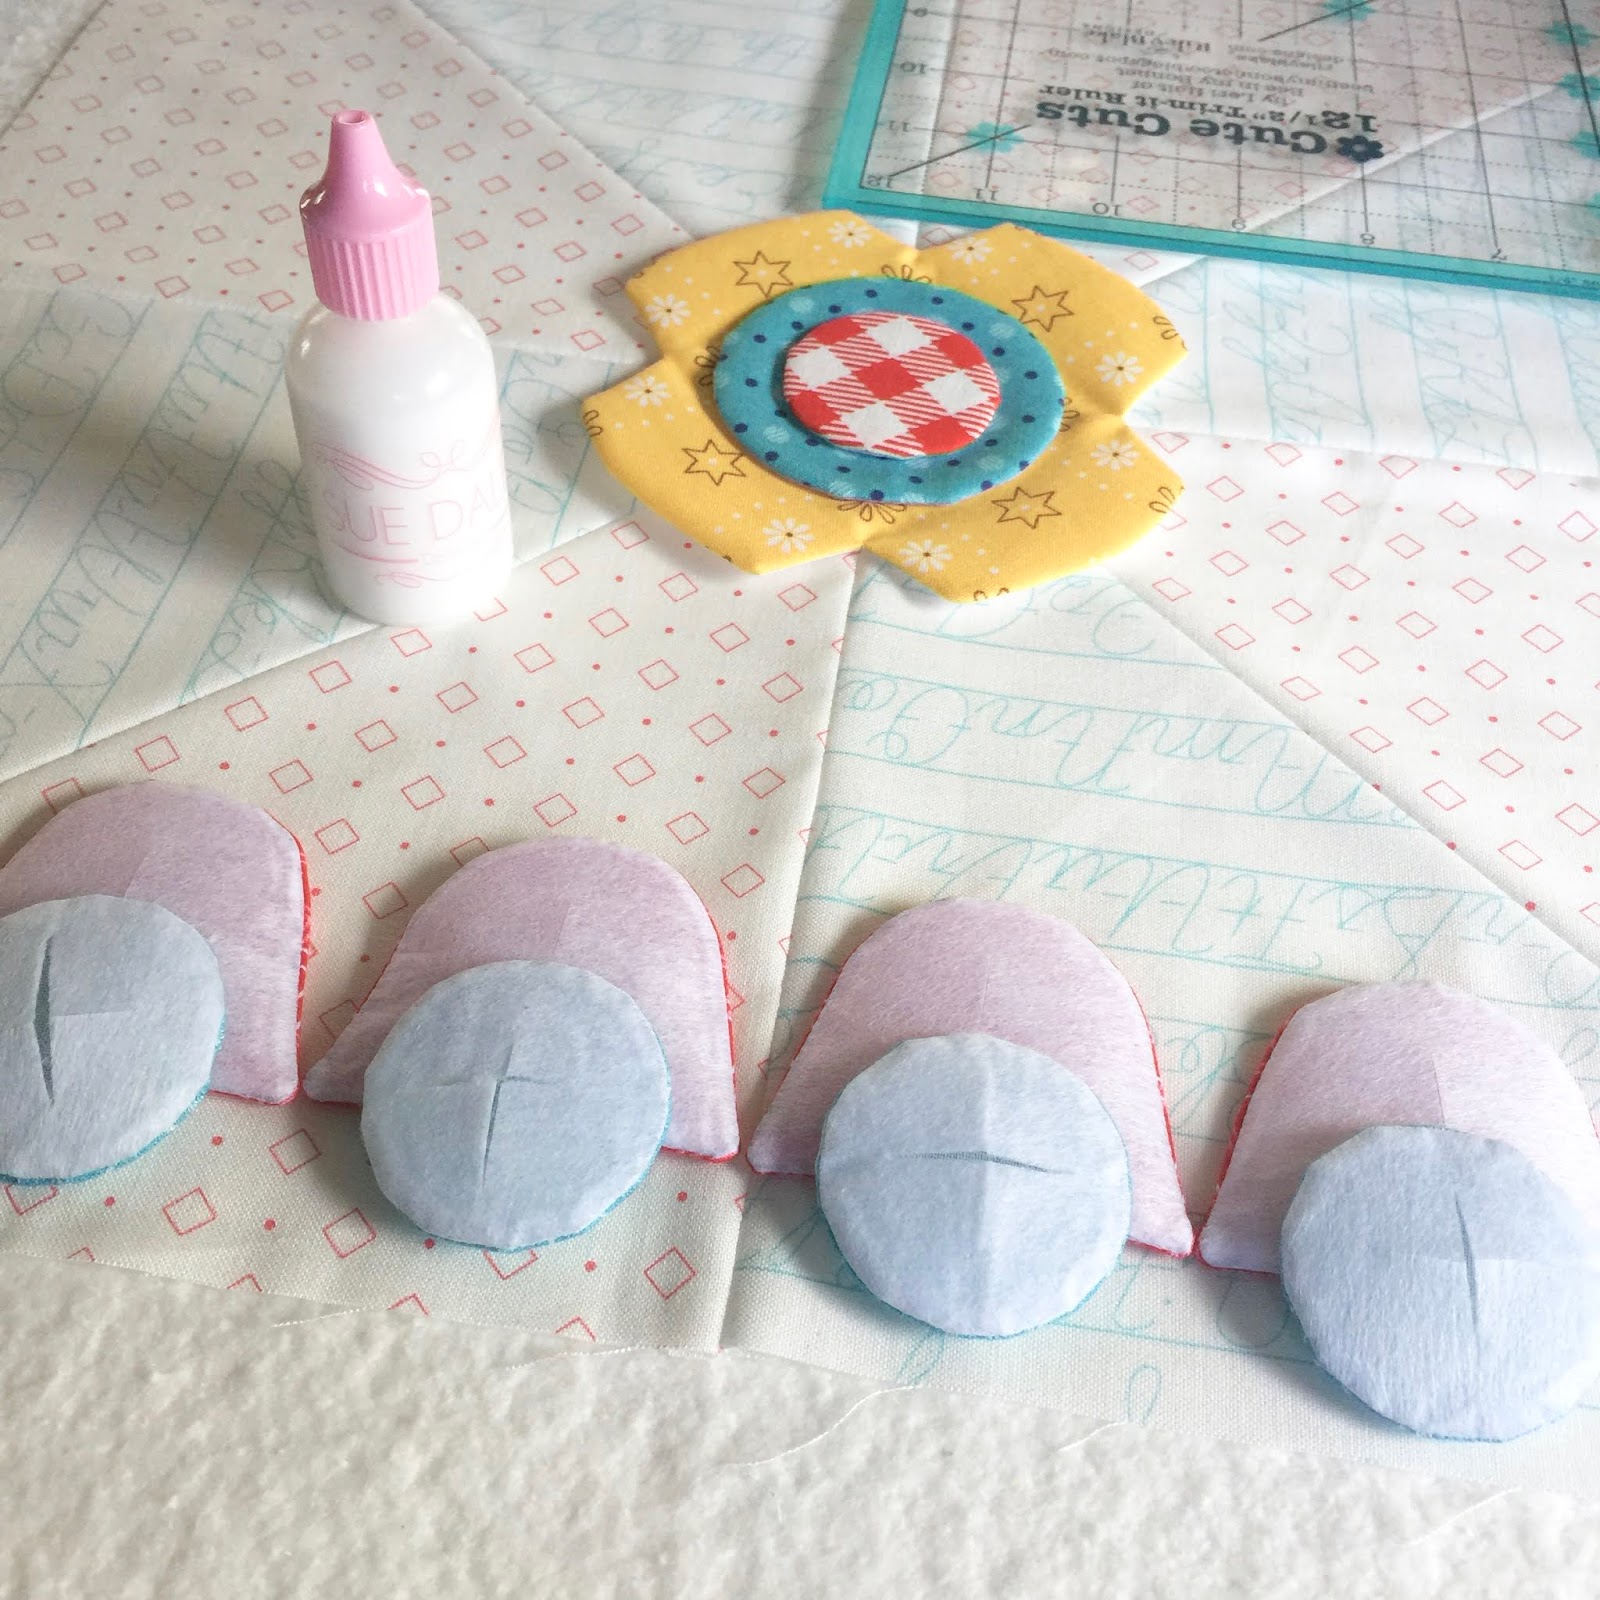
Before adding your flowers...
glue baste the center circles...

Like this!!
Now it will be easier because
they are each one piece.

I use my 12 1/2" Trim-It Ruler
to see how far into the corner
I can place the flower
without sewing over it or
cutting it off when trimming.

I ended up placing the bottom edge
of the flower 2 3/4" from the edge
of the yellow flower in the center.

And that ends up being 2 3/4"
from the corner too:)
Awesome!

Glue baste your stem down like this...

And finish up the other 3.
Now for the measurements
of the other pieces...

Coral circles are 3/4" from
the center flower like this.
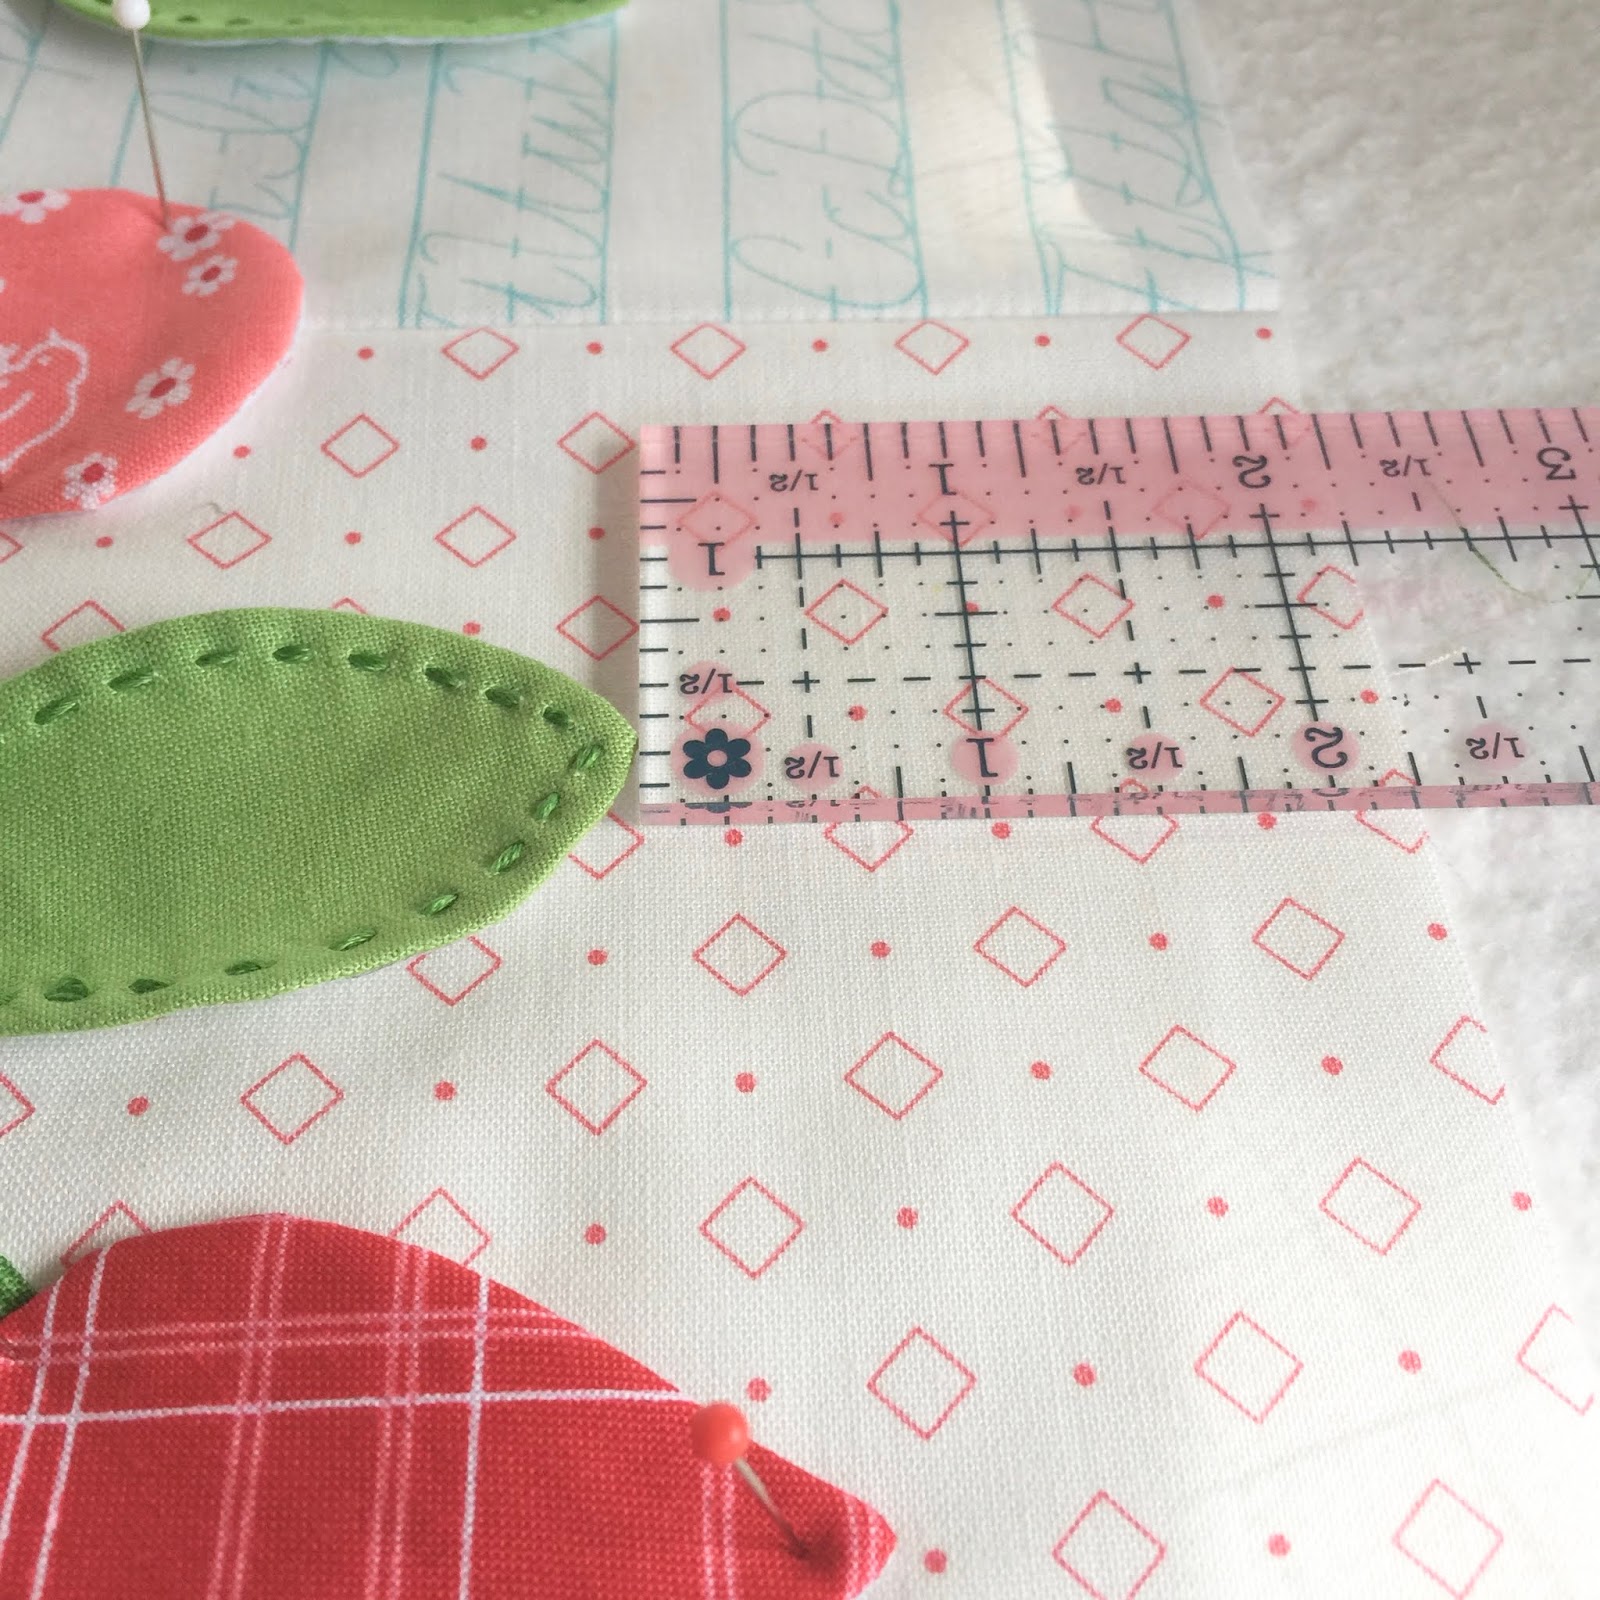
The leaf tips are 2 1/4" from
the edge of the background.

And they are 1 1/4" from the center flower...

And there is 1/2" between
the red flower and leaves.

Pin everything down into your
design board and
glue baste into place.
Let it dry for a few minutes:)

That 1/4" aqua strip around
all 4 edges of the ruler
is the seam allowance and everything inside is what your block will
look like at its finished size...
easy peasy right?
I don't trim my blocks up until
they're ready to go into the quilt.

Now it's time to applique this
sweet and happy block:)

Fun and Done!!!

Now onto the next block
made with the BLOOM set:)

Here are the shapes you will need:
1 - A1
1 - A2
4 - A9
8 - A10
8 - A11
Cut 4 -
5" long prepared stems from your spool.

Choose your fabrics...

and sew!!

There are no cleavage areas
or inner curves to clip.
Simply shape them and embroider
your leaves if you want to:)

After placing your two center circles...
measure 4 1/2" from the edge
and pin your top leaf.

That means they are about 2 1/2"
from the outside corner edge
of the background.

The largest leaves are 3/4"
from the circle...

And the medium leaves are
1/2" away from the smallest leaf.

The sides of the large leaves are
1/2" from the center seam lines.

Halfway there!

Remember to use your ruler
when laying out your pieces...
it's super handy:)

My block after pinning and glue basting.

I love the cool blues and greens of the leaves...and just a pop of red!

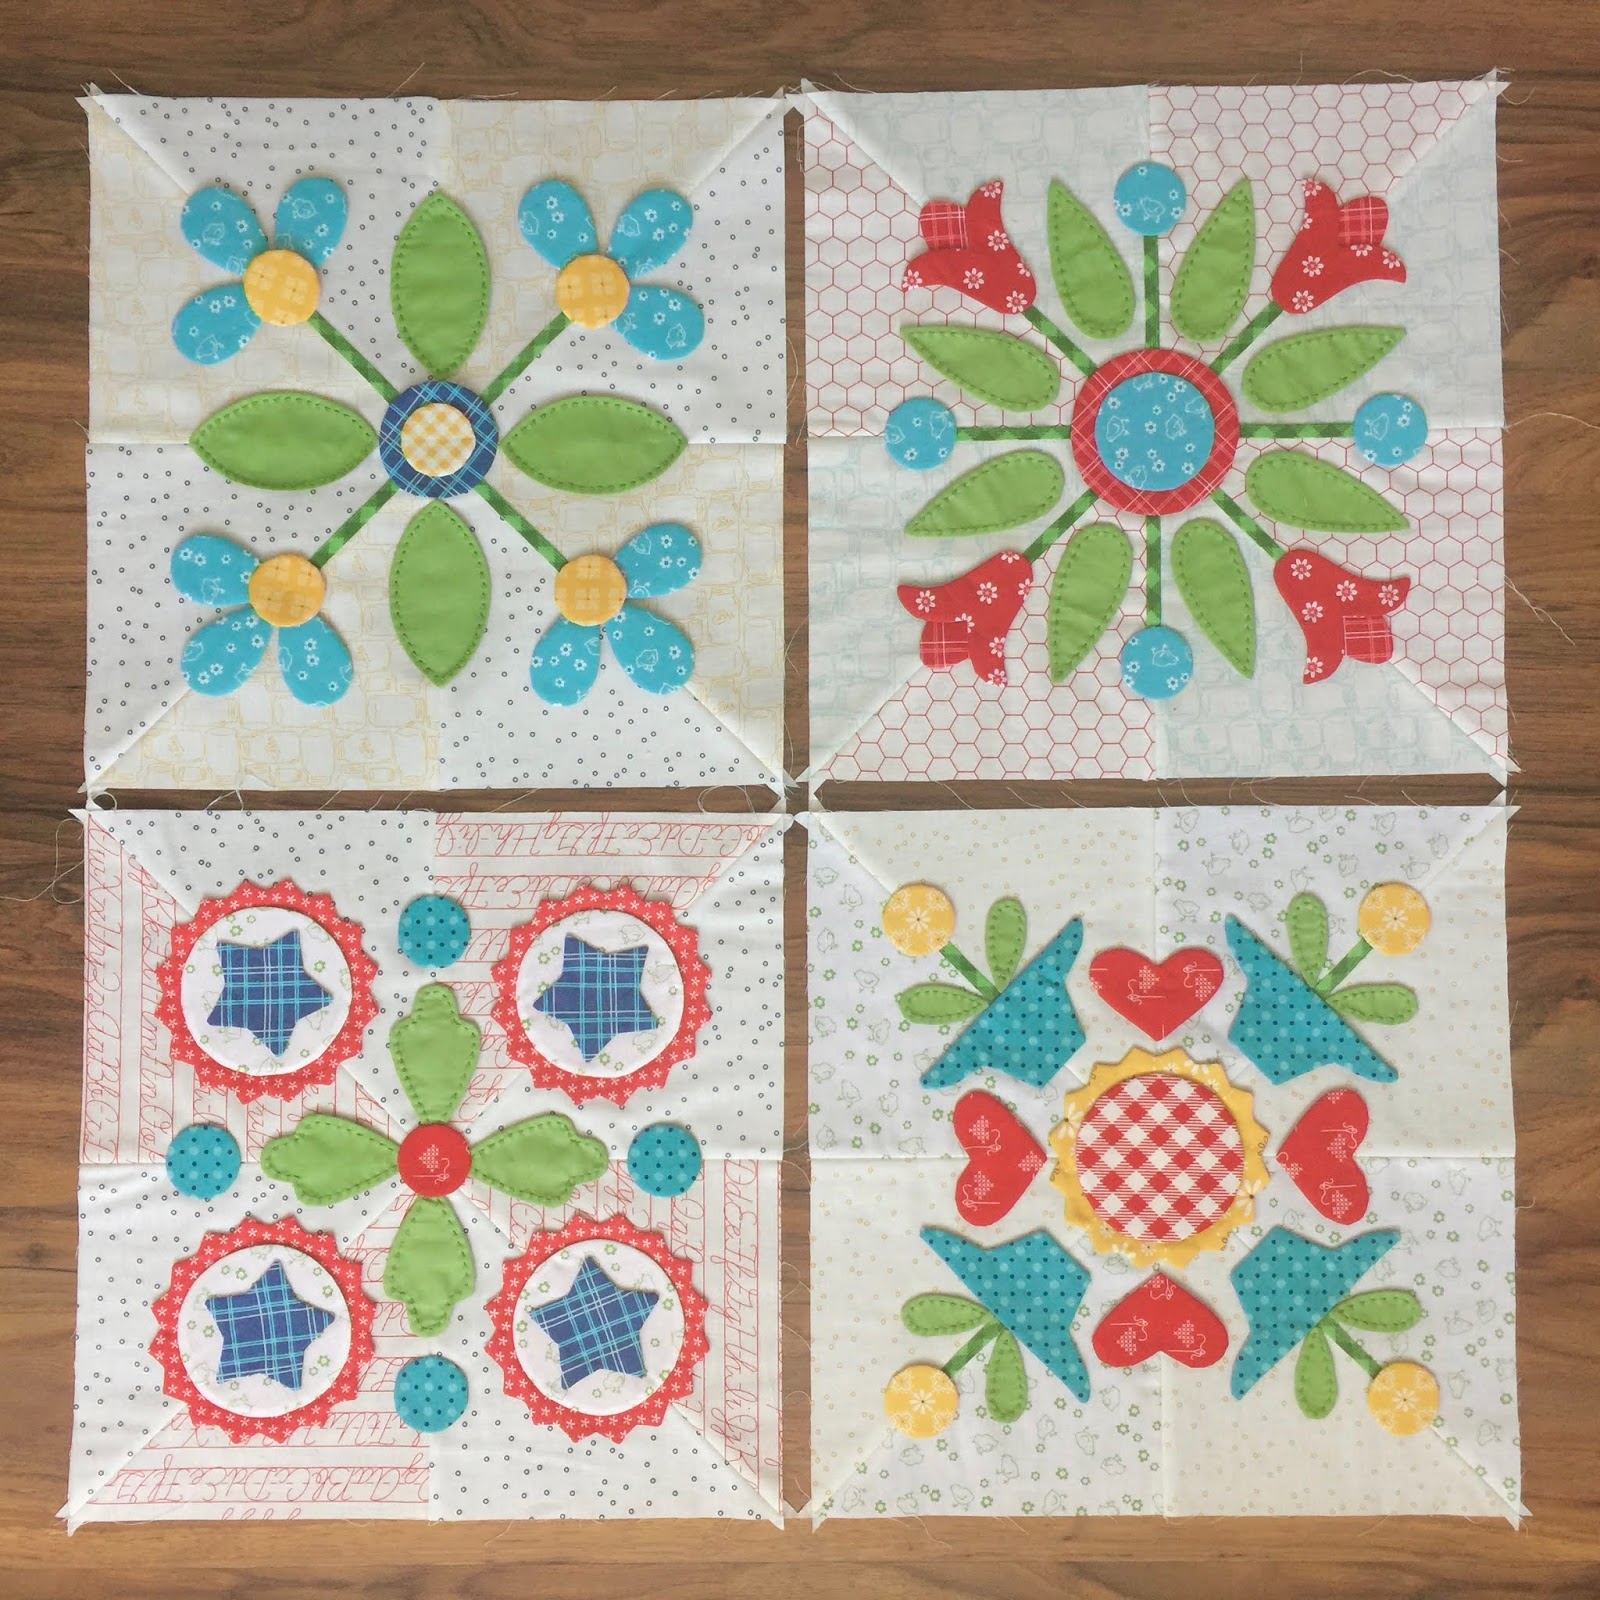
And then there were three!
All three blocks were made
with the BLOOM Sew Simple Shapes
and I'll be using another set
for next weeks blocks:)
Here's what we have
for our quilt so far...

BLOCK ONE

BLOCK TWO

BLOCK THREE
Remember that I told you last week
that these other 3 blocks
will be in our quilt...
but they are made using my
AUTUMN LOVE
Sew Simple Shapes.
They will not be available until July
and so I'll do those tutorials then:)
Happy sewing peeps!
I'd love to see your blocks
so make sure to use the hashtags
#SewSimpleShapes
and #SewSimpleShapesSeries
when you post on
See you here next Monday
for episode three!
xx
Lori

No comments:
Post a Comment