

Oh my goodness!
Can you believe that we are
on the last vintage block of the

I have had such a special time
sewing vintage with you
and my grandma all year long:)


And it's been so fun doing it with my
Farm Girl Vintage fabric too!

Today's tutorial is easy peasy.
We need 5 blocks that finish at
3" each to fill in a
small section of the quilt...
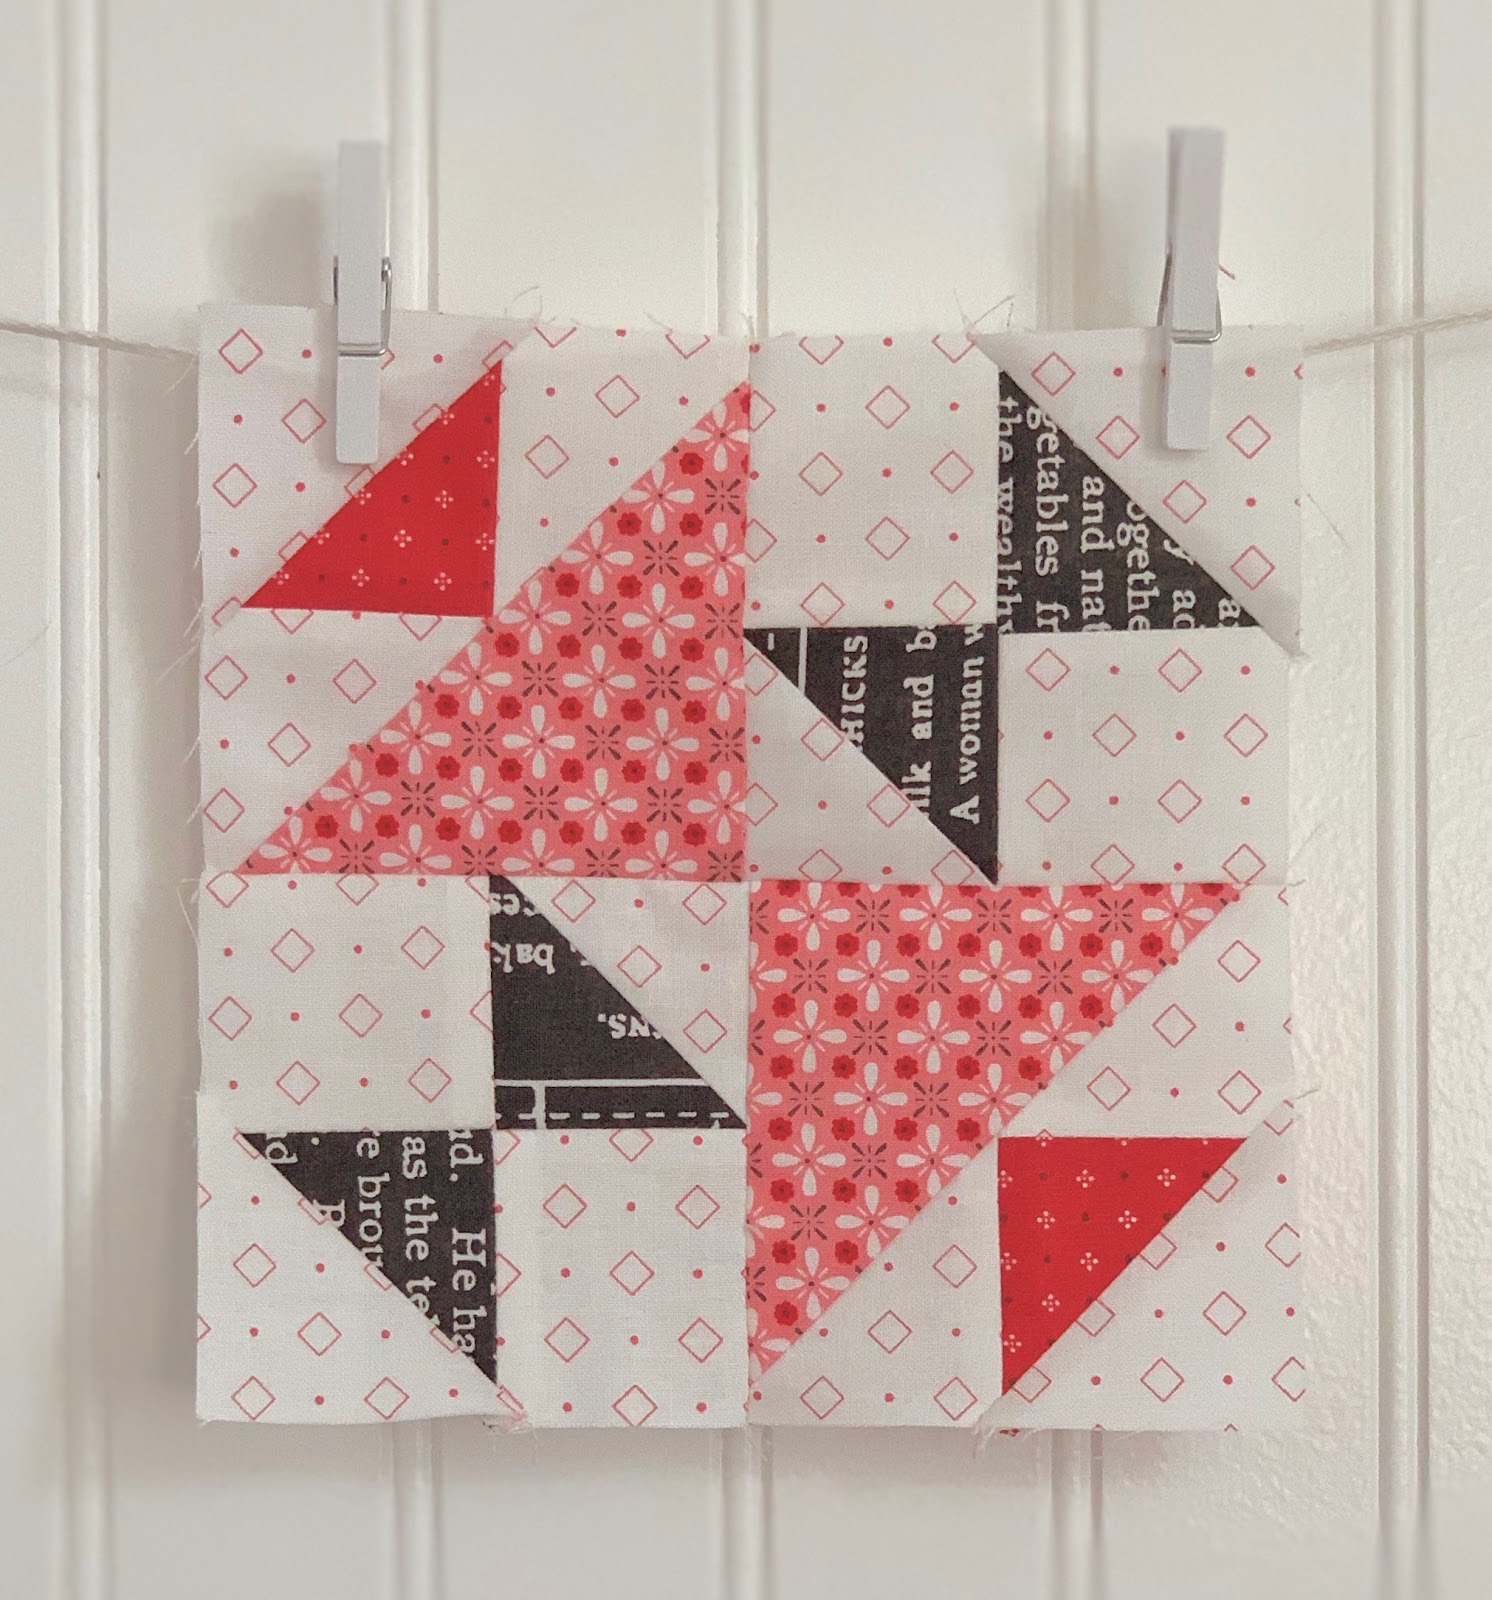
so I chose to make the classic
9 patch vintage block
in red and white and call them
CHECKERS
Notice that there are 2 variations
that I'll tell you about right now!

I used the same background for all 5 of Checkers Blocks and so I cut:
22 - 1 1/2" squares

I used 3 reds and used the
same red in one block.
For EACH of these
3 Checkers Blocks cut:
5 - 1 1/2" red squares
Sew them together like this
and press your seams open:)

I used 2 more reds for
these 2 Checkers Blocks
and for each block I cut:
4 - 1 1/2" red squares.
Sew them together and
press all seams open.

CHECKERS
should each measure 3 1/2"
before we sew them into our quilt:)

And speaking of that...
I've just been stacking the blocks
on top of each other on my design wall
until all of the blocks were finished.
Now I just can't wait to sew them
together into ONE BIG QUILT and put it
on my bed so it can be just like
one big quilty hug from my grandma:)
I hope when you finish your quilt
it will be like getting
one big quilty hug from me!!

I'll be putting the quilt together
in sections and doing a blog post
for each section.
To keep it all organized and easy to find...
I will provide links for each section
just like I've provided for each block.
The first section tutorial will be
up here on my blog this Sunday
and I'll continue on from there.
In the meantime you can
go over of ALL of the blocks from
beginning to end
to make sure that you
have them all completed!
************

1 - 12" Grandma's Star

1 - 15" Pattern Basket

1 - 15" Around the Corner

1 - 12" Little Farmhouse

4 - 6" Rhinestone

1 - 12" Vintage Lily

1 - 20" Star Shine

4 - 5" Humble

1 - 12" Egg Money

1 - 15" Quilting Bee

1 - 14" Sunday Star
10 - 3" Sweet as Honey

1 - 14" Bear Hug

1 - 9" Front Yard Flower

1 - 9" Granny Square
or
1 - 9" Memory
I'm using my Granny Square Block
for the front of my quilt
and the Memory Block for the back label:)

4 - 5" Farmers Daughter

1 - 18" Potluck

1 - 8" Spool and Bobbins

1 - 15" Picnic

2 - 7" Sparklers

1 - 13" x 20" 4th of July Flag
1 - 6" Playing Card

1 - 15" Penny Candy

1 - 9" Mercantile

1 - 14" Family Reunion

1 - 14" Parade

1 - 18" Shade Tree

2 - 7" Wildflowers

1 - 16" Crossroads

1 - 8" Leftovers

1 - 9" Peony

1 - 8" September Star

1 - 8" Road to Grandma's

1 - 6" Six Sisters

1 - 12" Twirl

1 - 8" Wash Day

1 - 6" Fall Flower

1 - 8" Fall Social

1 - 8" Holiday Lights

1 - 4" Holiday Lights

1 - 8" Winter Flower
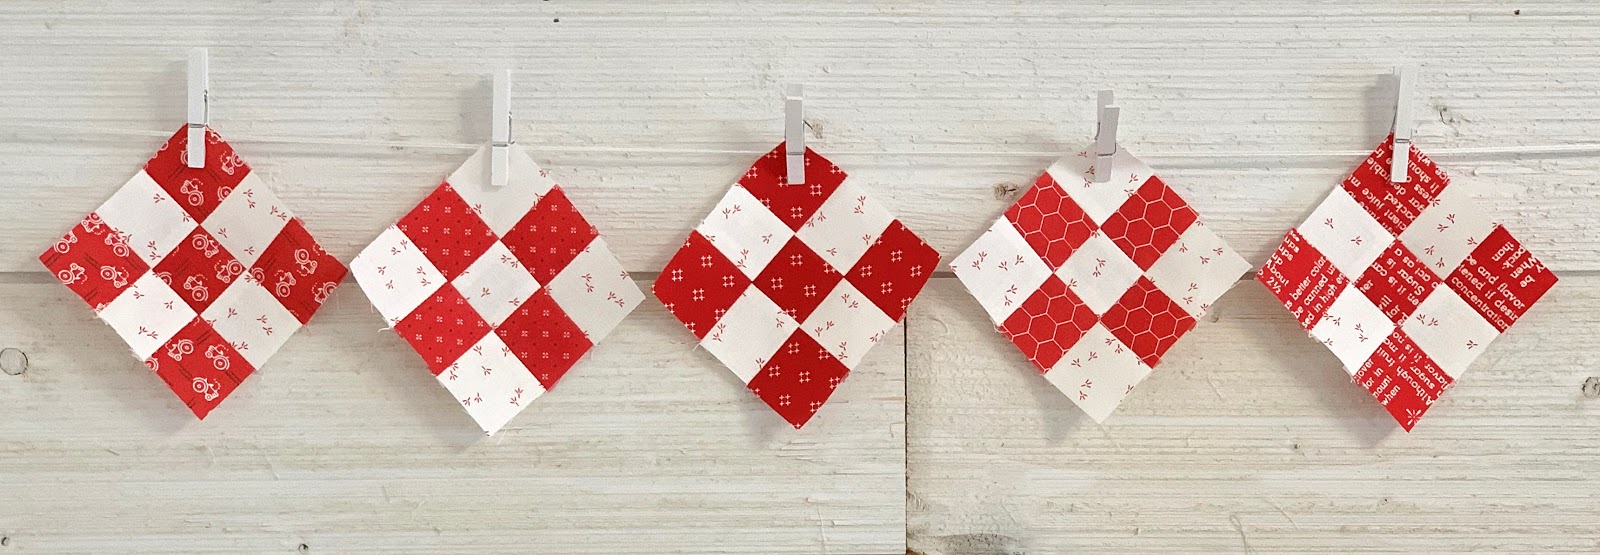
5 - 3" Checkers
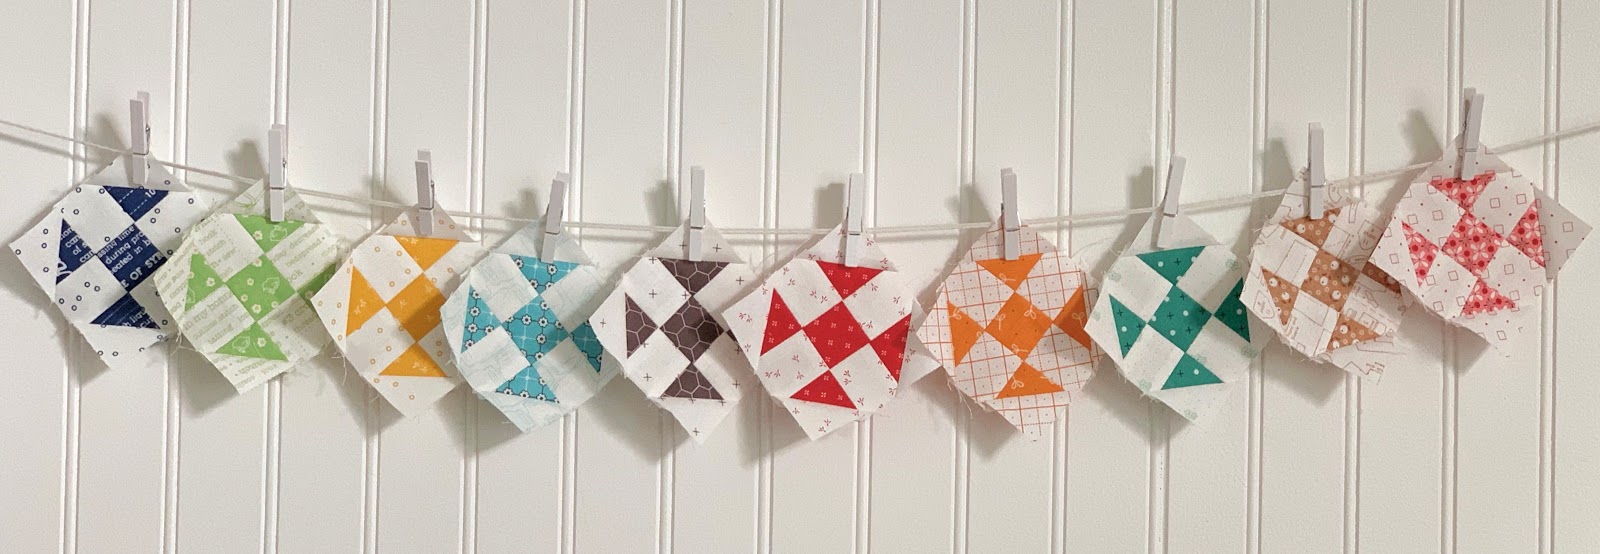
Wowzers!
Just looky at all the
"vintage lovelies"
that we made together!!
Besides just a fun walk down
memory lane of sewing
vintage this year...
Today my hope is by showing you the photo of
each block and how many you need
and also their size helps you to
check them off your list of
"fun and done"
Also...
take note that the size of the
block I gave you just now
underneath each one will be
the FINISHED size after we
sew it into our quilt.

Okay well I guess you know now
what I will
be doing for the next 5 days...
if you need me this is where I'll be!!
xx
Lori
If you are just joining us...
click on each block that we have
done so far to go to the tutorial:
5. Rhinestone
6. Vintage Lily
7. Star Shine
8. Humble
9. Egg Money
10. Quilting Bee
11. Sunday Star
12. Sweet as Honey
13. Bear Hug Block
15. Memory
16. Farmers Daughter
19. Picnic
20. Sparklers
21. 4th of July Flag
22. Playing Card
23. Penny Candy
24. Mercantile
25. Family Reunion
26. Parade
27. Shade Tree
28. Wildflowers
29. Crossroads
30. Leftovers
31. Peony
32. September Star
34. Six Sisters
35. Twirl
36. Wash Day
37. Fall Flower
38. Fall Social
39. Holiday Lights
40. Winter Flower

1 comment:
I would love to see a book from this Vintage Sew Along with all of the amazing blocks and the stories and photos you've shared! I'm not caught up yet, but am having a blast with this! Can't wait to see your finished quilt!
Post a Comment