Well hello there vintage block lovers!!
Welcome to week 21 and
a new tutorial from our
Vintage Block Along
Grandma was very patriotic and also...
she was born on the 24th of July
which is a holiday here in UTAH
and we celebrate it
just like we do the 4th of July.
Because of both holidays
and also grandmas birthday...
it seemed that the entire month of July
was just one big celebration
of the red white and blue ...
and we all loved it!!
I could not even think about
doing a vintage quilt block quilt
without including a flag!
For this sew along I'm using my
Farm Girl Vintage Fabric...
Along with my Bee Backgrounds:)
I love love love this
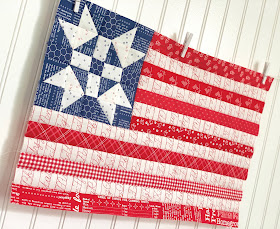
4th of July Flag block
and I'm going to make another block
as a mini quilt to hang
on my wall for July:)
Long may she wave!!
I grabbed a variety of
red white and blue and started cutting...
I started with these 4 prints
and added a few.
The order of this tutorial
is a little different
than the other weeks...
so bear with me please:)
First up you will need to
make one SPARKLERS block
from the tutorial last week:)
Cutting and sewing is exactly the same...
the only difference is that
the blue is the background
and the white is the star.
See what I mean?
It's the exact same block...
just the colors are switched:)
if you need that tutorial from last week.
Here's a close up of my
segment that I used for the corners.
I decided to use the red chicken tracks background from Farm Girl Vintage
along with the denim circles from
Bee Background together because
I think it adds more interest.
For the blue part...
I chose to use my denim
chicken wire print for the center square
and the four rectangles
just to mix it up a bit.
I like how it compliments my
denim canning directions text print.
Your SPARKLERS BLOCK should measure
7 1/2" square at this point...
and it makes a super cute flag star
if I do say so myself...
and YES!
I totally had this all planned out
so that we would use the Sparkler block
from last week to go into
this weeks flag block:)
Now let's talk about
cutting the flag stripes!
I chose to use my red penmanship print
from my Bee Backgrounds
for the white stripes.
You could make the letters
horizontal or vertical...
just make sure to cut them straight lol
You will need to cut:
3 - 1 1/2" x 13 1/2" strips
for the top part of the flag
3 - 1 1/2" x 20 1/2" strips
for the bottom part
I selected this red first and
decided to go scrappy and
add more reds in from
a few of my collections.
You can go scrappy too...
or cut all of the red stripes
from one print.
You will need to cut a total of:
4 - 1 1/2" x 13 1/2"
for the top of flag
3 - 1 1/2" x 20 1/2"
for the bottom
By the way...
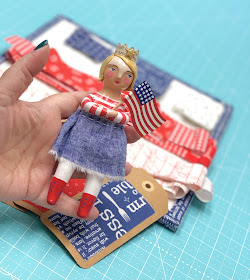
looky at this little
patriotic sweetie:)
She was made for me by
Jenn Meglon who is an amazing
artist don't you think?
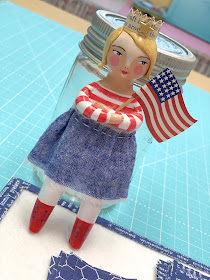
Close up:)
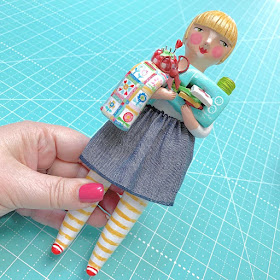
A while ago...
Jenn also custom made a
Bee in my Bonnet
mini me lol...complete with one of
my vintage sewing machines...
my Bloom quilt...quilty fun quilt blocks
and my gingham tomato pincushion!
Okay...enough show and tell...
back to the flag making:)
Once your star is complete
you just need to sew the
short stripes and the
long stripes together...
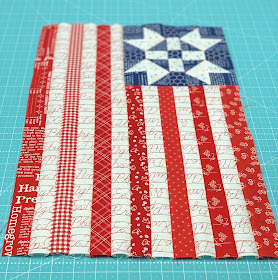
And sew them into a flag...
Like this!
I did press my seams open...
I just forgot to
take a photo of the back:)
4th of July Flag Block
should measure
13 1/2" tall x 20 1/2" wide
BEFORE we sew it into our quilt:)
I hope y'all have fun
making your flag and bee sure to
"tune in" to next weeks episode
of the Vintage Block Along...
it's gonna be another fun one!
xx
Lori
If you are new and just joining in...
Click on each one block
to go to that tutorial:
5. Rhinestone
6. Vintage Lily
7. Star Shine
8. Humble
9. Egg Money
10. Quilting Bee
11. Sunday Star
12. Sweet as Honey
13. Bear Hug Block
15. Memory
16. Farmers Daughter
19. Picnic
20. Sparklers








Love this! I have collected way too much red, white, and blue fabric over the years, in an attempt to make several large quilts. I am always “too busy to sew”, and my 4th machine just bit the dust! This is a small, obtainable project I KNOW I can get done before the 4th.
ReplyDeleteThanks!!!
Kat
The flag block is awesome! Just in time to make it up for the 4th! The special dolls were great to see also!
ReplyDeleteThank you so much....this little "4th of July Flag" is so adoreable.
ReplyDeleteYou are so awesome and thanks for all the inspiration !
I love these patriotic colors !
ReplyDeleteThose are also French flag colors !
Happy quilting,
Muriel la Française
Just started following you on IG and I am doing the SAL of the Sew She Did. I doubt if I'll be able to keep up as I am making gifts for quite a few birthdays in July, then there's Jolly July and I belong to a Ravelry Group but...........that flag and all your other darling projects are luring me in! LOL! I think that flag will be the start of a long relationship! LOL! I love your details....like the tags with your fabrics. Do you do that with all your quilts? I'm just starting back quilting so need to catch up on ' tips and techniques'. I also keep hearing Kimberly quote you about everything being pretty and that resonated with me because I love pretty and especially cozy but I need to be frugal so little things like the flag block and your tags I thought were just darling. Your nails are pretty too but I garden so that is out of the question! LOL! Thank you for being you and for sharing your talent with all of us! FYI...I graduated from HS in '67...I could have been your babysitter! Cute picture on your header.
ReplyDeleteThis is one of the best flag designs/blocks I've seen. Even though I probably have fabrics to make it, I'd love a kit to make like yours!! Thanks so much for this pattern design. (I bet Kimberly would make up a kit for us!)
ReplyDeleteOh...Miss �� love this adorable Flag block! Your Miss Bee’s are perfection, the artist did you proud. So cute!
ReplyDeleteI like this block and the work of your friend so lovely have a good day Geneviève de France
ReplyDelete