Good morning everyone...
it's week 20 in our
Vintage Block Along
I have another really fun
vintage block to share with you
from my grandma's pattern basket:)
I am traveling this week...
I am in beautiful Idaho
teaching a
Farm Girl Vintage Retreat/Workshop
but I have pre-posted this for you!!
I also wanted to let you know that It's Sew Emma just released a brand new Farm Girl Vintage 2 video
to watch it.
It's different from the livestream
that we did from my kitchen
during the photo shoot.
If you want to watch
the livestream one as well...
I love these videos and love how
they really show the projects
well that are in the book.
Thanks It's Sew Emma!
You sure do a fabulous job!
I'm using Farm Girl Vintage fabric...
And Bee Backgrounds:)
We are going to need
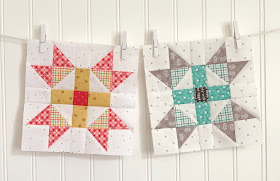
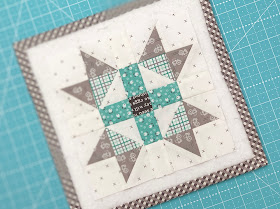
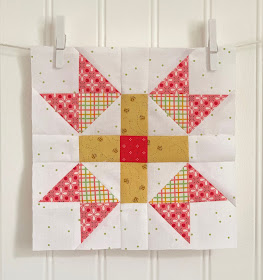
2 of these SPARKLER blocks
for our quilt...
And I'm going to show you
how I made this one...
but first let me tell you why
I chose to call these blocks
SPARKLERS
It's June now and so that means
that all of the firework stands
are showing up everywhere
and we can get our favorites
to celebrate Independence Day
here in the USA.
My favorite happens to be the sparklers!
Grandma always bought each of us
our very own box for
our 4th of July and 24th of July ...
(which is a Utah holiday)
celebration and we could not wait
until our BBQ was over and
it was dark so that we
could light them up!
We had so much fun with them.
I remember that would always
write our names with them in the air...
in cursive...as fast as we could lol
Grandma would bring us the
sparklers from her store.
This is something that I haven't
told you about yet...
grandma owned the only store
that we had in our small town
and it was called The Mercantile:)
I'll tell you more about that
on another weeks tutorial!
I think these cute little blocks...
(they finish at 7")
look like the tip of the sparklers...
sparkling against he warm summer night
and so that's why I chose this block
from grandma's patterns for this week.
Are you ready to sparkle!?
You will need a background and
4 different prints for
this weeks SPARKLER blocks:)
From the background you will need to cut:
16 - 2" squares
4 - 1 1/2" x 2" rectangles
From this print cut:
4 - 1 1/2" x 2" rectangles
From this one for the center cut:
1 - 1 1/2" square
From this print cut:
4 - 2" squares
And from this one cut:
8 - 2" squares
Grab these squares and
4 of the background squares
and sew them into a four patch...
Like this:)
I pressed my four patches open.
Now take 8 of the background squares
and add easy corner triangles
onto each of the
gray square corners...
Like this!
Now grab the remaining 4 of the
2" square background and add an
easy corner triangle onto
the plaid square at the bottom.
Of course I chain sew all of them:)
You can either draw a line or use the
to add the easy corner triangles
This is what your segment looks like now...
you should have four total
and they should each measure
3 1/2" square at this point.
I pressed all of the
easy corner triangles
towards the background on these.
We are almost ready to
finish our SPARKLER block...
but first sew the two rectangles
together like this:)
Now lay everything out on your
design board and sew your block together
just like you would a nine patch...
sew 3 rows first...
then sew all three rows together:)
Hello SPARKLER block...
you are so cute!!!
Now sparkle again for the second block:)
Your blocks should measure
7 1/2" square before we
sew them into our quilt.
These blocks are fun to make
and I really love pulling
different prints from
Farm Girl Vintage
together to make each block unique.
Thanks for sewing vintage
with me today
and join me here next week
for another block
and another chat:)
xx
Lori
If you are new and just joining in...
Click on each one block
to go to that tutorial:
5. Rhinestone
6. Vintage Lily
7. Star Shine
8. Humble
9. Egg Money
10. Quilting Bee
11. Sunday Star
12. Sweet as Honey
13. Bear Hug Block
15. Memory
16. Farmers Daughter
19. Picnic


Sooo sweet, I am almost caught up just a the last 4 blocks to go!!
ReplyDelete