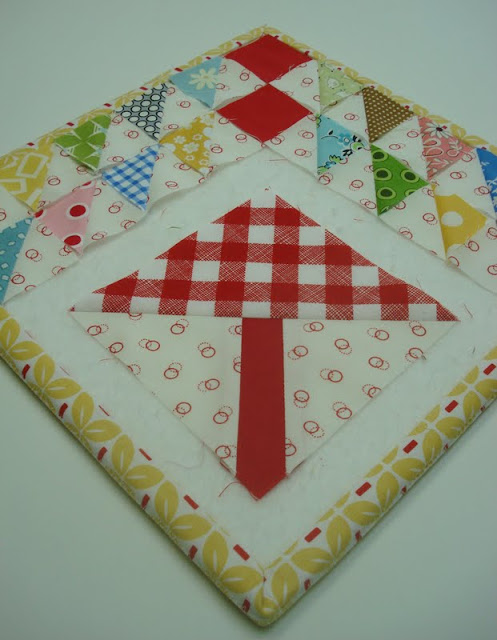
Good morning lovely quilters! I have yet another tutorial for you.
It's the very traditional vintagey tree block:)
YaY!!!
I love tree blocks because I love trees...
but they can be tricky because
the trunk shape of the tree often
use complicated template shapes.
But not this way!...of course I like to use easy corners on my tree blocks too:)
I cut 18 - 1 1/2" scrappy squares
and 18 - 1 1/2" background squares for the half square triangles and
2 - 1 1/2" red squares.
I cut a 4 1/2" red square and gingham square…
and 2 - 4" background squares.
Lay them out on your
the order which you would like to sew them together.
My leaves are colorful and scrappy...
inspired by the upcoming season of Autumn.
Don't forget to snap
of the layout so that you can
refer back
to it later:)
With a stack of your
background fabric squares...
you will make all of the colorful squares into half square triangle leaves.
Remember that I showed you how
After you have trimmed all of the excess...press towards the dark triangle.
Referring to your photo
for correct placement ... lay your
cute little/just sewn
half square triangles back onto your
mini design board.
Let them sit together patiently and
get to know one another
while you construct the trunk:)
FYI…another lesson on drafting…
if you are making a 6" finished size block, you will need to cut the
trunk square (mine is red) 4 1/2" x 4 1/2".
You will use 2 of your background squares for each side of the trunk.
Cut each of them 1/2" smaller (4" x 4")...
for a 1" wide trunk.
Lay the smaller square on top of the
larger square with RST...
And stitch from corner to corner of the background square.
Like this.
Trim...
And press towards the triangle.
Now repeat the same process for
the other side.
Now take your other 4 1/2" x 4 1/2" square that will be the body of the tree
(mine is red gingham)...
And lay it on top of the square that
you just completed...
(they should be the same size)...
And stitch from corner to corner...
making sure that you are stitching
across the trunk!
Trim off the excess leaving an
approximate 1/4" seam allowance.
Press it towards the gingham ...and
you have a tree trunk!
yay!
Back onto the design board to join
the half square triangle leaves:)
Delete your last picture and snap a
new updated version:)
Begin sewing the HST's together by two's.
I like to press my seam allowance open with pieces this small...it reduces alot of bulk and makes a smoother, flatter block.
Back onto the design board for accurate
color placement... and to make sure they
are all pointing the right way!
Then join them into four patches and
press the seams open.
When you are doing a quilt block with this many pieces...don't get discouraged!
The steps are simple and they just take time.
With each step complete...you can see the block taking shape.
Now you can see where it's possible to stitch the leaves to one side of the trunk.
Press this seam toward the trunk
instead of open.
Now for the last seam...
Press it towards the trunk also.
And there you have it...
a cute tree block!
(made up of 42 pieces...lol)
Do you like it?...
your very own cute and tiny
little work of art:)
Fabric Used:
White = Redwork Romance
Gingham = Sew Cherry
Red = Sew Cherry
HST = My Stash:)
Have a wonderful weekend my friends!
I will be traveling a few hours away
to beautiful Logan,Utah for a nice long weekend with the wonderful Mr. Honey.
I'll type at ya when I get back:)
xx
Lori


