Good morning...
did you get your borders on???
Good Job:)
Because now it's time to prepare the backing.
This is how I did mine...
First I finished off the edges of my bumblebee label by
laying it face down on a square of
white fabric about 1" larger all the way around.
I sewed around the block 1/4" in from the edge...
leaving an opening in the bottom for turning.
Then I trimmed off the excess white even with the
block edges and turned the block right side out...
like this.
I pressed the opening edges under 1/4".
You will sew it closed when you stitch it onto the backing.
Set it aside for now.
Cut the backing to be a
generous 5" larger all the way around the quilt...
or in other words...
10 - 12 inches longer and wider
than the quilt top.
Place right sides together and sew one long seam down the center.
I don't cut my selvedge off of my backing
so I use a wider seam allowance for this ...
just enough to go past the selvedge.
Give it a nice pressing.
Now wasn't that easy?
It's all ready except for the label:)
Pin your label onto the backing wherever you want it.
I pinned mine on the bottom left corner.
I used a ruler when pinning just so that I would pin it straight.
I also pinned it about 10 - 12 inches from the side and the bottom
leaving plenty of room for the quilter to
put it on the frame without bothering the label.
I used a whip stitch and sewed it to the quilt back.
I didn't worry about taking tiny stitches...
just nice and neat and secure.
Remember that it will be quilted also and
it won't be coming off...
so don't stress too much over the stitching:)
All ready for quilting!
Press the block...
fold the backing and set it aside until the quilting!
I've already done a tutorial on how to bind a quilt.
and read my tutorial which shows you every step
of binding a quilt from start to finish.
I'll wait.
Okay...
now I'll show you how to make your scrappy binding!
I used some of the fabrics that I used in my rows and
2 1/2" strips.
Join them together just like I have showed you before!
The strips are just different fabric
and shorter than normal:)
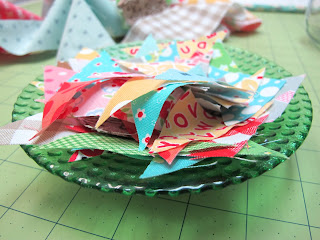
When you trim the triangles off...
Put them in a pretty candy dish that you keep in your studio...
because when your cutie pie granddaughter comes over
this is just the thing she likes to play with while you are sewing:)
Press all of the seams open and then press the strip
in half with wrong sides together just like I showed you in
Then to keep it from getting wrinkled and distorted...
wrap it around one of your mini design boards...
And pin it with a cute little bee pin for safe keeping
until your quilt is off of the frames!
My quilt is all quilted...
bound...
photographed...
and hanging on my wall:)
Tomorrow I will show it to you
and announce the end of my
Bee in my Bonnet Row Along
give away!
See you then...
xx
Lori
***(edit)
YaY!!!
The row along quilt pattern is now in a book!
to reserve your copy.
My book is called Quilty Fun and includes
new blocks and 10 "spin off" projects
from the row along!


