Well hello again and thanks
sew much for tuning in to my
Today I have another vintage block
from my grandma's pattern basket
to share with you:)
I'm using Farm Girl Vintage Fabric...
And today I'm going to
show you how to make the
MEMORY BLOCK
I made 2 different versions
to show you of this block.
You can choose which version
you would like to make for your quilt!
This was a very popular block
and it was commonly known as the
Album Block...
the Friendship Block or the
Signature Block.
Grandma and her sisters often made
these kind of quilts to commemorate
an event or as a gift to someone
who was moving or retiring etc.
Each woman would make a block
and embroider their name on it
and then all of the blocks
would be sewn together and quilted:)
You can find many different
kinds of vintage signature quilts
still around today and I think
that they are so sweet!
I decided to write grandma's first
and middle name on my quilt.
I wrote mine in pencil
(the first photo)
because I wanted to
embroider her name in red.
I wrote this one with a
micron pigma pen
just to show you that if you
don't want to embroider you can
just write it with this type of pen
because it's permanent on fabric
and will not smear or wash away.
Whichever way you decide
to do the signature...
you will need to cut a piece of
2 1/2" x 6 1/2" fabric
to write the name onto.
I use Riley Blake
Confetti Cotton in CLOUD.
That is the solid that matches
all of my Bee Background fabrics
and of course my Farm Girl Vintage.
For the remaining background
you will need to cut:
2 - 2 1/2" squares
12 - 2 1/2" x 3 1/2" rectangles
From the print you will need to cut:
8 - 2 1/2" squares
Simply lay your pieces out
into rows like this and sew together.
Then sew the rows together
and your block will look like this!
Remember when we did the
and we used the
12 1/2" Trim-It Ruler?
Well you trim this block up
the exact same way except you
will need to use a
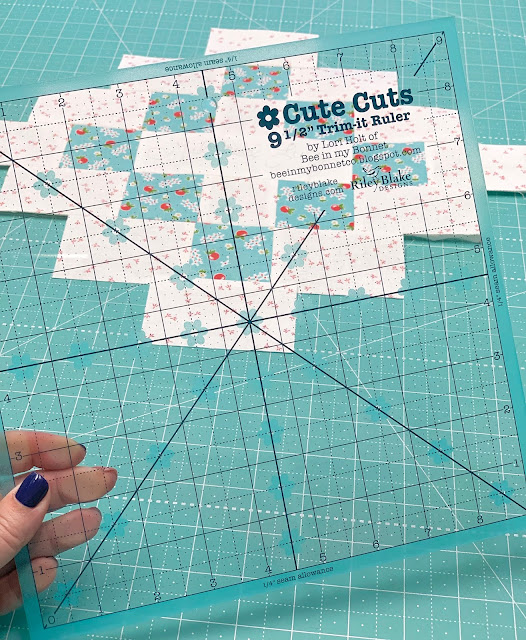
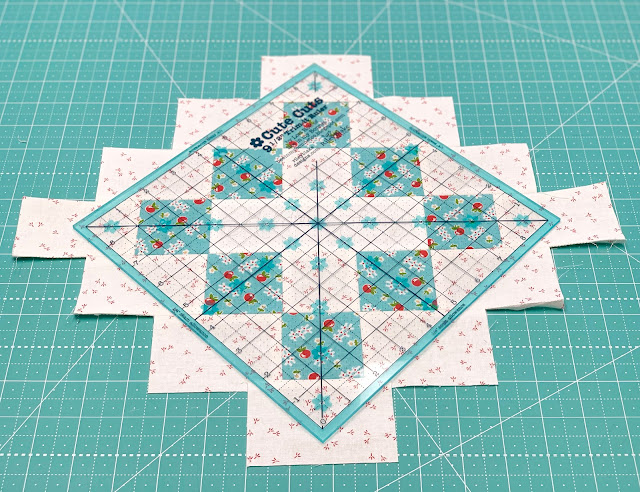
Lay the ruler on top of the
block like this and use all of the
lines on the ruler to make sure
everything is centered.
Trim away the excess like this!
Your block will now measure
9 1/2" square...
easy peasy!
Whoops!
I was going to embroider grandma's name
first before trimming but I
got too excited to show you
the next step lol!
Anyhoo...
I used 3 strands of my red Aurifloss
and a backstitch...
and of course a
french knot to dot the "i"
MEMORY BLOCK
9 1/2" x 9 1/2" BEFORE
you sew it into your quilt.
Sometimes they set their
blocks on point and
sewed alternate blocks with
colorful feedsack prints in-between.
This block is very simple
and very versatile!
Now for the other version
without the signature.
It's sewn the exact same way...
and here is cutting:
Yellow - 1 - 2 1/2" square
Teal - 4 - 2 1/2" squares
Coral - 8 - 2 1/2" squares
Background - 12 - 2 1/2" x 3 1/2" rectangles.
Sew it and trim it up
the exact same way with the
Cute!
This block is just a smaller version
of my Great Granny Square Block ...
from my book called
I guess we can just call
this one a Granny Square Block!
An entire quilt made from my
Granny Square Block would be
sew super cute and
scrappy happy vintage:)
Now that I'm back from retreat
I'll be here next week with
another popular vintage block
tutorial that I want to
add to my quilt.
If you are just joining us
here is the list and links to the
blocks that we have made so far:
5. Rhinestone
6. Vintage Lily
7. Star Shine
8. Humble
9. Egg Money
10. Quilting Bee
11. Sunday Star
12. Sweet as Honey
13. Bear Hug Block


