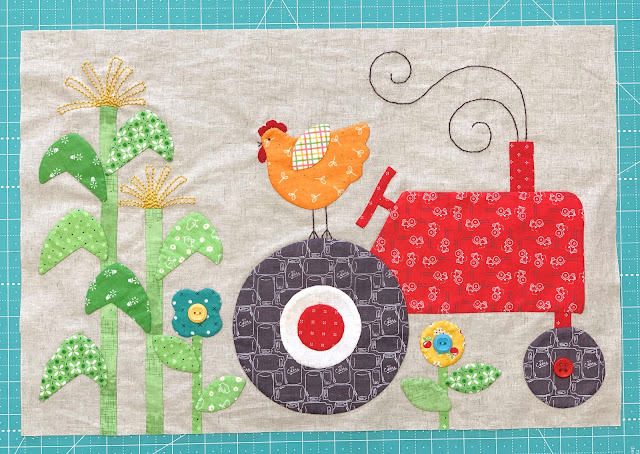
Well good morning sunshines!!
How y'all doin?
It's week ten in the
I've been having a blast playing with
each week and I hope you have too!
Take out the pieces that
you have cut for this block...
according to the
Sew Along Guide
if you need to download one
Grab your
and let's get started!
Here are my fabric pieces
all cut and just waiting
to become a tractor...
a cute hen and some sweet corn:)
Sew Simple Shapes
needed for this block are:
H4 - 2
H5 - 2
H6 - 1
H8 - 6
H15 - 5
H17 - 1
H24 - 1
H36 - 1
Take note that you will need to
trace the H-17 (hen) in reverse
for this block because she is
looking the other way!
Also trace two of the
H-8 (corn husk) in reverse because
they go the other direction as well.
Sew the two reverse ones to the
2 dk.green flower pot prints.
The other corn husks are sewn
onto the lighter green prints.
Bias tape maker strips are all
straight cuts and after preparing
I cut them into the following lengths:
1/2" green shabby for corn stalks-
cut one 11 1/2" and one 8"...
press one end under on both of them.
1/4" green flower stems-
Cut one 3" and 4"
3/4" red for smoke stack:
cut 3" long and press
one end under for top.
1/2" red for top of tire cut 2" long.
1/4" red for steering wheel
cut 2 1/2" long and press both ends under.
Cut the steering wheel column strip 1" long.
After sewing and trimming your shapes...
clip the inner curves and
cleavage ares on these pieces
that are on my cutting mat
before you turn them.
Turned and pressed and
ready to pin baste!
Don't forget to zig zag or serge
the edges of your background linen.
This block finishes at
12" tall x 18" wide and you will
trim it down to 12 1/2" x 18 1/2"
when your applique is completed.
That means that when
pinning the block down...
you do not want your shapes
to go any wider than 17 1/2"...
Or taller than 11 1/2"...
that includes the embroidered smoke
because that is the
tallest part of the block.
After you have pinned
everything into place...
Use your Sue Glue!!
Remove the pins and let the glue dry while your block remains nice and flat:)
It's all ready for
applique an embroidery now...
YaY!!
Fast forward a few days!
After my applique was completed...
I used all six strands of
gold Aurifloss and a backstitch
on the corn stalks and 3 strands
of dark gray on the tractor.
Time to trim it up!
Again...
it will need to be trimmed to
12 1/2" tall so I used my
for trimming the height.
I trimmed the top first....
And then the bottom.
I used an 18 1/2" wide ruler
and trimmed the bottom half first
and then moved it up and
trimmed the top half.

My tractor tire on the right
measured 1/2" in from the edge...
And this bottom part of the cornstalk
on the left side measures 1/2" in as well.
Then I sewed the buttons on the
flowers and the front tire.
My tractor block now measures
12 1/2" tall x 18 1/2" wide
and is ready to sew into the quilt...
just two more blocks to sew first:)
I'll meet you back here next week
and we will continue farming!
xx
Lori


2 comments:
LOVE this adorable block, and you make it so easy! Looking forward to Thursday's Vintage Block Along. Thanks again for sharing.
I'm obsessed with this project! It's the funnest and most enjoyable and satisfying sewing ever!
Post a Comment