Monday, July 30, 2018

Sew Simple Shapes Series - Week Eight - Blocks 18 - 19 and 20!!


Okay cute people...
here are the last 3 blocks 
for this fun quilt!
These are the blocks that started it all:)


I made them with my new 
Now that they are here and available...
 and you are pro's by making
 the first 17 blocks...
Here are the shapes you need to
 trace and sew for Block 18:
4 - F-1
1 - F-3
8 - F-5
4 - F-19
1 - F-24
4 - F27
Cut 4 - 2 1/4" long 1/4" wide
 stems from your spool.
Sew your pinwheel background square:)
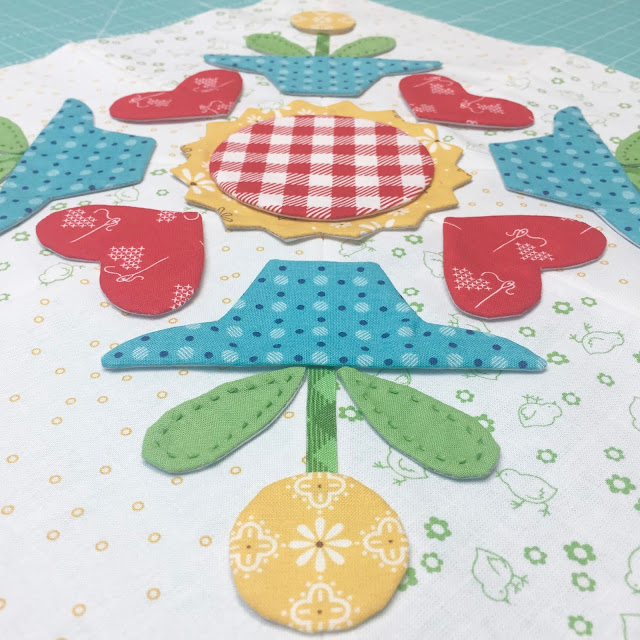
***You will need to clip the cleavage in the flower pot and sunflower shapes***


Pin and glue baste the center flower first. 
Measure in 2 1/2" from the corner
 and place the yellow flowers.
The top of the flower pot is 
5 1/2" in from the corner:)
The red hearts are 3" in from the side edge.


There is 1/2" between the 
leaves and the flowers. 


Ready for applique!


I fussy cut my flowers so that the
 white daisy would be in the center:)


I super love the sunflower 
with the red gingham center!


BLOCK 18


Here are the shapes that you will 
need to trace and sew for Block 19:
5 - F-1
4 - F-3
4 - F-8
4 - F-15
4 - F-24
No Stems!
Make your pinwheel background square:)
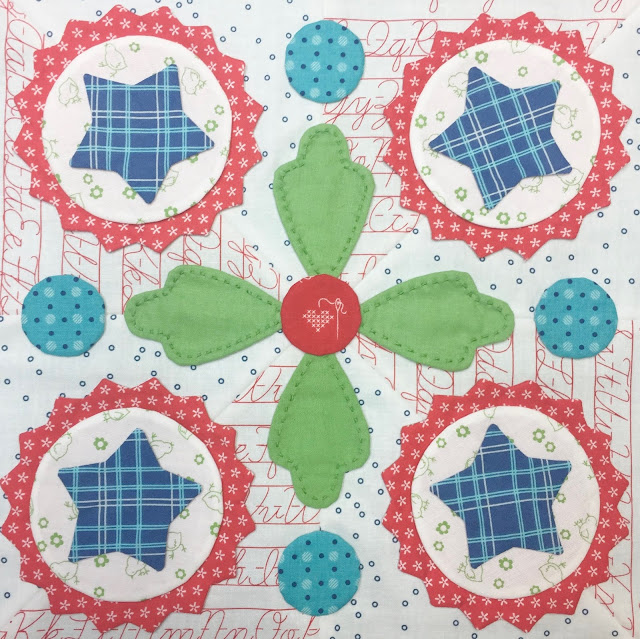
***Cleavages to clip are the 
sunflowers-stars and leaves***


Pin and glue baste the center circle 
and leaves first.


Measure in 3" from the corner 
and place your red sunflower shapes.

Layer with the circles first
 and then the stars.

The blue circles in between are
 1 3/4"in from the side edge.


Ready for applique!
I love the patriotic feel of this block:)


BLOCK 19


Here are the shapes that you will need 
to trace and sew for block 20:
4 - F-1
1 - F-2
1 - F-3
8 - F-10
4 - F-16
2 - F-20
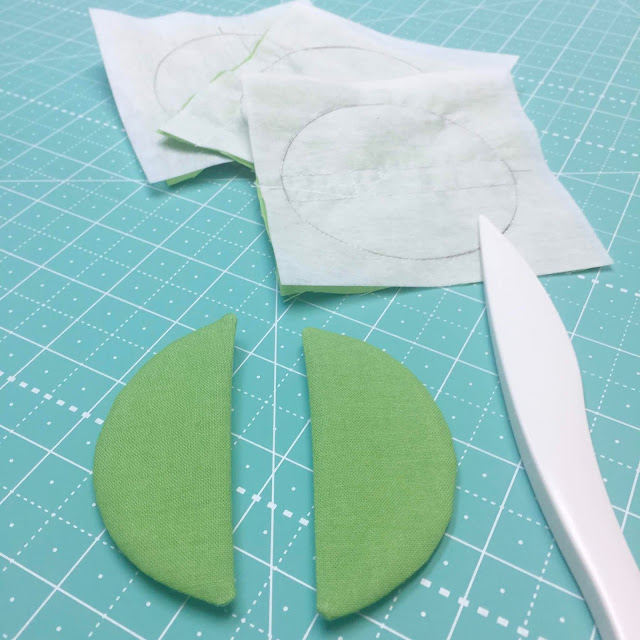
 (cut the 2 - F-20 in half after 
sewing to make the 4 tulip centers)

Cut 4 - 2 1/2" long 1/4" wide stems 
for the tulips
and Cut 4 - 3" long 1/4" wide stems 
for the little blue flowers
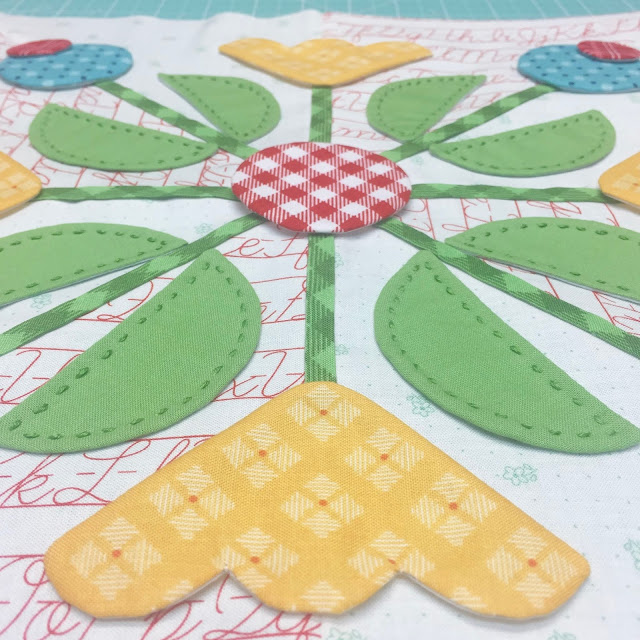
***You will need to clip the
 cleavage in each tulip***


Pin and glue baste the center circles first.


Measure in 3 1/2"in from the corner
 and place the tulip center.
Place the tulip on top:)

The blue flowers are about 
1 3/4" in from the side edge.

The tip-off the leaves are 2" in.


Ready for applique!


Because of the tulips...
this block reminds me of spring:)


Block 20

When all 20 of your blocks are completed...
you will need to use your 
12 1/2" Trim-It Ruler 
to trim them down to 12 1/2" square.

I'll show you what my quilt top 
looks like as soon as I decide 
how I'm doing it and 
get it sewn together:)
Of course I will give you 
all of those measurements!!

I'm not sure what the date will be
 but I do know that it will be
 BEFORE August 20th which is when my
 Autumn Love Sew Along starts.

I have really loved making these blocks
 with all of my 
Sew Simple Shapes sets together.

I hope this series has helped you to
 see how versatile they are and to think outside of the box when
 looking at each shape...
and seeing new possibilities:)
Talk to you soon!
xx
Lori


Monday, July 23, 2018

Sew Simple Shapes Series - Week Seven - Blocks 16 and 17 Tutorials!


Here we are at week seven in the 
Sew Simple Shapes Series
Click on the previous weeks
 if you are just joining in:


This week we will be 
making 2 blocks using the


For Block 16 you will need to 
trace and sew the following shapes:
4 - E-10
5 - E-11
4 - E-12
4 - E-16
Cut 4 - 3" long and 4 - 4 1/2" long 
1/4" wide stems from your spool.
Make your pinwheel background square.


The 4 - E-10 circles are for the leaves.
Mark the center after tracing the circle using the lines on the template.
Then use a ruler and draw 1/4" from center on both sides...or in other words...two lines 1/2" apart.


Sew on the lines like this.


Trim...


Turn and shape:)


On the E-16 shape you will need to
 clip the 2 cleavage areas.


Pinning and glue basting is the next step:)
Place the center circle first.


Measure 3" in from the corner and place 
the blue flowers...
measure in 2 3/4" in and 
place the red centers.
The yellow tulips are placed
 1 1/2" in from the side edge.


Always use the ruler to line everything up:)


Ready for applique!


I love these tulips:)


And the half circle leaves
 and red gingham center.


BLOCK SIXTEEN


Let's do block seventeen now:)


Trace and sew these shapes:
5 - E-10
1 - E-11
8 - E-12
4 - E-13
8 - E-17
Cut 8 - 3 1/4" long and
 1/4" wide stems from your spool.
Make your pinwheel background square.


The E-13 shape has inner curves 
that will need to be clipped.
3 clips in each inner curve will do nicely:)


Place the 2 center circles first. 
Measure in 3" from the corner and place the yellow gingham circles.
The flowers go in the center of each:)
The small aqua circles are placed
 1 3/4" from the side edge.


Pin and glue baste the leaves 3/4" up from the bottom of the stems.


Ready for applique!


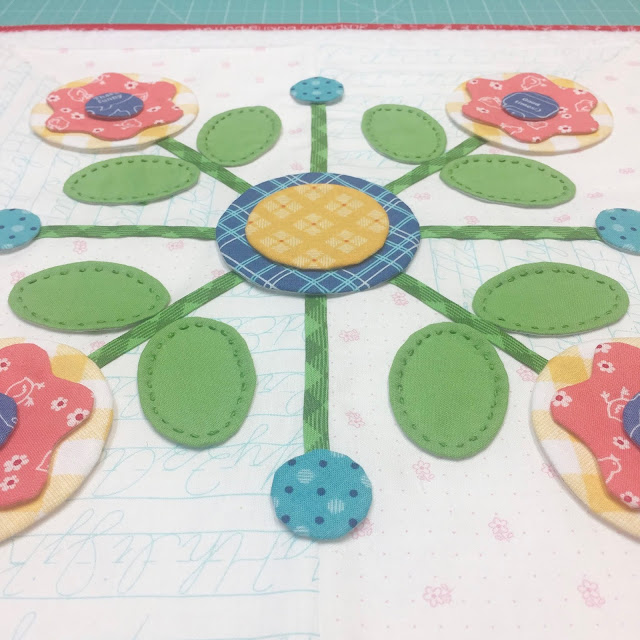
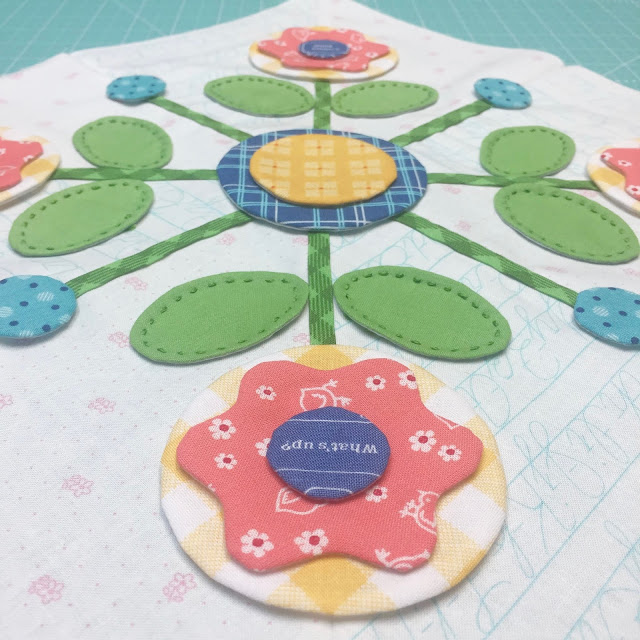
I love the cute little blue berries
 and the oval shaped leaves.


And I love that the flower fit
 on top of the circle perfectly!
(because those shapes were a 
frosted donut in the 
Let's Bake Quilt ...lol)


BLOCK SEVENTEEN

Next week we will have the last 3 blocks for a total of 20!
Those 3 are the ones made from 
 that I showed you in the beginning of this series:)

After that I'll draw up a setting
 and get may blocks
 sewn together and quilted.

Of course I will show you 
and give you measurements for the
 sashings and border as soon as 
I know what they will be.

My goal is to have it all completed 
before we start the 
Autumn Love Sew Along 
on August 20th....
YAY!
xx
Lori


Thursday, July 19, 2018

Sew Simple Shapes Series - Week 6 1/2 - Blocks 13, 14 and 15 Tutorials!


Welcome to week 6 1/2 cute people!
Yes...I did say 6 1/2.
I thought we needed one
 in-between week 6 and 7...
 so here we are!

Above is Block 13 and the
 first one that we will be doing today:)


We will be making three blocks 
(13...14 and 15)
with my fourth set of 


Pieces that you will need to
 trace, cut and sew for Block 13 are:
 5 - D-2
1 - D-4
8 - D-20
4 - D-23
Cut 4 - 3 1/4" long 1/4" wide 
stems from your spool
 and sew your pinwheel background block:)


There are no inner curves or cleavage to clip 
on this block and its an
 easy peasy layout with just a few pieces.

As usual...my center pieces go on first:)

I measured 2 3/4" in from the corner and placed the flower center.
I measured 3 3/4" in from the corner and placed the flower.
The tip of the leaves are 2 1/2" in from the side edge.


I always use my 12 1/2" Trim-it to 
make sure everything is lining up correctly:)


Ready for applique!


I love the simplicity of this block...


And the cute half circle flowers:)


BLOCK THIRTEEN


Onto the next block:)


For this block you will need the following Bee Happy Shapes:
12 - D-1
1 - D-2
4 - D-14
4 - D-20
Cut 4 - 4 1/2" long 1/4" wide 
stems from your spool and 
sew your pinwheel background block:)


Lay your center pieces out first and panther for glue basting.
I measured 2 3/4" in from the corner and placed the tip of my stars.
The top circle from the set of three measures 1 3/4" in from the side edge...


And the 2 circles on each side measure 2 3/4" in from the edge and are 2" apart.


Remember to use your ruler for perfect placement:)


Ready for applique!!


These circles are little and worth it!...
I love them sew much:)


Stars instead of flowers add a lot of interest and variety...
who doesn't love a red plaid star...right?


BLOCK FOURTEEN


Now for the last block with the 
Bee Happy Sew Simple Shapes.
I really wanted to use the stars again but this time in aqua:)


The shapes you will need for Block 15 are:
1 - D-2
1 - D-3
8 - D-5
4 - D-12
4 - D-14
4 - D - 16
Cut 4 - 2" long and 4 - 4 1/2" long 1/4" wide stems from your spool.
Sew your pinwheel background square:)


Place your center circles first:)
I measured 2 3/4" in from 
the corner and placed
 the yellow egg shape for the flower center. 
The widest part of the shape is at the top:)
I placed the red flower so that the bottom just barely overlapped the
 bottom of the yellow egg shape.
The starts are 1 1/2" from the side edge of the background block.


Before I placed my leaves I used my ruler to check that everything was correct...
then I put two leaves under each flower.


Ready for applique!


The aqua star print is from my latest collection called Autumn Love that is just being shipped to quilt shops world wide this week!!


I love this block too.
I love every block in this series and how they go together!


BLOCK FIFTEEN

Next week there will be
2 more blocks and we will be 
using the 
See you then!
xx
Lori
P.S. Here are previous weekly
 links for this series:


Related Posts with Thumbnails