Good morning!
Are you ready for a few more block recipes?
I hope you're having fun
baking each block with
Bake Sale 2!
And the Let's Bake
Today let's start with
this cute little
vintage hand mixer:)
You will need
E-8 E-15 E-19
Sew Simple Shapes
and the small Vintage Trim
in red for the cord.
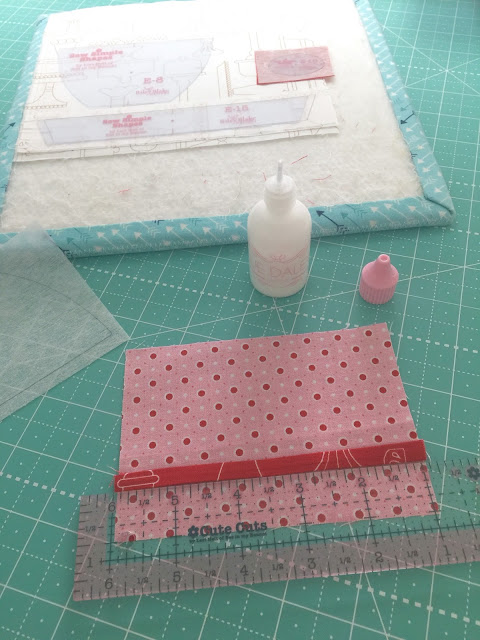
Run the strip through the
1/4" bias tape maker
and cut it 5" long.
Measure 3/4" up from the bottom
of your mixer fabric
and glue baste the strip
right above it like this.
Now you can sew your shape
just like you normally would
and the trim is already sewn
into the side seams...easy peasy!
After sewing these pieces...
measure in 2 1/2" from the
bottom marked line and
1 3/4" from the top
and then draw a diagonal line
from each point like this.
Also measure 1" in from the sewn line
on the oval and draw a line.
Now sew across these newly drawn lines...
backstitching on each end to secure.
Trim...turn...shape and press!
Place your mixer 3/4" in from the left
and 3/4" down from the top.
Pin or glue baste the inside handle space... taking note that it's
not in the center of the mixer
but over to the right more:)
Use the pattern on page 12
to trace your beaters and the
pattern on page 14 for the cord.
After tracing you can see
where to place the plug.
Do the cord first...
it's done in the exact same way
that we did with the large mixer.
I used all 6 strands of my Aurifloss.
Leave a little extra on each end
to tuck underneath the mixer...
And the plug...like this!
Now for the appliqué and embroidery!
I used all 6 strands of my
gray Aurifloss as well.
Also...
I used a red
Cute Little Button from the
pink jar for the knob:)
Super cute!!!
You will need to trim your block down to
6 1/2" square BEFORE
sewing it into your quilt.
Use the lines on the ruler
to make sure that you trim it straight
and also use the 1/4" aqua frame
around the outside of the ruler
(that represents your 1/4" seam allowance)
to see what the block will look like
after you sew it into the quilt!
Now let's mix up 1/2 dozen cupcakes!
You will need the
E-21 and E-24
Sew Simple Shapes
for this block.
Before sewing the cupcake papers...
measure in 1/2" from the bottom
of your traced E-21 shape
to make them a little shorter:)
Just sew all the way around
like you normally would...
using your newly traced line
for the bottom:)
Trim...turn...shape and press!
The small Vintage trim should be
slightly shorter than the top edge
of the cupcake papers...
so just under 2" long.
Place the cupcakes on the top row
3/4" down and 1/2" in from the sides.
put a few drops of glue
onto the bottom edge like this...
And place the cupcake paper on top...
overlapping it a little and
then "sandwich the trim in between.
Here's a side view of the "sandwich"
Continue baking each cupcake!
When laying out the rest of the cupcakes...
keep in mind that on the bottom row
the cupcake papers should measure
3/4" up from the bottom edge of your background fabric.
All of the cupcakes should measure
about 1/2" in from the sides
and be about
1/2" apart from side to side
and top to bottom:)
Ready for appliqué!!!
If you are worried about the
ends of the tim fraying...
just place a dot of fray check onto
each end but only AFTER you appliqué.
I chose Cute Little Buttons
for the cherries from these two jars:)
Your cupcake block should measure
5 1/2" x 8 1/2" BEFORE
sewing it into your quilt...
And looky how cute your block is in the quilt!!
Makes me want to have one of mom's cupcakes
with a fresh glass of milk!
Now let's move onto
cute kitchen storage
and make some canisters:)
I know I have already told you this
in the cutting but just in case...
for each canister you will need to
trace onto the interfacing:
3" x 4 1/4" and 3 1/2" x 5"
You will also need the
E-17 and the E-18
Sew Simple Shapes
for the labels.
Sew the red strips on top
of the canister fabric pieces
using a 1/4" seam allowance.
Press the seams open for less bulk.
Keep in mind that you want 3/4"
of the lids to show
AFTER sewing and turning.
You will have some fabric
leftover at the bottom...
just trim it away:)
Trim all of your pieces...
turn...SHAPE and press!
Use the Light Box and the
pattern on page 13 to
trace your stitching lines.
Prepare your vintage canisters
for appliqué
by placing them
3/4" in from the top...
as well as bottom and sides.
As you know...
I like to do the embroidery first:)
Sweet!!
Now you have a place to
keep your flour and sugar:)
Your block should measure
6 1/2" x 8 1/2" BEFORE
sewing it into your quilt:)
YaY!!
We are making great progress...
I love how these new block recipes
fit into the quilt perfectly:)
Be sure to post your pictures on
and use the hashtag
it's sew fun to look at
all the inspiration there!
Next week we will be making
a stack of cute mixing bowls...
doing the spoon blocks
and baking some donuts!!!
Until then...happy baking!
xx
Lori


No comments:
Post a Comment