


"Ironing Block"

Welcome to week four of the
"MY HAPPY PLACE"
Sew Along!
Join me here each week
when I will be doing tutorials
on the blocks for the quilt.
I will be posting each Monday
right here on my blog
and you can follow my tutorials
any time during the week that
is convenient for you.

For this sew along...
We are making the
My Happy Place Quilt
74" x 88"
I've been sew excited to begin...
This is going to be fun!!

The quilt is made with my newest fabric
collection called STITCH...


If you are just joining us and you
are looking for a kit...
simply do a quick google search of
"My Happy Place Quilt Kit"
and I'm thinking that you will easily
be able to find quilt shops
that still have a kit available:)

As all of my
Sew Simple Shapes Sew Alongs go...
The pattern for this quilt are
these three things:
1. Sew Simple Shapes
set and of course the
2. Sew Along Guide
and finally my weekly
3. Tutorials
that I do for you each and
every week during the sew along.
The set of shapes that we are
using for this quilt are called
MY HAPPY PLACE
I have already posted the
post which details all of the supplies
for the sew along and how it works.
I have also given the link there
for the free PDF Download
of the Sew Along Guide
to read that post.

As per the sew along guide
cutting instructions...hopefully
you were able to have
everything for this weeks block
all cut and ready to go.
The tutorial for this week
is right here on my blog
and we will be doing the
Ironing Block and Block Six...
so let's get started!

For the Ironing Block
you will need:
1 - L23
1 - L29
1 - L35
1 - L36
1 - L37
You will need your
background for the applique...
your 3/4" strips cut for the
3/8" bias tape maker
and your 1 1/4" wide strip for the
3/4" bias tape maker.
You will also need to
have all of your
background fabric and prints
for piecing the patchwork underneath the iron and everything for block six cut
and of course all of that cutting is
in the sew along guide:)

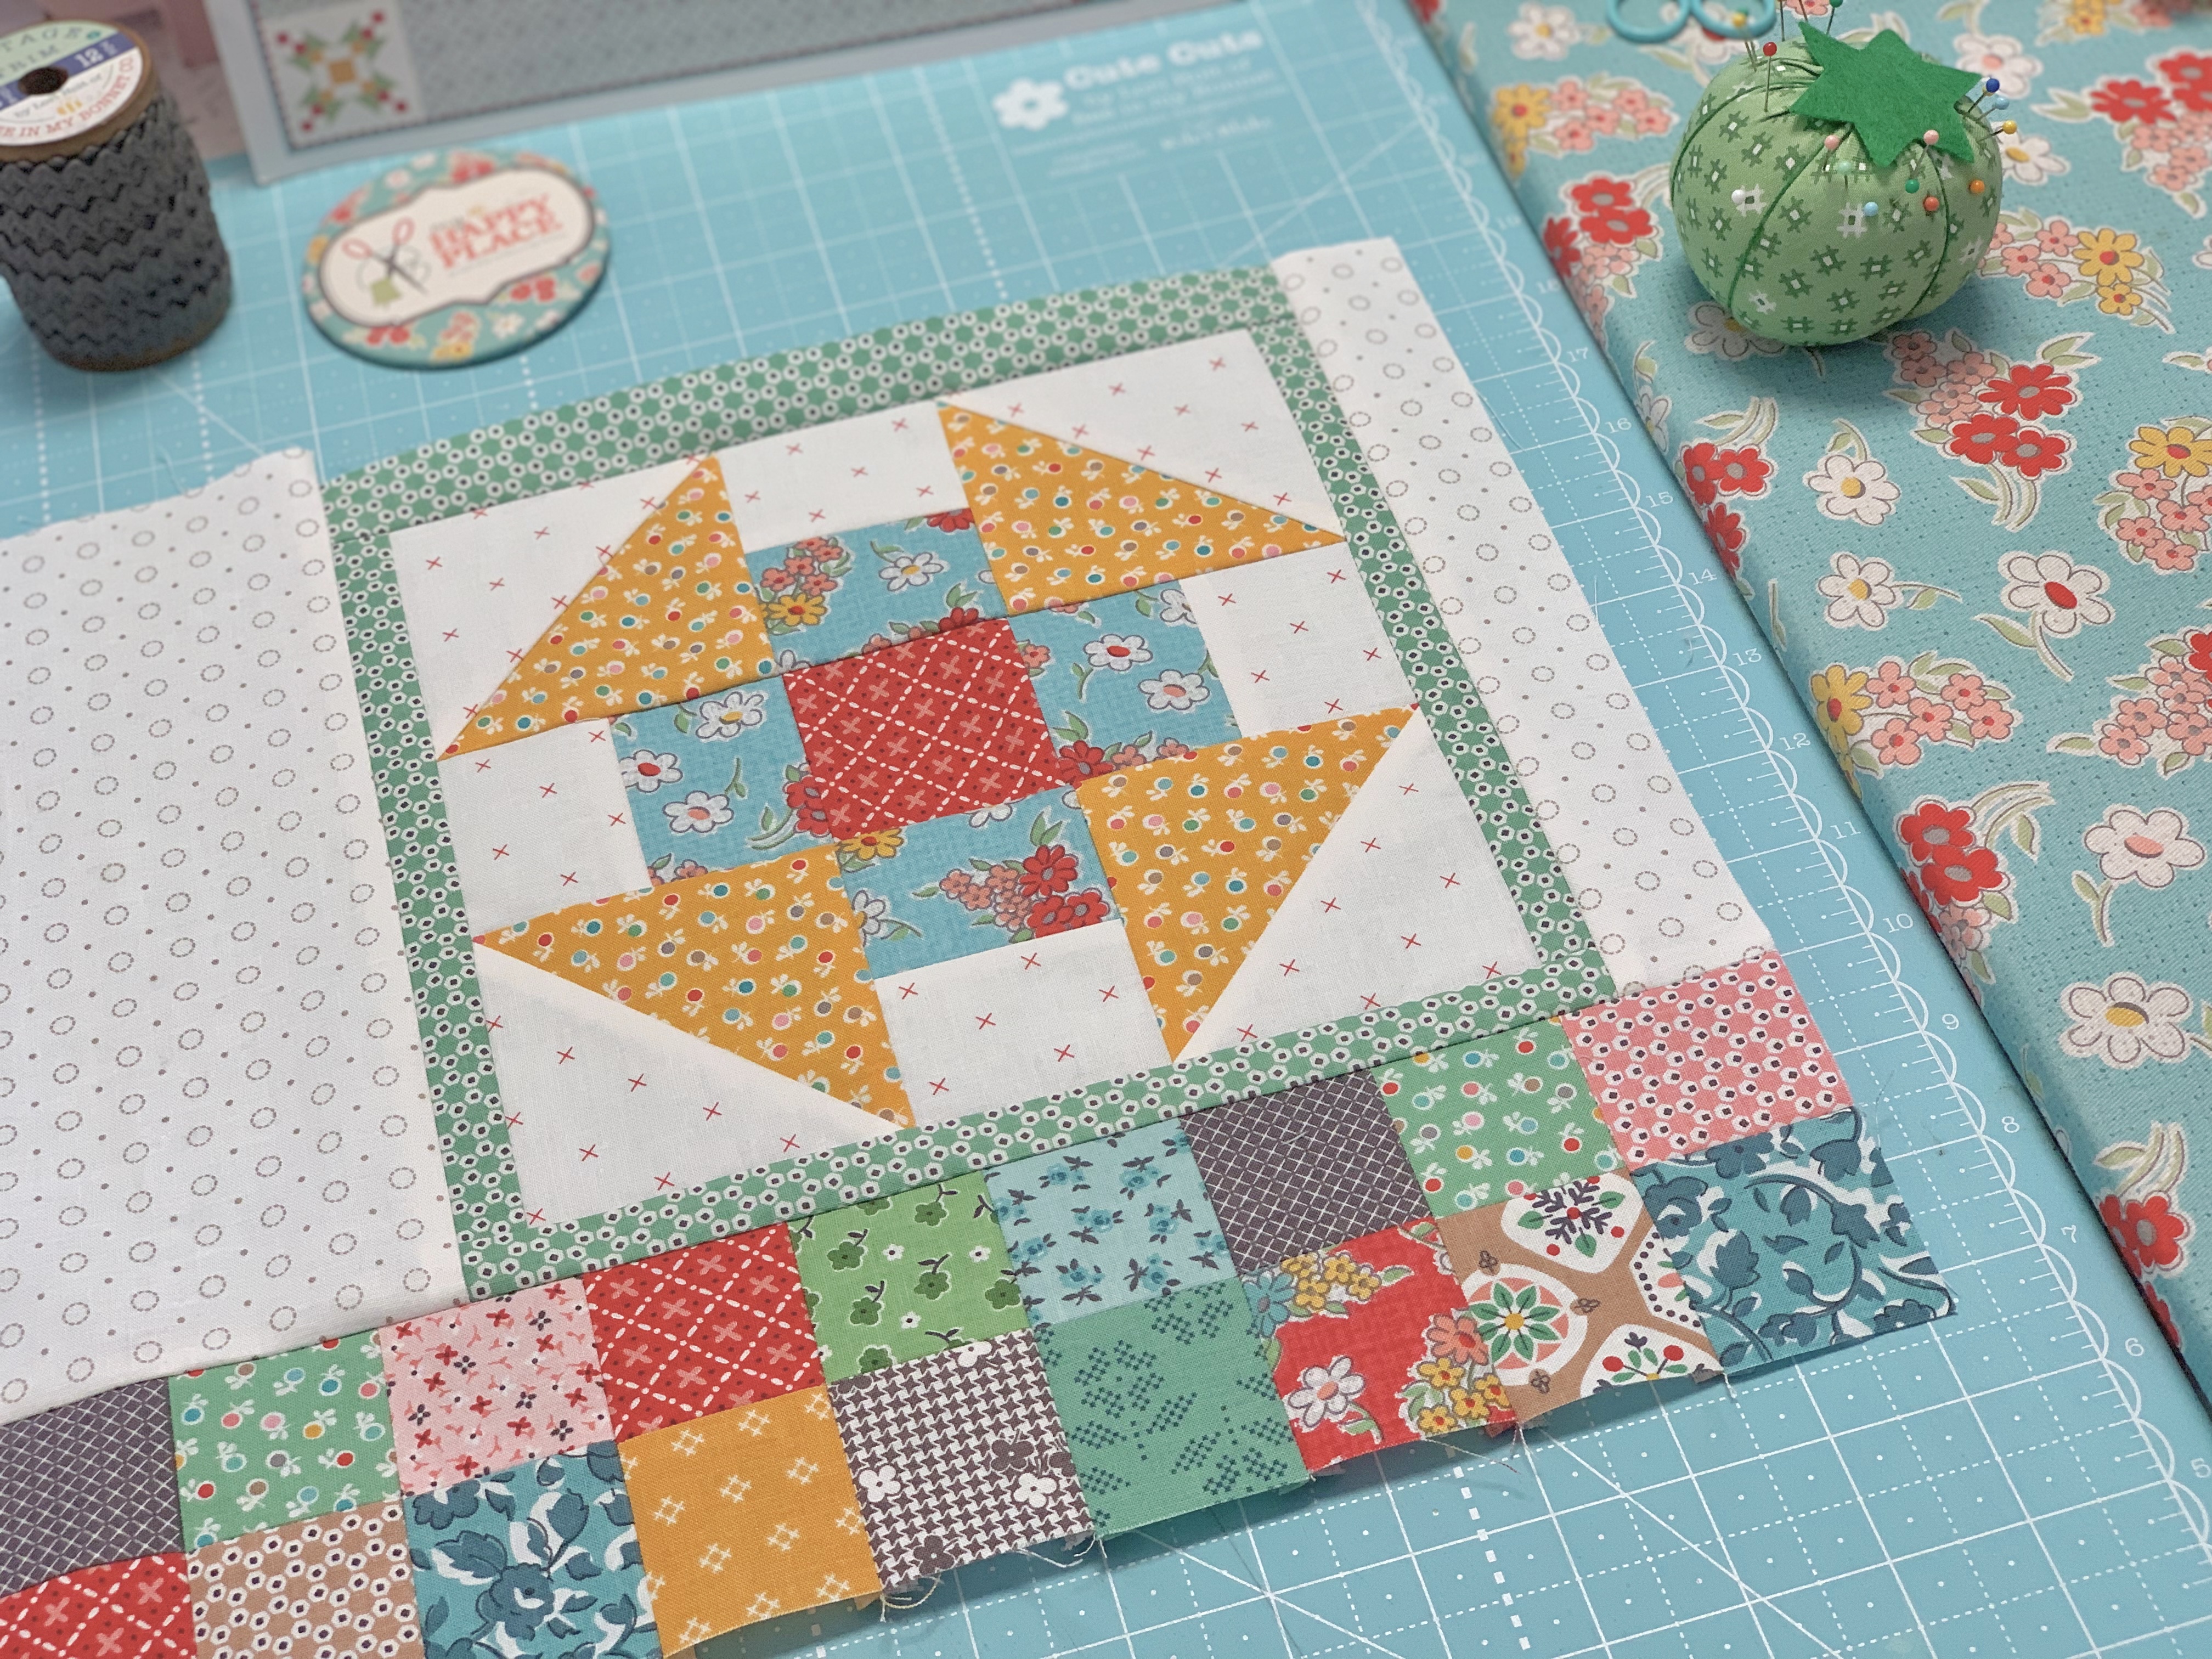
Let's start by doing all of the piecing...
first up is Block #6:)

Start by laying out on your design board
and sewing the rectangles together
like this so that you can simply
sew it together like a nine patch...

Like this!!

Now use the remaining four
background squares to sew an
easy corner triangle onto each corner.

Then trim off the excess...

And press!
This is how I sew my Churn Dash Blocks
and it's super easy peasy:)
Your block should measure
8 1/2" square at this point:)

Add the fabric strips and now
it will look like the block is sitting
on a design board on the ironing table
when it's sewn into the quilt:)
Now your block should measure
9 1/2" square at this point.

Go ahead and sew the
background strip to one side
of the block like this:)

The patchworks section of the block
is also easy peasy.
Simply grab your squares and
sew six sections like this.
Sew them together...

And press your seams open
during the entire process
so that it will lie flat.

You can do your squares in
whatever order that you would like...
or do them how I did mine.
I put mine aside on my design wall
and moved onto the next step:)
At this point it measures
3 1/2" x 36 1/2"

Now to sew the appliques!

After you have trimmed and
cut the interfacing for turning...
you will need to clip the inside curves
on both the iron handle and
the top of the spray bottle.

Turn and shape your appliques...
use the seam roller to help shape your
iron handle just like I showed you
when doing the sewing scissors
during week two.

It's kind of a strange shape
but it's easier than it looks:)

Now for the strips...

Run them through the bias tape makers
and press a slight curve
in the end of the 3/8" red strip
to use for the spray bottle.

3/8" gray strips:
Cut the strip for the bottom
of the iron about
11" long and press both ends under
so that it finishes at about 10 1/4".
Also cut two pieces 1 1/2" long and
press them in half for the plug ends.
3/8" red strips:
Cut a strip about 1 1/2" long
and press both ends under
so that it measures about 3/4" long.
Also cut the curved end of the strip
about 2 1/2" long and press the
curved end under about 1/4"
3/4" red strips:
Cut a strip about 2" long
and press both ends under so
that it measures about 1 1/4" long.
Also cut another one 2" long
and press in half
for the knob on the iron.
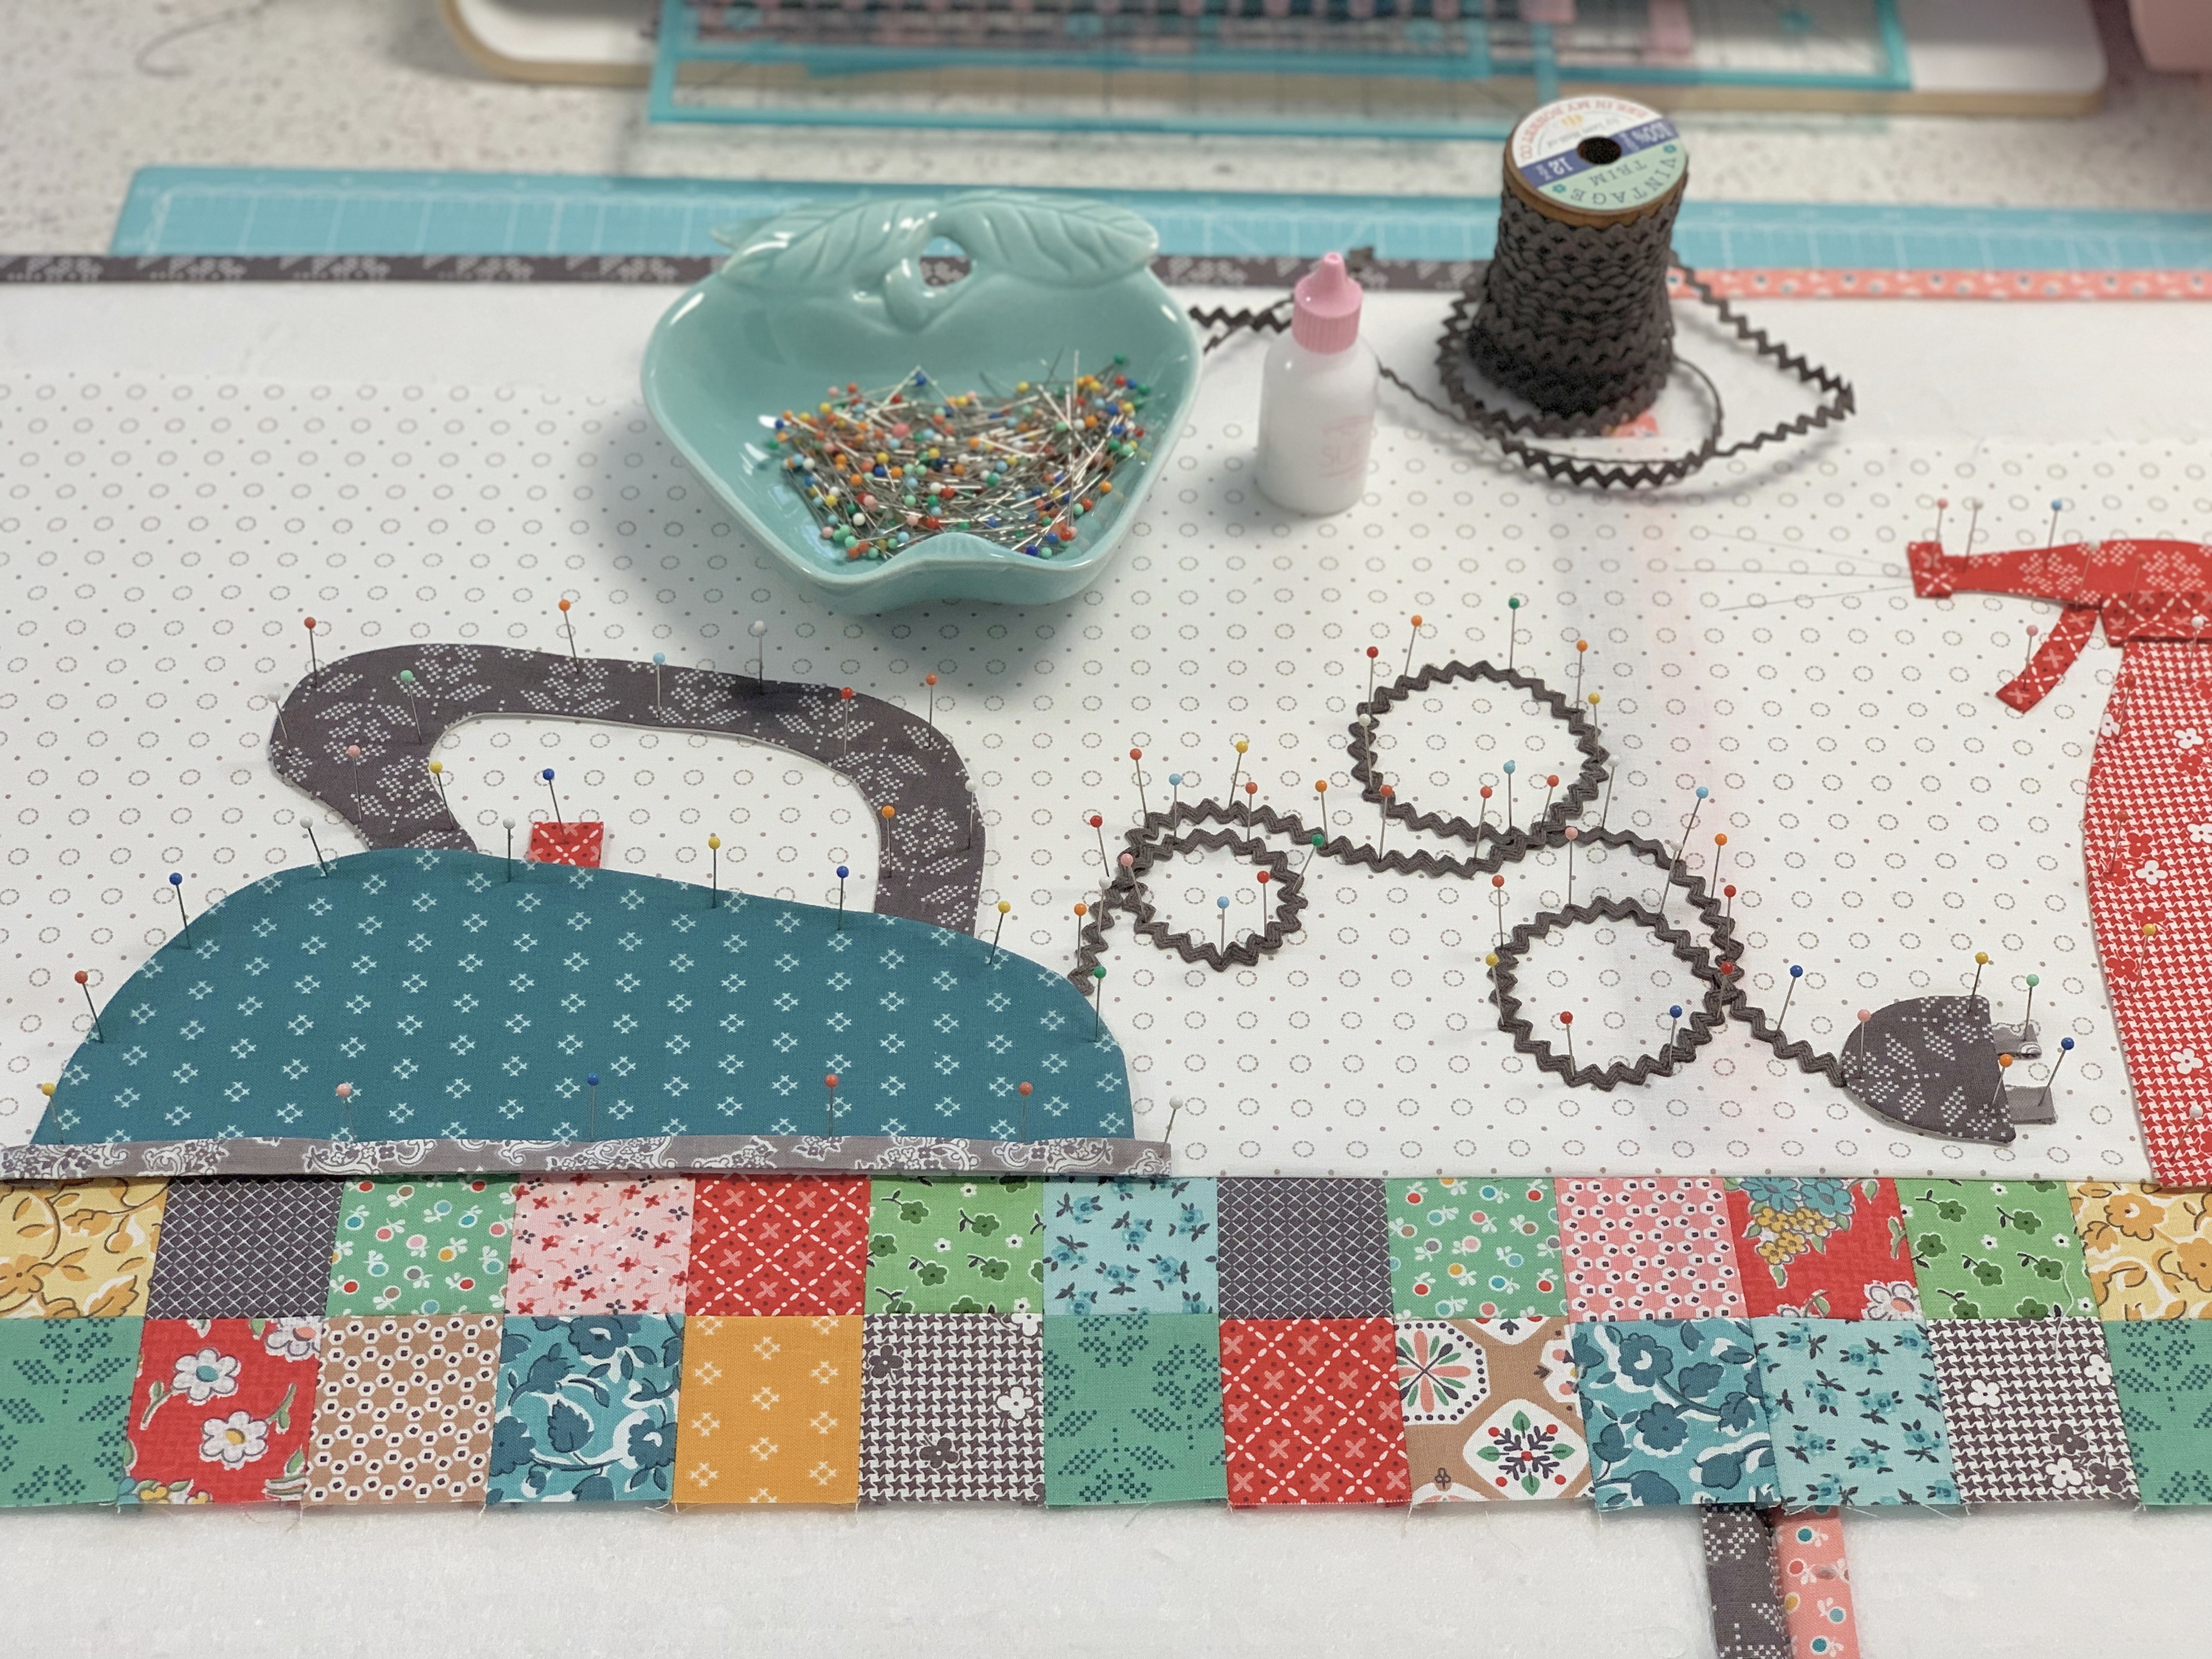
Before laying out your appliques for basting...
you will need to sew the block
to right side of your background fabric
and the patchwork along the bottom.
I made sure that my background fabric
on the right side and bottom were
cut straight before doing so.
Use a 1/4" seam allowance
and press away from the patchwork.
The top and left side of the background
for the applique part will hang
over the edges and that's totally fine...
you can trim them up after
the applique is completed.

It's easier to glue the strip
onto the bottom of the iron
and the red strip onto the top
of the spray bottle and
the end of the nozzle
like this before glue basting:)

Pin the spray bottle
approximately 1 1/2" away from
the pieced block and the plug ends about
3/4" away from the spray bottle like this.
Trace on the embroidery lines
for the spray and the lines for the
iron cord using the pattern
in the sew along guide.

Tuck the end of the vintage trim
under the plug before
glue basting it down.

You will know how far apart the iron
and the plug are by the
embroidery pattern for the cord...
the tip of the iron is about
2 squares in from the patchwork.
Pin your iron appliques into place
and Sue Glue them down:)

Now Sue Glue your cord.
When I do this I make sure
to place my pins BETWEEN
my little dots of glue.
I let the glue dry longer
for the Vintage Trim to make sure
it stays on there and
I don't want to actually glue
my pins in as well:)

As soon as it's dry
I'll stitch down the cord...
And embroider the spray lines.

All Sue Glued and ready for applique...

Side view:)

Time for embroidery!!!
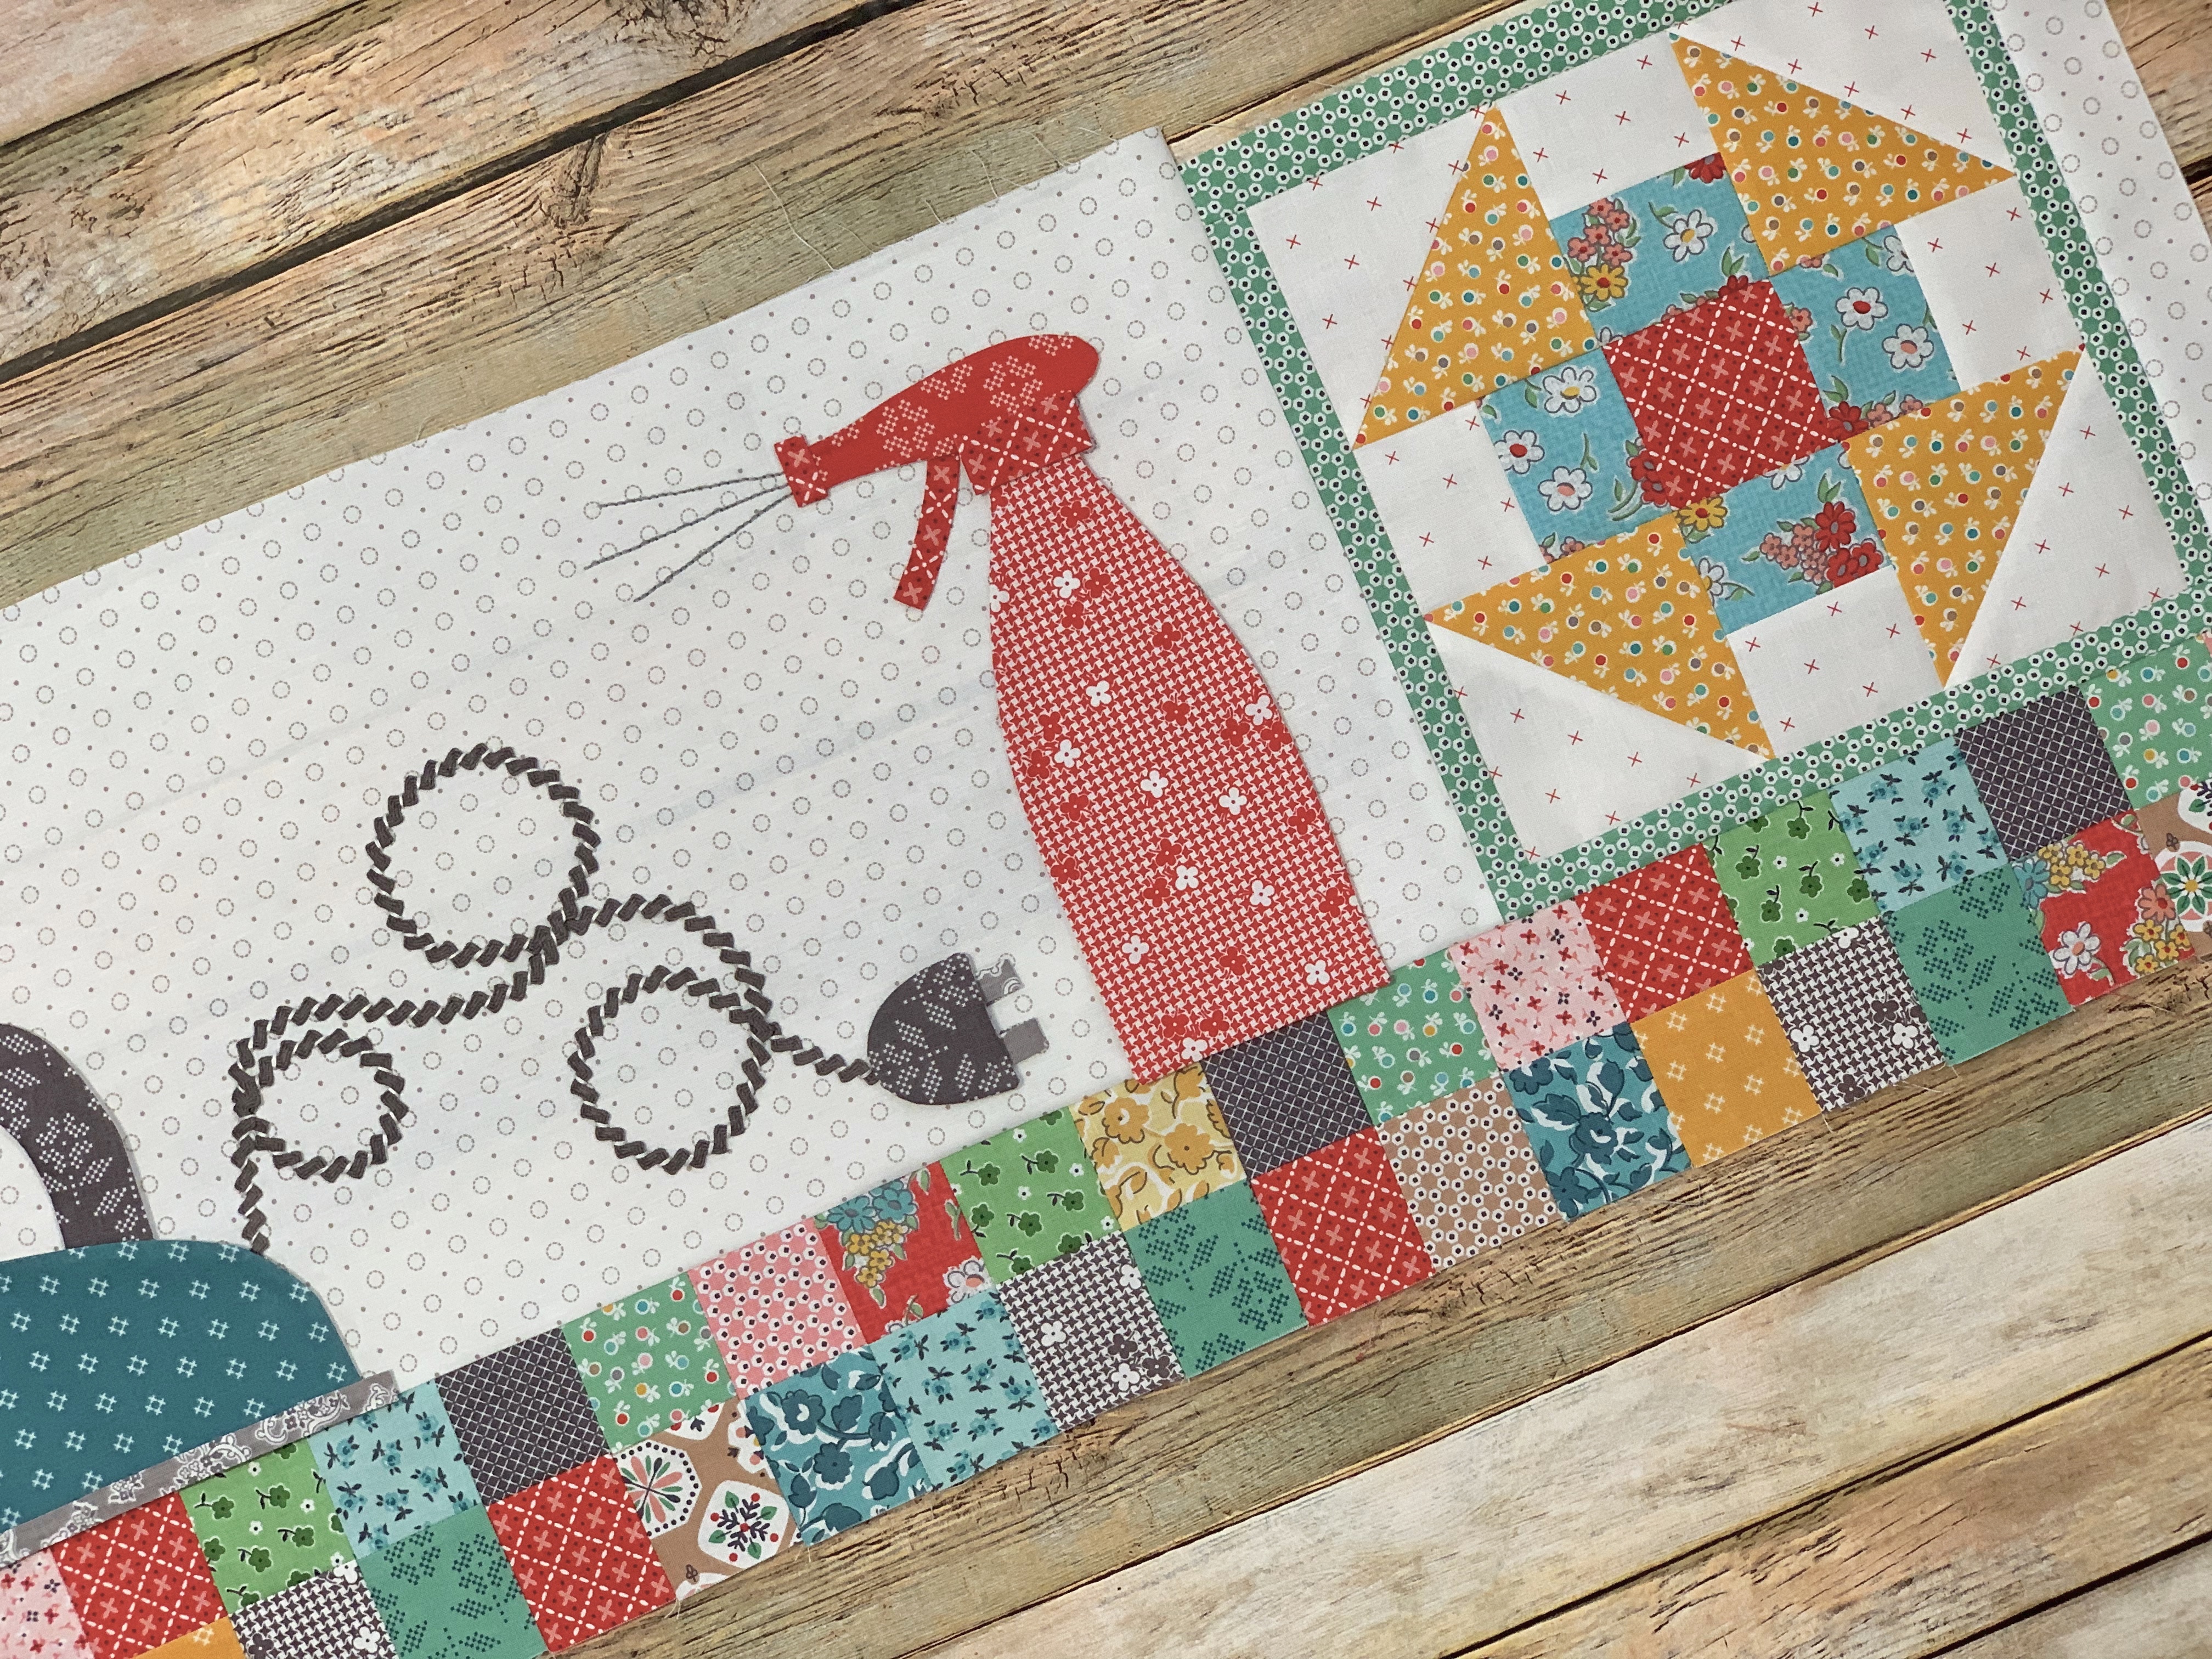
After I applique I'll trim down the
left side and the top
of the applique background.
All together with the patchwork
and the Block #6 added...
"IRONONG BLOCK"
should measure
12 1/2" x 36 1/2"
unfinished...
and 12" x 36" finished after
it's sewn into the quilt:)

These are all the blocks together
that we have made so far...
We are making great progress!!


Enjoy making your Ironing Block
for this week and I'll be back next week
for the pieced Quilt Blocks One and Two...
and the applique
Embroidery Scissors Block.
I'll do the Fat Quarters Block too!
xx
Lori


"Bee in my Bonnet"
Vintage 1966

No comments:
Post a Comment