Wednesday, March 20, 2013

The Bee in my Bonnet Row Along - Outer Borders Tutorial!


Hello.
It's me again:)
You can see here that my 
 top is complete...
and soon yours will be too:)
The row along is over!

***(edit)
YaY!
My book is now ready for pre-order!
The book includes the pattern for the row along quilt
 plus new blocks and 10 "spin off" projects!


Now that your inner borders are finished...
It's time for the final outside border:)

I have showed you about a bajilloion times 
the fabrics that I have chosen for the borders of my quilt!!!


But as I have said...if you want it scappy...
you can easily make it scrappy and it will look something
 like the outside border in my 
Now that you have an idea of what 
the scrappy verses one fabric looks like...
you can decide!
Both will be pieced exactly the same...easy peasy:)


Cut Width of Fabric strips.


From each strip cut squares.


If you are making a scrappy border...
Cut a bunch of different fabric squares:)


Cut your background fabric.


These are the squares for the easy corner triangles.


Now cut strips and join together like you did for the inner borders.

Set them aside for later:)


You will need 4 squares for the corners.
Sew an Easy Corner Triangle onto opposite sides of all four squares.


Trim and press towards the triangles.
Set them aside for later.


Now sew easy corner triangles onto the
 top 2 corners of your remaining squares.
You know the drill...
do I even have to say it?
(okay...trim and press towards the triangles)


Sew them together in a row like this.
Press the seams open:)

Pinning...
You know the drill for that too...from the inner border tutorial
so I really won't repeat it all again.
Just do it the same way!


Sew to the side of your quilt starting at the top ...


and ending at the bottom like this.
Press the seams towards the outer border.
Repeat for the other side.


Now join squares together in a row and 
then sew a corner piece on each end.


Then sew one of your previously cut  
background strips to the top like this.
Press towards the background.


Now pin and sew it to the top of your quilt.
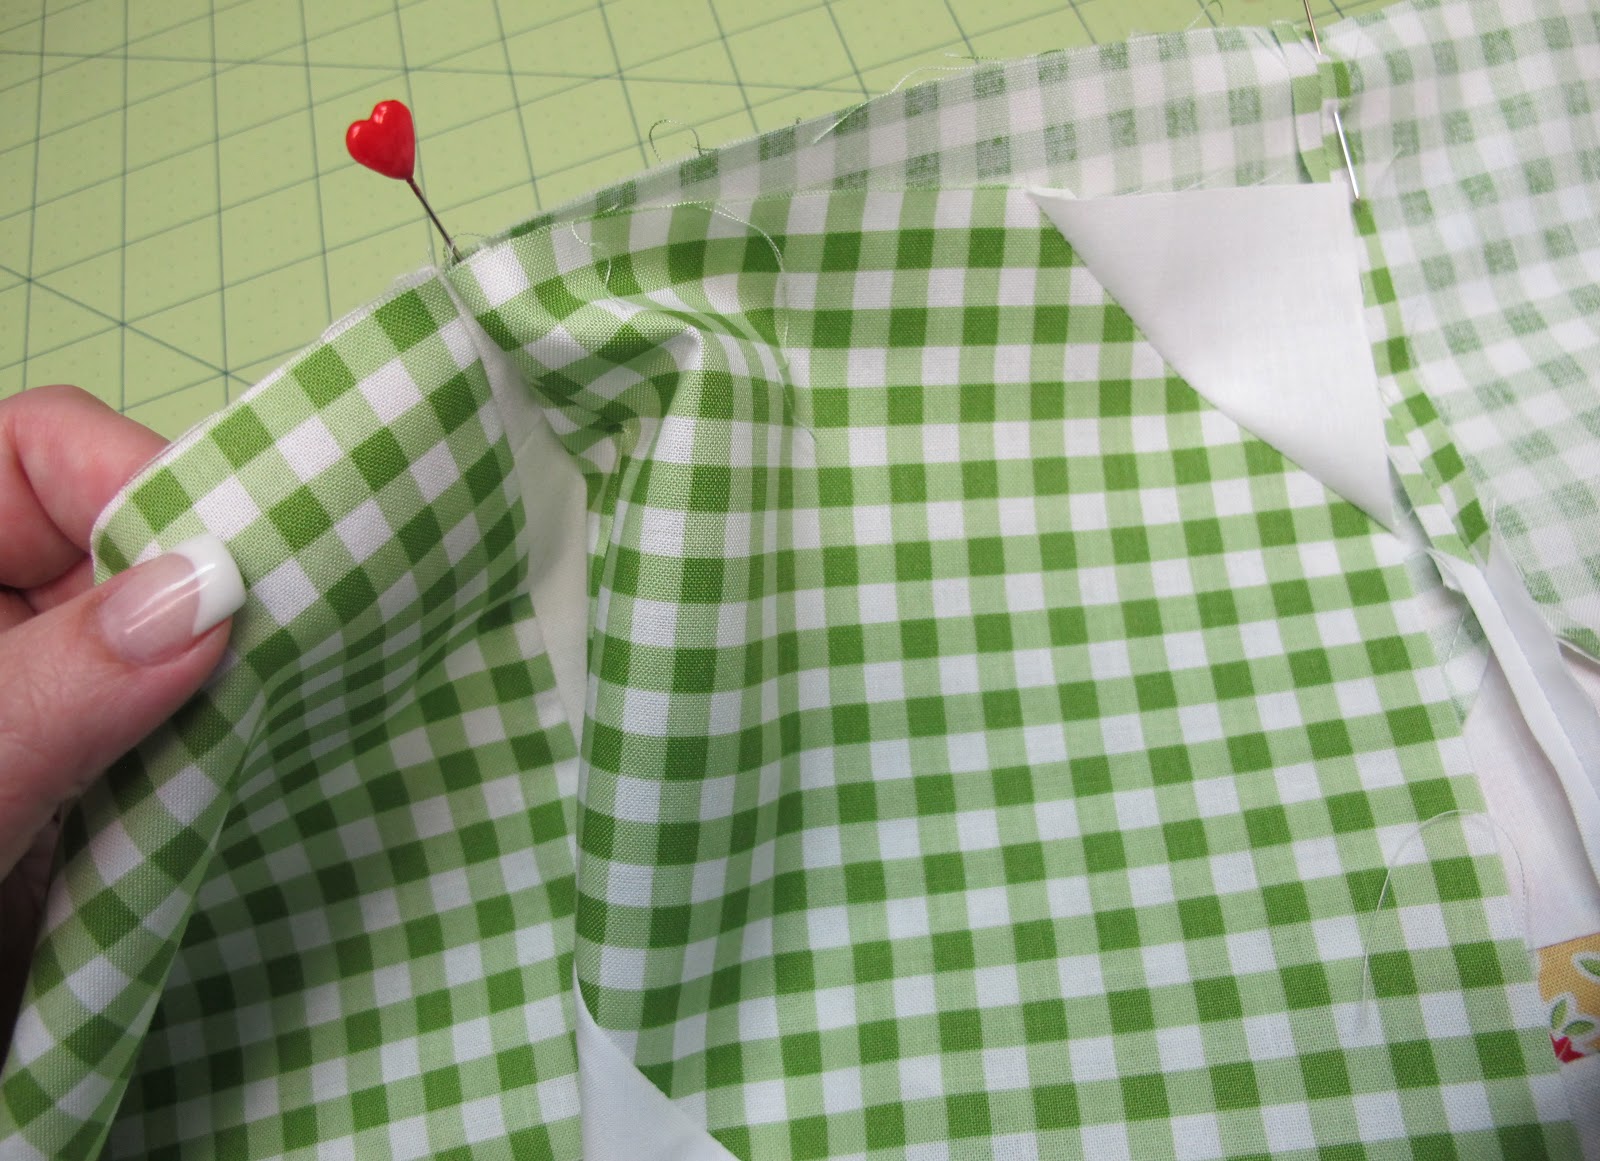


Make sure to line up and pin the seams right at the intersection
where the top and side of the outside borders meet
 so that you will have a nice crisp corner:)


Press seams towards the outer border and 
repeat process for the bottom of the quilt.


Pin and sew one of the background strips
 to the side of your quilt.
Press seam towards the background.
Repeat for the other side.


Give yourself a big pat on the back because
 you now have your row quilt top completed:)
YaY!!!
I'm so proud of you!!!

Stay tuned...
 because tomorrow I have a 
"preparing the back 
and the
scrappy binding tutorial"

Have a finishing up your row quilt top kind of day...
xx
Lori

Tuesday, March 19, 2013

The Bee in my Bonnet Row Along - Another Tutorial!!!...Inner Stop Border...


Good morning cute people! 
Today is inner stop border day...
tomorrow will be outside border day:)

I love to put a stop border in most of my quilts.
I think it's a nice addition between the 
inside center of the quilt and the outside borders...
and it's a great way to add a nice contrasting color to the outside border.


I am using white and aqua:)


Cut the selvedge off the ends.


Join all of the white strips together on the diagonal 
so that you have one long strip.
Press all of the seams open for less bulk.


Repeat for the print.
If you need a reminder on how to do this...
to go back to my detailed tutorial on sashings from row 2.


The long strip of your print...
one goes on the top of the quilt and one goes on the bottom.
Set remaining aside for later.

Fold the strips in half to find the center
 and do a quick press there with your iron 
to make a crease so that you always know where the center is.
Find the top center of your quilt and crease the same way.
Match up the center creases and pin.
(with right sides together)


Now pin the ends...


And then pin in-between...
using as many pins as you need for easing in to make it fit.


After pinning...sew across the top.


Repeat for the bottom with the remaining strip.


Press the seams towards the print.


Now for the sides.
From BOTH the background and the print 
long strips that you have joined...
Pin and sew the print strips 
to the background strips like this.

***From the remaining white strip...
Cut 2 long strips and set aside for later.


Press the strips that you have just 
sewn together towards the print. 
Now you are ready to sew one to each side of the quilt.


Again...
begin by finding the centers..
pressing a crease and
pinning from the center out.


***Make sure that your PRINT goes on the 
outside of your quilt when pinning!!!
So that when you sew and flip it out to press...


the WHITE will be on the outside:)
Sew both combined strips to the sides of
 your quilt like this...
and press towards the print.


Now sew your background strips
that you set aside... 
to the top and the bottom of your quilt.
Press towards the background.


Now your quilt is ready for the
pieced outside border!


As I said before...
I will be using one fabric for mine.
You can use one fabric too... or make it scrappy.
I'll show you all about it tomorrow!!!

Have a quilty kind of day...
xx
Lori

***(edit)July 18
The Row Along is over now and the pattern is now in my new book along with somw new blocks and 10 "spin off" projects from the quilt.
to reserve your copy!


Monday, March 18, 2013

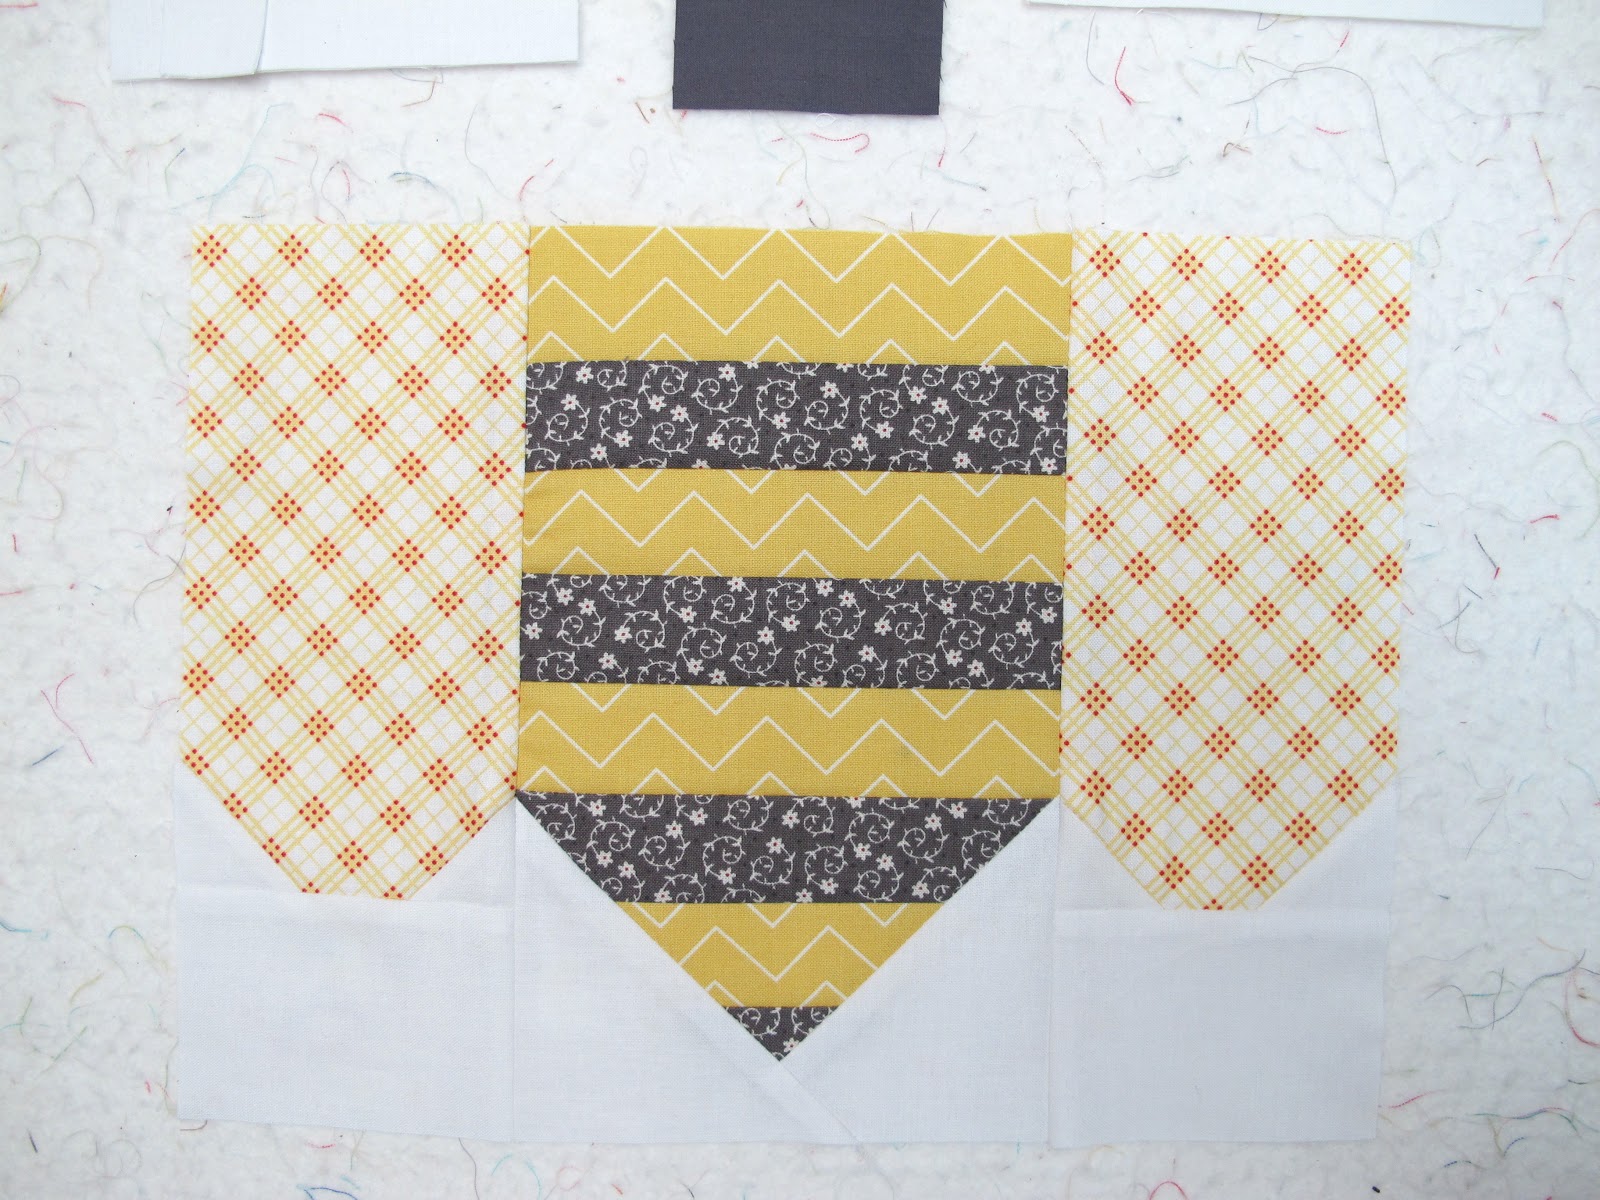
The Bee in my Bonnet Row Along...Quilt Label and a Bee in my Bonnet Bumble Bee Tutorial!!!...


I'll bet you thought you were finished making blocks for the 
didn't you?
Well...guess what???
It's not summer yet and you have a little more time to finish your quilt!

You really didn't think that I would 
let you get away without a label for your quilt did you?
Of course not:)
I just had to designed another block
to finish it off perfectly!!!

A bee in my bonnet bumble bee of course...
so that you can remember me 
and our fun time rowing along together:)

Lets get started!


Get your bee cut!!!


Start by sewing the stripes together to form the body.
***NOTE the yellow stripe is at top and the gray at the bottom:)


Press towards the gray.


Lay a square on one side of the body segment at the bottom.
Stitch from corner to corner to form an Easy Corner Triangle.


Trim and press towards the triangle.


Repeat for the other side...


Yes...your seams will overlap.
You will be forming a stinger:)


Now sew ECT to the bottom sides of the wings.
Trim and press towards the triangles.


See the cute little stinger?
ow:)
Now sew the rectangles to the bottom of the wings.
Press towards the rectangles.


Then sew the wings to the side of the body like this.
Press towards the wings.


You will be sewing 2 large easy corner triangles across each upper corner.


Use squares...
 and because they are larger than the Angler 2 lines...
lightly mark a stitching line from corner to corner with a mechanical pencil.
It will only take a second...
Don't guess because they are large squares and will
 easily become distorted if you don't mark them.
Trim and press towards the triangles.


Now let's move onto the head.
Sew ECT onto each side like this.


Trim and press.


Then sew the remaining rectangles to the top and then the sides.
Press towards each rectangle.


Finish up by sewing the head section to the body...
 then the remaining background strips to the sides and then the top.


If you want...
you can draw some antennae 
(on paper first)
 and then trace them onto 
the top of the bee head for embroidery. 


You can do the same with the words that you want on your quilt label.


You can see through your background fabric to trace the words 
by using a light box or taping them to a window on a sunny day:)


Now choose 4 colorful prints that you have used in your rows and cut them to border the block.
Press all seams towards the print strips.


Your label is almost complete and ready to be stitched onto your backing.
YaY!!!
I'll show you how to finish it up
in the backing tutorial
 later this week.


I will be using this green daisy print for my backing.


In my last post I showed you my outer border fabric....
the medium green gingham by Riley Blake.

I will be using the aqua daisy print for the inner stop border.

I will also be using my
 white background fabric for all of the borders.
We will talk about the binding later:)


Today kicks off a week long celebration of
  finishing up the quilt...
ending with a 
fun giveaway announcement on Friday!
(so be sure to leave me some bloggy love)

Have a quilty kind of day my friends...
xx
Lori


Related Posts with Thumbnails