I just got my
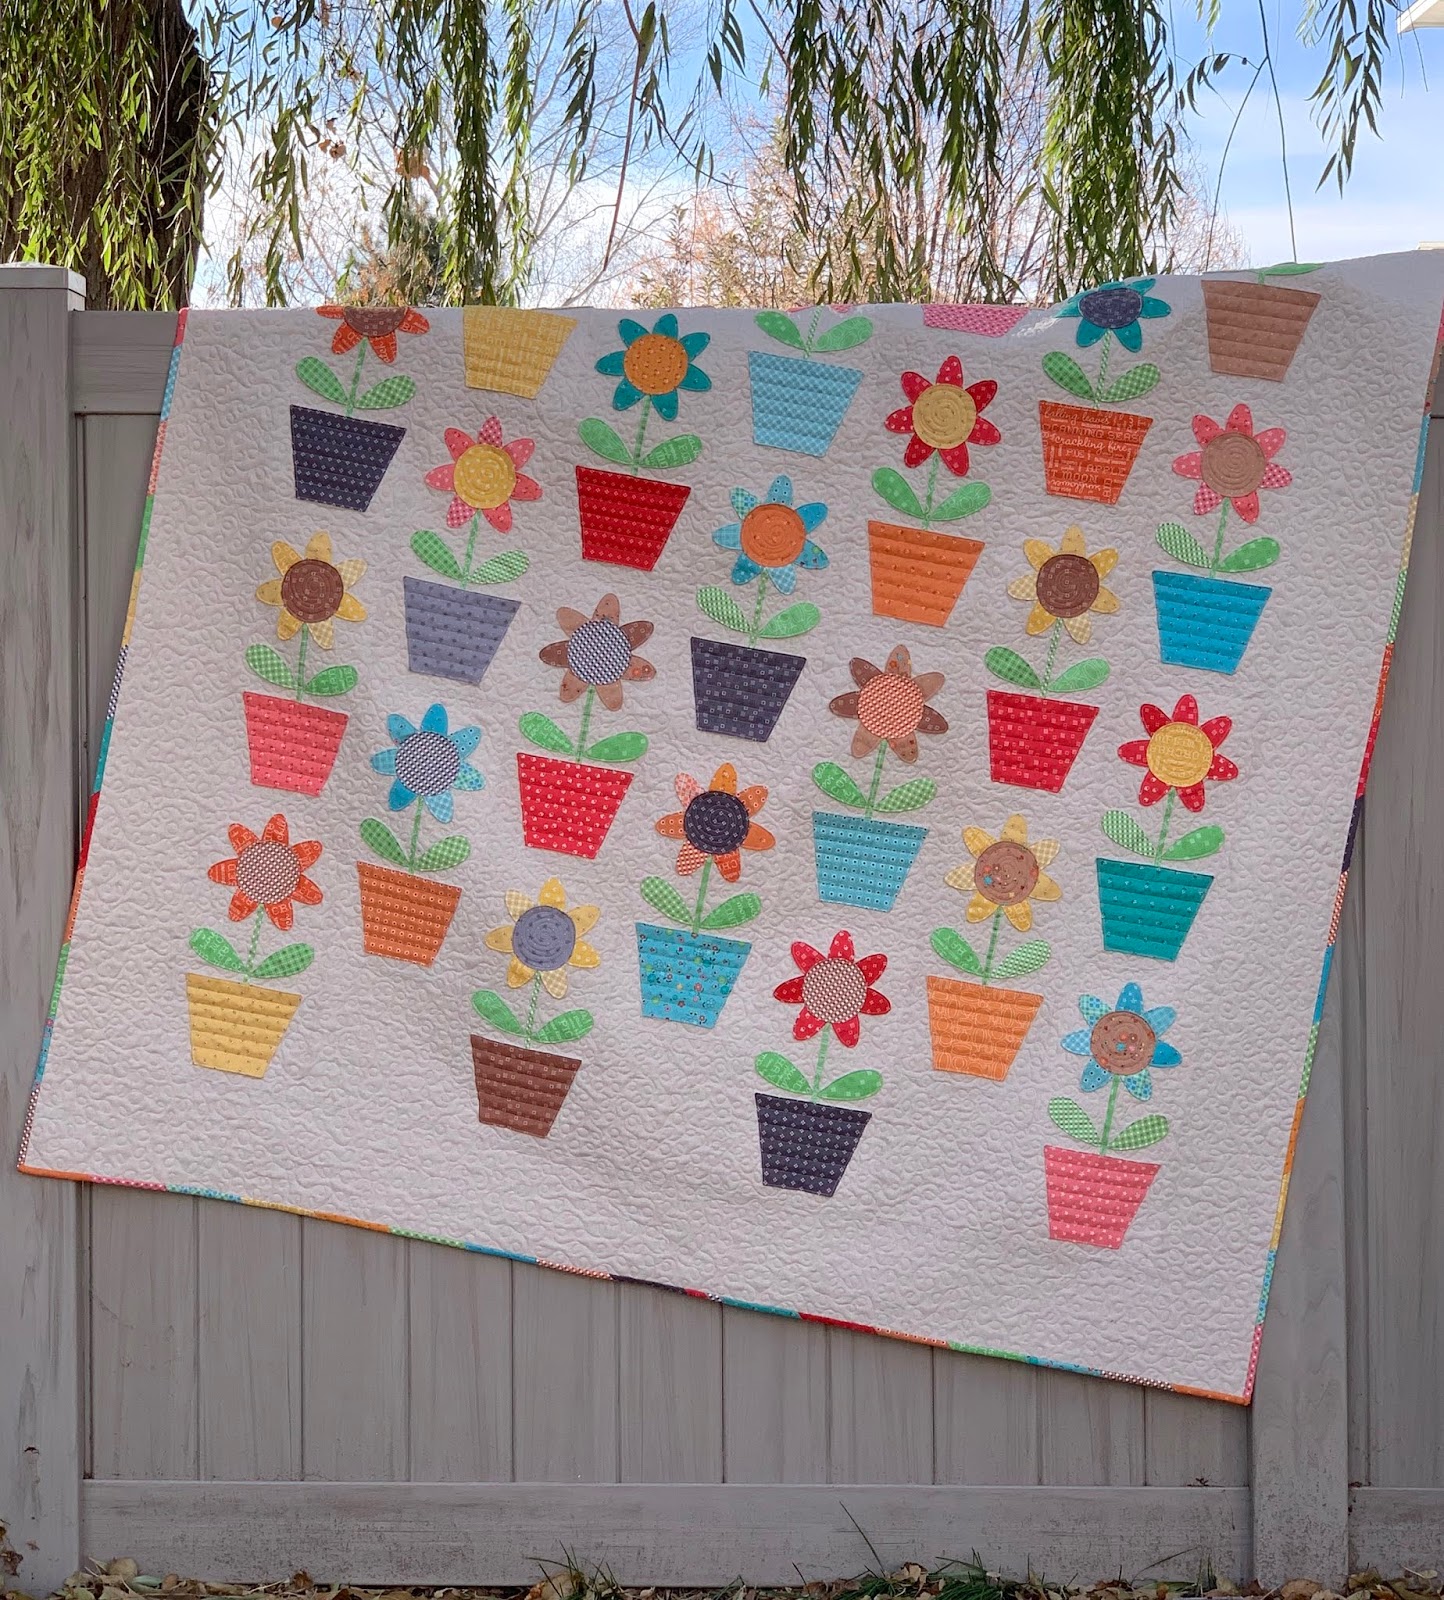
Fall Flowers Quilt
back from my friend Juli
who does my quilting and always
does such a fabulous job!
Now I want to show you how I made it:)

The blocks are super fast and easy
to prepare for appliqué...
and I decided to applique by machine
to make it even faster!

I used my Autumn Love fabric collection
and was able to use a lot of
the leftover bits and pieces
from the sew along...
especially for the flower petals.

I used 4 of the
Autumn Love Sew Simple Shapes:
F3 for the flower center
F10 for the leaves
F20 for the petals
F33 for the flower pots

The petals are really easy to make
because you just sew one F20 shape...
cut it in half ...
and you have two petals!
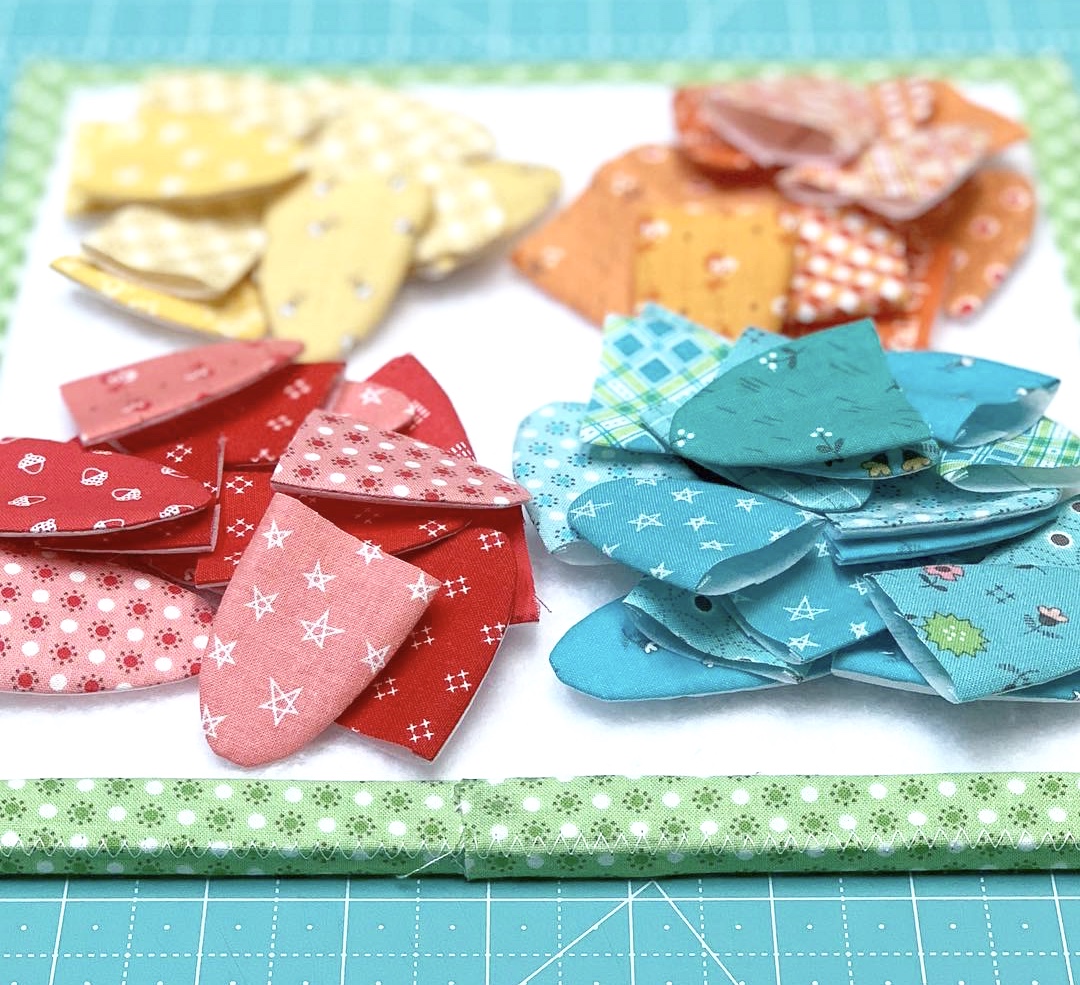
I used all of the prints and
divided them into piles of colors.
For each flower you need 7 petals.

I used all of the green prints
to make the leaves and stems.
You need 2 leaves for each flower.
Each stem is cut 5" long after preparing
and I used the 1/4" bias tape maker
so that they measure 1/4" wide:)

I started out using only the
browns and grays for the centers
and then added more colors later.
At this point I was not sure
if I was going to make a runner or
a quilt so I didn't know
how many blocks I would end up making.

I used all of the color prints
in the collection
to make the flower pots.

For the background I chose to use
the new linen by Riley Blake Designs.
This color is called natural.
I cut my background blocks
10" x 18"
and later trimmed them down to
8 1/2" x 16 1/2"
after the applique.

I started with this pile all ready to go!
I prepared all of my appliqués
just like I always do
with my sew along quilts.
If you have not used
my method before...
to watch the Autumn Love week one
video where I show you how.

First I pressed my background in half
so that I had a nice center line.
I pinned and glue basted the
flower pot 1 1/2" up from the
bottom edge of my background
and then glue basted
the stem down the center..
tucking 1/4" under the flower pot.
Because I cut my stems 5" long...
by the time I tucked the top edge
under the flower center by 1/4"...
the length of stem showing is 4 1/2" long.

After I pinned my circle...
I tucked the raw edges of the
petals underneath it
starting at the top and centering
that petal and then working my way around.
The flower petal at the top
measured about 1 1/2" down from
the top edge of the background.

After I glue...
I remove all of the applique pins
and layer my ruler on top
and then my bumble bee to
weight it down while
drying for a few minutes.


All dry and ready for applique!

I took it to the machine and
decided to just do a
"top-stitch applique"
by going around the
edges of each piece.
I sewed about 1/8" inside the edge
and used a neutral thread
for all that matched the linen.

I backstitched a little
when I stopped and started.

On the flower top...
I did all of the petals first and
then finished up with the circle.

Easy peasy...
and one block took me about
10 minutes to machine applique!

All of my flowers were about
14 1/2" tall from top of petal
to bottom of pot.

I used my 8 1/2" Trim It Ruler
and trimmed it 8 1/2" wide
by starting at the bottom
and using the center line
on the ruler to line up with
the center of my pot and the stem...
and trimmed the sides

Like this.

Easy peasy!!

Then I trimmed off the top and the bottom
so that the block measures
16 1/2" tall now:)
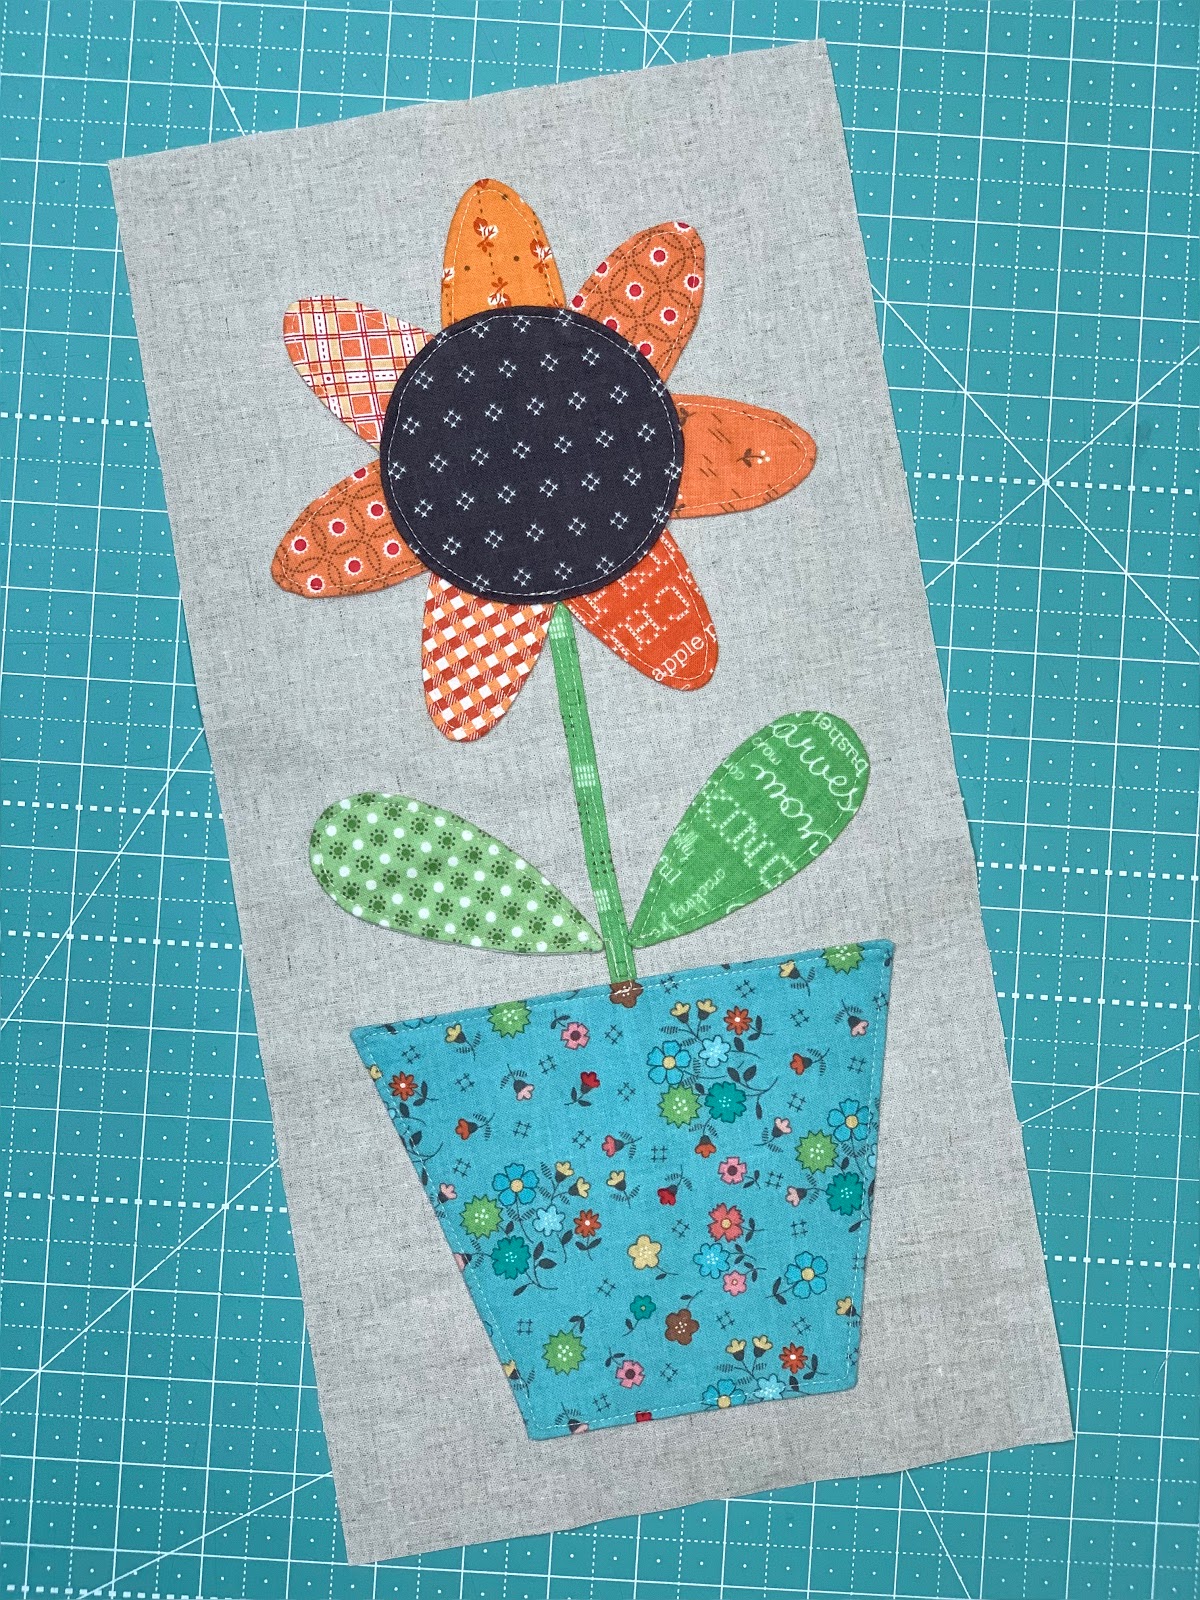
Fall Flower Pot Block
8 1/2" x 16 1/2" unfinished
Ready to sew into the
quilt or runner:)

At this point is where I decided to
make more blocks and do an
entire quilt because they were
so fast and easy and it was fun
to make all different
color and print combinations:)
Yes ...lol...
I'm a quilter and I like to
play with fabric!!

My potted flowers kept growing...

And growing...

Until I had 25 Blocks!

I started to lay them out and
decided that off setting them
like this would be fun way to finish:)

I cut 6 - 8 1/2" squares of the linen
to add to the top and bottom
of those rows where they are offset.
I really loved the way they
looked on the natural linen:)

I sewed 4 long rows of 4 flower pots
and 3 rows of 3 flower pots
and those 3 shorter rows are the ones
that I added the 8 1/2" squares to.

I decided to use the linen as
the borders as well!
YES! I love it!
I cut 2 side borders
6 1/2" x 64 1/2"
and added them first.
The top and bottom borders are cut
6 1/2" x 68 1/2"

The quilt measures 68 x 76
and I'm sew happy with it!
I decided to add a scrappy binding...

And so I grabbed a
2 1/2" strip roll and used some
of the strips to make it.
Cut the pieces about 6-7 inches long
and join on the diagonal until
you have at least 300".

I think the scrappy binding really
adds the perfect finishing touch
against the linen.
The linen is a dream to work with...
and in fact I'm using it
for the background in my next sew along...
Farm Sweet Farm!
When working with linen
you should probably
pre-wash it for shrinkage purposes.
It doesn't shrink a lot but it will
shrink at a different
rate than the fabric...
which by the way I do not prewash.

I super love the
scrappy happy look of my
Fall Flower Pots Quilt!

It really was so fun to make
and adds so much vintage goodness
to my fall decor.
It's also versatile enough
to use year round!

It was such a beautiful fall day today...
blue skys and all!
I hung my quilt over the gate where the colors of my barn and shed
look so cute with it:)
I hope you all have a wonderful week!
Thursday is Thanksgiving
and I am sew grateful for all of you wonderful and amazing quilters.
Thank you so much as always
for sewing along with me:)
xx
Lori