Thursday, December 6, 2012

Stitchy Kit...


Meet my new Stitchy Kit...the perfect companion on a stitchy kind of day.
She can sit nicely over the arm of your favorite chair and be quite useful!


Or you can fold her up and tie her for a stitchy traveling companion.


She holds all kinds of fun little stitchy friends....
would you like to meet them too?


Miss Tape Measure cozy...


Miss Needle Keeper...


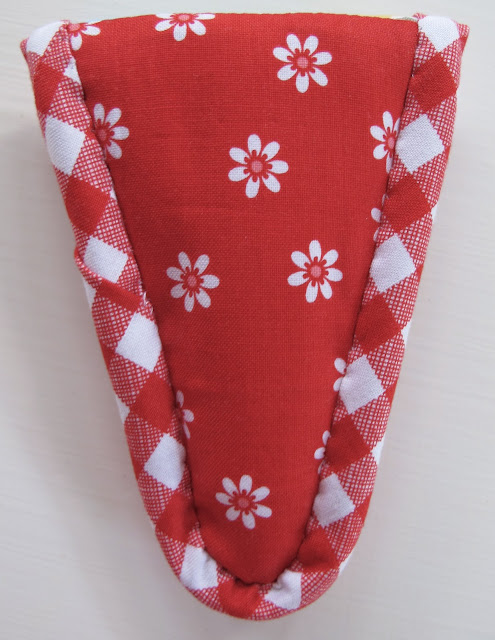
Miss Scissor Cozy...


and last but not least...
Miss Flossy Bag.


is now available ...
and included are two embroidery patterns.


My Daisy Love stitchery that I blogged about here


And my little "Needle & Thread" embroidery pattern.


by Lori Holt
of
Bee in my Bonnet


A BIG THANK YOU
 to all of you who have been so patient with me as I have
 worked on getting my new creations from 
Fall Quilt Market into pattern form.
I'm happy to say that they are all finished!!! 
YaY!!!!

if you want to have a stitchy kind of day:)
xx
Lori

Wednesday, December 5, 2012

The Bee in my Bonnet Row Along - Row 8...Mittens!


Good Morning cute people!!!
We are full on into winter here and that means mitten wearin' time...
and so it's time to whip up a few pair for row 8 of the 


We will be sewing warm woolen mittens:)
So...
1.Change your rotary blade...
2. Plug in your iron...
3. Make some cocoa...
4. Download "Baby it's Cold Outside" on your iTunes...
and let's get started!


First cut all of the background for the entire row...including sashing.


Okay...now let's cut and sew one pair of mittens.


Sew a square onto these corners of the mittens and the thumbs.

Trim....


and press towards the triangles.


Now sew a square onto each bottom corner of each mitten.
Trim and press towards the triangles.


Sew a rectangle to the bottom of each thumb.
Press seam allowance towards the white.


Now you are ready to sew the thumbs to the sides of your mittens.


Press seams toward the mittens...
not the thumbs.


Place a square on the top inside corners and sew easy corner triangles.


Trim and press toward the white.


Prepare the cuffs by sewing a white rectangle on one side...
and another rectangle on the opposite side.
Press both seams toward the cuffs.


Now add the cuffs to the top of each mitten and press toward the cuffs again.


Sew a strip between each pair to join them together.

Your first mitten block is complete!


Just for fun... 
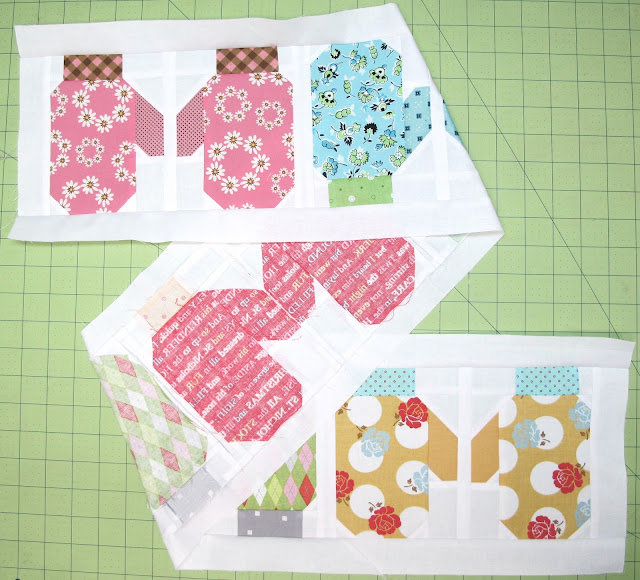
I chose to use a different fabric for the thumbs on some of my mittens:)


And there you go!!!
Colorful and  cozy winter mittens.
I can't wait to see yours!
I love it when you post them to the 


I have had several emails in the last little bit asking if it's too late to join up.
Of course not!
As I've said before...
you have until next summer:)

***EDIT July 2013
The pattern and instructions for the 
BIMB Row Along Quilt are in my new book
"Quilty Fun"

to reserve your copy today!


Let me know if you are having fun with the row along...
I'd love to hear from you!
Have a warm and woolen quilty kind of day:)
xx
Lori


Monday, December 3, 2012

Tilt O' Whirl....a crazy fun ride!!!...


Meet my Tilt O' Whirl quilt.
Each block of swirling circles looks like
 the top view of a Tilt O' Whirl....
my very favorite ride!!!


This quilt will have you playing with circles once again.
 Are you getting tired of playing with circles?
Oh!!! I hope not!!!
 As for me...I just love circle blocks...
always have...
always will.
I even put more circles on the borders:)


I used light gray for the sashings...
 with red posts...
 and a red yo-yo in the center.


The blocks are easy to assemble...
4 patch backgrounds and 4 easy corner triangles each.


All of the circles are easy to sew using the pellon method.


And once again each circle in this quilt are sewn from the circles in 
these 3 prints from


Also included are the patterns and directions to make this
 bunting/banner in 2 sizes. 
The small bunting is made 
with the circles from the 3 prints also... 


And the larger bunting is made with 5" squares.
I think both sizes look cute together...
don't you?
I showed the larger bunting at quilt market but
 I didn't show the small because 
I ran out of time and didn't get it made:(


I hung the large one on the monkey bars in my back yard 
for a photo or two the morning before it 
flew on a plane to Houston:)


I liked the way it looked outside too...
and I'm sure I'll be hanging these banners inside and out!


45" x 45"
by Lori Holt of Bee in my Bonnet


You can use my new Circle Rulers to make the banner ...but they aren't necessary.
For those of you who have been asking about my rulers...they are coming very soon!
We are just awaiting the shipment so that they can be packaged and shipped out.
They will be available online, or at your LQS or in my new Etsy.

Let me know what you think about my newest pattern Tilt O' Whirl....
does it make you want to ride?
Have a quilty kind of day my friends:)
xx
Lori 


Related Posts with Thumbnails