Monday, July 9, 2012

The Great Granny Along!!!...


Good morning cute people!
I'm sew excited to share my 
very first quilt along with you...
and of course...
you are ALL invited to
 join in with me:)
(Oh!...I "sew" hope you do!)

How do you play you ask?
Well, you simply make a block...
 or two...or nine...haha 
(however many you want)
Then join the flickr group and
 post your photos!
Click below to join the club!!! 
Let me and all of the other
 members be inspired by your 
fabric choices, blocks and  
finished quilts! 
 I will be posting more about the GGA every Tuesday for the rest of the summer:)


I also asked my good friend 
Jodi from Pleasant Home 
to partner up with me for the
"Great Granny Along" 

Just for me...she designed a 
Great Granny Along button... 
and set up the 
Great Granny Along flickr group...
 and she has posted 
a fantastic "how to join flickr" tutorial
 for those of you who have never
 used flickr before...
what a sweetie!
 to visit Jodi and her flickr tutorial.


please PIN above photo from original source...thanks:)

So about me and granny squares...
they were the very first thing
 that my Grandma Ewell taught me
 how to crochet when I was a girl.
 I made a ton of them using leftover
 bits of yarn that she gave me.
I fell in love with the scrappy look 
of granny squares even way back then!
I still love to crochet them...
but this time...
I'm making them with fabric
 instead of yarn:)


So here is the scoop on how 
my idea for the quilt along started.
Last year I saw in a few magazines
 some pieced granny blocks
 (inspired by crochet granny squares)
and then in a few months time 
I started to see some on several blogs
 and then I even pinned some on
I thought the blocks were sew cute and
 would really be
 a fun way to use up 
some of my leftover fabric!

However...
I decided I wanted my blocks 
to be bigger...
 (to use up more scrap fabric)
So I added another round of squares
 on my block and the
 "Great Granny Block"
was born!!!

My block consists of a center square
 and 3 surrounding rows 
which I call a round
(a crochet term which the granny block stems from)

I named the center square (aqua) 
"The Baby"
The round of 4 squares surrounding 
the baby(green gingham)...
I appropriately named
"The Mama"
I then named the round with 8 squares 
surrounding the mama (red & white)
"The Granny"
And the final round surrounding 
the granny (gray) 
is of course...
"The Great Granny"


As I told you...
my reason for wanting to make a 
"great granny block"  
was to use up leftover fabrics. 
Most of my leftover fabric are precuts
 from my fabric lines 
that have been piling up
in my studio
 over the last year.
Do you have orphaned precuts too?

YAY!!!!
This block is perfect for precuts!!!
 Simply because you can 
cut squares from 
each precut size 
with absolutely no waste!
(mom & grandma will be so proud)


As you can see...
I always use a 
portable design board
 when I cut and sew blocks...
I really wouldn't
want to be without one!
If you haven't made one yet...
for my tutorial on how 
and why I make them.
The design board pictured 
measures 18" x 24"


Here is my quilt that I made
 using 9 blocks....very scrappy!
I just need to bind it and 
then I can hang it...
or use it as a
 table topper...
which is why I chose to
 make it square.


To help you get started in the
 Great Granny Along...
I am giving away a 
"granny roll"
of Millie's Closet.


Just leave me a comment letting me
 know that you are joining the
 "Great Granny Along" 
and that you have also joined 


I just can't wait 
to see your blocks:)
Have a quilty kind of day my friends!
xx
Lori

EDITED January 16, 2014;
My new book called 
Great Granny Squared 
is now available for pre-order


Tuesday, June 26, 2012

Three More Patterns...


I have 3 more patterns to show you! 

This first one is fun and easy 
and made from one 10" square of each 
of the
 Millie's Closet prints...
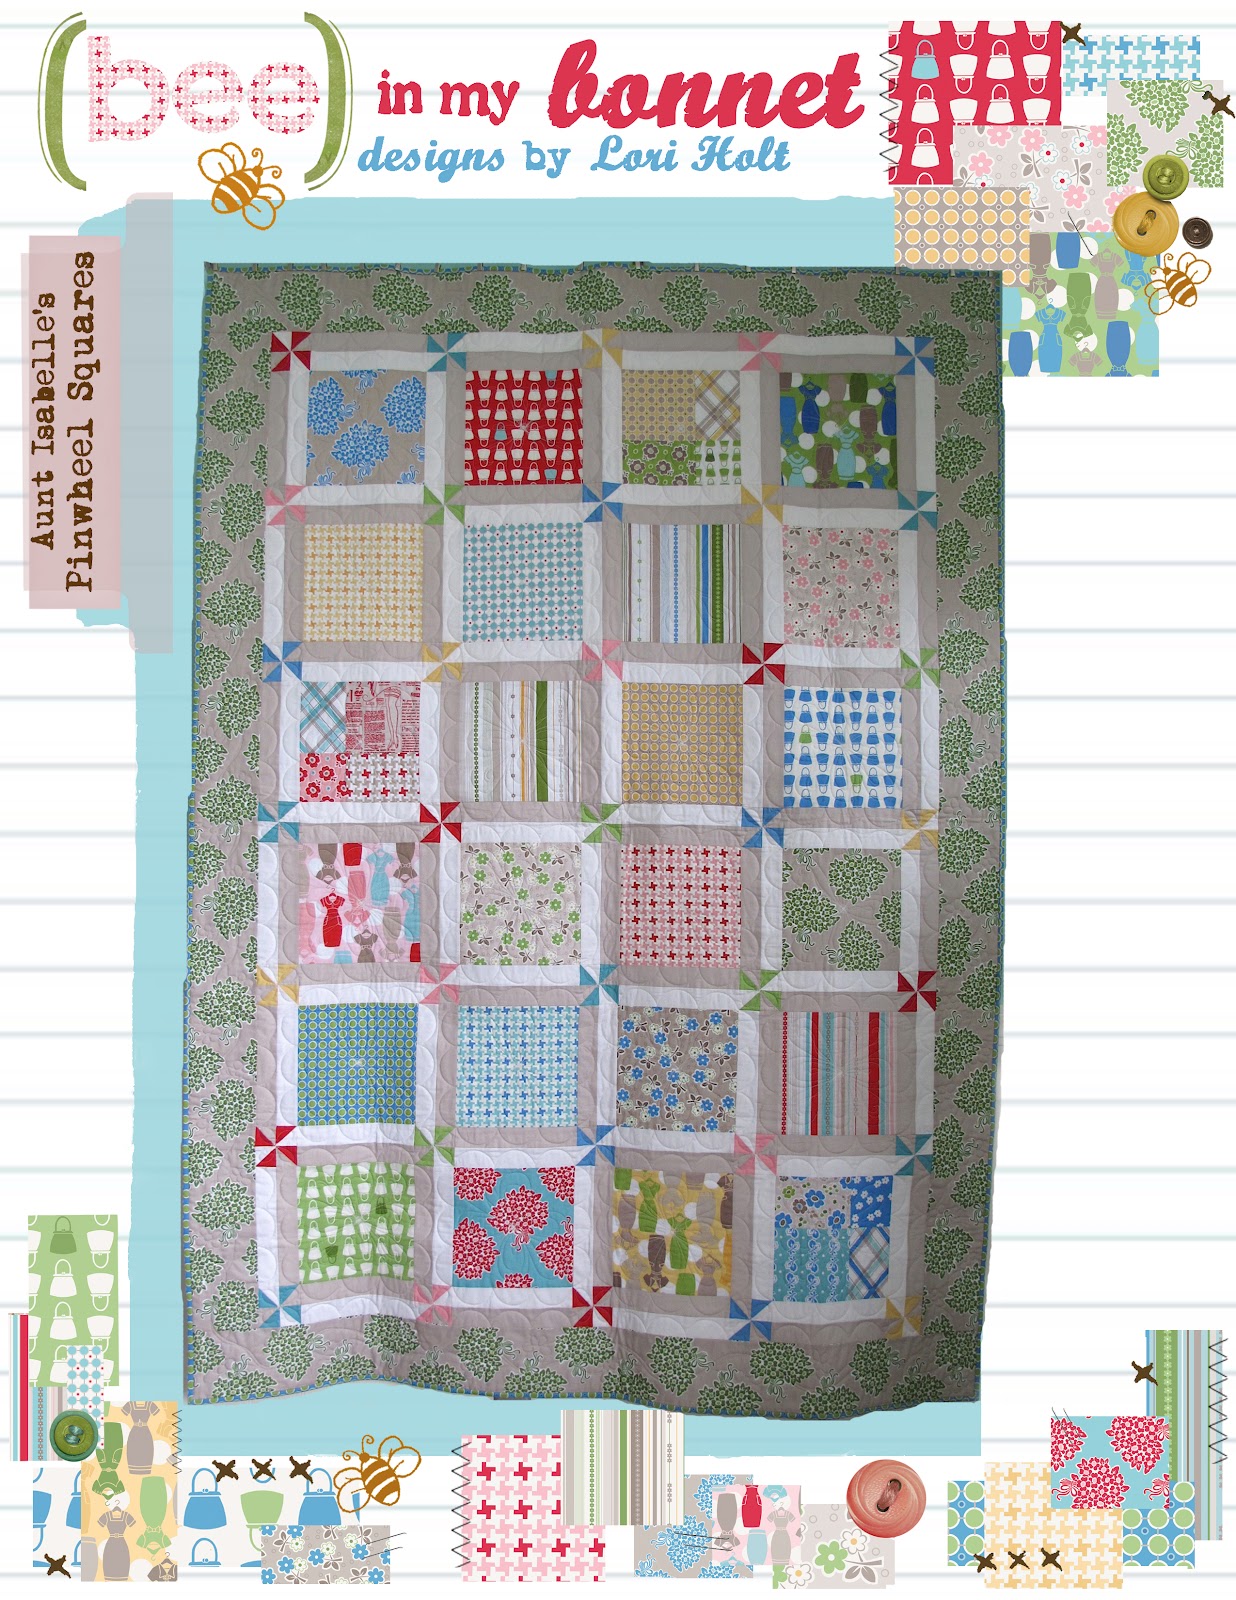
along with tiny pinwheels 
in each corner sashing:)


I named this quilt after my 
Great Aunt Isabelle
 who just lived down the road 
a few houses from me 
in the small town (Herriman)
where I grew up.

She was my Grandma Millie's 
oldest sister
 and was a wonderful cook as well
 as a wonderful quilter.


She was a very kind lady who worked hard to take good care of her large family.
I have very fond memories of 
Aunt Isabelle and I was in her home often...
I was in charge of taking her 
extra cream from our cows:)

Her home always smelled so good because she always had bread baking and something wonderful cooking on her 
old fashioned stove...
which she still preferred to use 
even after my Uncle Elt bought her a
 brand new modern range:)


"Aunt Isabelle's
Pinwheel Square's"
by 
Lori Holt 
of 
Bee in my Bonnet


Next up is a mini quilt and pillows named after my Great Aunt Marjorie who was also one of my Grandma Millie's 5 sisters.


Aunt Marge lived in Riverton with my 
Uncle Tom and their children.
(she actually lived a few houses away 
from Mr. Honey whom I didn't meet
 until we were both 12)
Riverton was 5 miles away from Herriman!

Because my Grandma and
 her sisters were very close...
I saw her often and I especially 
remember her being very 
put together
 at all times and up with 
the latest in fashion.
Her home was always spotless
 as was her garden and her aprons!

I also remember her lovely embroidery 
and her tiny quilting stitches 
that she prided herself on...
9 to the inch to be exact:)


"Fashion Fun"
by 
Lori Holt 
of
 Bee in my Bonnet


Next up are covered hangers.
Each are made from one fat quarter 
along with a few buttons on some and
 some different trim on others.

I thought it would be fun to
 sew up a bunch in honor of the theme  "Millie's Closet".

It was really fun to quickly
 stitch up a covered hanger using
 each and every print in the line!


I crocheted some lace on the
 bottom of a few...


Bound the bottom edges of some and 
topped them off with a fabric flower with a covered button center.


On some I used trim from the


Of course the directions for each hanger...
trim... and flowers 
are included in the pattern.


"Cute Covers"
by
Lori Holt
of
Bee in my Bonnet


If you are interested in the patterns...
you may

I hope you all are having a nice summer and finding some time to get a
 little quilting done!

I will be out of town this week with 
my quilty friends in beautiful Logan 
teaching my workshop...
when I get back...
I'll show you the remaining 3 
of my new patterns!
xx
Lori

Monday, June 18, 2012

Cute and Easy Laundry Bag...


Good Morning cute people!!
Today I wanted to share with you 
a quick little project that 
Kassidy and I made in preparation
 of her girls camp coming up next week.


We went to Target (our fav)...
 and bought some laundry bags.
You can get 2 bags in a package
 for 3 or 4 dollars.
They're made of nylon mesh and 
measure about 15" x 18".

Of course we decided to 
sweeten them up a bit!...
we added fabric binding 
around the edges.

I'll show you how we did it...
quick and easy.


Cut two - 2 1/2"x Width of Fabric strips.


Cut off the selvedge ends and stitch
 together on the diagonal.


Press the seams open.
This will give you plenty to go around
 the outside edges of one bag....
(you will have about 10" left over)


Press the strip in half with
 wrong sides together...


And then use your center fold as a guide 
to fold and press one side into the center.


Then repeat for the other side...
both sides now folded and
 pressed to the center.


Then fold in half and press again...
now you're ready to stitch 
your strip onto 
the edges of your laundry bag.


Simply fold it over the edge
 and sew using a zig-zag stitch.

When you get to the end...
 fold over the raw edge ends and 
continue to zig-zag...
and then backstitch to finish!


You will have to ease in 
the excess a little when you
 sew around the corners.

If you cut your 2 1/2" strips 
on the bias it will lay nicer 
around the curves...
 But I wanted to use leftover strips
 that I already had cut...
and we thought that they 
worked out fine considering.


"Cute and Easy Laundry Bag"


Of course...
now that you have a 
cute little mesh bag...
you don't have to use it
 just for laundry...


You can use them as a bag to
 make a gift extra special...


Or as a cute project bag to take
 on your next Sew Day...
or...
 you can use them to keep your
 sewing room organized.
The possibilities are endless!

I can honestly say that they are 
the easiest bags that 
I've ever made...
considering that 
they are already made! 
 (We just added a little bit of cuteness!)

Until next time...
have a quilty kind of day my friends;
xx
Lori


Related Posts with Thumbnails