Tuesday, August 14, 2012

Great Granny Pot Holders!...


Good Morning cute people!!!...
or should I say good afternoon...
(i'm a bit late posting today:)

Today is
day and I have a new project to show you.

I made 2 potholders using 1 1/2" squares instead of 2 1/2" squares.


I needed a quick gift 
and in keeping with 
using up my scraps...
I pulled out some FMF leftovers
 that I had been saving.

These scraps came from a project 
where I used my
 Easy Corner Triangle Method


When trimming for the
 easy corner triangles...
I always save the leftovers
 if I can cut them into a 1 1/2" square.

The FMF scraps were perfect for this
 and so I cut some into squares ...
I love making a project completely
 out of scraps!!!


I cut enough for 2 blocks and laid 
them out on my design board. 

The amount of squares that you
 will need is of course exactly 
the same as the 12 1/2" blocks...
and the method is the same as my
the only difference is
 the size of the 
squares and rectangles...


For this size block you will need 
8 - 1 1/2" x 2 1/2" 
for each block row ends...
and you will need 
4 - 1 1/2" x 3 1/2" strips
 for the corners.


After you have sewn them
 together...
you will need to use a 
6 1/2" square ruler 
to trim them up!


This size is sooo cute!
I think I see another Great Granny quilt
 in my future with 6 1/2" blocks!


But for now...
these are pot holders...
 so for each one...
I cut an 8" square of 
backing fabric,
 an 8" square of batting
 and some leftover
 silver ironing board fabric
 that I always use when I
 cover my ironing table.
 (I buy it at JoAnns)

I also cut a 2 1/4" strip x WOF
 to use as binding.


I layered as follows...
top, batting, silver fabric and backing.
 I did some quick and easy 
straight line machine quilting...
(make sure you use a walking foot)

I then bound each potholder 
and stitched a drapery ring 
to the top corner for hanging.

The Great Granny blocks are cute 
hanging on the diagonal!


All in all...it took only 
a few hours from start to finish
 for both of them.

I am planning on making more
 with my scraps to use as Christmas gifts.

They could also be used as a mug rug...
or six of them would make an adorable
 little dolly quilt for my Sophie Belle! 

What do you think?
Do you see 6 1/2" Great Granny blocks
 in your future too?
xx
Lori


Saturday, August 11, 2012

Introducing Polka Dot Stitches...


Yay!!!!...I have a new fabric line coming out!
My new line was inspired by 
circles, doilies, crochet,
 the 60's (when I was born) 
and of course...embroidery.
I learned how to embroider when I
 was 6 years old...
 and so I have been having 
an ongoing love affair
 with stitching ever since:)


Introducing
......
......
by
Lori Holt
of
Bee in my Bonnet
for
Riley Blake Designs


I just have 2 yards of precuts to 
start designing with and to 
get working on a few new patterns!


It's always soooo hard for me 
to cut into my pre yardage because
 I'm afraid I will run out 
before my bolts of the 
fabric line get here...
which will be in about 3 weeks!
YIKES!!!


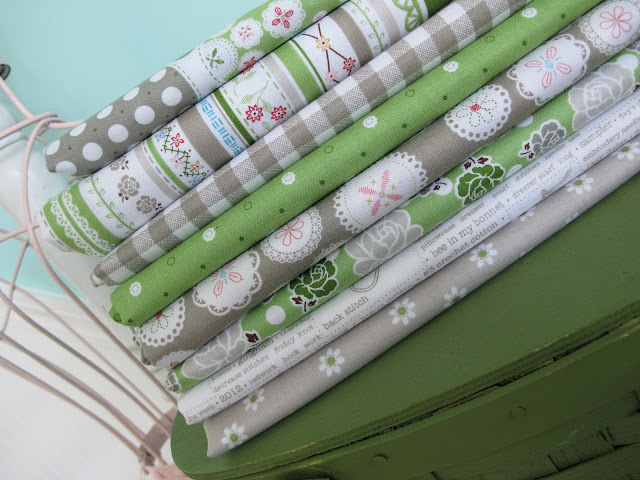
Here are my 2 yard cuts 
in a nice little stack 
in my front room. 
 I am missing the 4 solids 
that have not arrived yet.
The solids are
 red, aqua, gray and white.


Total number of fabrics in 
Polka Dot Stitches...
28
 including solids:)


Red/Pink/Gray 
colorway


By the way...
the circles on this print each 
measure 2 1/2" across:)


Aqua/Yellow/Gray
colorway


Gray/AppleGreen/White
colorway


I'm really excited about 
these 3 "words" prints that
 I designed to go in the line.
First I drew up diagrams 
for common embroidery stitches ...
(just like they used to put 
in the iron on embroidery patterns) 
And then I added words that
 have to do with stitching. 
(vintage embroidery stitching
 and crochet stitches:)

I think these "word" prints will
 make fun backgrounds!


I currently have them all rolled up and waiting to be played with.
They are waiting impatiently...
inside my cute new aqua utility cart! 
I picked it up from IKEA while
 there last month...
lucky me...
I have an IKEA 10 minutes
 from my house:)


As you can see from the
 quilt hanging on the wall...
 (Vintage Dishes - made with Sew Cherry)
Polka Dot Stitches fits in rather nicely 
with my other fabric lines.

I have 4 new quilts drawn up along with 
2 other quilty patterns....
I will start cutting into it 
first thing Monday morning!!!

I'd love to hear how you feel
 about my new line....
I hope you like it and that you want
 to play with Polka Dot stitches too!

I love hearing from you and 
I read each and every comment with 
a smile on my face...thank you so much for all of your kind words!!!
Until then...
have a quilty kind of day!
xx
Lori


Tuesday, August 7, 2012

Fusion Blanket Crochet Along...


Hello again!
I can't believe it's been a week
 since I've posted!
My summer is still in full swing 
around here and time gets away 
from me too fast.
I hope all of you are enjoying your 
summer as much as I am.


Today I wanted to show you the project that I took along with me on my camping trip.
My project was inspired by a photo that 
I saw on Pinterest....
using 5" squares that are sewn together and then adding crochet.


You know that I love to add crochet edgings on several of my fabric patterns
so when I saw the photo...I was inspired and started immediately!
I just kind of made up my blanket
 as I went along but I have now 
discovered that there is 
by Corey@Little Miss Shabby and a 
and it's a crochet along as well!
It's called the 
Fusion Blanket Crochet Along.
Fabric/Crochet fused together = fun!!!


I love the fact that I have been able to use up even more of my precut leftovers from 
Sew Cherry, Daisy Cottage and Millie's Closet.


I chose to use "I Love This Cotton" yarn in 
68 Aqua that I bought at Hobby Lobby.
It's so soft and the color is yummy and goes with all of my fabrics...and is 100% cotton which is a big plus for me.
I like to work with natural fibers 
as much as possible.


I have several squares completed so far...
they really work up fast.
I did a single crochet into each buttonhole stitch and then a double crochet into each single crochet and that's all!
Easy peasy.
*Take note that on the corners...I did 3 stitches instead of one:)


I love the scrappiness of my blanket...


I put some of the squares up on my 
design wall together to see 
how they will look when I crochet them together.
I will just use a single crochet stitch when joining them and I think I will leave the holes in the intersections...I like how it adds a lacy kind of look.
Of course I will make the final decision on that when I join them all together:)


I know that today is Tuesday...
and week 5 of
I don't have anything new to show you yet...but Jodi has some new blocks...so go over and see them!
All of the beautiful blocks and quilts that are showing up on the flickr group 
are just amazing!!!
It's been so fun to see all of them 
over the last 5 weeks:)
Next post...I will be showing you a sneak peek of my up coming fabric line.
Until then...have a quilty kind of day:)
xx
Lori
Related Posts with Thumbnails