

Rise and Shine cute people...
It's time to build another barn!
YaY!!!
he summer is going by sooo fast and so I thought we needed a block
to represent summer before it's completely over:(

So I drew up this
"Summer Star"
It consists of 2 different kind of blocks within it...
4 square in a square
and
4 hourglass
(or quarter triangle block)
Of course I have an easy method to show you for both of them!
Soooo....
onto the cutting for Summer Star...

Cut a 2 1/2" square for the center.

Cut 2 - 3 1/2" color squares and
Cut 2 - 3 1/2" background
These will make 4 hourglass blocks.

Cut 1 - 5" color square for the square in a square blocks
and Cut 1 - 6" square background fabric.

Subcut the 5" square into 4 - 2 1/2" squares.
Subcut the 6" square into 16 - 1 1/2" squares.

Let's start with the square in a square blocks.
Sew a 1 1/2"Easy Corner Triangle on opposite sides of each square like this.
Trim an approximate 1/4" seam allowance...

and press towards the triangles.

Now sew another Easy Corner Triangle on the remaining sides.

Trim ...

and press.
Now you have 4 square in a square blocks
that will measure 2 1/2" at this point.

Place them on each corner of your design board along with the center square
and let's move on to the quick and easy hourglass blocks!
Mark a diagonal line 1/4" away from the center on the 2 background squares.

Place a marked square RST with a colored square.
Sew directly on these marked lines and cut them apart like this.

Press seams open.
Do not trim off little triangles on each end of the seam allowance.

Now mark again (only 2 of them) across the seam diagonally like this.

Place 2 squares together...(one unmarked and one marked)
so that the colors are on opposite sides.
Sew again on these newly marked lines.

Cut them apart

Press seams open again.
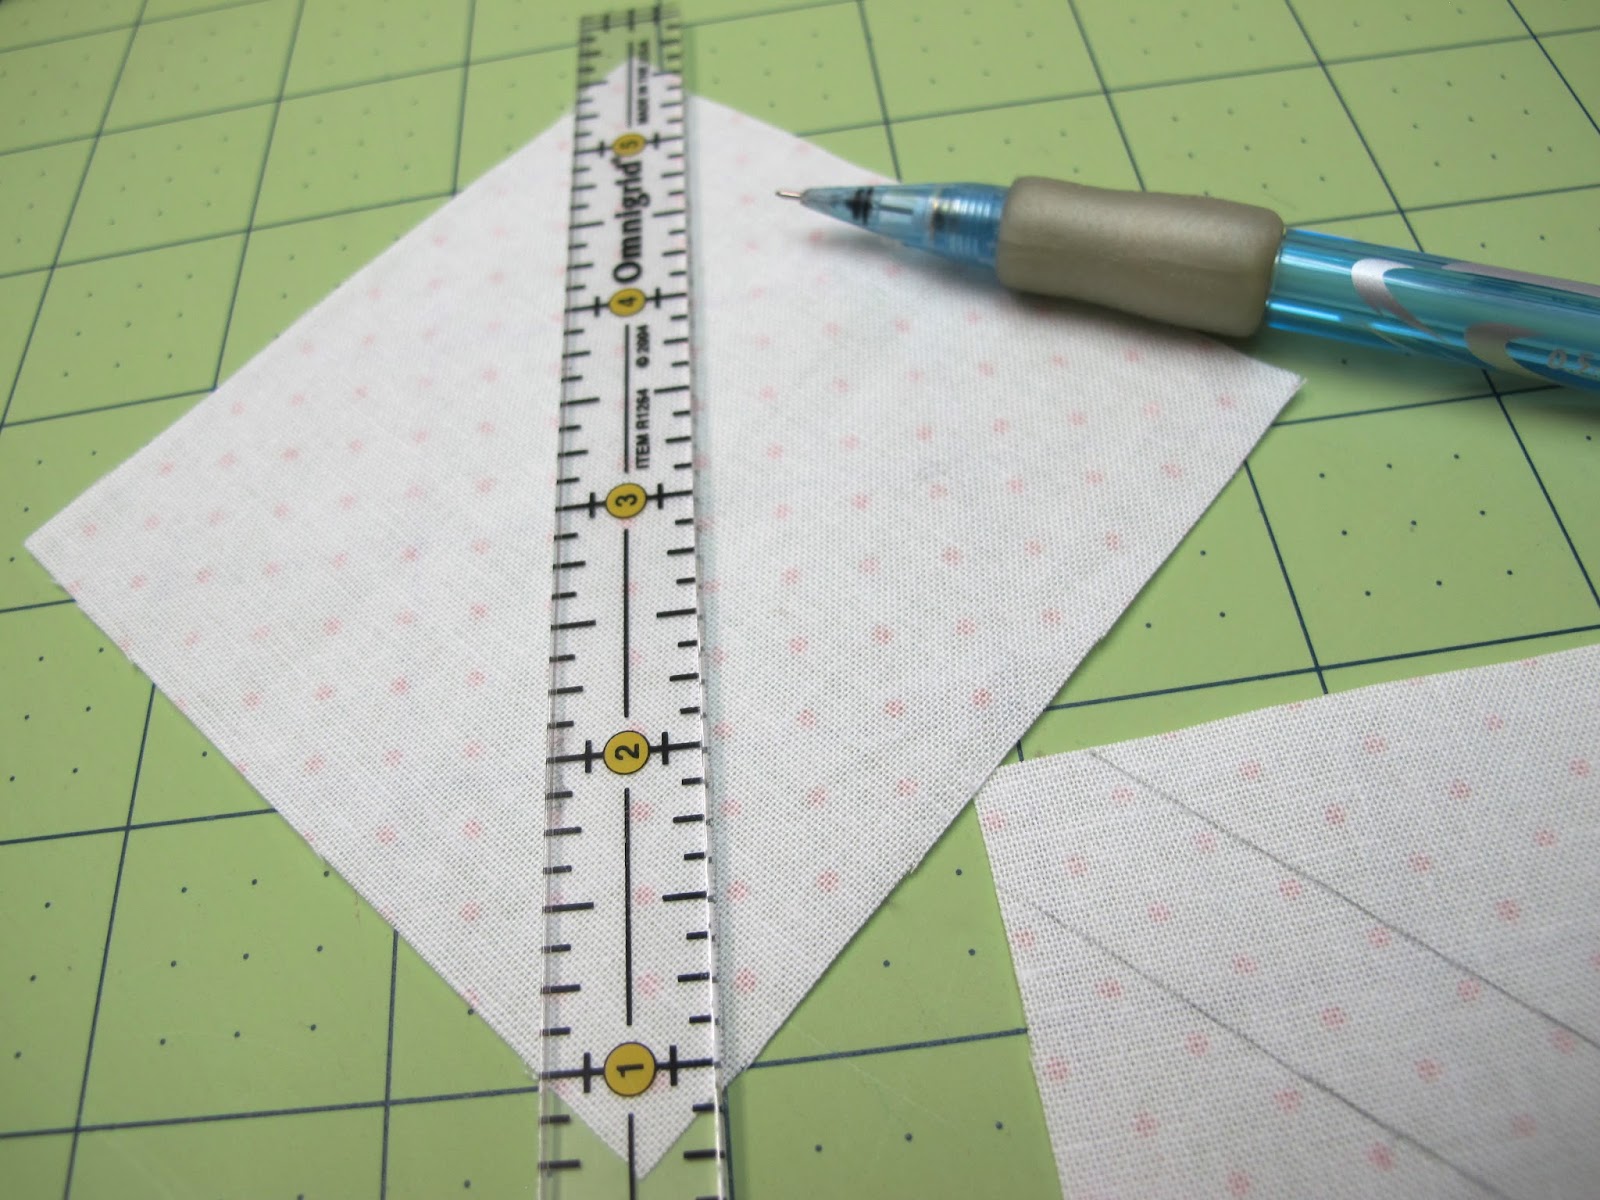
They will be a little larger than the
2 1/2" square that they need to be at this point...

Use a 2 1/2" square ruler and trim them up...
make sure to align the seams with the lines and corners of the ruler.

I like to use a rotating mat when I am trimming blocks on all 4 sides.

Now add the hourglass blocks to your design board...
and sew your block together just like you would a 9 - patch.

The back of my block:)

6 1/2" unfinished Summer Star...
I love it!

Now build your barn:)

We're having a hexie kind of day in my barn...
we even have pins flying up to the rafters!

Can't wait to see your Summer Star blocks and
Quilty Barn #10!!!
xx
Lori

14 comments:
I love you new barn. The block is so pretty.
valspierssews@gmail.com
http://valspierssews.blogspot.com.au/
I am so thankful for your blog! Your tutorials are fantastic!! Thank you for sharing!!
Love the summer star block! Thanks for the tutorial. I have some barn stitching to do! :)
There is just something heartwarming about a red barn. Love both your new blocks. Thanks for the tutorial!
Another wonderful barn and tutorial! Thank you so much. I know you must put hours into these posts.
Lori, thanks for the new barn block it is fabulous! You always have wonderful bright red fabrics. Can you tell what the name of this one is? I sometimes have a tough time finding true red fabrics. Thanks so much!
Lori, you are such a total inspiration to me - thank you!
I started the Quilty Barn Along late, but I'm caught up now! I've chosen my fabrics and I'm getting ready to start cutting. Thanks again Lori for your detailed tutorials- such a great teacher!!
Love the block- I've been saving them. I had multiple irons for awhile because I taught classes out-of-town & forgot the iron so had to get new ones 4class....but....you've got so MANY irons! Are they all different?
I can't wait to finish my current project so I can start on these too cute barns. Thank you so much for doing these patterns for us!
I came upon your site from Pinterest and I absolutely love it! Your colors and creativity are so inspiring.
I was not able to find the tutorial for the barn blocks, however. I found the tutorial for the star for aug 7 barn block but the link wasn't working for the barn itself. Any ideas?
Thanks,
Molly in Sumner, WA
Thanks for another great barn...and the tutorial for the block...love it.
I just wanted to tell you that without a doubt you have the best tutorials online. They are clear, concise, and the photos are far and away the nicest to look at. I am so eager to get your first book and have pre-ordered it at the Fat Quarter Shop. I think I speak for all cute people when I say, "thanks for making quilting so fun"!
Post a Comment