

Today I thought I would share a
fun and easy tutorial for
"Lined Travel Bags"
I designed them to go with my new
I don't know about you...
but when I travel,
I like to keep my things separated
inside my suitcase to protect them.
Things like sweaters or delicate clothing
items are good to keep separated so
that they aren't roughed up during travel...
and I also like to keep my shoes
in separate bags too.
This bag finishes at about 10" x 16"
perfect for a pair of shoes or
for whatever else you may need it:)

For each bag you will need...
2 Fat quarters.
One for the outside of the bag...
and one for the lining.
Cut EACH fat quarter to measure 17" x 21".
For the tie you will need one
2 1/2" x 44" strip of fabric.

Fold the lining in half with
right sides together so that it
measures 10 1/2" x 17".
On the side that isn't folded,
measure 7" down from the top and
5" up from the bottom...
placing a mark on the seam allowance
so that you know where to
stop and start stitching....
this is your opening for turning
right side out later.
Using a 1/4" seam allowance,
sew along the bottom edge and the side, leaving the top open...
and make sure to leave the opening
that you have marked unstitched.
Don't forget to backstitch each time
that you stop and start again.

Fold the bag front in half with right sides together so that it measures 10 1/2" x 17".
You will need to leave an opening for
the tie on this piece.
Measure 2" down from the top and mark...
then measure another 1 1/4" down
from that line and mark again.
You should have 2 marks 1 1/4"apart.
Stitch along the bottom and the side...leaving the area between your markings unstitched. Backstitch to secure stitches each time
you stop and start again.

You will need to finger press the seams open on the bag front and stitch around the casing opening so that the seam allowance won't come out when you tie and untie your bag.
By the way...I used matching thread on my other bags but I used contrasting thread for this one so that you could see my stitches:)

For this next step,
turn the bag front right side out but
keep the lining turned wrong side out.

Place the bag front inside of the lining and line up the top edges and the
side seam allowance.
Pin into place and stitch all the way
around the top edges.

Like this.

Remember the opening in the lining?...
it's time to pull the
front of the bag through it...

Like this.

Now both front and lining are sewn together
at the top and both are turned
right side out like this.
Now top stitch the opening in
the lining closed...

Like this.

As I said before, your front and lining are sewn together at the top...
now push the lining inside of the
bag front until they both lay
as flat as possible and
give your bag a nice press.

To form your casing for the tie...
sew a line 1 1/2" down from the top...
and then another line 2 3/4" from the top.

You will have a casing that
measures 1 1/4" wide..
and a finished opening in the
bag front for the tie!

Fold your 2 1/2" x 44" strip of fabric
with right sides together and
stitch down the side with
a 1/4" seam allowance.

Use your favorite turning method and
turn it right side out...
for this one I used the
tried and true
safety pin method
that my mom taught me:)


After turning...
give it a nice press and
tuck the seam allowance inside on
each end and topstitch closed.

I used the safety pin again
to thread
my tie thru the casing.

Lay your bag out flat until the end
of the ties are even...

And stitch a small zigzag back and forth
a few times over the center of
the tie inside the casing
so that it won't come out!

The tie is long enough to tie a cute bow:)

Your bag is ready for travel...
or gift giving:)
I think I'll make a few of these
for
my mom for Mother's Day
and fill
them with something fun!
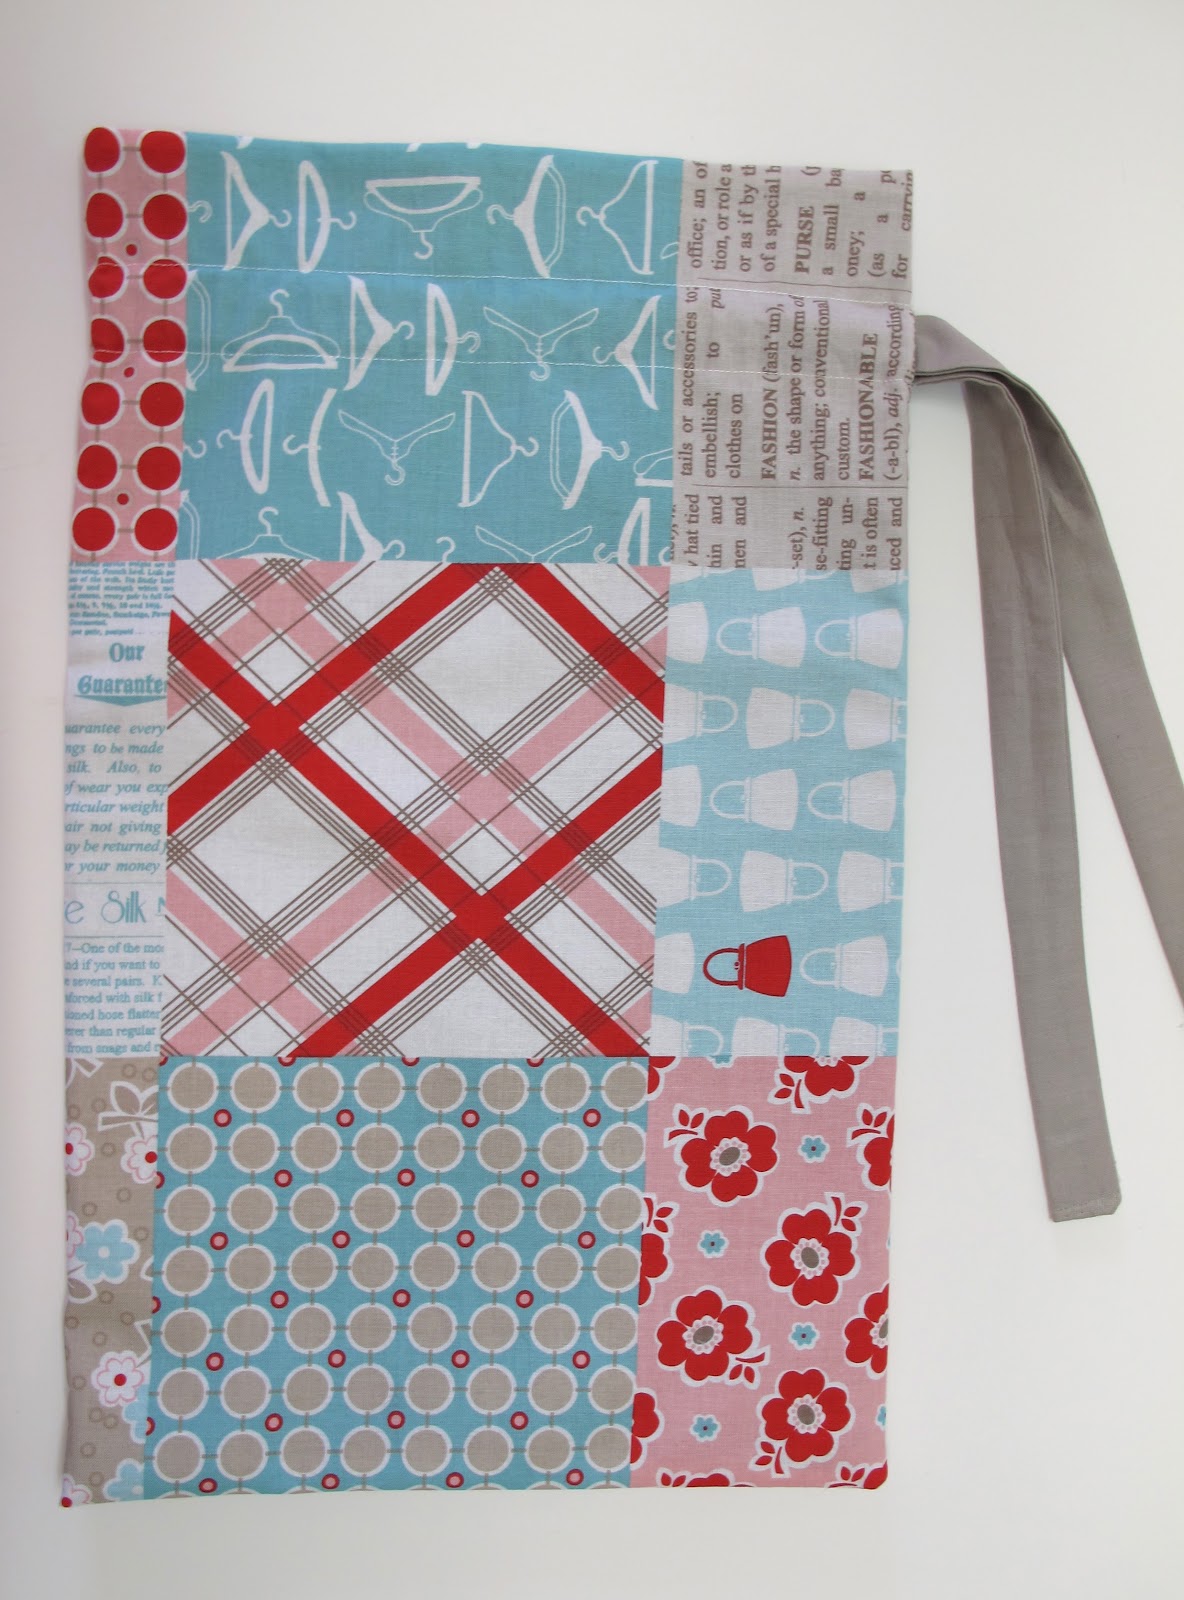
I wanted to show you one of the bags
that I made using my fabric that
looks like it's already been pieced...
but it wasn't...it just comes off the bolt
that way!...that's how I designed it:)

I have made several of these bags already and I have even more cut out and ready to go.
I hope you all enjoyed my latest tutorial...
and until next time...
have a quilty kind of day!!!
xx
Lori

28 comments:
I love your tutorial Lori!! I really really want to make some of these bags. When I was scrolling down the blogs that I follow, I saw the bag made from Millie's Closet. I thought to myself, "Heh, who got a hold of Lori's fabric!" Then I looked at the title of the blog and it was yours!!! lol
You always do such a nice job on your tutorials. The bags are especially darling in your fabrics!
What a fabulous tutorial Lori. The stitch on the outer part of the bag to secure the tie will make *all* the difference for me. :0) Thank you for showing us how. :0) Your fabric is just as pretty as ever!
Super excited! I just ordered my Millie's Closet fabric last night...This is cute for tap shoes or ballet slippers too. Oh the possibilities. Thank you Lori for sharing the inspiration...smiles...Renee
I love this! Thanks so much for the great tutorial!
Cute bags! Thanks for doing a tutorial.
Great tutorial! Beautiful fabric : )
Those are all sew-cute! Love your darling prints! xo
Thanks for this wonderful tutorial!! I've just discovered your blog, it's fantastic!
Big hugs from
Vintage Collages
.
Another great tutorial...I will be making a bunch of these cute bags...Again hats off to you Lori..When does you new line of fabric come out? Just love this line...Thanks again
Great idea and fun tutorial. Love love love this new fabric line...you are the greatest...
Mary
A fantastic tutorial...love it! I love the bag. Thank you so much for sharing, Lori.
I love your tutorials! They are so clear and usually something a beginner like me can handle. These bags are so cute! I think I will make some for my (grown) daughters for Easter. Thank you for the tip of stitching in the middle of the casing so it won't slip out. Ahh, it's the simple things that can make it or break it. Thanks for caring and sharing.
Son unas bolsas preciosas y muy bien explicadas; yo también soy aficcionada a hacer bolsas para guardar todo tipo de cosas.
Me gusta mucho tu blog, te invito a visitar los míos.
SALUDOS DESDE ESPAÑA.
I saw your video on Riley Blake about this project. Great job! and it looks like a great project and I think I will make some for Christmas gifts.
I too saw your video on Riley Blake ~ (and I think your darling grandaugher favors you so much). Just love this tutorial and the others you have done. Just love your fabric lines (Please don't ask me which one I like best) Thanks for all the tutorials.
Me too, saw you on Riley Blake, and love these bags....great tutorial, can't wait to start creating some. TFS
~Terry~
WOW, this is a great tutorial. Thank you so much for sharing it with us.
Printed Bags
Thanks for this amazing tutorial!! I've just found your site, it's fantastic!
Some fabrics and some very nice bags. Thank you very much for your tutorial.
A hug.
Anna
Hi,
thank you for the tutorial. I also enjoyed your video tutorial for the same bag on the RileyBlakeDesigns channel on Youtube.
I truly enjoy all your tutorials! Wish you had a PDF down load for them!
Lori, my daughter is going to a birthday party sleepover this weekend! Thanks for a great handmade gift idea :)
Have made one bag and have at least 10 more in progress (wonderful gifts), and I just wanted to add a little tip I just discovered. After turning the ties, when it comes to ironing them flat, I was having difficulty getting them to come out flat and burning my fingers trying to make the seam behave so that I could iron. While looking around my sewing room to find something to help, I discovered that a 1/2 inch dowel rod placed inside the tie would assist in ironing the seam to one side, and after removing the dowel rod, ironing the tie nice and flat is a breeze. Thanks for a great tutorial and much success with your designs!!
Just finished making 2 of these bags. Good instructions. We were making different bags at retreat last week, and I use these for knitting projects also. Perfect for holding one or two skeins of yarn. Only thing I did different was folding the end of the ties in half and tieing a tight knot at the end. I'll be posting pictures later this evening.
http://shadywood.blogspot.com/
Betty
I have just made four! That's right. FOUR. And I will only be bringing one pair of shoes with me on the trip. AND I will be wearing those shoes. The tutorial is very easy to follow. I just loved making these and kept making up reasons why I needed more.....But since I am leaving on Monday (Saturday today), I really should get packing. Thank you so much!
Great tutorial! I used it to make reusable Christmas gift bags - I'm so impressed with how they turned out! Thanks!
Thank you so much for such great, clear tutorial. I made one bag and it is great... thank you so much!!!
Natalia Hernandez
Mexico City, Mexico
Post a Comment