

FLOWER BASKET BLOCKS
ONE - TWO - THREE - FOUR - FIVE

Welcome Quilty friends!!
Today is the day for the
"WEEK TWO"
in our
FlOWER BASKET SAMPLER
SEW ALONG

We are making the
FLOWER BASKET SAMPLER Quilt
which finishes at
87" x 87"
It consists of 12 pieced pinwheel blocks
and a pieced border which surrounds
the pieced basket blocks with
appliquéd trim and flowers on each!
(Basically this is mainly
a pieced quilt with some applique)

To make the appliquéd flowers,
leaves and basket trim
we are using my
Sew Simple Shapes called of course...
Flower Basket Sampler!


The collection that we are using
for the quilt is...
PIECE AND PLENTY!!
Piece and Plenty was designed by me...
and produced and distributed
to quilt shops everywhere
by the amazing
If you would like to know everything about
PIECE AND PLENTY
to view the entire storyboard...
to see all of the fabrics close up
and to view the notions and ALL of
the patterns that coordinate with it:)

So let's chat about the
FLOWER BASKET SAMPLER
Quilt Fabric Kit.
Several shops are stocking the kit...
both brick and mortar shops
as well as online quilt shops.
The fabric and notions as well
have already shipped
to quilt shops everywhere
and will continue to ship as
each new item arrives at the warehouse!
So of course if you have not
already pre-ordered
your fabric kit and need one...
it is not too late at all!

If you still need to download
the free sew along guide
click on the following link:

And if you still need all of
the info about this sew along
please click on the following link to
read last weeks blog post called
The tutorial for Basket Block One
is on my Youtube channel.
to watch the tutorial
I also have already done the tutorial
on piecing the baskets in preparation
for the appliqués...
if you missed it:)

Now let's talk about this week's blocks!
We are doing the appliqués for
Basket Blocks
Two - Three - Four - Five
All of the cutting and info
about each of these blocks
is of course in the sew along guide
for your convenience:)

Basket Block Two

***Take Note***
Trace one of the leaves in reverse
for Basket Block Two

Basket Block Three

Basket Block Four

Basket Block Five

***Also take note to trace one of the
leaves for Basket Block Five
in reverse as well.

Now for sewing the appliqués:)

Because I'm doing four blocks
I like to streamline my sewing...

And save time by sewing all of the
shapes for all blocks at the same time:)

I think it's much easier that way
and then after the sewing part
I go back to each block one at a time.

Okay!
All of my shapes are sewn:)

Let's start with Basket Block Two

Before I trim my shapes...
I always separate the ones that
need to have seam allowances clipped.
The shapes on the Bitty Design Board
on the left do not need any clipping
in the seam allowances
as they are all outer curves.

I clipped all of the cleavage areas
in the basket trim, flower and leaves...

And also the three inner curve areas
on each leaf like this.

Turned and shaped!!...
Now let's go to the work table
and layout the appliqués:)

I marked my block for the center stem
and the basket handle EXACTLY like
I showed you in last weeks video
and of course will do that with
each basket block as we continue.
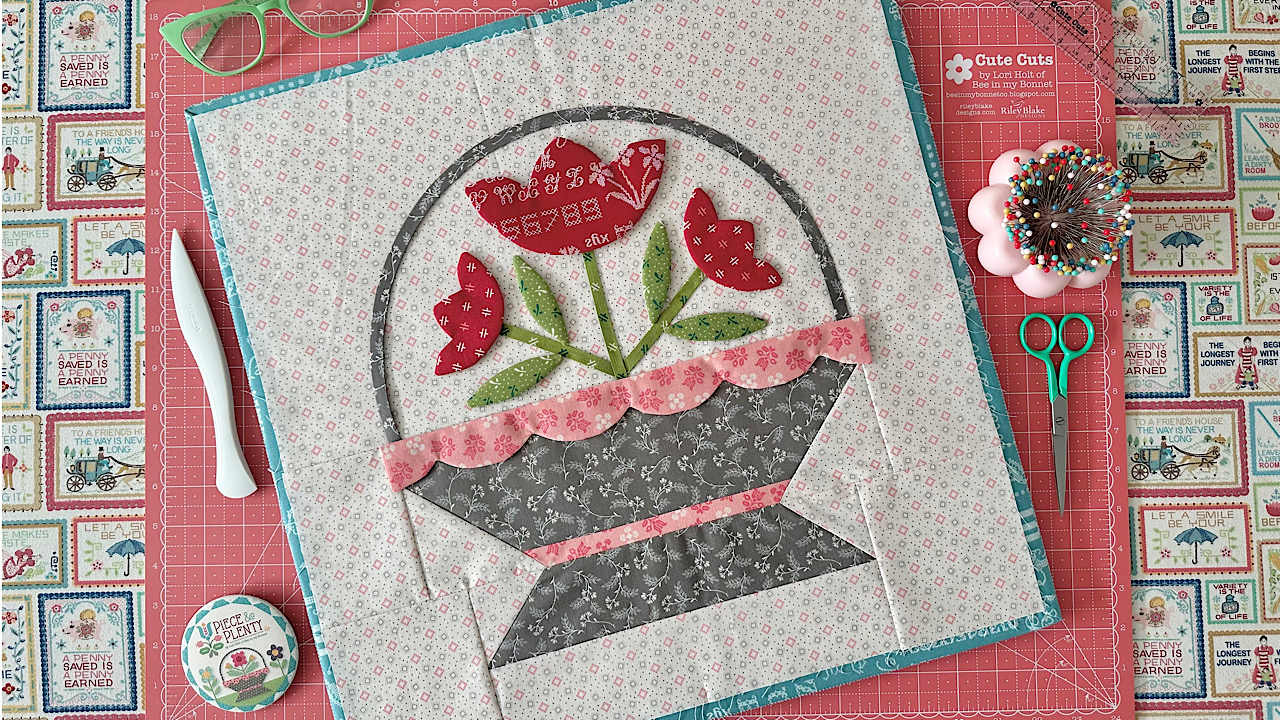
I took the above photo to show you
that when I placed the four
flower petals I did not overlap them.

I "planted" my flower and leaves
in my basket by pinning them
into place before glueing.
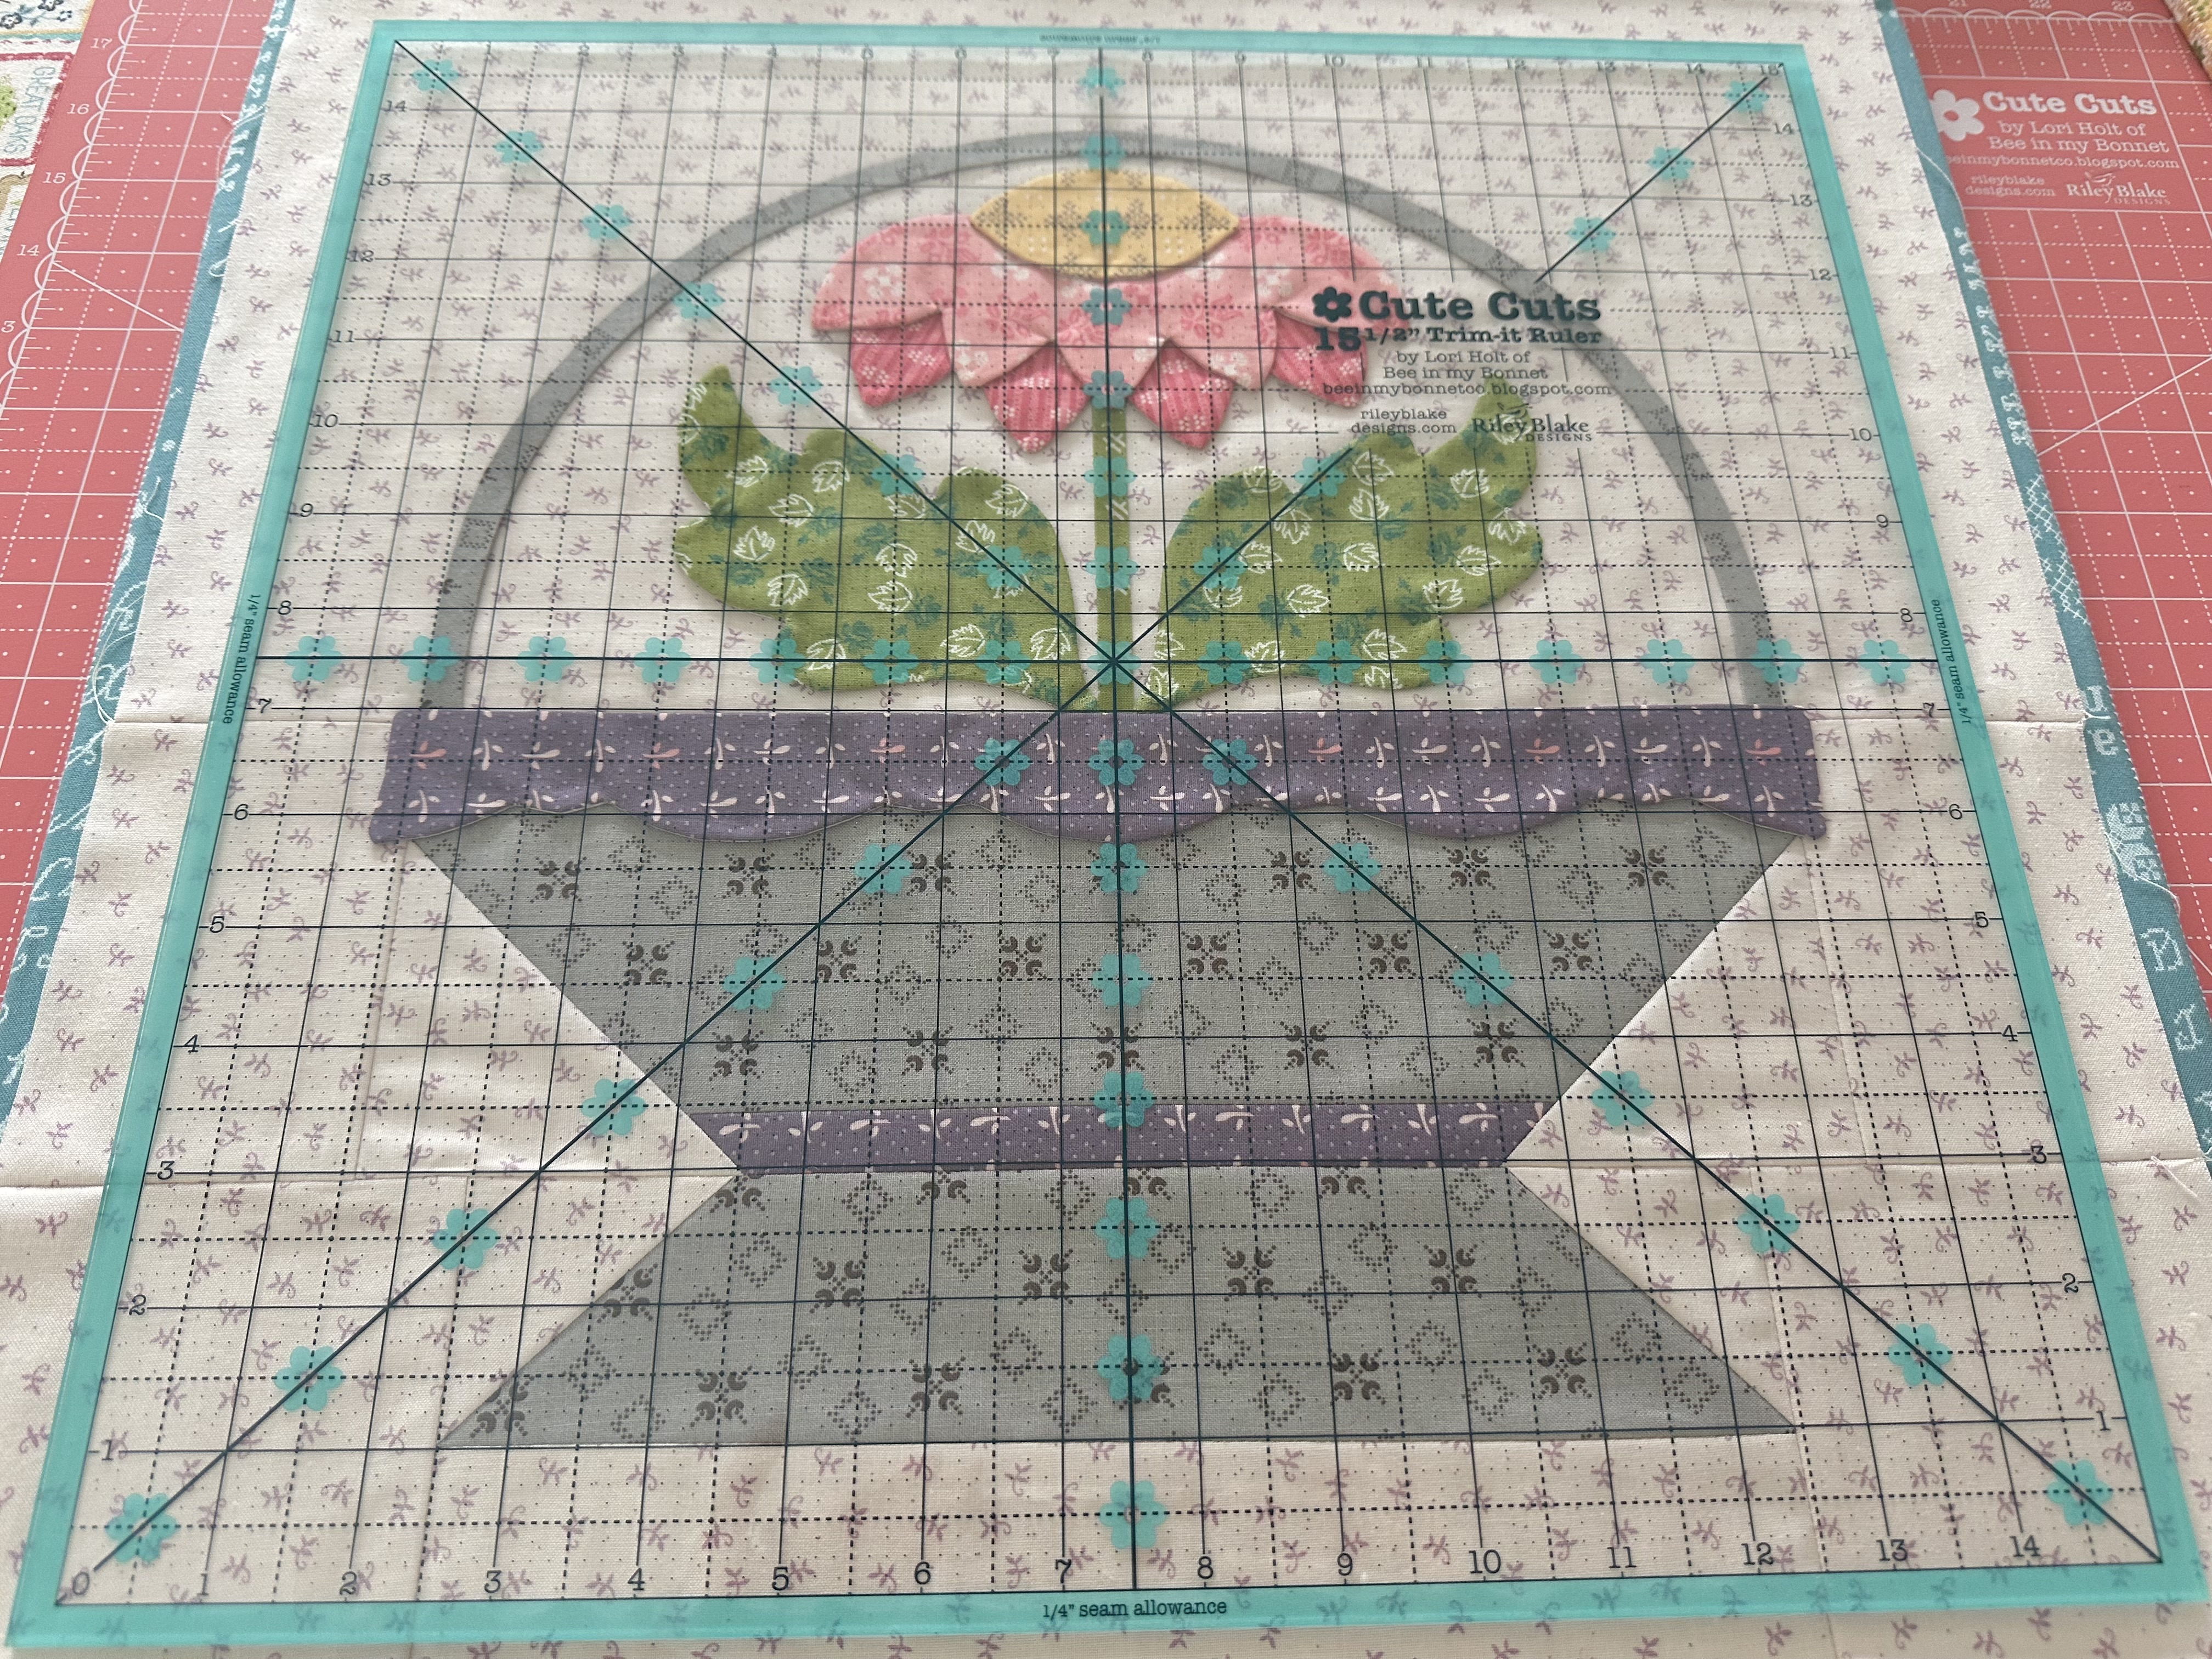
I used the lines on my ruler as needed.
After my block is appliquéd
I'll press it from the back and
use this ruler to trim it down to
15 1/2" x 15 1/2" square
so that it can be sewn into the quilt.
***Take Note that...
All of the flowers in the basket blocks
are pretty simple to layout because
they simply need to fit within the
half circle created by the handle
and centered by the stem
so be sure to do your handle and stem first
so that you have that space
within as your guide for placement:)

I love Basket Block Two!
I designed this flower to be a Dahlia.
It's one of our favorite flowers
to grow in our garden:)

already hanging on my design wall:)

Now let's do Basket Block Three.

Shapes on the Bitty Board to the left
do not need clipping...
just trimming of seam allowances.

Before turning...clip the inner curves
on the basket trim and the cleavage area
in-between the flower petals.

Turn...shape and press:)

"Plant" your flower by laying out
and pinning within the half circle.

Then add the Sue Glue!!

Check everything by using the
lines on the ruler if needed.
After my block is appliquéd
I'll press it from the back and
use this ruler to trim it down to
15 1/2" x 15 1/2" square
so that it can be sewn into the quilt.

This sweet Basket Block Three
is all ready for applique!!

And added to my design wall until then!

pretty little flowers into
Basket Block Four.

You know the drill by now...
no clipping needed for the shapes
on the Bitty Board to the left:)

Before turning...
clip all of the cleavage areas
in the basket trim and the flowers.

Turned...shaped and pressed!

Pinned and Sue Glued:)


After my block is appliquéd
I'll press it from the back and
use this ruler to trim it down to
15 1/2" x 15 1/2" square
so that it can be sewn into the quilt.

Sew Pretty!!!
It's blooming where its planted:)

on the design wall company:)

Let's do Basket Block Five!


Clip the cleavage areas in the basket trim, leaves and the flower and also
the inner curve areas on each leaf.

Ready for planting!!

Easy peasy:)


After my block is appliquéd
I'll press it from the back and
use this ruler to trim it down to
15 1/2" x 15 1/2" square
so that it can be sewn into the quilt.

So cute!!!
I am loving the Red Cross Stitch
background and how it looks against
the aqua, green and gray in this block:)

Our first five basket blocks
are ready for applique:)


Thank you for sewing with me today
and I will be right back here
next week for Flower Basket Blocks
Six-Seven-Eight and Nine!!
xx
Lori

1 comment:
Hello Lori, I love this sew along. The flowers are so pretty in the colors from collection. Thank you for the tutorial and see you next week.
Post a Comment