

Okay...
as promised I've now edited this post
to add the photos of my quilt
which is now quilted and bound...
YaY!!!
I'll add all of the photos
at the very end of this post
so scroll down to see them!

Welcome Quilty friends!!
Today is the day for the
"BIG FINISH"
in our
FlOWER BASKET SAMPLER
SEW ALONG

We are making the
FLOWER BASKET SAMPLER Quilt
which finishes at
87" x 87"
It consists of 12 pieced pinwheel blocks
and a pieced border which surrounds
the pieced basket blocks with
appliquéd trim and flowers on each!
(Basically this is mainly
a pieced quilt with some applique)

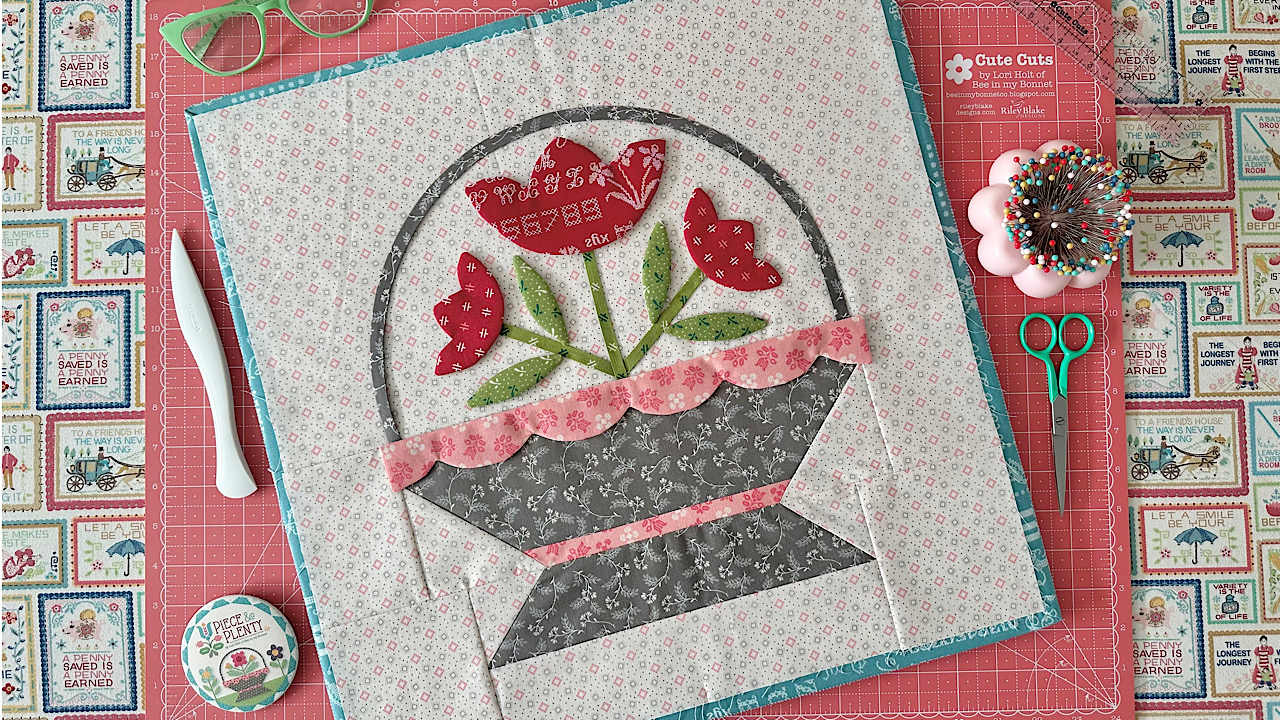
To make the appliquéd flowers,
leaves and basket trim
we are using my
Sew Simple Shapes called of course...
Flower Basket Sampler!


The collection that we are using
for the quilt is...
PIECE AND PLENTY!!
Piece and Plenty was designed by me...
and produced and distributed
to quilt shops everywhere
by the amazing
If you would like to know everything about
PIECE AND PLENTY
to view the entire storyboard...
to see all of the fabrics close up
and to view the notions and ALL of
the patterns that coordinate with it:)

So let's chat about the
FLOWER BASKET SAMPLER
Quilt Fabric Kit.
Several shops are stocking the kit...
both brick and mortar shops
as well as online quilt shops.
The fabric and notions as well
have already shipped
to quilt shops everywhere
and will continue to ship as
each new item arrives at the warehouse!
So of course if you have not
already pre-ordered
your fabric kit and need one...
it is not too late at all!

If you still need to download
the free sew along guide
click on the following link:

And if you still need all of
the info about this sew along
please click on the following link to
read last weeks blog post called
The tutorial for Basket Block One
is on my Youtube channel.
to watch the tutorial
I also have already done the tutorial
on piecing the baskets in preparation
for the appliqués...
if you missed it:)

During week two
we did blocks Two thru Five.
for that tutorial

During week three we added the
Basket Blocks
Six - Seven - Eight - Nine!
for the tutorials.

During week four we did the last
four of all 13 basket blocks:)
for that tutorial:)
All of the cutting and info
about each of these blocks
is of course in the sew along guide
for your convenience:)

During week Five we made the we
Piece and Plenty Pinwheel Blocks!
for that tutorial:)

So now all of my blocks are finished
and my quilt goes to the quilter today:)
As soon as I get it back
(in a week or so)
I'll add a plethora of
close up photos to this post!

Today I thought that I would
talk about the border blocks.
Here I have all of the fabrics
cut to piece the blocks...


And have my border fabric,
binding fabric and
Raindrop Vintage Trim
ready for cutting!!

I sewed the half square triangles first...
we only need four of them
and so I cut four squares of background
and four squares of the print for
easy peasy quick half square triangles.

First I grabbed the Marking Rulers
and a mechanical pencil and marked the
back of each of the four backgrounds
(and a few for the rectangles too)
just in case you will mark for yours...

Or use the lines on your
Seams Sew Easy Guide like I usually do...
it's your preference!
I paired them up with the print
and sewed directly onto the line
and then trimmed off excess leaving
an approximate 1/4" seam allowance.

Easy Peasy!

I pressed my seams open:)

Now for the rectangles...
sew from corner to corner and if
you did not mark sewing lines,
just keep the point on the middle line
as you sew and no marking is needed:)
Sew one onto each side of each rectangle,
(I'm doing four at a time)

Trim...

And press open:)
Keep going until you have all
of these little scallop pieces
completed and then follow the diagrams
at the end of the guide
for sewing your quilt top together!
If you have followed me for a while
you know How much I love
scalloped borders in my quilts
and have often made them many times
from the very beginning in many of my
patterns and I STILL love them!

Of course before you sew your
blocks together you will need to
trim them all up to measure
15 1/2" x 15 1/2"

Here are all of my basket blocks
(in no particular order)
and a few of the pinwheel blocks
hanging on my design wall after trimming.

Using the lines in the
15 1/2" Trim-It Ruler
to center everything up really
makes this step easy peasy:)
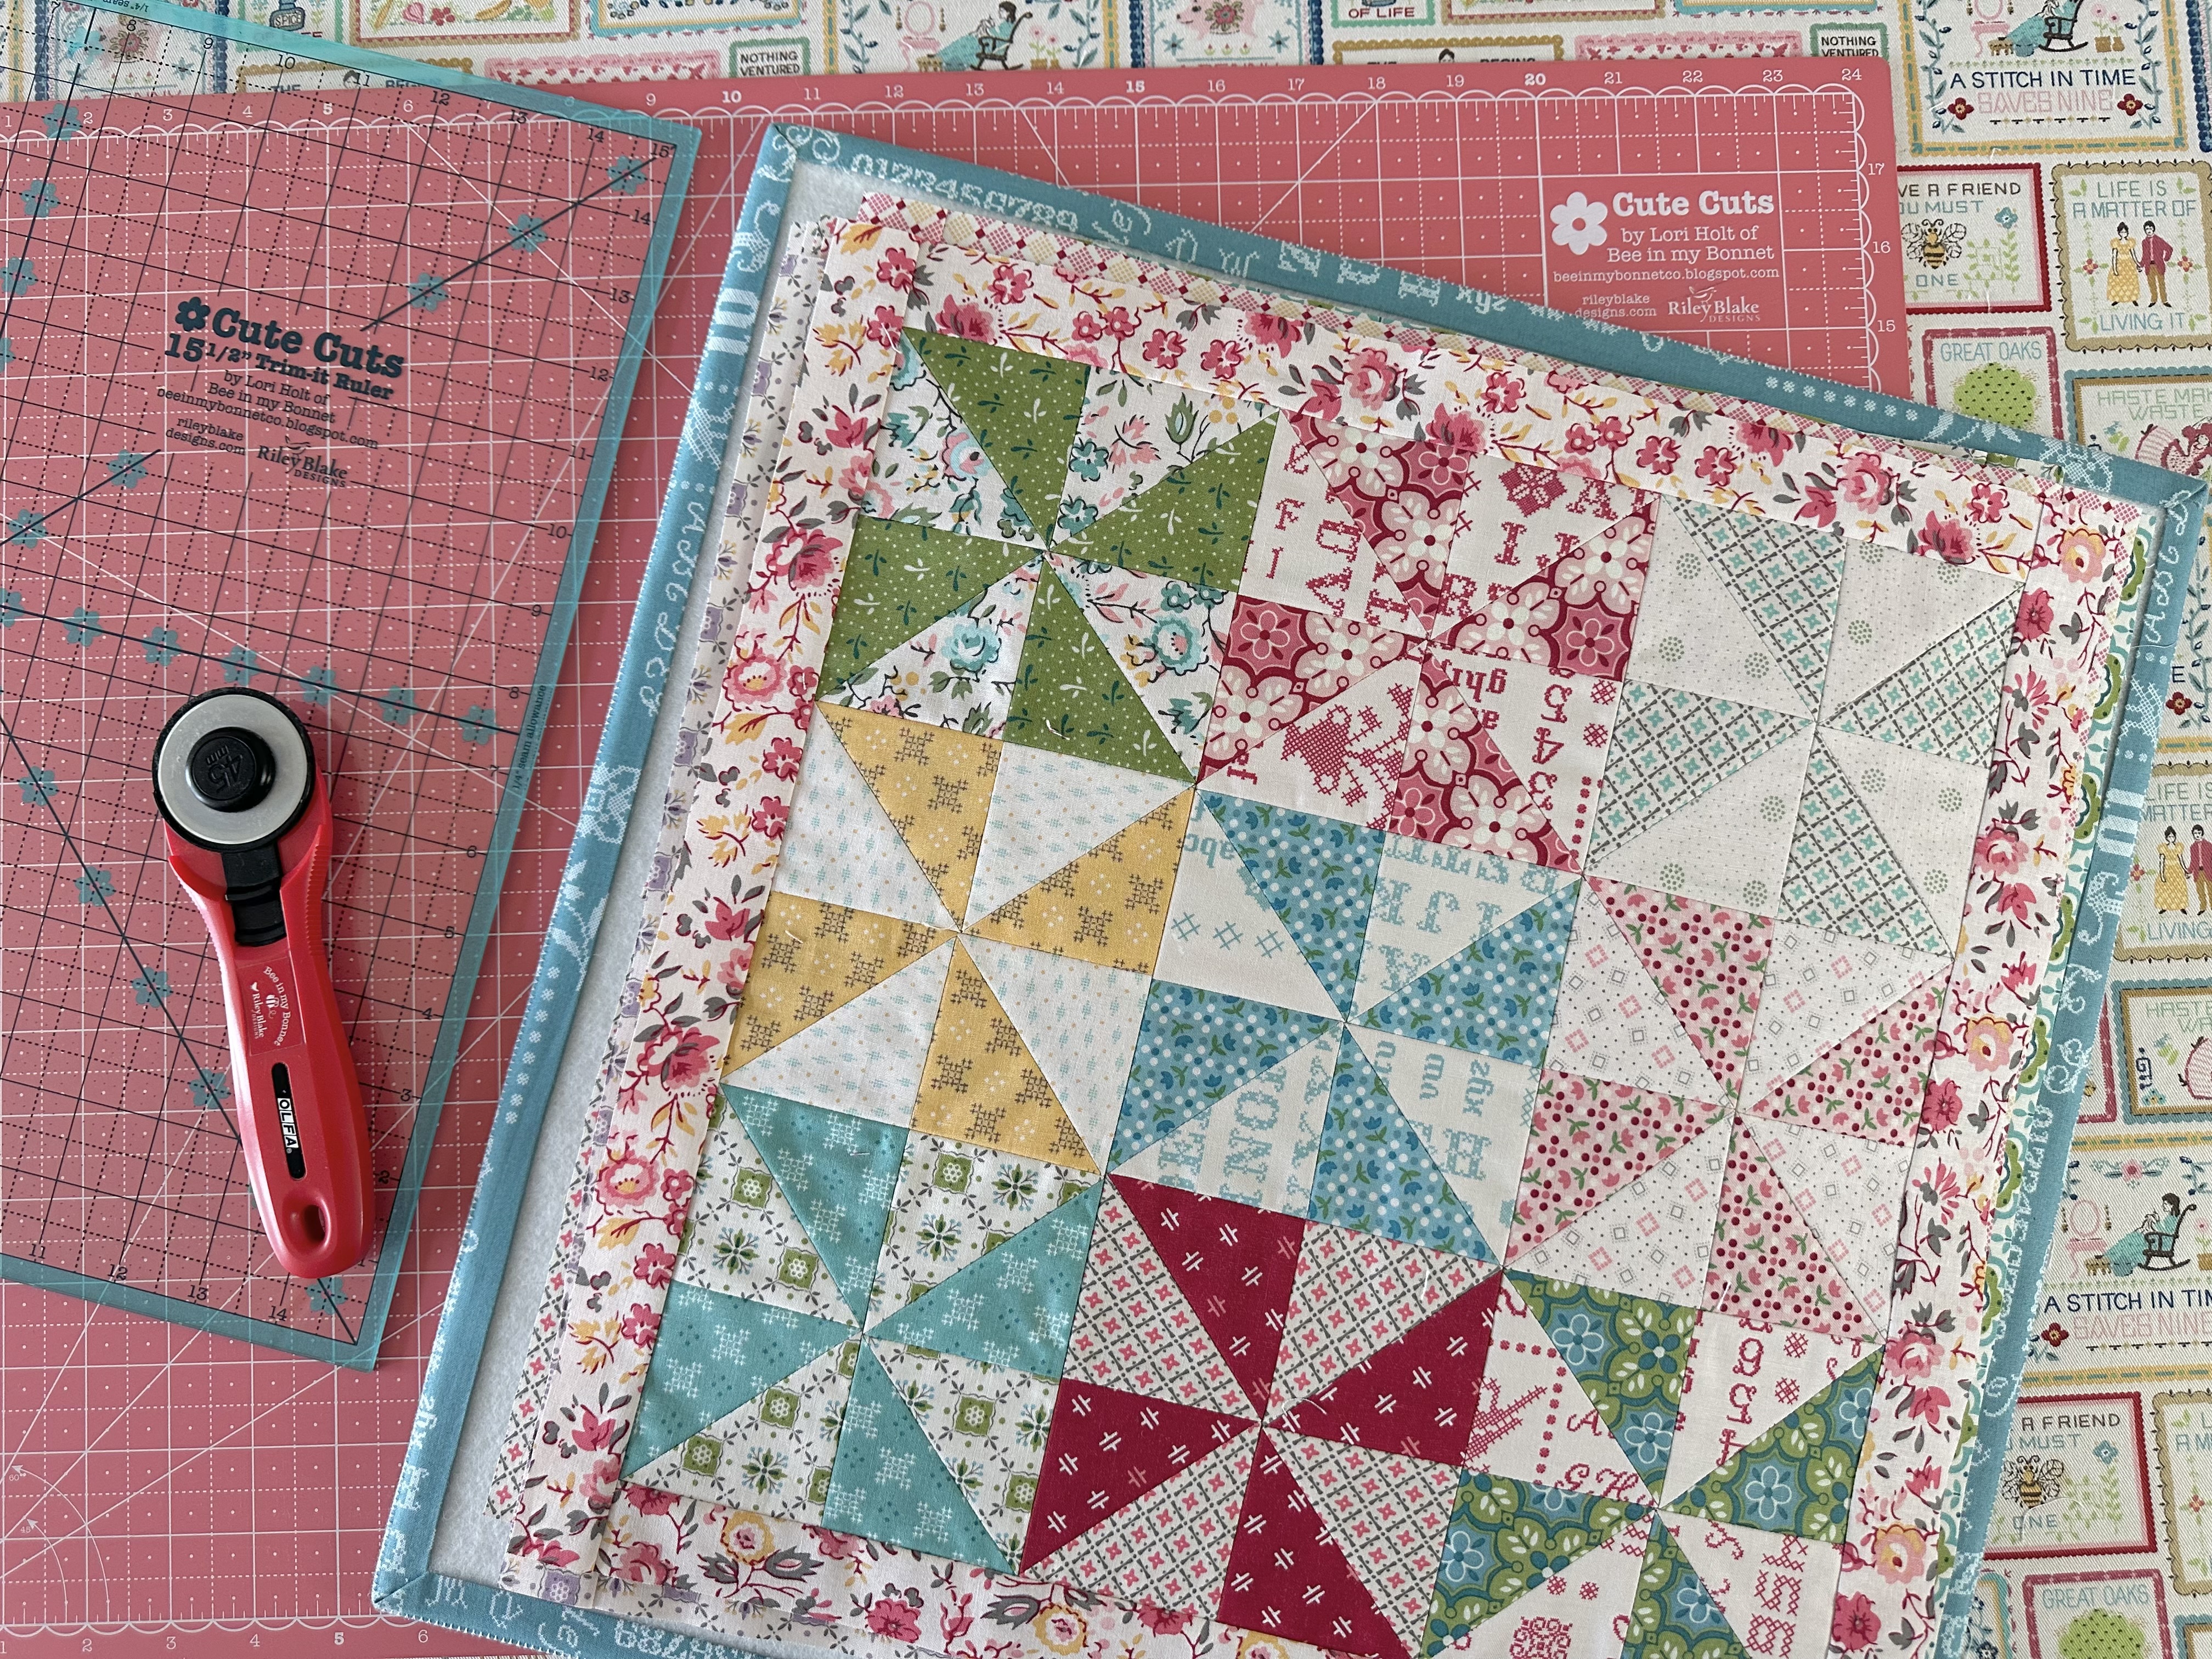
All the pinwheel blocks are
also trimmed and ready to go!


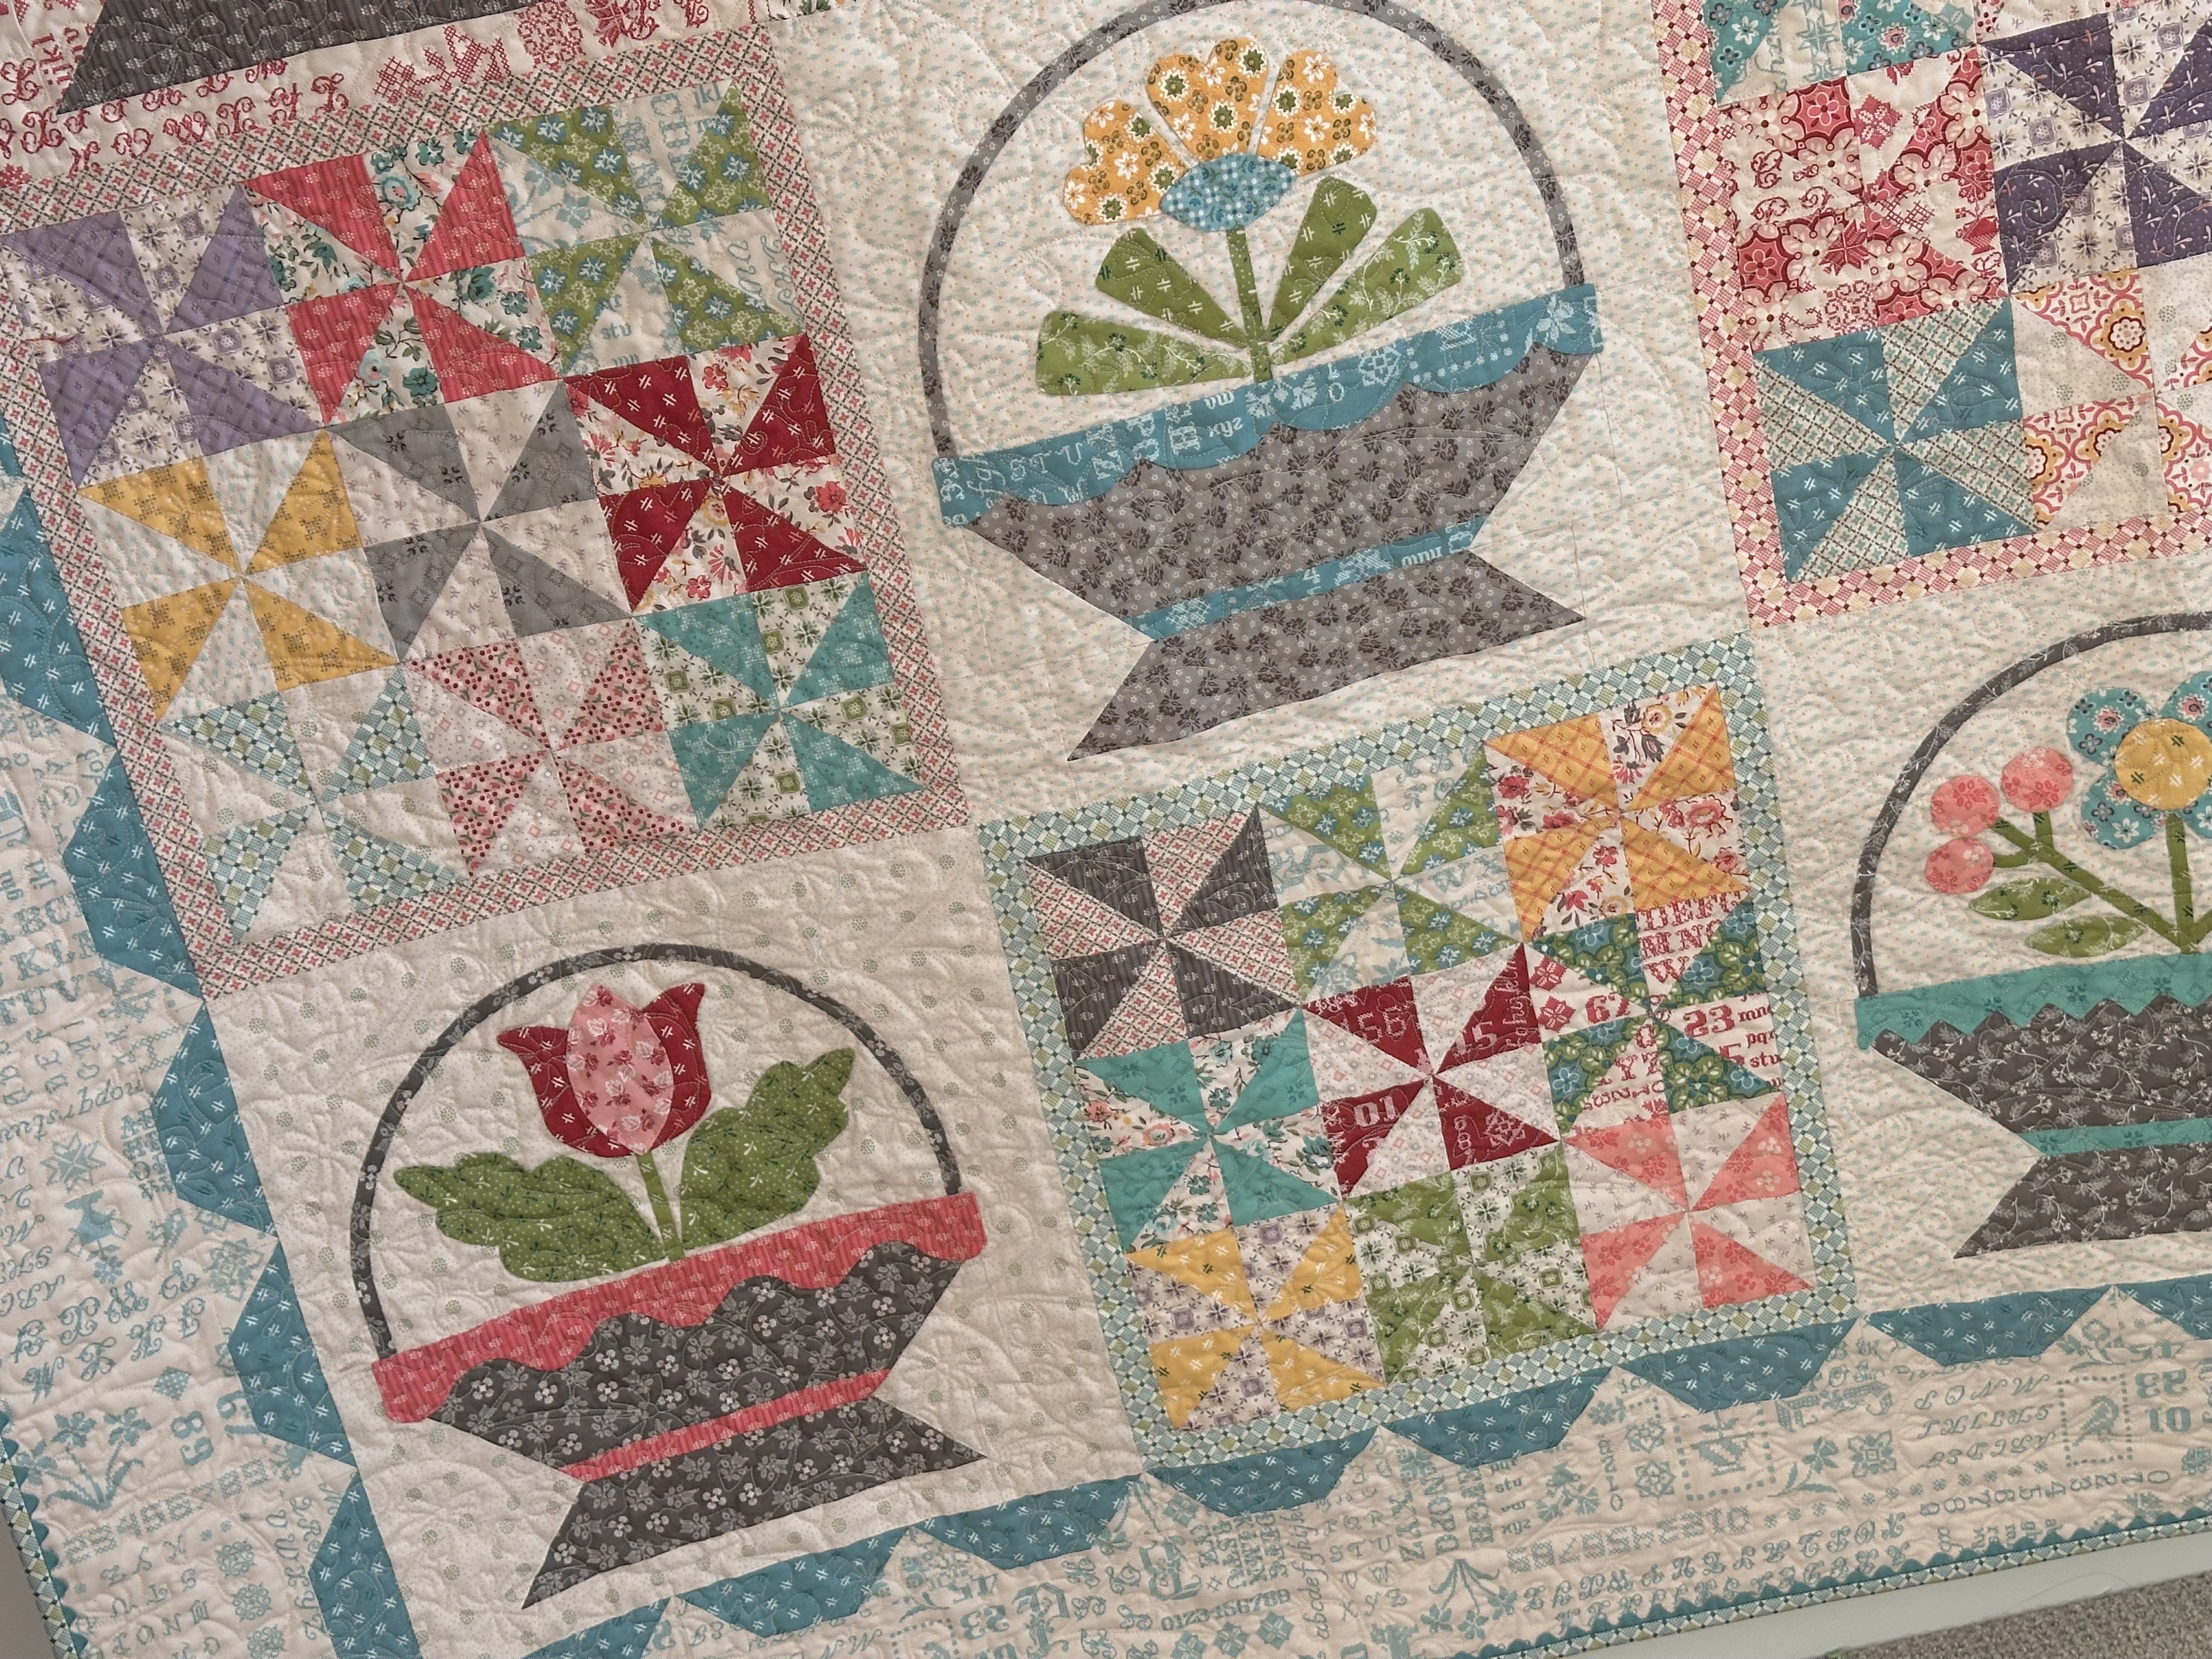
Thank you from the bottom of my heart
for sewing with me during the
Flower Basket Sampler Sew Along!
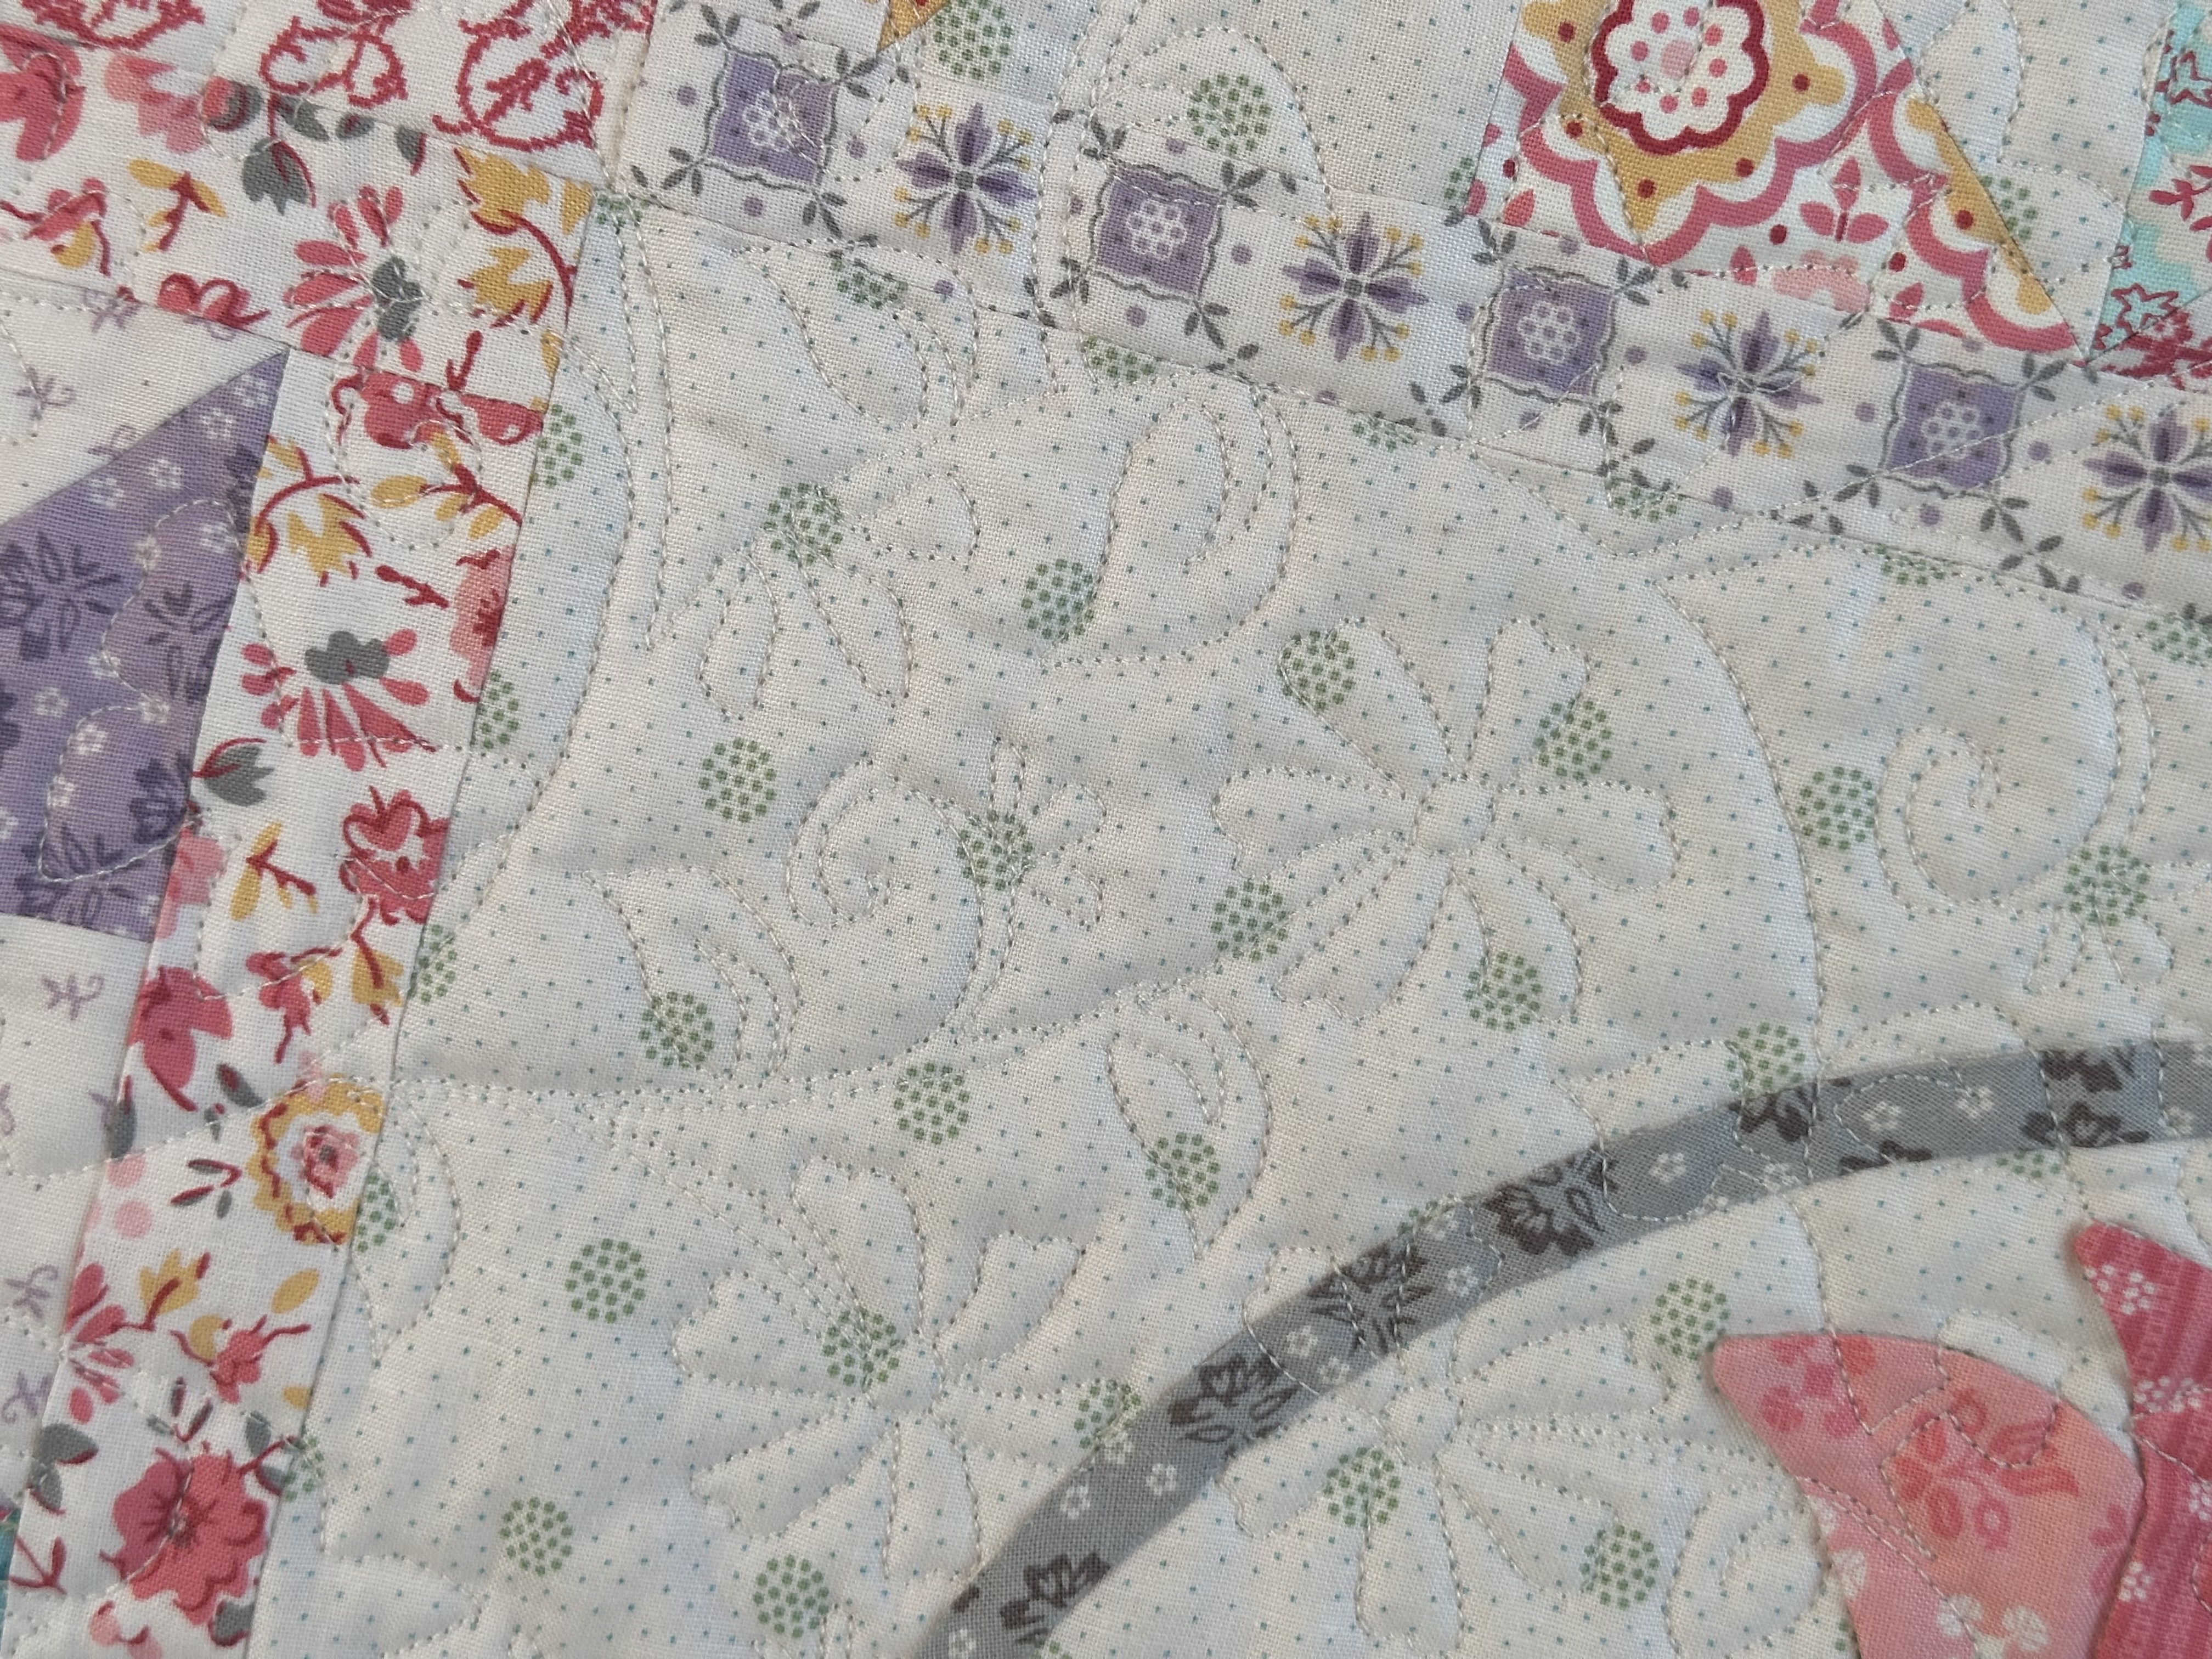
I hope you enjoy all of the
close up photos that I took for you
of my finished quilt.
I'm so very happy and excited
to have it completed and I think that
it turned out fabulously!!
It will be a treasure to me
and my springtime decor!
xx
Lori


And that's a wrap!!!

P.S. Don't forget to join me
in my next fabric collection
sew along!
The quilt we will be making is called
Sweet Land (pictured above)
And we will be using my
AMERICANA fabric collection
that will be here in a few weeks!
The quilt consists of 5 pieced blocks
and 4 applique blocks
along with a pieced scrappy border!
That sew along will begin in May:)
