Showing posts with label Gracie Girl. Show all posts

Thursday, November 21, 2013

Mod Podge Guitar Tutorial!!! ...


Are you wondering why Kass is playing 
a guitar 
that looks like its manufactured
 using our
Gracie Girl Collection???

Read on to find out:)


Back when my daughter Kassidy Grace and I
 were playing with our Gracie Girl pre-yardage...


and having fun making several new quilts...


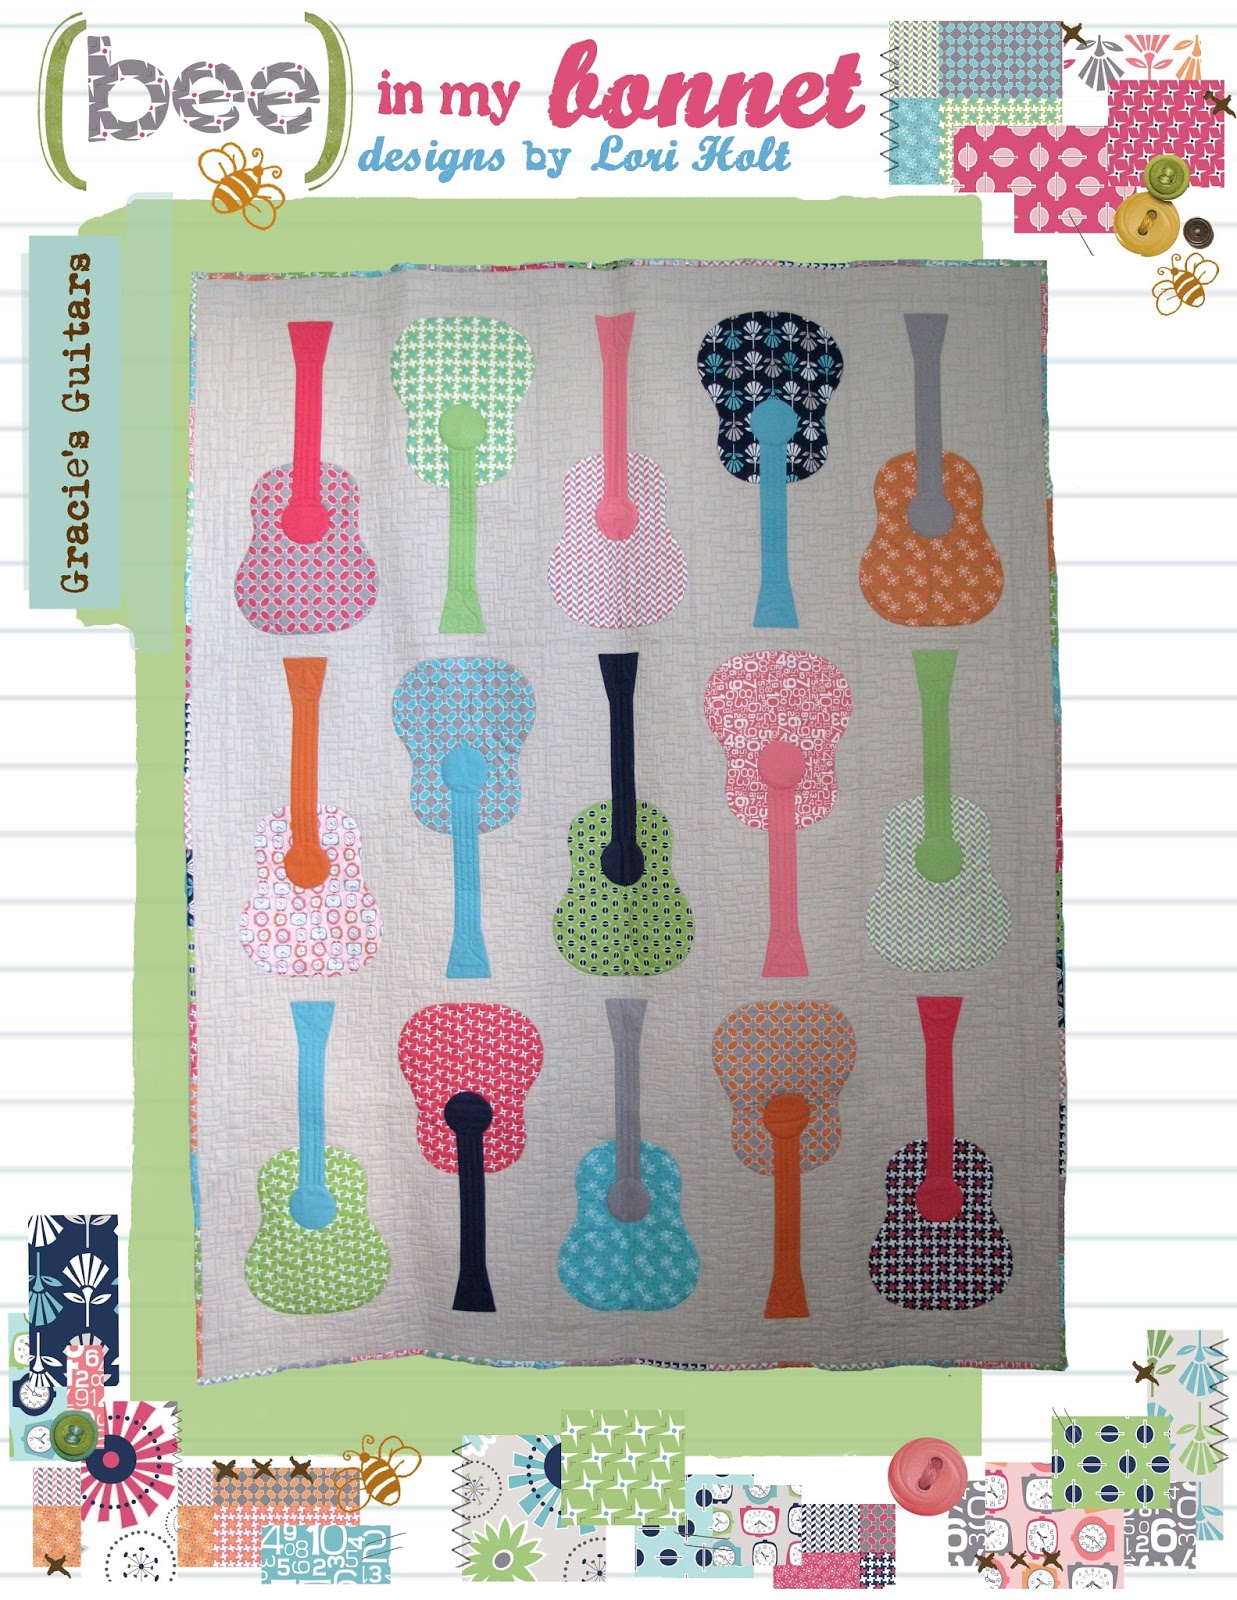
we knew that we would be doing a guitar quilt for her room.


That quilt turned in to this pattern called


We loved the colorful fabric guitars so much...
She wanted to have a real guitar made out of Gracie Girl:)
And I said
I can make that happen!

(Ben and Sophie fishing)

I gave my oldest son Ben a call...
(who is an awesome guitarist BTW)
When he was growing up
he went to every thrift shop
 within a hundred mile radius with me…
while I searched for treasures:)


So I knew he could help me find what I needed...
 an acoustic guitar that needed
a little love but with "good bones"


Even though I LOVE to go thrifting…
I really didn't have time that week.
(too busy getting ready for quilt market)
and I knew that if there was one to be found…
he had the skills to find it for me:)


I was so happy when he brought this good old Fender acoustic over…
the very same day that I asked him!
(he is so good to me!)
He had found it in a thrift shop near his home
on his way home from work:)


Mr. Honey cleaned it up and removed 
all of the hardware for us
and he taped a piece of paper
 on the inside to protect it.


He sprayed a good coat of KILZ primer...
so there was no sanding
 of any kind necessary.
YaY!
(Love me some KILZ)


Then he hung it from a ceiling hook in Kassidy's room to dry overnight.


I painted the guitar with BEHR 
paint from Home Depot.

"Embellished Blue 510D-4"
Which is BTW
 the same color that I painted 
my piano a few years ago:)


I just brushed the paint on ...
using a few good small brushes that I like to use for
 small thrifted treasures and for getting into small areas.
(I left the very front of the guitar where the fabric would go unpainted)


We used this kind of Mod Podge…


Sponge brushes...


and a 3 1/2" 
Gracie Girl 
Bitty Stacker.


After we Mod Podged...
we hung it to dry on the same ceiling hook:)


If you have never used Mod Podge before
you can click here to find out
 everything you need to know:)


We started in the center where I
 drew a 3 1/2" square just to
 keep things straight.
We overlapped the edges of the squares a bit.

 I trimmed off the fabric hanging off
 of the sides so that it was
 even with the guitar top edge.
I used small sharp embroidery scissors.

 We finished by brushing a coat of
 Mod Podge on the surface of
 all the fabric pieces.


 Mr. Honey replaced all of the hardware and restrung it:)


And now we have a real Gracie Girl guitar…


to match the quilt!!!


We had a lot of fun doing this project together.
That's what crafting is all about…right?

F.U.N.

Isn't it amazing what a little paint and glue can create?
I grew up using Mod Podge and I still use it a lot to this day.


  I guess I've never out grown the
 desire to play with
 glue and scissors.


I hope this tutorial gives you an idea or two!
xx
Lori


Tuesday, November 12, 2013

Gracie's Guitars!!!...


All of my Gracie Girl quilts are back from quilt market...


and now I can show you another quilt
that I made for Kassidy's room. 


It's a nice twin size or ...
 a perfect snuggle quilt size:)


I've had this quilt drawn up for quite awhile…
and have just been waiting for Gracie Girl
to make it with:)


It was so fun to make ...
not to mention fast!

I wish I had a real guitar 
like each and every one in the quilt!


I used a Riley Blake solid for each guitar neck...


and then matched them up
 with a print from Gracie Girl:)


I used my quick and easy machine appliqué method for the entire guitar
making it a quick process.


I did a scrappy binding with the 
leftover fabric from the guitar bodies…
easy peasy!!!


There are 15 guitars total…and I used 15 Gracie Girl  fat quarters:)


Gracie's Guitars
66" x 84"

Pattern is now available in 
my little etsy shop

What do you think?
Doe's your very own Gracie Girl need one too?

Have a quilty kind of day!!!
xx
Lori

Wednesday, October 30, 2013

Herringbone Table Runner Tutorial!!! ...


I just can't seem to quit making things with
There are just so many things buzzing around in my head to make...
 in addition to the quilts that I have already made:)


One of the projects that I've been planning
 is a table runner for the desk top in 

I thought you might like
 to see how I made it:)


My friend Nedra works for 
 and she recently sent me some of their product to play with.
Thanks Nedra!!!


I chose to use the
 6" braid paper for this project.
It also doubles as flying geese paper if you follow the black lines...
but if you follow the red lines you will get braids...
aka herringbone design:)


I chose to use this size because it works out perfectly
 for the 5" precut squares of Gracie Girl:)

I also used a few 3 1/2" precut squares...
I cut them in half to use as a starting triangle for each braid section.


On the paper it will tell you what size 
to cut your strips for the braids...

notice on this one that it 
says to cut the 1 1/4" x 5".

It also says light and dark but
 I just used all of the
 Gracie Girl prints on mine.

(by the way...those are the large Clover green clips that I use to keep my rolls together after opening them)


You can get exactly 4 - 1 1/4" x 5" strips
 from one 5" square with absolutely no waste.
YaY!

I stacked my squares 4 deep 
and cut 16 at a time.
I used about 40 strips per paper section.
(That means I used about 70 - 5" squares for the whole runner)


I cut 7 lengths of the paper about 20" long.
I rolled it up and clipped the sides with two red Clover clips
 to make it easier to handle when sewing.

I pinned a fabric triangle onto the paper...
lining it up with the red lines and about 1/2" hanging off the edge like this.


***Before you begin sewing you will need to shorten
 your stitch length so that you also
 perforate the paper while sewing.
This way...the paper will tear away
 easily when it comes time to remove it:)

I lined up my first strip even withe triangle edges and stitched down...
using a 1/4" seam...
starting from the top and stitching past the edge of the paper a bit.
I did not back stitch.


I finger pressed it back like this...


and added the new strip on the left side ...
lining all edges up again...
stitched and finger pressed back.
If you use a 1/4" seam allowance and your strips
 are cut correctly they should line up
 on the red lines every time.


But sometimes you will notice that they are just a bit short of the red line... 


like this.
But don't worry!
All you will do is place the next strip
 on the red line and it will correct itself.
YaY!
That's what makes this paper so great
 when working with small pieces.
You always have that line as a guide:)


Just keep adding on the strips until it covers the paper.


This is what mine looked like on the back.


One side hangs over more than the other...
no worries!
You have to trim off the edges of the fabric anyway:)


I trimmed off the fabric edges even with the paper on the sides...
and trimmed the ends so that each piece measured 18 1/2" long.


Then I removed the paper by tearing at the perforated lines:)


I cut 8 pieces of Jade (Riley Blake Solid)
1 3/4" x 18 1/2" for in-between herringbone sections...
and 
2 pieces for the top and bottom of the runner...
 1 3/4" x 47"
(i cut 3 - 1 3/4" x WOF and joined on the diagonal to use for the long strips)


Here I am getting ready to pin baste it for machine stitching.
I layered it with batting and backing fabric
 that measures a little larger than the runner top.
(I like to use 100% cotton batting for table runners
 and toppers so that they lay nice and flat)


***When I sewed the runner top together...
I alternated the direction of each herringbone.
I pressed all of my seams towards the green fabric.
Be careful when sewing the herringbone sections...
they will stretch if you let them because when
 you trim them they are on the bias.

No worries though...
remember that 
you are the boss!


All machine quilted and bound:)


I used a walking foot while quilting and used the edge as my guide for the width.


I did not quilt on the herringbone as I did not feel that it needed it...
that is totally up to you!


(however i did stitch in the ditch all the way around each herringbone section...not each strip...but around each of the 7 whole rectangle sections)


I used white thread for around the section and green thread on the solid fabric.


I loved the" triangle on a roll"papers 
because I could cut them any length that 
I needed for an exact fit for Kassidy's desk top.

It looks great in her room and will protect the painted surface ...
it seems to be a catch all place for everything!

I hope you enjoyed my tutorial on how to make a table runner 
with cute and tiny patchwork herringbone sections!

Have a quilty kind of day...
xx
Lori

P.S. I also made a herring bone quilt using
 3 1/2" Gracie Girl strips and no paper.
As soon as I get it back from the quilters next week...
 I will do a tutorial on that too!


Related Posts with Thumbnails