

Hello there!
Welcome to Week Four of the

For this sew along we are
sewing patriotic things from the
or of course you can use
fabric from your stash:)

Grab your book
and let's do
three more blocks this week.
This sew along will be
easy to follow...
simply sew directly from the book!
You can make your blocks in the
exact same prints that I did
by of course looking at each
block photo for placement
or you can
"bee the boss of your own quilt"
and switch it up!

to download the schedule of what
blocks that we are sewing
each week...
as well as the
cutting guide for the
smaller quilt
setting if you are making the 6" Blocks.
(12" Block setting is already in the book)
Okay ...let's get started!!

First up is the
SPARKLE BLOCK
on page 84 of the book.
The center square in this block is
the perfect place for fussy cutting:)

The second blocks is
VINTAGE PINWHEEL BLOCK
and it's on page 105
This is a classic block with an
easy twist on putting it together...
it always looks good in any
two color combo or even scrappy!

Our last block is
WOOL STAR BLOCK
and it's on page 107
I of course designed this as a
winter block but I think it's fabulous
as a summer block too!
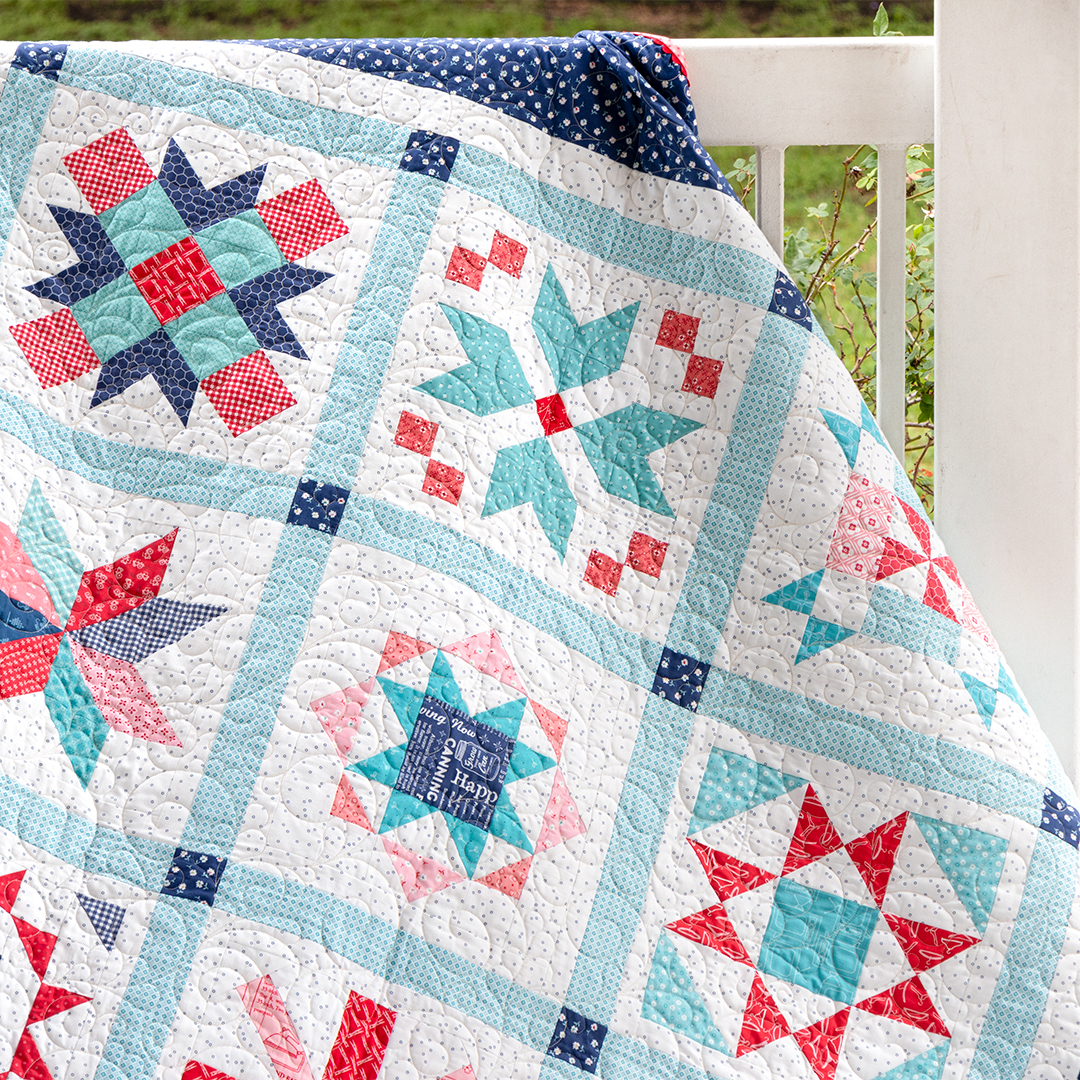
Well that's all 12 blocks...
and now you can sew your
quilt top together and quilt it...
YaY!!
Next week we will talk about
the binding and how to
add the Vintage Trim inside...
and I'll show you
what I made for my label:)
But before then...

Remember those projects that I
told you about that I made
at the beginning of this year?
That's when I planned out
this sew along and chose
all of the fabric for the bundle.

Last week I showed you my
Bunting Tutorial
if you missed it
And this week I'm showing you
two more things that I made.
You got a sneak peek of one of them
if you watched the tutorial:)
It's my Bee Patriotic Table Runner.
For the runner I chose 12 reds
from the bundle and also the
navy gingham from the bundle
for points in the star.
I used the same Bee Background
from the quilt for the
white star points...

And I chose to use this background
from my Farm Girl Vintage collection
for the white stripes.

From the white I cut:
3 strips - 2 1/2" x 32 1/2"
From the red prints I cut:
32 - 2 1/2" x 4 1/2" rectangles
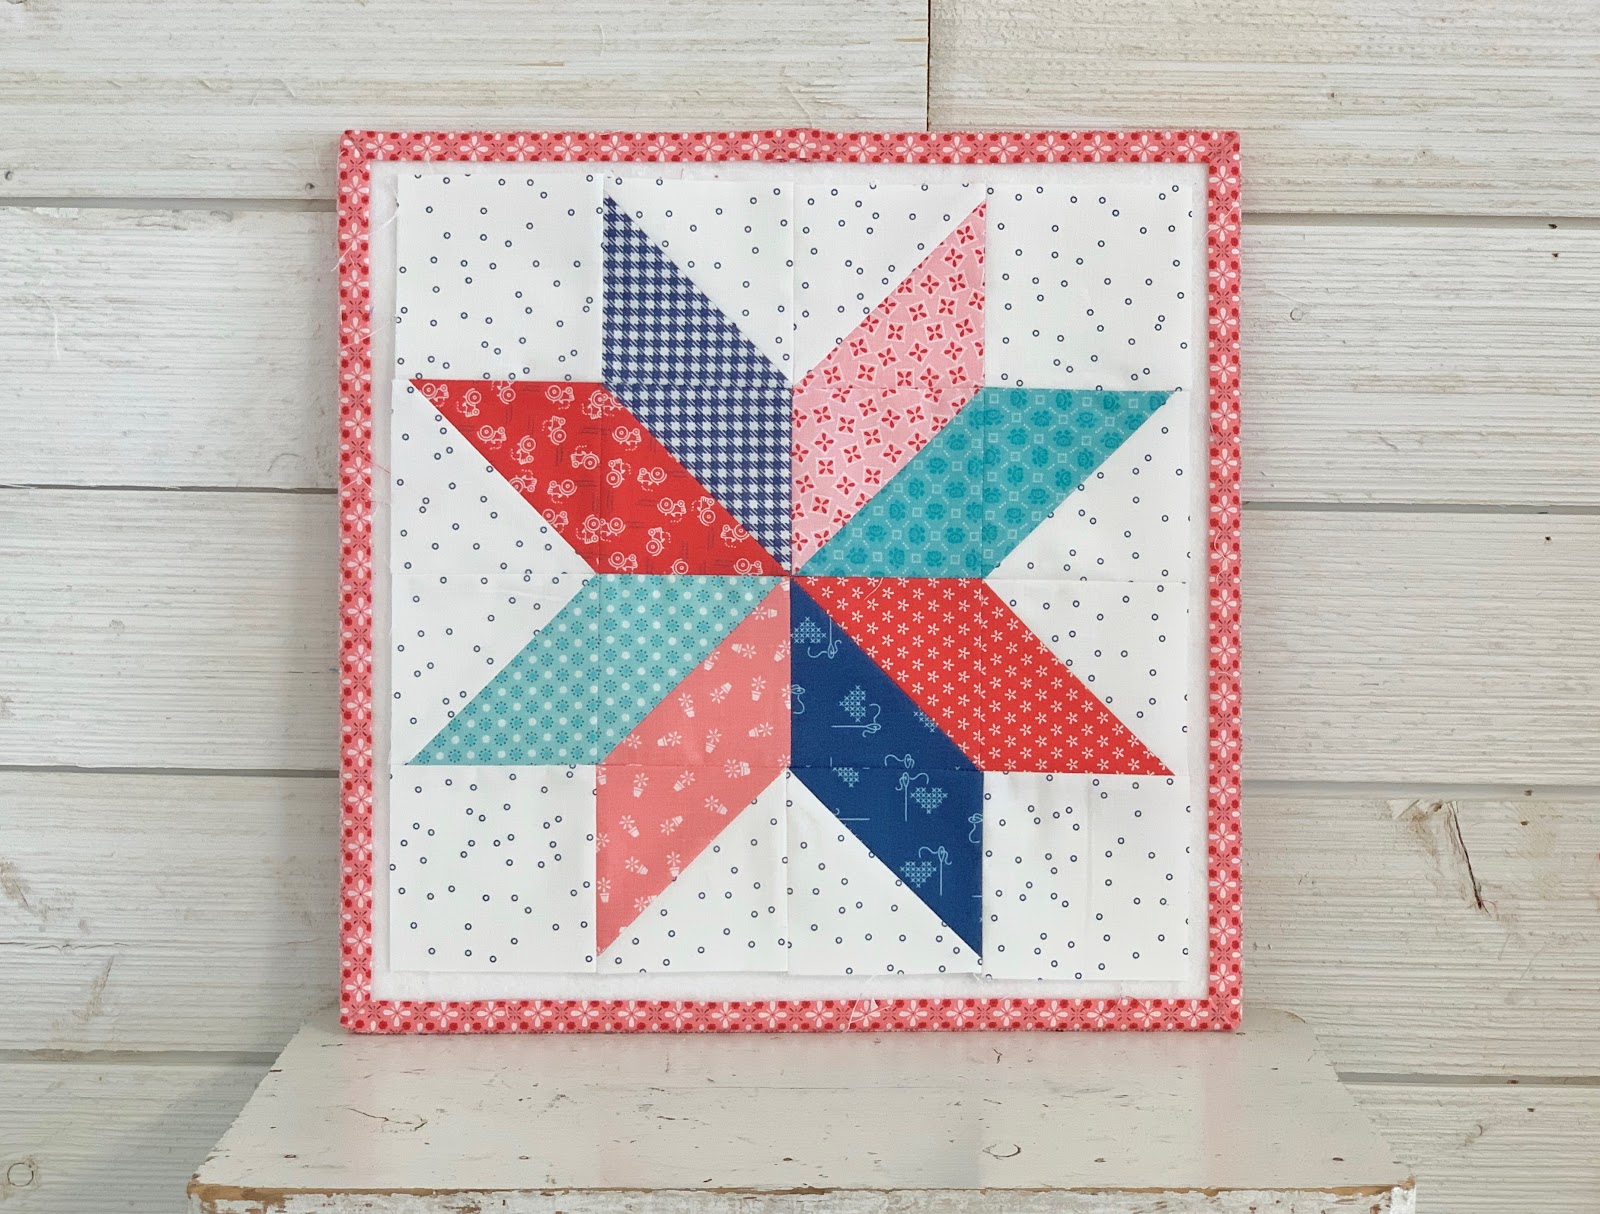
Next step is open the
Vintage Christmas Book to page 22.
This is the Christmas Star
block pattern
that I used to make the 2 stars.
I made them 12" Blocks.

I used C120-DENIM for the background
which is a Confetti Cotton Solid
by Riley Blake Designs
I also cut borders for BOTH blocks:
Cut 4 - 1 1/2" x 12 1/2"
and sew to sides
Cut 4 - 1 1/2" x 14 1/2"
and sew to the top and bottom...

Like this.
Remember to make two of these blocks:)
They should each measure 14 1/2" square
after the borders are on.

Now for the red stripes.
I just laid them out on my
design wall until I
liked the placement.
I laid out four stripes...
each with 8 of the rectangles.

I sewed them together like this:)
Each strip should now measure
2 1/2" x 32 1/2" wish is exactly
the size that you
have cut the white strips:)
Now to sew the 3 white strips
in-between the red ones:)

After sewing the strips together
they should still measure 32 1/2" long
and 14 1/2" tall which is the
same height as the star blocks.
*Now let's chat about this for a minute.
I made my stripes this long
because this runner fits
perfectly on my farm table.
You can easily customize the length
of your runner by making your
stripes longer or shorter
to fit on your own table.
Simply sew the 2 star blocks
and then cut your stripes
whichever length is
needed for your own table.
Take note that the 2 star blocks
will take up 28" of that
measurement in length.

After sewing the two
star blocks on the end my
Bee Patriotic Runner measures
14 1/2" x 60 1/2"

Now I'm going to show you how
I made my Bee Patriotic Flag for my wall.
I used the same block pattern
and same fabrics
and made one 6" block.
I cut borders for this block as well;
Cut 2 - 1" x 6 1/2"
for the sides
Cut 2 - 1" x 7 1/2"
for the top and bottom
After adding the borders...
your block should measure 7 1/2" square

I cut 7 strips of fabric...
four red and four white:
1 1/2" x 16 1/2"

After I sewed them together they measured
7 1/2" tall and 16 1/2" long.
*Now let's talk about this for a minute.
At this point I wanted to show you
how easy it would be to sew another
star block and make a half sized version
of the Bee Patriotic Runner.
I wanted to give you a choice of making
a runner...or a flag...or both!
Sometimes you just need a small runner
for a sofa table or maybe your
coffee table or piano top etc.

If you want to make a flag like I did...
Cut 3 white strips and 3 red strips:
1 1/2" x 23 1/2"
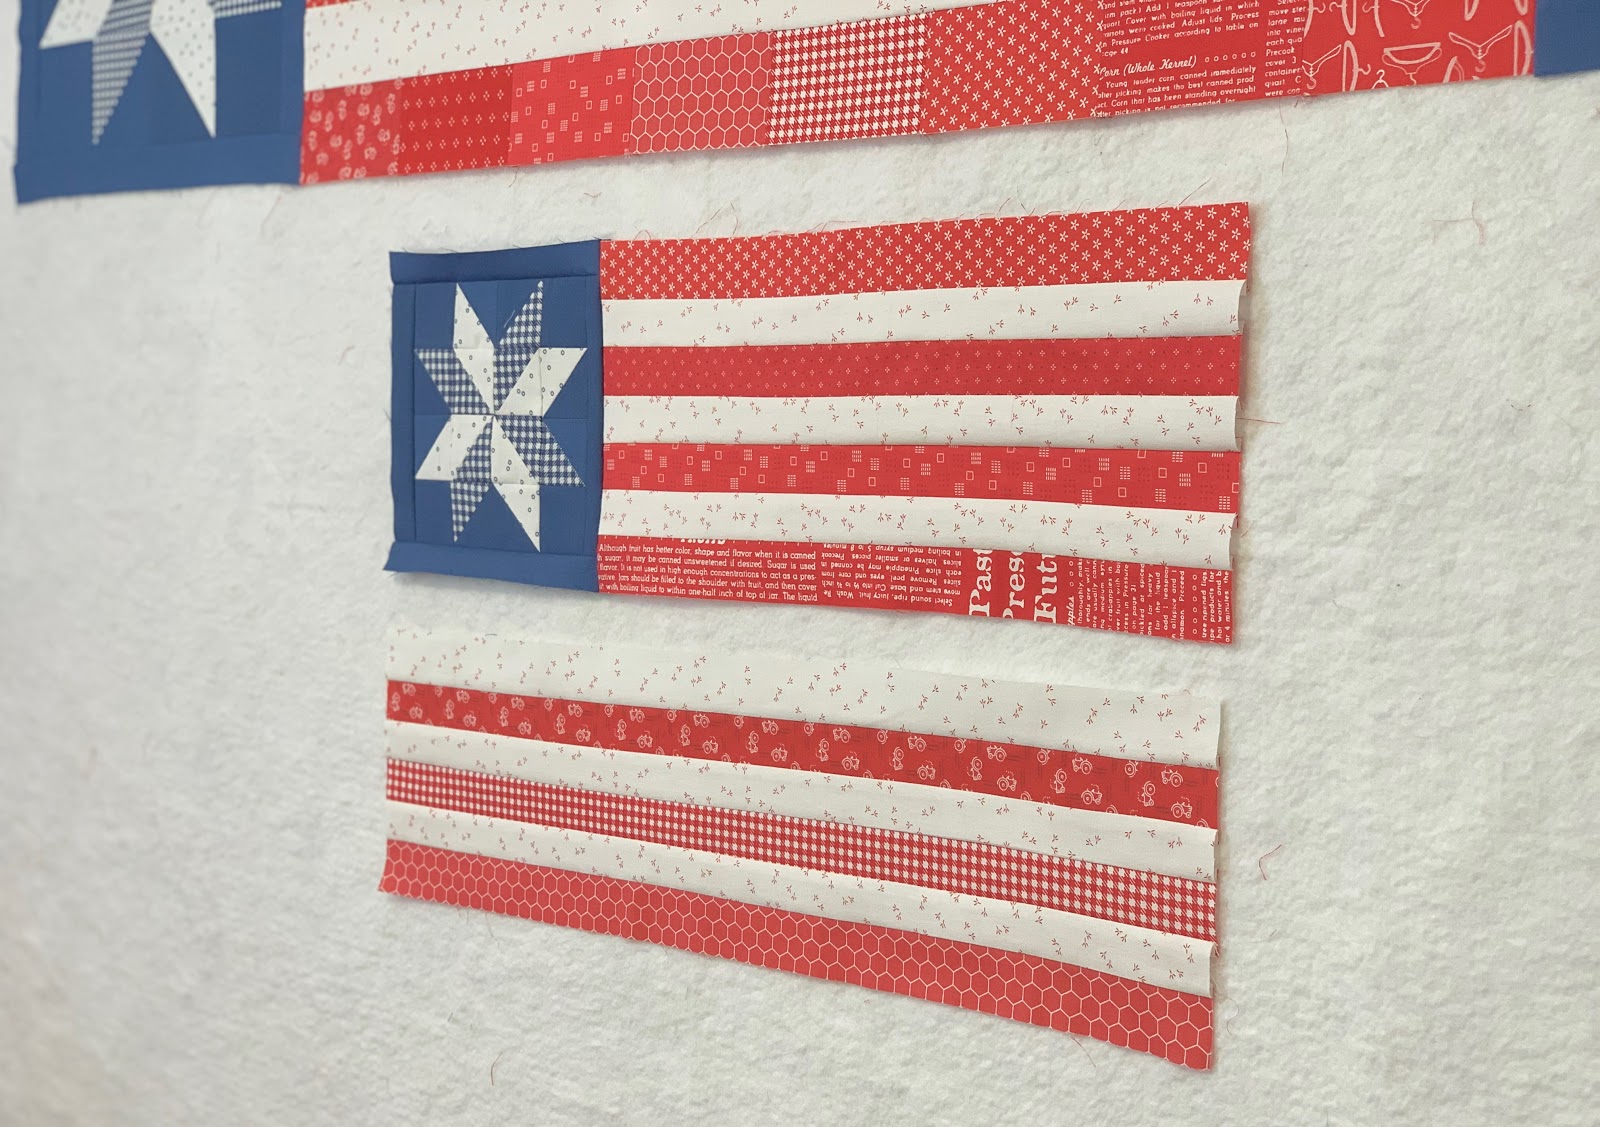
I sewed the strips together and
added them to the top section.
After sewing my cute little
wall flag measures 13 1/2" x 23 1/2"

And there you have it...
Bee Patriotic Table Runner
and
Bee Patriotic Flag

I chose to use my denim plaid
108" widleback print for the
backing on both of them.
I chose the Bee Backgrounds
Denim Circles for the runner binding
and I chose the Farm Girl Vintage
background for the flag binding.

Then I left the rest up to my
friend Juli Stubbs who quilted
them beautifully for me.
I hung the runner on my design wall
for the tutorial filming and
I love how they go together:)

I took a few close up pictures of the
flag hoping that you could see the quilting.
I asked her to quilt them the same:)


Thank you sew much for joining
me this week for the
Bee Patriotic Sew Along...
I'll bee right back here
next week for the big finish!!
xx
Lori


