

I'm back!
Thank you all for your kind emails and comments on my tutorials.
It makes me happy to know if they have
helped you in any way.
It's so important to enjoy
each and every process in the
wonderful world of quilting!

I'll be making this block today...
and while I make it...
I'll show you how I cut squares and sew
"Easy Corner Triangles"
on any segment of a quilt block that
requires a triangle on the corner.

These are the rectangles that require the triangles on opposite corners.
I did the math
on what size to cut them...

And went to work stitching them together
from corner to corner.

One side stitched...

Pressed...

Trimmed...


And pressed again.

When I stitched the other side I paid close attention which direction to sew my seam for this particular segment.


I pressed and trimmed...

And pressed again:)

I laid the block out on my
for sewing into a block.
This is where the
"partial seam" part
of the tutorial comes in!
I use a partial seam technique
whenever I sew four long triangles
around a center square.

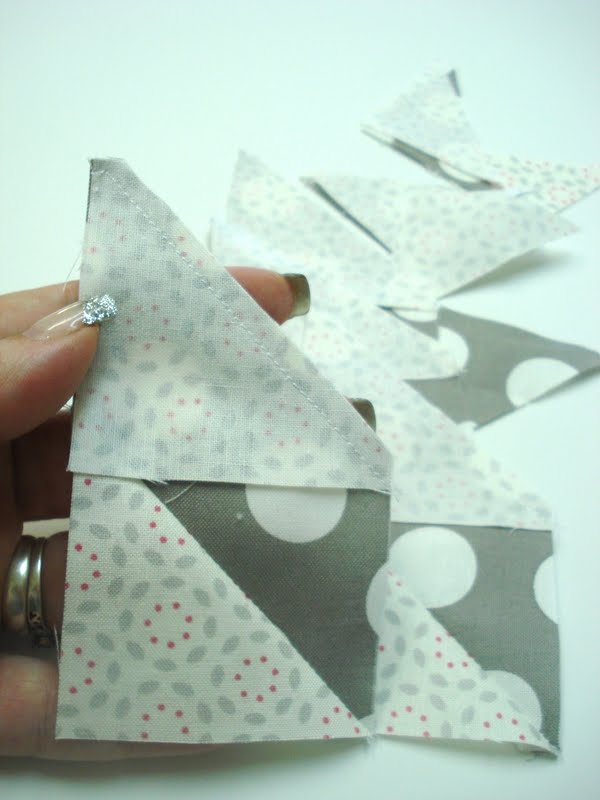
I place the center square and one of the rectangles with RST just like I normally would when I am sewing them together.
But before I start to sew...
I place a cute pin in the middle to
remind me where to stop stitching.

Like this.

I sew until I get to the pin....and stop.
I don't backstitch.

Like this.
This is the only partial seam that I need
to sew in the entire block.

I finger press towards the center square and lay it back down on my design board.
As you can see from the above photo...
the rectangle segment above the one I have just sewn lines up perfectly.
That's the one that I sew next....
no partial seam...sew both of the segments with RST from one end to the other.

See?...just like this.

I press and lay it back down on my board.
As you can see...
I am working in a counter clockwise
direction and the next rectangle
lines up perfectly...yay!

I press again and lay it down on my
board once more to make sure I
sew it together right:)

I sew the last rectangle to the
center of the block...

And this is what my block looks like
at this point....

I just have to close up my partial seam...

Like this:)...easy peasy!

Finished block size...6" x 6".
Fabric used;
White = Sunkissed
Pink = Annie's Farm Stand
Gray = ?
I have had fun teaching you some of the methods that I use...
I absolutely love to teach.
You all are the teachers pet...
and you get an A+!!!
xx
Lori

21 comments:
and a gold star for you for being an excellent and thorough teacher!
Thank you SO much for this little tip- I can't believe how easy it seems once you know how! I'll definitely be using this in my new few blocks :)
This series of tutorials has been very valuable to me. I think I can now take a block I love and resize it to the size I need!
Its a really great tutorial!! thanks!
Love it! You make it look so simple! And I have this book too, and have been avoiding FW.. I started it by hand piecing it.. because on the machine.. yikes.. but maybe it is possible LOL. Hmmm, what fabric?? Decisions, decisions...
I love your choice of fabrics!
Marsha
I have been a self-taught quilter for many years, but I am loving your tutorials! The old saying is wrong.....you can teach an old dog new tricks....can't wait to start using my new tricks that you have been teaching me!
I do love your tutorials Lori. Although I am an experienced seamstress, I am new to quilting. All the little pieces have always intimidated me, but I have learned so much from the wonderful quilters online! Yours are especially easy to follow and I love your sense of color and pattern. Thanks so much for sharing your knowledge with us!
I never would have thought this was "easy peasy" until you showed me how to do it! I am going to make this block right now! Thank you, thank you! I hope you keep going with the tutorials, there are still some blocks that are confusing. Also, how do you divide a block into 5 equal segments? You're the best Lori ♥
your tutorials are awesome.
and i love your blingy fingernails!
You are an amazing instructor!!! Your tutorials are the easiest to follow....have you considered doing them on video? I'd buy it in a heartbeat!!! Thanks so much for all you do!!! :)
~Terry~
Great tute!
Thanks
Thank You!
This one looks scary!
I'll have you "sewing beside me" the whole way through though so should be great!
You are an excellent teacher. Thanks so much. Could you consider doing a tutorial on each of the Farmers Wife QuiltAlong Blocks? That would be incredible!
You are my favorite one! Thanks for taking the time to teach great quilting techniques!
I love the video idea and your choice of fabrics/colors! Thanks for taking the time to share your wonderful talents :)
Thanks again for another great tutorial. I love each and every one of them. Today I purchased my foam core board so I can make the mini design boards. I also had a blank canvas and a frame so I covered the canvas with flannel and framed it and now it is a design board to prop against the wall. I love your ideas. Keep up the good work.
I HAVE to get some of that green herringbone! I would love to make this block with it :)
This is terrific (I need to practice somewhat!) but your tutorials and help in teaching how to figure out the block sizes in the FWQAL is IMMENSLY appreciated! You are the Best!
Thanks for taking the mystery out of that, it does look easy when you explain it!
I can tell by the dates on the other comments I am coming late to your party, but I am so glad to be here and I love the easy cornrer triangles block. Great tutorial. :^D
Post a Comment